Key Takeaways
- Ethereum’s transition to PoS presents significant opportunities for passive income through staking.
- Dedicated servers enhance Ethereum staking by offering improved performance, security, and reliability.
- Optimal server configuration and maintenance are crucial for maximizing staking rewards and minimizing risks.
- The future of Ethereum staking will see increased institutional involvement and advancements in server technology.
- Security, decentralization, and regulatory compliance remain paramount for the success of Ethereum staking.
- User experience and automation in staking management will evolve, making staking accessible to a broader audience.
- Integration with Layer 2 solutions and sustainability concerns will shape the development of Ethereum staking strategies.
Ready to earn while you sleep? Ethereum staking makes it possible! The new Proof-of-Stake system means you can generate passive income simply by holding Ethereum. Setting up a dedicated server makes the process even smoother. Join the blockchain revolution today!
This article explains how a server can boost your Ethereum staking. It ensures top performance, security, and profits. Understanding the crucial function servers play in staking will provide you the wisdom to make wise decisions and optimize your earnings, regardless of experience level with blockchain technology.
Come along as we delve into the specifics of Eth staking on servers—an endeavor that offers rewards and a closer look at the dynamic realm of cryptocurrencies.
Table of Contents
- Key Takeaways
- What is Staking?
- Benefits of Staking Ethereum
- How Dedicated Servers Fit into Ethereum Staking
- Critical Specifications for a Staking Server
- Securing Your Ethereum Staking Server
- Frequent Software Updates and Patch Management
- Firewall Configuration
- Secure Shell (SSH) Access
- Employ a Dedicated IP Address
- Install intrusion detection systems (IDS)
- Data encryption
- Frequent Backups
- Physical Security
- Employ a Hardware Security Module (HSM) or Hardware Wallet
- Security Audits and Penetration Testing
- Optimizing Your Staking Setup
- Future of Ethereum Staking and Dedicated Servers
- Conclusion
- FAQs
What is Staking?

Credits: Freepik
In blockchain technology and cryptocurrencies, staking is a crucial idea. It is essential to the operations of many different cryptocurrencies, like Ethereum. Staking gives up ownership of cryptocurrencies. It is done to keep a blockchain network secure and working. Blockchain networks use the Proof of Stake (PoS) consensus mechanism. It is used to reach an agreement and validate transactions.
PoS offers a more energy-efficient alternative to Proof of Work (PoW). In PoS, the chance of validating transactions and creating new blocks is linked to the cryptocurrency a participant holds. It is linked to the amount they want to “stake” as collateral. PoW requires significant computational effort and energy consumption to mine blocks.
In proof-of-work (PoW) systems, validators stake their cryptocurrency. They are selected to make new blocks based on the amount of cryptocurrency they have staked and other factors. These factors include the dependability of the node and how long the cryptocurrency has been staked.
Validators show they support the network’s integrity. They do this by staking their currencies. Validators receive staking incentives in exchange for their work and taking on the risk of locking up their assets. These benefits are usually obtained from network inflation or transaction fees and take the shape of extra coins. This incentive scheme improves the network’s resilience and security. It does this by promoting currency hoarding and staking.
Staking democratizes participation in the network’s operations. It lets anyone with lots of cryptocurrency become a validator. They just need to meet the blockchain’s criteria. In contrast, PoW concentrates mining on a few influential users. It relies on processing power to increase the chance of mining a block.
Staking reduces entrance barriers. It also ties validators’ rewards to the network’s stability and security. This aligns their interests with the blockchain’s long-term health and success.
Benefits of Staking Ethereum
Staking Ethereum benefits users and organizations in the network. Ethereum 2.0 is transitioning to a Proof of Stake (PoS) system. These advantages provide real benefits and opportunities for stakeholders. They also improve the security and effectiveness of the Ethereum blockchain. Here’s a thorough examination of the many advantages of staking Ethereum:
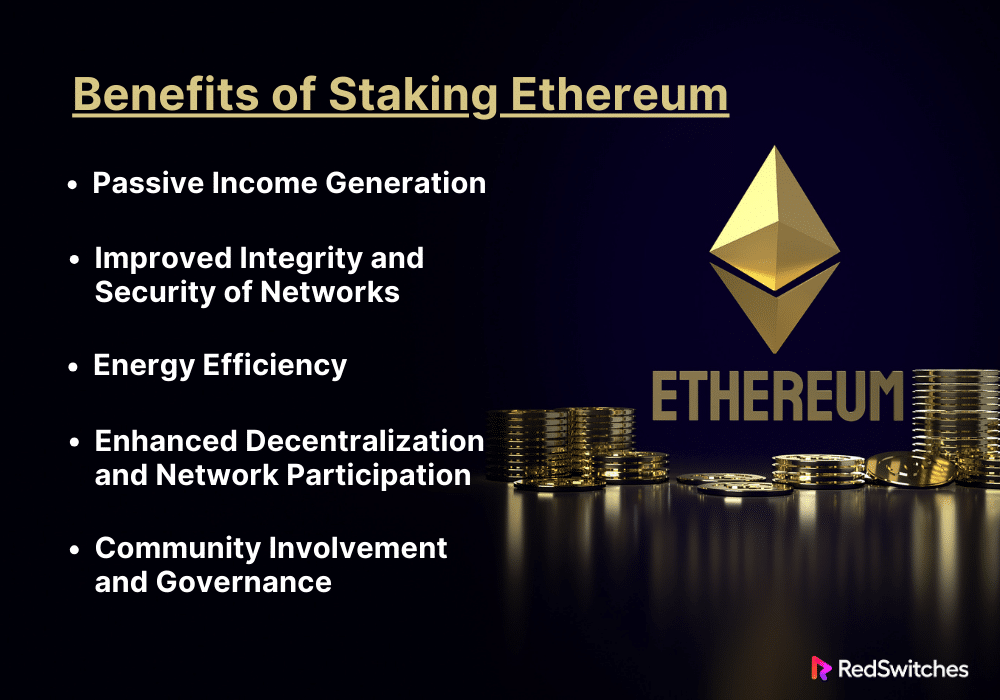
Passive Income Generation
One of the main draws of staking Ethereum is the potential to make passive income. Validators are rewarded with more Ethereum tokens (ETH) when they lock up ETH as a stake. People get these prizes as payment for taking part in the consensus process. They confirm transactions and keep the network secure. Staking often yields a competitive yield compared to traditional investments. But, the amount of ETH staked, and the quality of the validator can affect the return.
Improved Integrity and Security of Networks
Stakeholders greatly enhance the Ethereum blockchain’s integrity and security. The Proof of Stake (PoS) model transition signifies a paradigm change in the attainment and upkeep of network security. According to this idea, the amount of Ethereum staked directly links to the network’s security. This process makes attacking the network very expensive. Attackers would need to buy and stake a lot of ETH. But this is too costly and illogical. An attack would likely cause them to lose their stake. The PoS architecture also adds features like slashing, where validators risk losing some of the ETH they have staked in exchange for activities judged detrimental to the network.
Energy Efficiency
The move to Proof-of-Stake (PoS) is a significant turning point in Ethereum’s development, particularly about energy usage. This modification tackles one of the most important critiques of blockchain technologies: their environmental impact. Under the PoW concept, mining requires miners to use specialized technology and a lot of electricity to solve complicated mathematical riddles. Staking eliminates this computationally expensive procedure. Using Proof of Stake (PoS), Ethereum significantly lowers its carbon footprint, making it a more ecologically friendly and sustainable choice. This shift is incredibly alluring in today’s environmentally concerned world, where people and businesses prioritize sustainability in their investments and operations.
Also Read A Guide to the Best GPUs for Mining Bitcoin, Ethereum, and More
Enhanced Decentralization and Network Participation
Staking on Ethereum dramatically reduces the entrance barrier for network involvement, promoting a more open and decentralized ecosystem. By simply locking up their ETH, users can take part in the network’s security and consensus procedures by staking instead of the PoW approach, which demands significant processing power and electricity. This inclusivity boosts the decentralization of the blockchain by encouraging a larger demography dispersed across various geographic regions to contribute to the network’s activities. Since fewer entities can get undue influence over a network, decentralized networks are, by nature, safer and more resistant to attacks.
Community Involvement and Governance
Staking radically changes how users interact with the Ethereum network. In addition to the monetary rewards, it gives stakeholders governance rights to influence the network’s future course. Voting on significant choices, from network policy changes to technological upgrades, is possible for stakeholders through Ethereum Improvement Proposals (EIPs) and various decentralized finance (DeFi) platforms. This degree of involvement promotes a lively, dynamic community where a wide range of individuals’ interests and perspectives are respected and heard. It is consistent with the overarching goal of Ethereum in particular and blockchain technology, which is to decentralize power and build a more just and democratic digital future.
Also Read: Automated Staking Scripts and Tools for Server-based Nodes
How Dedicated Servers Fit into Ethereum Staking

Credits: Freepik
Dedicated servers for Ethereum staking steamline the whole process. Ethereum 2.0 shifts to Proof of Stake (PoS). Validators must be online. They must be actively involved in the consensus process. This is to propose new blocks and verify transactions under this system. Here’s how servers improve Ethereum staking’s effectiveness, dependability, and profitability:
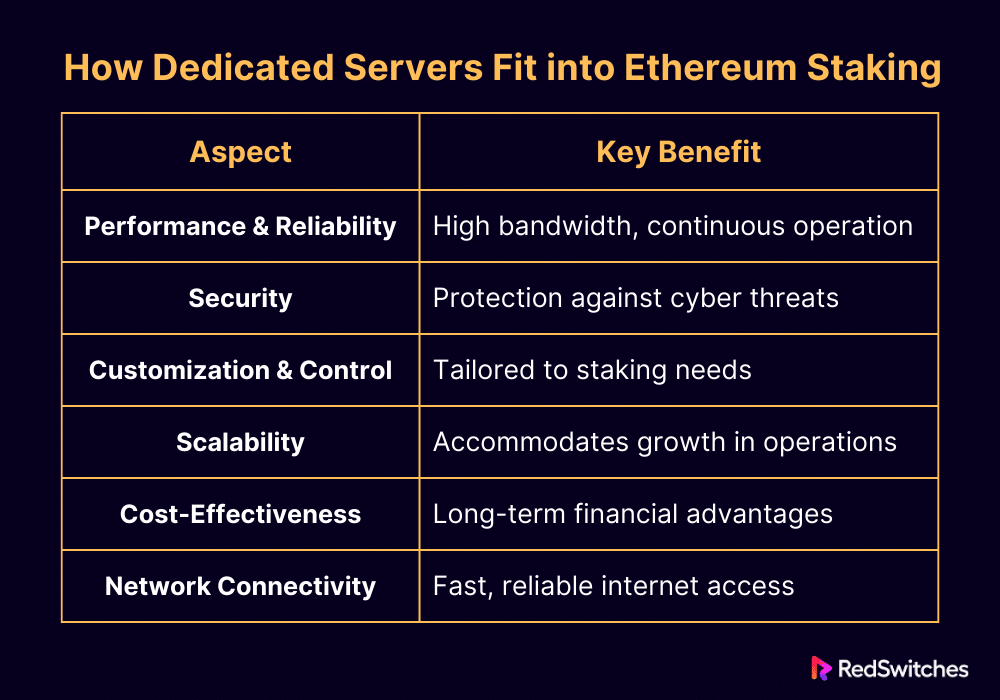
Improved Performance and Reliability
Dedicated servers for Ethereum staking offer the bandwidth and processing capacity. They are needed to ensure a validator runs smoothly. It must run continuously and effectively. A server, not shared hosting, devotes all its resources to one customer. This guarantees that competing requests won’t impede the staking process. This is crucial for validators. It directly affects their chances of earning staking rewards. They earn rewards if they can propose and validate blocks quickly. Also, servers often have better uptime guarantees. These reduce the risk of going down due to server problems. Validators must minimize this risk to avoid fines or lost opportunities for block proposals.
Security Benefits
The PoS approach prioritizes safeguarding staked assets and validator operations. Dedicated servers for Ethereum staking provide better security. They defend against cyber threats like DDoS attacks. These attacks could stop a validator from joining the network. Validators can protect their operations with solid firewalls. They can also use intrusion detection systems and dedicated IP addresses. They get these protections when they have a server. Staking has monetary risks. You can lose or have ETH stolen due to security breaches. So, this control and protection are crucial.
Customization and Control
Validators have different requirements. This depends on their staking strategy, stake size, and technical skill. Dedicated servers for Ethereum staking can alter the server environment to meet these particular needs. Validators can customize their servers. They do this to make them efficient and fast. They can do this by changing storage, processing power, the operating system, and software. You can also customize the networking and connectivity settings. This improves latency reduction, and the reliability, speed, and dependability of transactions and block proposals.
Scalability
The strain on validators’ infrastructure increases when they elect to run numerous validator clients or increase their stake. Dedicated servers for Ethereum staking offer the scalability required to meet this expansion. Without sacrificing speed or security, validators can quickly expand their staking operations or handle higher transaction volumes by upgrading their server capacity. Validators can adjust to the changing needs of the Ethereum network and their personal staking goals thanks to this scalability.
Cost-Effectiveness
Although setting up and maintaining a server has an initial cost, long-term advantages frequently offset these costs. For committed stakers, servers can be a cost-effective option because of the higher likelihood of staking rewards and lower risk of penalties from server outages or security breaches. The operational efficiencies attained from total control over the staking environment may also help to increase Ethereum staking’s profitability.
Improved Network Connectivity and Latency Reduction
Improving network connectivity and reducing latency is one of the less talked about but equally important benefits of Ethereum staking via servers. The speed and dependability of a server’s connection to the Ethereum network are critical in the high-stakes world of blockchain validation, where a validator’s ability to submit a block could be determined in milliseconds. The fact that servers are usually located in data centers with high-bandwidth connections to the internet backbone ensures fast and reliable access to the Ethereum network. Due to this connectivity benefit, there is a lower chance that blocks will be validated and rewards will be earned without being realized because of network latency.
Let’s summarize it in a tabular format.
Critical Specifications for a Staking Server

Credits: Freepik
Several vital requirements and factors are essential. They ensure the best speed, security, and dependability. This is for setting up a server for Ethereum staking, especially in a dedicated environment. Choosing the correct server setup is essential. This is because the stakes are high—both literally and figuratively. The following is a thorough explanation of the essential requirements for a staking server:
Central Processing Unit (CPU)
Your server’s CPU manages calculations and processes. It does these for staking. The most powerful CPU on the market isn’t needed for Ethereum staking. But, you need one that can multitask and run the Ethereum client software without lag. It is advised to choose a contemporary, multi-core processor (such as an AMD EPYC or Intel Xeon) with a high clock speed because of its capacity to handle numerous threads simultaneously, which is advantageous for preserving network connectivity and node responsiveness.
Memory (RAM)
Because RAM directly impacts the speed and efficiency at which transactions and blocks are handled, it is essential to operate blockchain nodes properly. At least 8GB of RAM is advised for Ethereum staking, but 16GB or more is preferable. This guarantees enough RAM to operate the Ethereum client and any associated apps without issues, enabling quicker data processing and enhancing system responsiveness.
Storage
Because solid-state drives (SSDs) provide higher read/write rates than conventional hard disc drives (HDDs), they are recommended for hosting servers. SSDs are more suited for staking due to the scale of the blockchain and the requirement for fast data access. The Ethereum blockchain needs a lot of storage capacity, especially given its expanding size. To support the blockchain and allow for future expansion, a minimum of 1TB SSD is advised. Furthermore, considering a configuration with redundant storage, like RAID 1 or RAID 5, can offer data redundancy and avoid scheduling disruptions in the event of a disc failure.
Network connectivity
For a staking server, a dependable and quick internet connection is essential. Although a minimum upload speed of 10 Mbps is advised, faster upload speeds are preferable to manage any potential spikes in network traffic and guarantee quick block validations and transactions. Furthermore, having an unlimited data plan is crucial because staking activities might eventually use a large amount of bandwidth.
Power Supply and UPS
A dependable power supply unit (PSU) must sustain the hardware on your server to ensure that a power outage does not impact your staking activities. Additionally, adding an Uninterruptible Power Supply (UPS) can protect against data loss or downtime during blackouts, preserving your server’s uptime and averting certain fines related to being down.
Securing Your Ethereum Staking Server
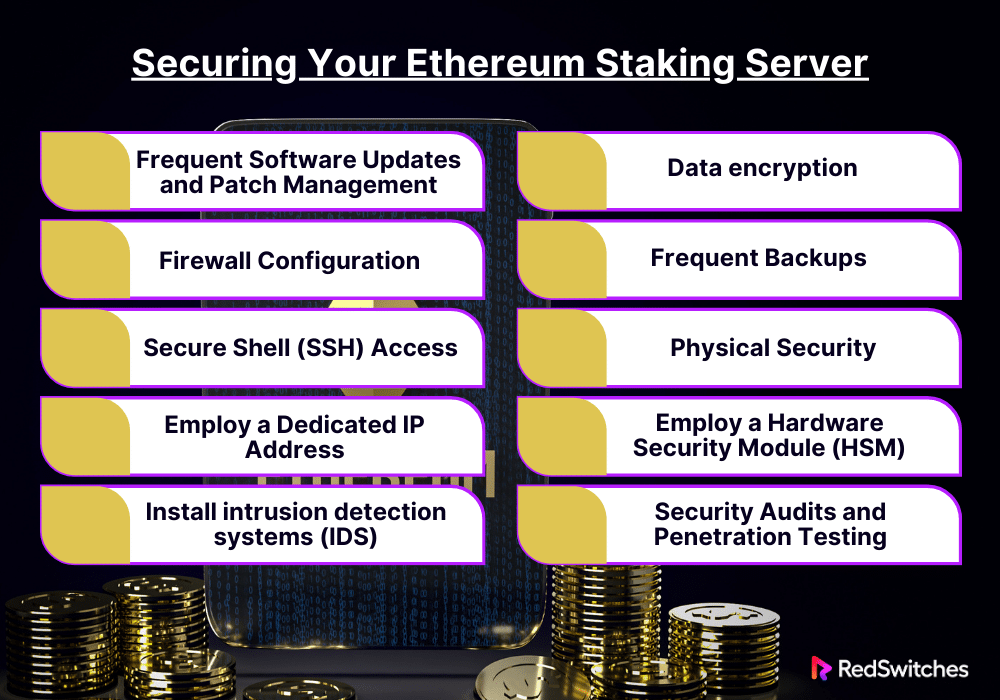
Securing your Ethereum staking server is critical. It protects your investment and the integrity and reliability of your staking operations. A hacked server can cause financial losses. This includes slashing your staked ETH due to malice or even accidents. Here’s how you can secure your Ethereum staking server in detail:
Frequent Software Updates and Patch Management
One of the most important security procedures is keeping the operating system, Ethereum client, and any other apps on the server up to date. Upgrades happen often. They fix security flaws. They shield your server from known exploits. It’s critical to add an update system. But, it must not interfere with staking.
Firewall Configuration
A correctly set firewall is the first defense against cyberattacks and unauthorized access. It can help prevent unwanted access to your server. It regulates incoming and outgoing network traffic according to a rule set. Ensure all other ports are blocked and that the only open ports are those required for your staking operations and management.
Secure Shell (SSH) Access
One popular technique for remotely managing servers is Secure Shell (SSH) access. To safeguard SSH access and lower the danger of brute-force assaults, disable root login, switch to key-based authentication from passwords, and alter the default SSH port. Furthermore, consider automatically banning IP addresses that repeatedly attempt unauthorized access using a program like Fail2Ban.
Also read SFTP vs SSH Protocol: Which Is The Best Safety Protocol in 2024?
Employ a Dedicated IP Address
A dedicated IP address can improve security by making your staking server less vulnerable to assaults directed at shared resources. Because traffic can be monitored and handled more readily, firewall and security configurations are also simplified.
Install intrusion detection systems (IDS)
An IDS monitors system activity and network traffic to look for any indications of malicious activity or policy infractions. It can notify you of possible security lapses so you can take immediate action to lessen any risks. Combining an intrusion prevention system (IPS) with an intrusion detection system (IDS) can improve security by automatically blocking detected threats.
Data encryption
Encrypting data both in transit and at rest prevents unauthorized persons from intercepting or accessing sensitive information. For data in transit, use Transport Layer Security (TLS) encryption. For data at rest, consider disc encryption, particularly for sensitive data like private keys and configuration files.
Frequent Backups
In case of a hardware malfunction, data corruption, or security breach, you must have regular server backups, including the Ethereum client data and configuration files. Ensure backups are encrypted to prevent unwanted access and are kept safely in a different location.
Physical Security
If your server is hosted on-site, taking physical security precautions is crucial. These can include surveillance systems, access control systems, and secure server rooms to prevent unwanted physical access to your server.
Employ a Hardware Security Module (HSM) or Hardware Wallet
Keeping the validator keys in a Hardware Security Module (HSM) or Hardware Wallet might protect validators who possess substantial quantities of ETH. By securely generating, storing, and managing cryptographic keys, these devices significantly reduce the likelihood of attackers accessing your staked assets.
Security Audits and Penetration Testing
Experts can find setup vulnerabilities in your server that you might have missed with routine security audits and penetration tests. These professionals test the robustness of your security systems through attack simulations, revealing areas that require reinforcement.
Optimizing Your Staking Setup

Credits: Freepik
Your Ethereum staking must be successful for a long time. You must optimize your setup to get the most returns and least risks to do this. Here is a comprehensive how-to tutorial for optimizing your staking setup:
Choosing the Best Ethereum Client
The Ethereum client (software) you choose greatly affects your staking. It affects the efficiency and dependability of your activities. Features, security levels, and resource requirements vary among customers. Find the client that best suits your hardware requirements and staking objectives by doing some research. Consider things like customer service. Also, consider community comments, update frequency, and security history. Running many clients can help by reducing the impact of client-specific defects or vulnerabilities. This can help diversify risk.
Hardware Optimization
Making sure your staking server runs effectively and dependably requires optimizing your hardware. This involves keeping a steady internet connection, having enough RAM for smooth operations, and choosing a dependable SSD to speed up block processing. To cut operational expenses, consider energy-efficient components as well.
Network Optimization
Timely block proposals and attestations depend on a reliable and fast network connection. Your server should have a dedicated, fast internet connection. And, your network settings should be set up to reduce latency. Use network tools and services to check your connection’s quality. They can find problems before they get serious. Consider setting up a backup internet connection if possible to ensure uptime during disruptions.
Validator Software Configuration
For best results, make sure your validator software is configured correctly. This involves adjusting the software settings based on your hardware’s abilities and the network’s state. Update your validator software often to get the latest version. It has security patches, new features, and performance improvements. Adjust your client’s settings for peer connections and memory allocation to increase efficiency.
Improvements in Security
Increasing your staking’s security guards against threats, including theft and cutting. Best practices include data encryption, firewall configuration, safe SSH access, and frequent software updates. Consider using a hardware wallet or HSM to safeguard your validator keys. To handle new threats, assess and update your security procedures regularly.
Monitoring and Alerts
Implement thorough monitoring and alerting systems to monitor the performance and health of your staking business. Track parameters, including network connectivity, client performance, device health, and server uptime. Use alerting systems. They advise you of problems like low disc space, high CPU use, or network disconnections. This saves downtime and lets you respond quickly.
Future of Ethereum Staking and Dedicated Servers

The Ethereum network is growing. Staking on the platform will change a lot. This is especially true when combined with servers. Several trends and developments are expected to shape Ethereum staking. They will mirror wider changes in technology, finance, and network governance. This is a thorough examination of potential future developments:
Growing Institutional Interest
Ethereum is becoming a top platform for decentralized finance and applications. Institutional investors are increasingly interested in Ethereum staking. It is a way to make passive income from their holdings. As a result of this trend, the demand for expert staking services, such as servers, is anticipated to rise. Institutions want reliable, secure infrastructure to boost staking benefits and cut risks. This will drive innovation and investment. The investment will be in servers made just for institutional stakers.
Technological Developments in Servers and Staking Infrastructure
As Ethereum staker demand increases, the server market will change. To meet the high availability needs of staking, we can expect advances in server tech. This includes faster and tougher storage like NVMe SSDs, more efficient processors, and better networks. Also, improving staking tools and Ethereum clients will make overseeing staking on servers easier and more effective.
Improvements to Security and Decentralization
Future staking advances will focus on methods and tech. They will support the security and decentralization that the Ethereum community strongly values. This could involve improvements in distributed validator technology. They would increase network resilience and security. They do this by spreading a single validator’s work among servers in different regions. Such methods can lessen the impact of physical or network attacks and limit the dangers of centralized infrastructure.
Developments in Regulation and Compliance
The rules governing cryptocurrency and staking operations are changing. Future legislation may affect the tax treatment of staking incentives, the functioning of staking services, and the obligations of service providers and stakeholders for compliance. Stakeholders and providers of servers will need to manage these restrictions carefully; they may need to modify their operations to fulfill compliance criteria without sacrificing security or performance.
Improved Automation and User Experience
As the staking ecosystem develops, we should anticipate staker automation and user experience advancements. These could involve more advanced alerting systems, automated staking plans, and complex management dashboards that make overseeing staking activities on servers easier. The intention is to increase the accessibility of Ethereum staking for a broader range of users, including non-technical individuals.
Ethereum Staking and Layer 2 Solutions
Combining Layer 2 scaling solutions with Ethereum staking opens up new possibilities. As these systems become more widely used, they might change or include new staking mechanisms, impacting the need for servers. To accommodate Layer 2 protocols, stragglers may need to modify their infrastructure, optimizing for various performance attributes and security concerns.
Conclusion
In summary, dedicated servers for Ethereum staking are key to the whole staking process. They boost validators’ performance, security, and reliability. As we’ve seen, carefully examining device specs, security procedures, and network configurations, among other things, is necessary to optimize your Ethereum staking setup.
Future developments in legal frameworks, dedicated servers for Ethereum staking technology, and Ethereum staking all point to promising prospects for expansion, innovation, and further institutional involvement. Selecting an infrastructure provider is essential for anyone wishing to start or advance their Ethereum staking journey.
At the vanguard of this changing scene is RedSwitches, which provides cutting-edge dedicated servers for Ethereum staking that satisfy the stringent needs of staking. Validators can use our cutting-edge technology, strong security protocols, and unmatched support to increase their staking payouts and strengthen and decentralize the Ethereum network.
FAQs
Q. What hardware is needed for ETH staking?
To stake ETH, you need a dependable computer with a contemporary multi-core CPU, at least 8GB of RAM, a 1TB or larger SSD, and a steady, fast internet connection.
Q. How much can you earn by staking 32 ETH?
The payout from staking 32 ETH varies according to validator performance and network conditions. However, it usually ranges from 4.5% to 6% annually.
Q. Is it profitable to stake ETH?
Yes, staking Ethereum can be profitable. It gives you a consistent investment return and helps keep the network secure. However, the amount you stake and network fees determine its profitability.
Q. What is the benefit of staking your ETH with servers?
Staking your ETH with servers can maximize your rewards by providing continuous uptime and high performance for your staking node.
Q. How does staking ETH with servers differ from other staking options?
Staking ETH with servers offers a more reliable and secure environment than cloud providers or basic VPS services.
Q. What is the significance of running an Ethereum node for staking?
Running an Ethereum node is essential for staking as it helps validate transactions and secure the network, contributing to decentralization.
Q. Can I stake ETH without a dedicated computer?
While having a dedicated computer for staking is recommended for optimal performance, you can also stake using other methods, such as validator nodes or staking pools.
Q. What is the process of setting up your Ethereum staking using servers?
Setting up your Ethereum staking involves configuring your staking node, connecting it to the network, and ensuring it has the necessary resources to participate in staking.
Q. What are the risks involved in staking your ETH with servers?
Risks of staking include potential downtime, slashing penalties for misbehavior, and the need for constant monitoring to ensure smooth staking operations.
Q. Can I stake my ETH through a staking-as-a-service platform with servers?
Yes, there are staking-as-a-service platforms that offer server options for staking your ETH, providing convenience for those who prefer a managed staking solution.
