How to Extract .tar.gz Files in Linux: A Complete Guide for Beginners and Engineers
Learn all about the tar and gz file formats. This article covers the essential background and practical aspects of using the .tzr.gz archival format for compressing files on your system.

A .tar.gz file is a compressed archive created by combining multiple files using tar, then compressing it with gzip. It’s common in Linux to distribute source code, data, and backups.
Do you realize how much scattered, bulky files can slow you down? They take longer to transfer, are harder to manage, and eat up precious storage space. If left unorganized, they can quickly turn into a bottleneck for productivity and efficiency.
So what is the solution?
Package them into a single archive and compress it. This makes your data easier to organize, faster to share, safer to store, and far more efficient to transport across networks.
.tar.gz, a file extension format that has a combined archiving power of TAR with the compression efficiency of Gzip. This format has become the go-to standard for distributing source code packages, creating system backups, archiving log files, and sharing massive datasets without the storage and transfer headaches.
In this tutorial, we will guide you through the step-by-step process to extract .tar.gz files in Linux.
But before we jump into the extraction process, let us have a quick look at the prerequisites:
The Prerequisites
Before you move on, ensure you have the following:
- Basic Linux terminal familiarity
- tar, gzip, and optional pigz installed
- How to check: tar –version, gzip –version
- Install command on Ubuntu:sudo apt update && sudo apt install tar gzip
Understanding .tar.gz Files
A**.tar.gz**file format is a combination of two distinct technologies: TAR for packaging and Gzip for compression:
By understanding how these work together, you can make informed decisions about when and how to use this format.
TAR (Tape Archive): The Packaging Layer
The**.tar**format stands for tape archive. It was originally developed in 1979 for Version 7 UNIX to facilitate the storage of multiple files on magnetic tape drives, which were the primary backup and data transfer medium at the time
The primary function of the tar utility is to combine multiple files and directories into a single archive file. This process is called archiving, and it preserves the directory structure, file permissions, ownership, timestamps, and other metadata.
- Supports multiple file types: regular files, directories, symlinks, device nodes
- Standardized by POSIX, with extensions like UStar and GNU tar for long filenames & large files
- .tar only archives, it does not compress
The .gz Format: Gzip Compression
The**.gz** extension refers to files compressed using the gzip (GNU zip) utility. Gzip is a compression tool that reduces the size of files using the DEFLATE algorithm, which combines LZ77 and Huffman coding.
Here, the LZ77 algorithm finds repeated sequences in the data and replaces them with references, reducing redundancy, and the Huffman coding assigns shorter codes to more frequent data patterns, further reducing file size.
- Provides lossless compression (original data can be reconstructed)
- Works on single files only (combine multiple files in a .tar archive first)
- Shorter codes assigned to frequent patterns. This leads to far better compression ratio
- Widely supported on all Unix-like systems
Combining .tar and .gz: The .tar.gz File
Now the question is why to combine**.tar**and .gzand create a .tar.gz file. Here are four critical benefits of this approach:
- Separation of Concerns:.tarhandles archiving (combining files), while .gzhandles compression (reducing size). This modular approach allows each tool to do its job efficiently
- Preservation of Metadata: By archiving first, you ensure that all file metadata (permissions, timestamps, ownership) is preserved, which might be lost if you compressed files individually
- Space Efficiency: Compressing the archive as a whole often results in better compression ratios, especially for many small files.
- Widespread Compatibility: The**.tar.gz**format is supported across virtually all Unix-like systems and is a standard for distributing software and data
Now that we know why .tar.gz files are important, let us see how to extract the contents from a .tar.gz file. By extracting, you can revert the compressed package into its original files, allowing you to use, edit, or deploy them as needed.
How to Extract .tar.gz Files in Linux
There are two kinds of extraction: basic extraction and advanced extraction.
In the basic extraction, you basically unpack the archive without doing anything extra. There is no selective extraction, no preserving permissions, no splitting, and no additional processing.
While in advanced extraction, you are extracting an archive with additional control, customization, or conditions. It is beyond simply unpacking everything.
In this tutorial, we will discuss both basic and advanced extraction. Let us start with the basic extraction.
Basic Extraction
There are primarily two methods to extract .tar.gz file:
Method #1: Extract to Current Directory
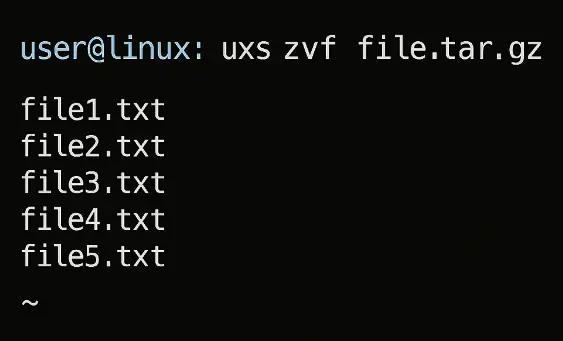
This is the most common method. The command unpacks the contents of the archive into the directory where you are currently working.
# tar -xzvffile.tar.gz
Here,
- -x: Stands for extract. This tells tar to unpack the files.
- -z: Specifies that the archive is compressed with gzip. This tells tar to decompress the file before extracting.
- -v: Stands for verbose. This option makes tar print a list of the files as it extracts them, which is useful for seeing the progress.
- -f: Stands for file. This flag is followed by the name of the archive you want to process
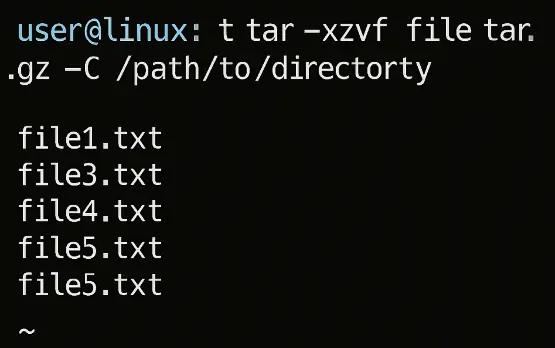
Method 2: Extract to a Specific Directory
If you want to extract the files to a different location without navigating there first, you can use the -C (change directory) option.
# tar -xzvf file.tar.gz -C /path/to/directory
Here, -C /path/to/directory flag tells tar to extract the files to the specified directory. The directory must already exist.
This method is useful for keeping your current working directory clean while placing the extracted files exactly where you need them.
Advanced Extraction
To perform more advanced extractions with .tar.gz files in Linux, you can use these commands.
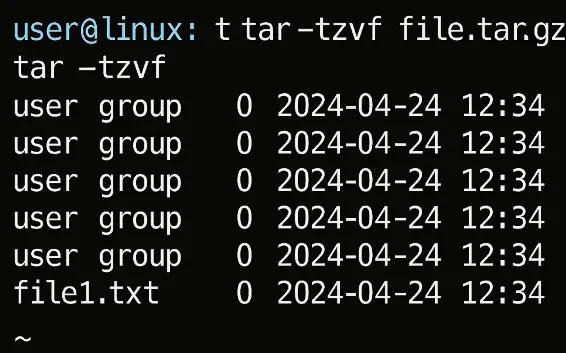
Use Case #1: List Contents Without Extracting
To view the files inside a .tar.gz archive without extracting them, use the -t(list) flag.
# tar -tzvf file.tar.gz
This helps inspect the contents before committing to an extraction.
Use Case #2: Extract Specific Files
If you only need a few files from a large archive, you can specify their paths after the archive name. This saves time and disk space.
# tar -xzvf file.tar.gz path/to/file.txt
You must provide the exact path of the file as it’s stored within the archive. You can find this path using the list command (-t).
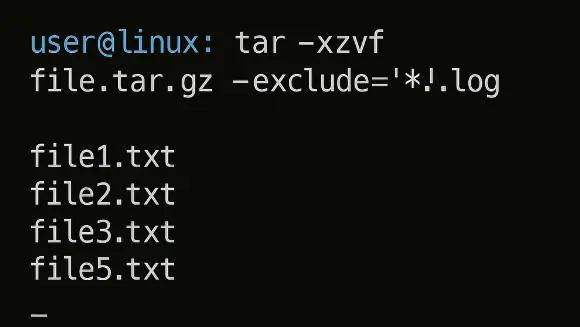
Use Case #3: Exclude Files During Extraction
To prevent certain files from being extracted, use the –exclude option with a pattern:
# tar -xzvf file.tar.gz –exclude=’.log’*
This is useful for skipping log files, temporary files, or specific directories.
Here, –exclude=’*.log’ implies tar to skip any file ending with .log. You can use other wildcards like ***/temp_dir/***to exclude a whole directory.
Use Case #4: Extract Multiple .tar.gz Files
If you want to extract all**.tar.gz**files in the current directory, use a for loop. This automates the process, so you don’t have to run the command for each file.
*# for f in .tar.gz; do tar -xzvf “$f”; done
Here,
- for f in .tar.gz: This loop iterates through every file in the directory that ends with*.tar.gz**.
- tar -xzvf “$f”: The tar command is executed for each file ($f) found by the loop.
Use Case #5: Handle Symlinks (Preserve or Dereference)
When tar extracts a file that is a symbolic link, it can either preserve the link or extract the file the link points to.
The preserve symlink’s default behavior is to simply extract the symlink itself, pointing to its original target. For this, the command would be:
# tar -xzvf file.tar.gz
In the case of dereference symlinks, you can extract the actual file that the symlink points to by using the -hflag.
# tar -xzhvffile.tar.gz
This dereferences the link and copies the target file instead.
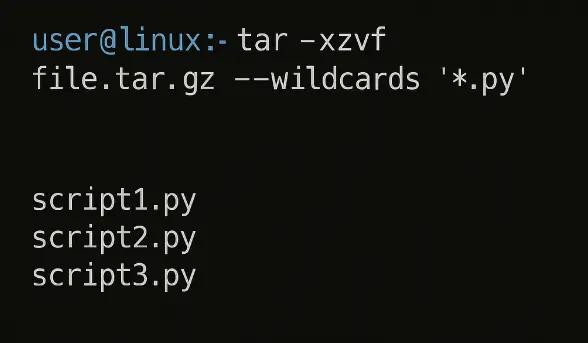
Use Case #6: Use Wildcards During Extraction
If you want to extract specific groups of files, even if they’re not in the same directory, combine wildcards with the –wildcards option:
# tar -xzvf file.tar.gz –wildcards ‘.py’*
tar.gz Command Cheatsheet
The following table presents the most common commands you need to know about the tar.gz command usage.
| Command | Purpose | Example |
|---|---|---|
| tar -xzvf file.tar.gz | Extract archive to current directory | tar -xzvf app.tar.gz |
| tar -xzvf file.tar.gz -C /path/to/directory/ | Extract to specific directory | tar -xzvf app.tar.gz -C /opt/app/ |
| tar -tzvf file.tar.gz | List contents without extracting | tar -tzvf app.tar.gz |
| tar -xzvf file.tar.gz path/to/file.txt | Extract specific file(s) | tar -xzvf app.tar.gz config.yaml |
| tar -xzvf file.tar.gz –exclude=’*.log’ | Exclude files during extraction | tar -xzvf app.tar.gz –exclude=’*.log’ |
| *for f in .tar.gz; do tar -xzvf “$f”; done | Extract multiple archives at once | Bulk extraction |
| tar -xzhvf file.tar.gz | Extract and dereference symlinks | tar -xzhvf app.tar.gz |
| tar -xzvf file.tar.gz –wildcards ‘*.py’ | Extract files matching a pattern | tar -xzvf app.tar.gz –wildcards ‘*.py’ |
| tar -czvf archive.tar.gz /path/to/files | Create a new archive | tar -czvf backup.tar.gz /home/user/docs |
| tar -cvf – /path/to/files | pigz -9 > archive.tar.gz | Parallel compression with pigz | Fast compression on multi-core systems |
Handling Edge Cases and Errors
In this section, we will discuss some of the issues you may encounter during extraction.
Issue #1: Permission Denied Errors
This error occurs when you don’t have the necessary permissions to write to the destination directory.
In such cases, you can use sudo to run the command with superuser privileges (sudo tar -xzvf file.tar.gz) or use chmod to change the permissions of the directory.
Issue #2: Corrupted .tar.gz Files
A corrupted file may fail to extract. Therefore, we recommend testing the integrity of the gzip compression before attempting a full extraction.
Run the following command to check the integrity of the gzip compression
# gzip -t file.tar.gz
If the file is valid, this command will not produce any output. If it’s corrupted, it will return an error message.
Issue #3: Partial Extraction (Resume Interrupted Downloads)
If an extraction is interrupted, running the command again will overwrite existing files by default. To prevent overwriting, use the –keep-old-files or**–skip-old-files** option.
This skips any files that already exist in the destination directory, effectively resuming the extraction from where it left off.
Compression and Archiving
Knowing how to create a**.tar.gz** file is not just about knowing how to archive. It is about optimizing for your specific use case, whether you prioritize compression ratio, processing speed, or file integrity.
Let us see some of the techniques you should know.
Step #1: Create a .tar.gz File
Start by creating a .tar.gz file with the following command:
# tar -czvf archive.tar.gz /path/to/files
Here,
- -c: Create a new archive
- -z: Apply Gzip compression
- -v: Verbose output (shows files being processed)
- -f: Specify the output filename
Step #2: Adjust Compression Level (1–9)
Gzip offers nine compression levels that balance processing time against file size reduction:
# tar -czvf archive.tar.gz /path/to/files -gzip -compression level
The maximum compression is level 9, which results in the slowest compression rate, but produces the smallest file size. While level 1 is the fastest compression level, which quickly processes larger files.
When to use each level:
- Level 1-3: Large datasets where processing speed matters more than storage space
- Level 6: General-purpose archiving (default recommendation)
- Level 8-9: Long-term storage where maximum space savings justify longer compression time
Step #3: Preserve Symlinksonclusio During Creation
Symbolic links require careful consideration during archiving, as they can either be preserved as links or resolved to their target files:
If you want to preserve symlinks as symlinks (default behavior), use the following command:
# tar -czvf archive.tar.gz /path/to/files
Now, if you want to follow symlinks and archive the actual target files, use the -hoption:
# tar -czvhf archive.tar.gz /path/to/files
If you want to explicitly preserve symlinks (redundant but clear), use the -P option:
# tar -czvPf archive.tar.gz /path/to/files
Some of the key points we need to consider are:
- Following symlinks (-h): Results in larger archives but ensures all referenced data is included
- Preserving symlinks (default): Maintains the original link structure but may break if target files are missing during extraction
- Broken symlinks: Will be preserved as-is, potentially causing issues when extracted elsewhere
Step #4: Parallel Compression with pigz
Modern systems with multiple CPU cores can dramatically accelerate compression using pigz (parallel implementation of gzip)
For maximum parallel compression, run the following command:
# tar -cvf – /path/to/files | pigz -9 > archive.tar.gz
Conclusion
Extracting .tar.gzfiles in Linux is a straightforward yet essential skill for anyone working with compressed archives or managing software packages.
By using the tar command with appropriate flags, such as -xzvf, users can efficiently unpack files and access their contents directly from the terminal.
With just a few commands, you can navigate, extract, and manipulate compressed files with confidence in any Linux environment.
FAQs
What is a .tar.gz file?
.tar.gz file is a compressed archive created by first combining multiple files using tar (tape archive), and then compressing it with gzip. It’s commonly used in Linux for packaging software or backups.
Which command is used to extract a .tar.gz file?
You can extract a .tar.gz file using:tar -xzvf filename.tar.gz
What do the flags -xzvf mean in the tar command?
The flags -xzvfmean the following:
x – extract
z– decompress with gzip
v – verbose (shows progress)
f– specify filename
Can I extract a .tar.gz file to a specific directory?
Yes. Use the -C option: tar -xzvf filename.tar.gz -C /path/to/directory/
How do I view the contents without extracting the file?
To view the contents without extracting the file, use the -tzf option: tar -tzffilename.tar.gz
What if I want to extract only specific files from the archive?
You can specify the filename(s) usingtar -xzvf filename.tar.gz path/to/file.txt
How can I exclude files during extraction?
You can exclude files during extraction using the**–exclude** option: tar -xzvf filename.tar.gz –exclude=’*.log’
What if I get a permission denied error while extracting?
If you get a permission denied error while extracting try using sudo for administrative permissions: sudo tar -xzvffilename.tar.gz
Is it possible to extract .tar.gz files without the terminal?
Yes, most Linux desktop environments allow extraction via file manager by right-clicking the .tar.gz file and selecting Extract Here or similar.
What’s the difference between .tar, .gz, and .tar.gz?
The difference between .tar, .gz, and .tar.gzis**:**
.tar: Archive without compression
.gz: Single compressed file
.tar.gz: A .tar archive compressed with gzip
Sonika
Linux System Administrator
Sonika holds the position of Linux System Administrator at RedSwitches. Besides her administrative duties, she is recognized as a proficient Linux Technical Writer. Her expertise lies in addressing intricate challenges in critical server management and administration. Beyond her professional sphere, Sonika takes pleasure in playing badminton and engaging in yoga.

Ubuntu vs Linux: Key Differences Explained
Linux is the kernel, while Ubuntu is a complete operating system built on it. This guide breaks down their key differences, use cases, and when to choose each.

Reduce Docker Image Size: Best Practices to Slim Your Images
Docker image size can become a serious issue as you add more code to the image. Learn how to reduce Docker image size and optimize Dockerfiles for production to speed up CI/CD pipelines and improve container efficiency.

Best Linux Distros 2026, Full Guide for Beginners, Developers, Gamers & Servers
Match your hardware, workflow, and skill to the right Linux distro in 2026. Compare 23 top picks, Mint, Ubuntu, Fedora, Arch, Bazzite, covering beginners, developers, gamers, and servers.
Power Your Next Project With Bare Metal
Instant provisioning, zero setup fees, and 24/7/365 human engineers across 20+ global locations.