PostgreSQL, aka Postgres, is an open-source relational database management system (RDBMS) that’s become very popular in the IT industry, particularly in app and web development.
Thanks to its open-source background, Postgres works without major issues on all platforms, including Linux, Windows, and macOS (It is the default database for macOS-powered servers).
This compatibility stems from the fact that Postgres has a standard SQL implementation, concurrency support, and very reliable transactions. Furthermore, PostgreSQL offers advanced features such as built-in replication, robust high-availability options, and both asynchronous and synchronous commit capabilities. These attributes make it suitable for enterprise-grade applications seeking scalability and resilience.
This tutorial covers the process of installing PostgreSQL on Ubuntu servers in 3 simple steps.
Table of Contents
- Why Should You Consider PostgreSQL for Your Projects
- Prerequisites
- Install PostgreSQL on Ubuntu
- Login to PostgreSQL
- Check Available Databases and Users
- Configure Remote Connections to PostgreSQL Server
- Uninstall PostgreSQL Database on Ubuntu 22.04
- Conclusion
- FAQs
Why Should You Consider PostgreSQL for Your Projects
The popularity of PostgreSQL is because of the following factors that come together and make it a dependable RDBMS for your projects:
- A diverse community that helps you set up and use PostgreSQL for your projects.
- Support for Stored Procedures (SQL functions) speeds up data operations
- PostgreSQL supports multiple indexing techniques, including GIN and GiST
- Simple full-text search for strings
- PostgreSQL is an excellent option for geographically distributed data stores.
Prerequisites
To install PostgreSQL on Ubuntu, you’ll need the following:
- A server running Ubuntu 22.04 (or the latest stable version)
- A non-root user with administrator (sudo) privilege
- A basic firewall on the server
As you can see, security is always an important consideration whenever you do anything related to data. If you’re setting up PostgreSQL for your active projects, you should consider more robust security measures.
Install PostgreSQL on Ubuntu
Now that you have the basic information about PostgreSQL and the prerequisites of the process, let’s dive into the details of the process.
Step 1: Update the Server Packages
Start by updating the package index of the Ubuntu server with the following command:
sudo apt update
Step 2: Install the PostgreSQL Package
Next, we’ll download and install the PostgreSQL default package. This download will also include utilities that will help us better use PostgreSQL. Here, we will install the default version of PostgreSQL database server available with Ubuntu 22.04.
Use the following apt command to download the postgresql-contrib package:
sudo apt install postgresql postgresql-contrib
During the process, you’ll be prompted to confirm that you want to install the package and restart the service after installation.
Step 3: Confirm PostgreSQL Service is Up and Running
After installation, you need to check if the PostgreSQL service is running. Start by checking the status with the following command:
sudo service postgresql status
You can also verify the PostgreSql version using the psql command line utility:
Login to PostgreSQL
Now that PostgreSQL is installed and running, you can access the PostgreSQL database.
During the installation process, PostgreSQL creates a user postgres. We’ll use this user to access the database engine.
Start with the following command to switch over to the PostgreSQL user:
sudo -i -u postgres
Next, access the PostgreSQL prompt with the psql utility:
psql
This launches the PostgreSQL command line utility that allows you to access the databases and users.
Check Available Databases and Users
The first thing you should do after installing PostgreSQL is to check what databases and users are available.
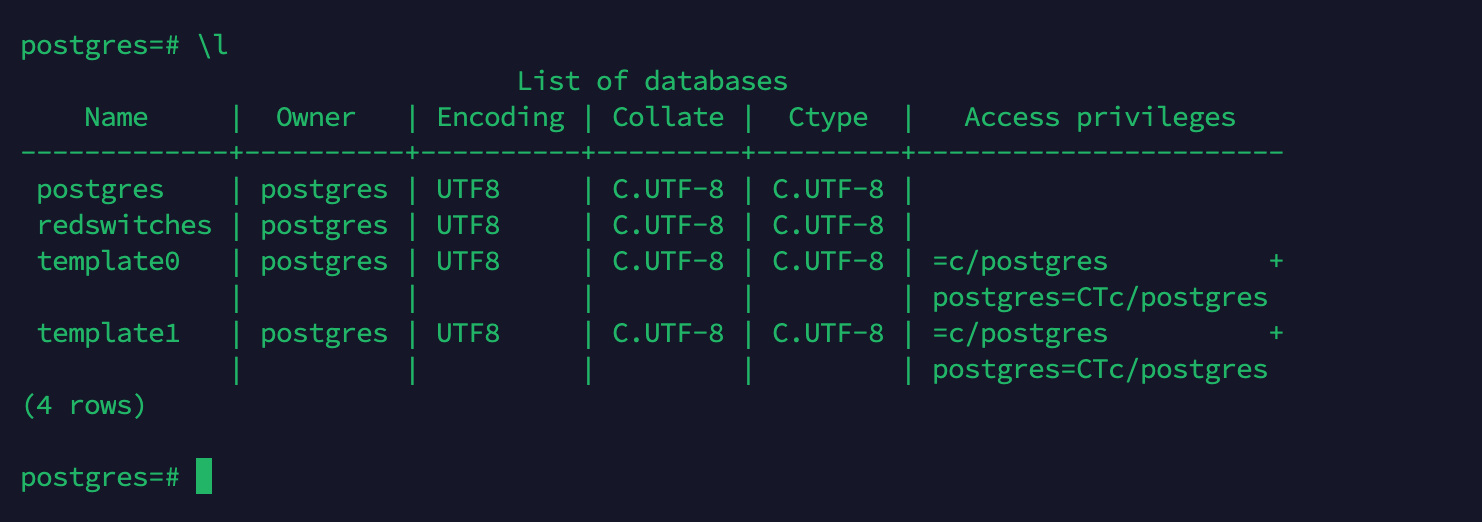
First, run the following command to see the list of all databases available on the server:
\l
Next, check the list of all the users and their privileges using the following command:
# \du
You should note that the default user “postgres” has no password. If you want to set it up, you can use the following command:
\password postgres
You will be prompted to set up the password. Remember to press ENTER to complete the process at the second entry.
Finally, to quit the PostgreSQL prompt, run the following command:
\q
You’ll be returned to the PostgreSQL user command prompt. If you wish to return to the logged-in user, run the exit command:
$ exit
Add A New User
When using PostgreSQL, you might want to add a new user. This is often a critical project requirement when you want to add users with different roles and access rights. PostgreSQL has a simple process of adding new users and defining their roles.
Use the following command to add a new user:
createuser --interactive
Because of the –interactive switch, the script will prompt you to answer a question. Based on your responses, the script executes the correct commands to create a user to your specifications.
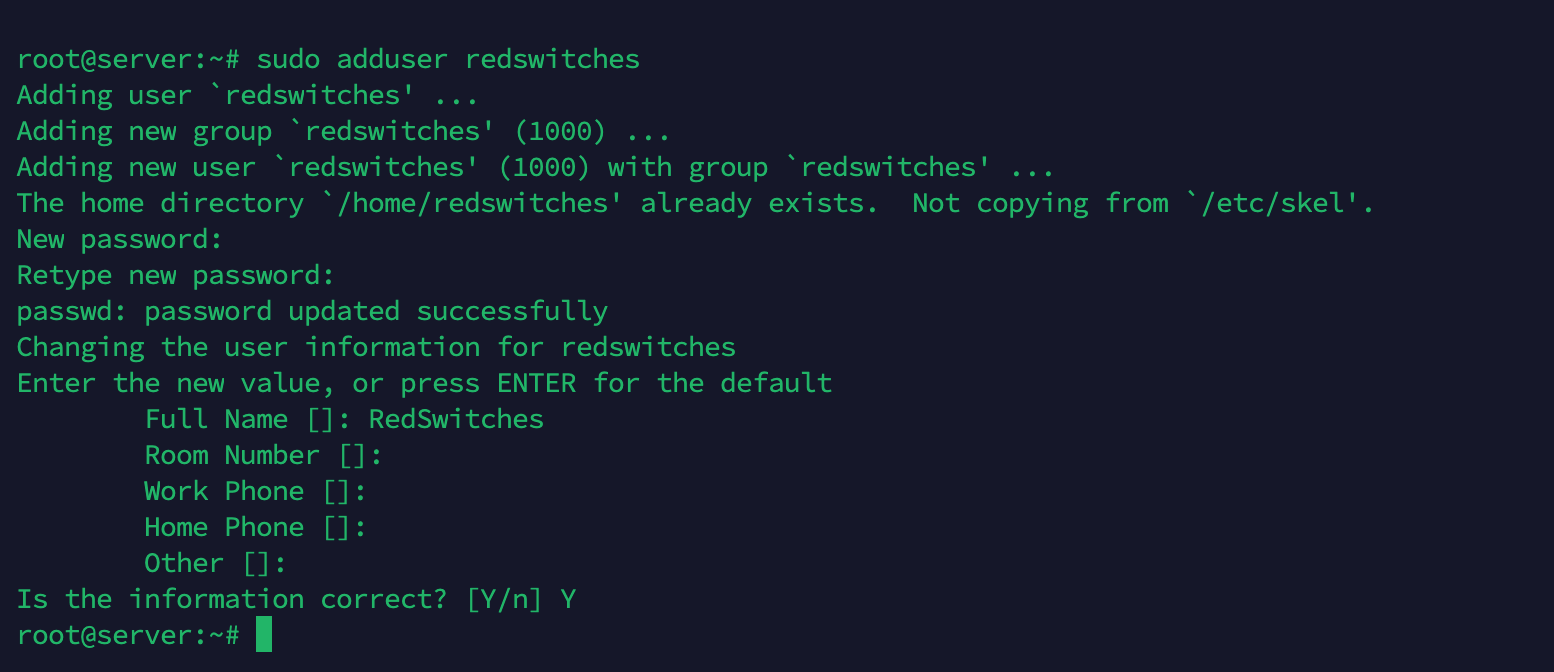
To log in to PostgreSQL using this new role, you’ll need a Linux user with the same name as your Postgres role and database. You can create this user with the adduser command in Linux.
Important: As mentioned in the prerequisites, remember to log into the server with the non-root account with sudo rights.
sudo adduser redswitches
Once the account has been added, you can switch over to it and connect to the database:
sudo -i -u redswitches
psql
This command will log you in automatically, assuming all components have been appropriately configured.
Once logged in as redswitches, you can check your current connection information by running the following command:
\conninfo
Create a New Database
Now that you have added a user, it’s time to add a new database.
Notice that we added a user named redswitches to PostgreSQL. To add a new database, you must be logged in with this user to conform to the PostgreSQL authentication processes.
We’ll now add a new database (named redswitches) with the following command.
createdb redswitches
This will create a database with the name redswitches.
Configure Remote Connections to PostgreSQL Server
By default, PostgreSQL restricts connections only to localhost or the server where it’s initially installed. However, there are scenarios where you might want to enable remote connections, allowing users from other locations to access the Postgres database server, including remote access for yourself as the database admin.
PostgreSQL utilizes the postgresql.conf file, located within the /etc/postgresql/<version>/main/ directory to configure remote database access. The “<version>” placeholder represents the specific PostgreSQL version you have installed.
For instance, in our current setup, the complete path to the configuration file is /etc/postgresql/14/main/postgresql.conf. To modify this file, you can use your preferred text editor. For this demonstration, we’ll use Vim.
$ sudo vim /etc/postgresql/14/main/postgresql.conf
In the “CONNECTIONS AND AUTHENTICATION” section, find the ‘listen_addresses’ directive and remove the comment symbol (#) to activate it. Replace ‘localhost’ with the asterisk symbol ‘*’, enabling the PostgreSQL server to accept connections from all remote IP addresses.
After saving the modifications, close the file.
Then, open the pg_hba.conf file to configure it for permitting IPv4 connections from remote clients.
$ sudo vim /etc/postgresql/14/main/pg_hba.conf
In the section labeled ‘IPv4 local connections,’ update the fourth column to enable worldwide remote connections.
0.0.0.0/0
After making these adjustments, save the configuration file and exit.
To apply these changes, you’ll need to restart the PostgreSQL service.
$ sudo systemctl restart postgresql
If you are using a firewall, you should permit port 5342, as shown below. By default, the Postgres server listens to 5432 for incoming connections.
$ sudo ufw allow 5342/tcp
Reload the firewall rules to make sure the changes you made are in force.
$ sudo ufw reload
Now, to establish a connection to the PostgreSQL server from a remote client, run the following command, replacing the IP address with the database server IP address.
$ psql -h 192.xx.xx.xx -U postgres
Uninstall PostgreSQL Database on Ubuntu 22.04
If you wish to uninstall PostgreSQL Database on Ubuntu 22.04, run the following command:
$ sudo apt-get --purge remove postgresql postgresql-*
Select YES to allow the uninstall process to remove the PostgreSQL packages.
Conclusion
We hope you now have a clear idea of how to install PostgreSQL on the Ubuntu server. We also covered the process of adding a new user and a database. We highly recommend using strong passwords and usernames to improve database security. If you need further help setting up PostgreSQL on your Ubuntu server, post your question in the comments for our experts.
Since your PostgreSQL database is running smoothly, hosting it on a reliable platform is essential. For top-notch hosting solutions, look no further than RedSwitches. Their robust infrastructure and exceptional support ensure your PostgreSQL databases are in safe hands. Take your data management to the next level with PostgreSQL on Ubuntu and experience the difference of hosting with RedSwitches. Don’t miss out – act now and unleash the full potential of your data.
FAQs:
Q1: Can I install PostgreSQL on any Ubuntu version?
Answer: Yes, PostgreSQL is available for all recent Ubuntu versions. The installation process may vary slightly between versions, but the core steps remain the same.
Q2: Do I need to be a superuser to install PostgreSQL on Ubuntu?
Answer: No, but you need sudo privileges. You can install PostgreSQL using a user with sudo access to execute administrative commands.
Q3: Is it necessary to secure PostgreSQL after installation?
Answer: Yes, it’s crucial. PostgreSQL should be properly configured with passwords and access controls to prevent unauthorized access and protect your data.
Q4: Can I run multiple PostgreSQL versions on the same Ubuntu server?
Answer: Yes, it’s possible to run multiple versions concurrently. However, careful configuration is required to avoid conflicts.
Q5: Where can I find more resources for learning PostgreSQL and Ubuntu?
Answer: You can explore the official PostgreSQL documentation (https://www.postgresql.org/docs/) and Ubuntu documentation (https://ubuntu.com/server/docs) for in-depth information and tutorials.
Q6: Is there a graphical user interface (GUI) available for managing PostgreSQL on Ubuntu?
Answer: Yes, tools like pgAdmin and DBeaver offer GUI interfaces to manage PostgreSQL databases on Ubuntu, providing a user-friendly experience.
Q7: How do I back up and restore PostgreSQL databases on Ubuntu?
Answer: We recommend using the pg_dump command for backup and the pg_restore command for restoration. These tools are part of PostgreSQL and are well-documented in the official documentation.
Q8: Is PostgreSQL compatible with other programming languages on Ubuntu?
Answer: Yes, PostgreSQL supports various programming languages, including Python, Java, PHP, and more, making it versatile for developing applications on Ubuntu.


