
Deploy a Server
Deployment is fully automated for in-stock servers. The median time from payment to online is about 3 minutes, and you can follow every stage live. You stay in control of the build: operating system, RAID, access, bandwidth and billing cycle are all yours to choose.
This page covers each step in detail. For a short walkthrough, see Deploy your first server.
Choose
Section titled “Choose”Select Deploy in the sidebar, or the Deploy button on the Servers page.
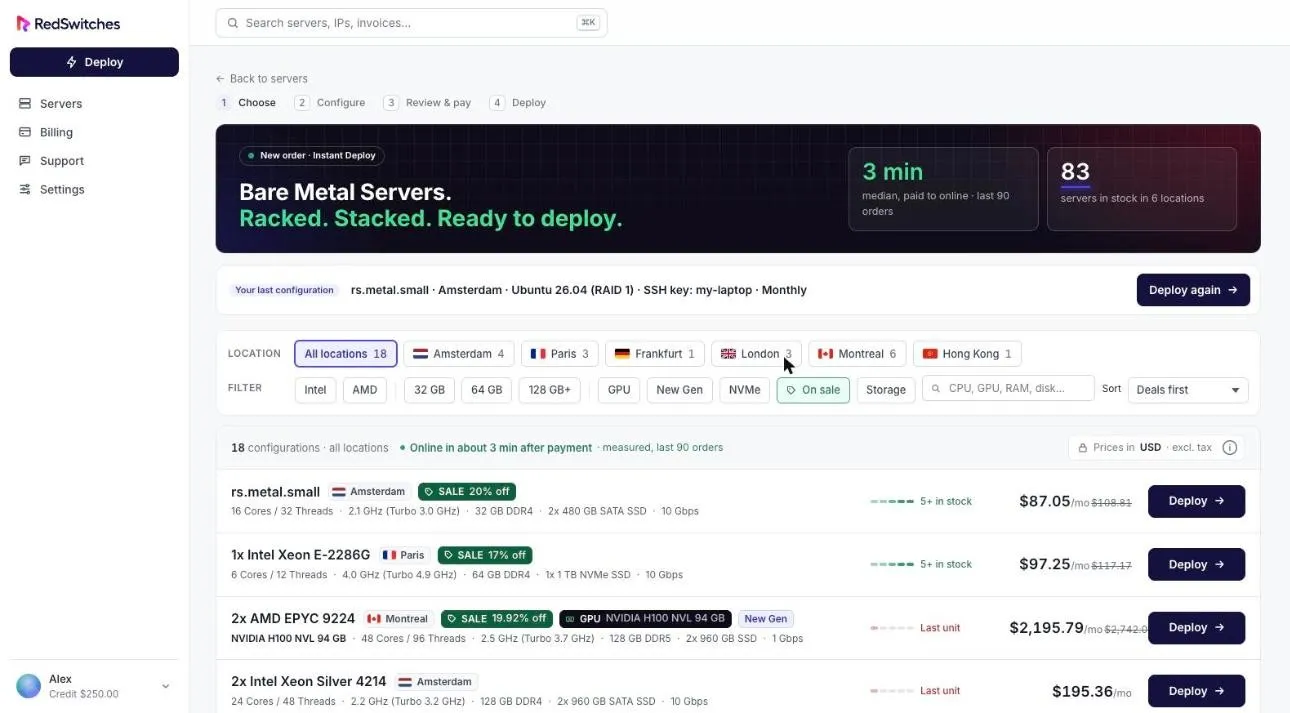
The top of the page shows two live figures: the median time from payment to online over the last 90 orders, and the number of servers in stock across locations.
Filters
- Location: each location with stock is listed with its count.
- Hardware: Intel, AMD, memory size, GPU, New Gen, NVMe, Storage and On sale.
- Search: type a CPU, GPU, memory size or disk.
- Sort: the list shows deals first by default.
Each row shows the processor, cores and threads, clock speed, memory, storage, port speed, stock level and monthly price. Sale prices show the discount and the original price.
If you have deployed before, Deploy again repeats your last configuration.
Configure
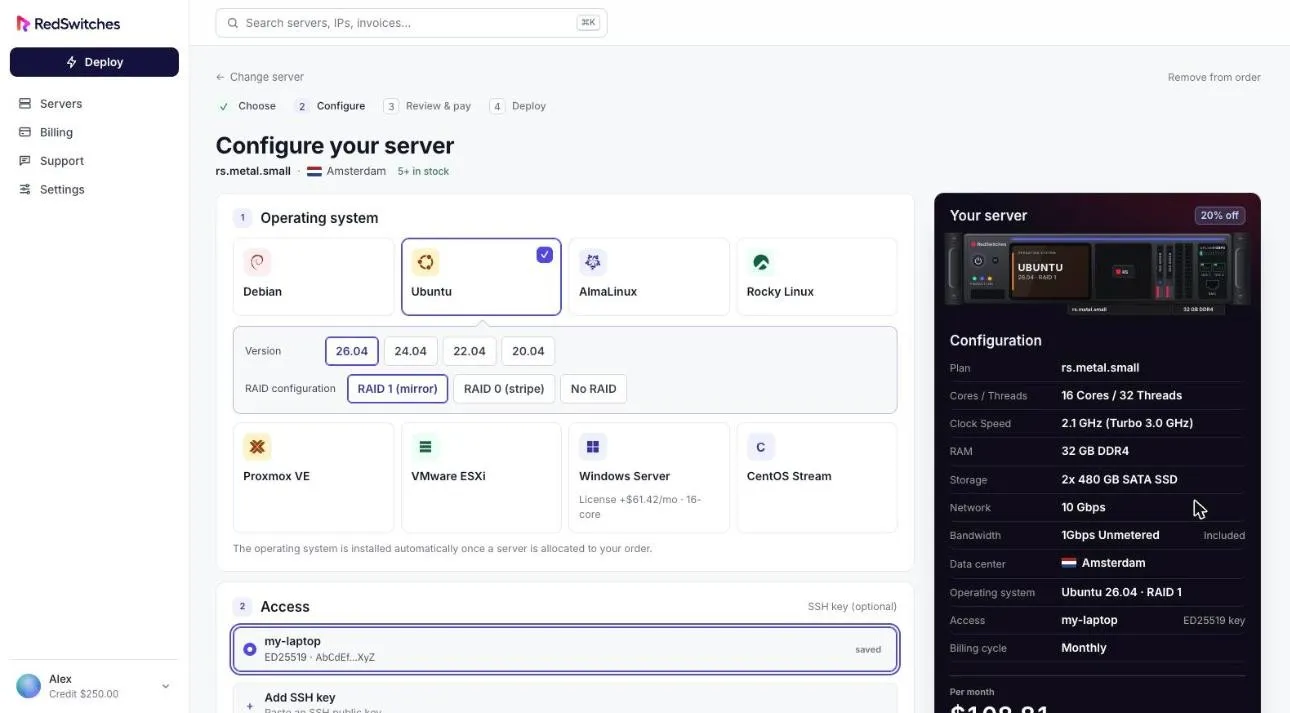
Section titled “Configure”Operating system
| Family | Notes |
|---|---|
| Ubuntu | Several versions, including LTS releases |
| Debian | |
| AlmaLinux | |
| Rocky Linux | |
| CentOS Stream | |
| Proxmox VE | |
| VMware ESXi | |
| Windows Server | A monthly license fee applies and is shown on the option |
After choosing a family, pick a version and a RAID configuration: RAID 1 (mirror), RAID 0 (stripe) or no RAID.
Access
- A saved SSH key: keys from Settings, SSH keys are listed.
- Add SSH key: paste a new public key.
- No SSH key: log in with the root password.
A root password is always created and shown on the server’s Overview tab.
Bandwidth
Included options are marked Included. Higher traffic allowances and faster unmetered speeds are listed with their monthly price.
Billing cycle
Monthly, quarterly, semiannually or annually. Longer cycles have a lower monthly rate, and each option shows the saving. See Billing cycles.
Review and pay
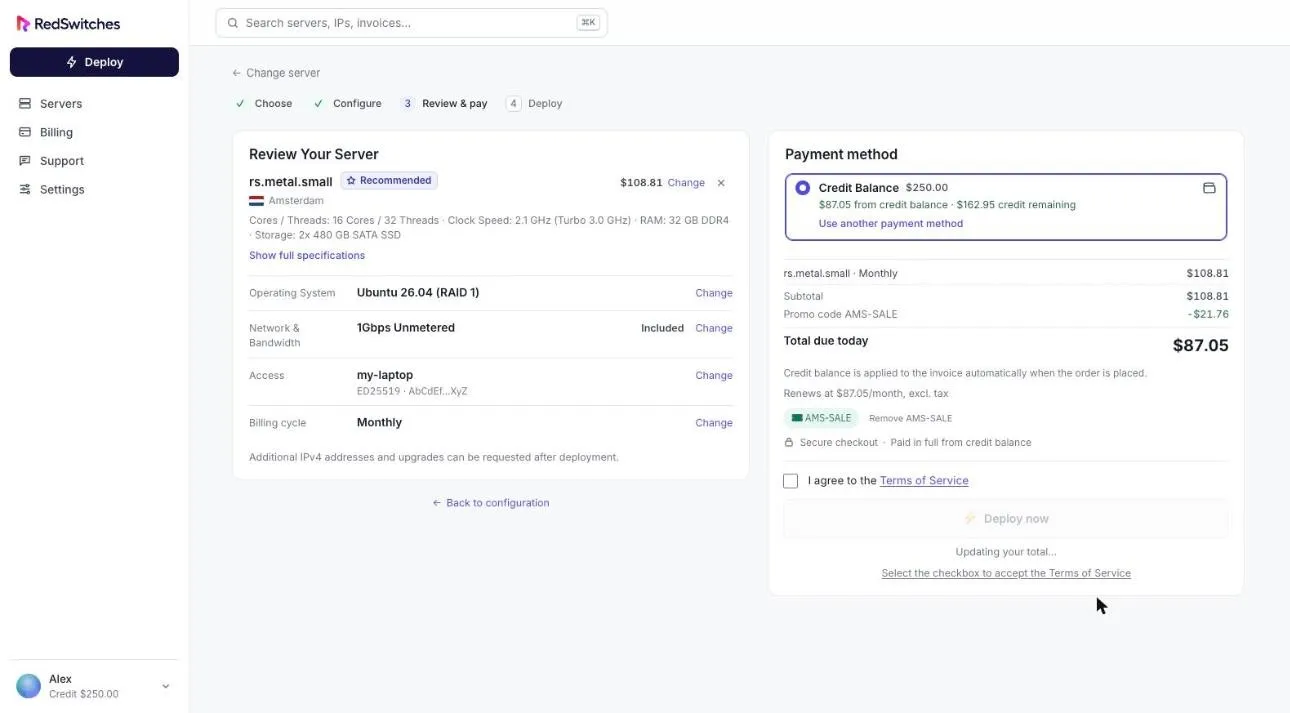
Section titled “Review and pay”The review step lists the server, operating system, bandwidth, access method and billing cycle, each with a Change link.
On the right:
- Payment method: credit balance is used first when available. Select Use another payment method to change it.
- Totals: subtotal, any promotional discount and the total due today, plus the renewal price.
- Terms of Service: tick the box to enable Deploy now.
Prices are shown excluding tax. Tax, credit and the total due are shown before you pay.
Deploy
Section titled “Deploy”After payment the deployment page opens automatically. Nothing is hidden behind a status email: you see each stage complete in real time.
- Payment received
- Allocating server
- Server assigned (the IP address appears here)
- Installing OS, step 1 of 3: rebooting the server
- Installing OS, step 2 of 3: loading the installer over the network
- Installing OS, step 3 of 3: installing the operating system
- Finalizing the installation
A timer counts from the moment the server is assigned, and an installation log shows what is happening. You can leave the page; the server appears under Servers when ready.
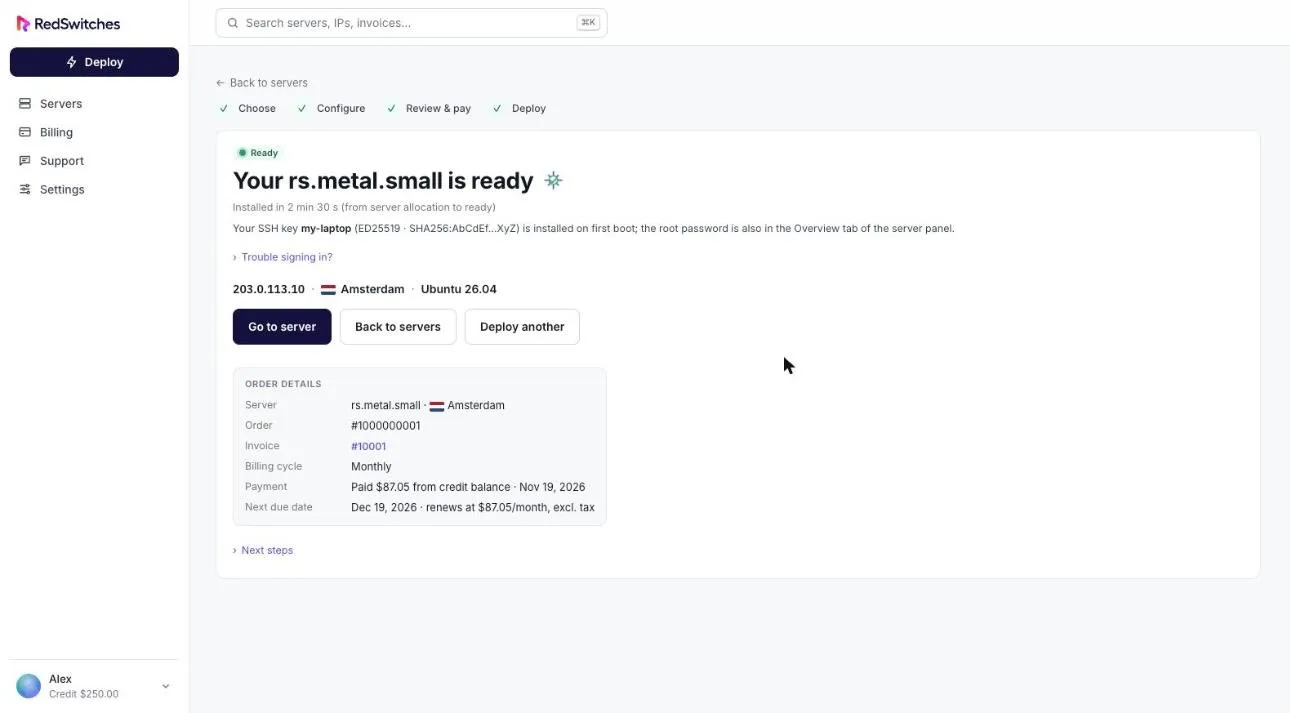
The ready page shows the IP address, location, operating system, installation time and order details (order number, invoice, billing cycle, payment and next due date). Select Go to server to manage it, or Deploy another to start again.
Additional IPv4 addresses and upgrades can be requested after deployment. See Extra IPs.