Since the days of mainframes and remote terminals, accessing and working with remote systems is a critical requirement.
Telnet was introduced in 1969 as a standard protocol for establishing a remote connection with another device or server. Once the connection has been established, you can run commands on the remote system.
In this comprehensive guide, we’ll discuss how to use the Telnet command in Linux. We’ll show you how to install and set up relevant packages and then go through several application scenarios of the Telnet protocol.
- What is Telnet?
- Install Telnet on Linux
- How to Use Telnet in Linux
- The telnet Command Options
- Specify a Username at Login
- Automatically Log In with the Default Credentials
- Bind the Telnet Session to a Network Address
- Change the Default Escape Character
- Specify the Port
- Set the Terminal Type
- Keep The Telnet Session Alive
- Record the Telnet Session
- Use the X Display
- Use Telnet in the Background
- Run Telnet Session in the Quite Mode
- Get Help
- Popular Telnet Application Scenarios
- Conclusion
- FAQs
Let’s start with an introduction to the Telnet protocol.
What is Telnet?
Telnet is a communication protocol and command-line tool that allows users to remotely connect to and interact with devices, servers, and systems over a network, often the Internet. It provides a basic, text-based interface for establishing connections with remote hosts. Network admins use Telnet for tasks like configuring networking equipment, diagnosing issues on remote servers, and testing network services.
Perhaps the best-known fact about Telnet is that Telnet doesn’t offer encryption. As such, data transferred through Telnet is not secure. That’s why, over the years, network admins have started using better-secured alternatives like SSH to protect confidential or sensitive operations.
Despite this critical security flaw, admins still use Telnet to manage remote devices and servers because of its ease of use. Since the protocol transfers data in cleartext, it is very fast. However, we strongly recommend SSH over Telnet for critical data transfer.
Do you know that you can use Telnet on Windows? Just go through this simple tutorial and start using Telnet on Windows to connect to remote systems.
Install Telnet on Linux
Telnet is not usually included with major Linux distributions because of the popularity of SSH as the preferred way of working with remote servers. So, the first step is to install the required packages.
RHEL Based Distributions
If you are on an RHEL-based distribution (Fedora or CentOS), follow these steps to install Telnet on your system. Note that you will work with Yum as your package manager.
Step #1: Install Telnet Packages
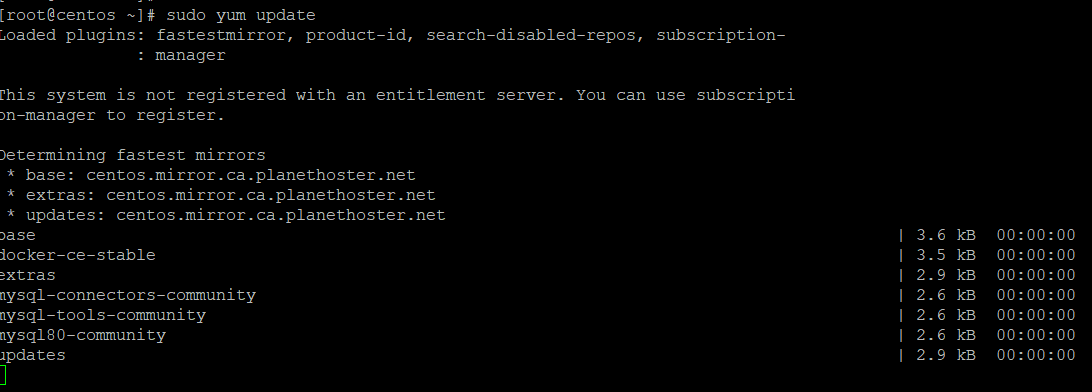
Before installing Telnet, update the system’s package index:
# sudo yum update
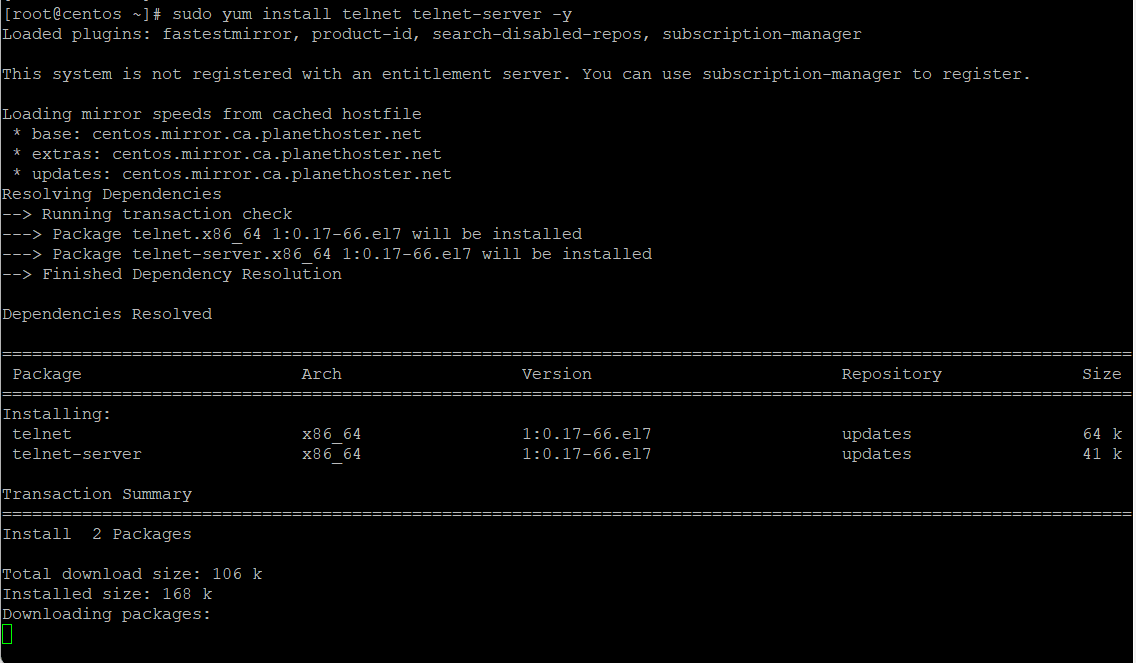
Next, install the telnet server packages with the following command:
# sudo yum install telnet telnet-server -y
Step #2: Enable the Telnet Service
Run the following commands to launch and enable the Telnet service on your system:
# systemctl start telnet.socket
# systemctl enable telnet.socket
Step #3: Configure the Firewall on the Target Machine
The final step is to configure the firewall on the target system to accept Telnet connections. The default port is 23, but you can change this on the target system. However, we’ll use the default port to demonstrate firewall configuration.
For this, run the following command in the terminal:
# sudo firewall-cmd --permanent --add-port=23/tcp
Next, apply these commands and reload the firewall rules to allow incoming Telnet connections:
# sudo firewall-cmd --reload
Debian Based Distributions
If you are on a Debian-based distribution, like Ubuntu, you will work with apt as the default package manager. You should follow these steps to install Telnet packages on these distributions.
Step #1: Install Telnet Packages
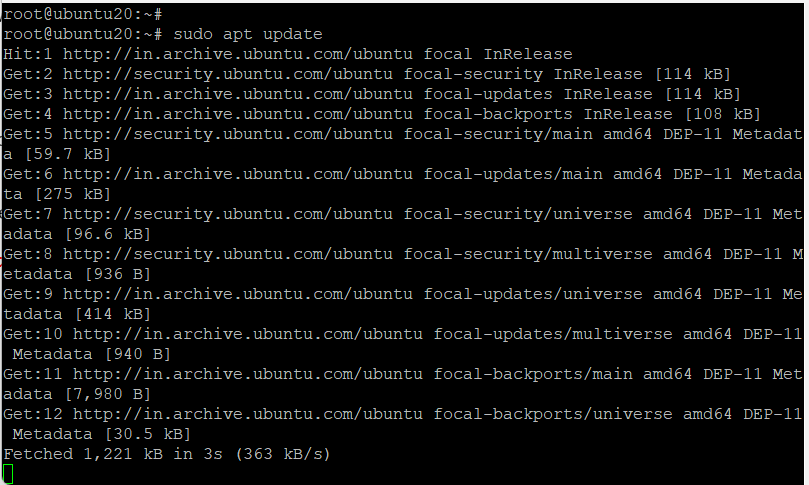
Start by updating the package index of the system with the following command:
# sudo apt update
Next, run the following command to set up Telnet:
#sudo apt install telnetd -y
Step #2: Launch the Telnet Service
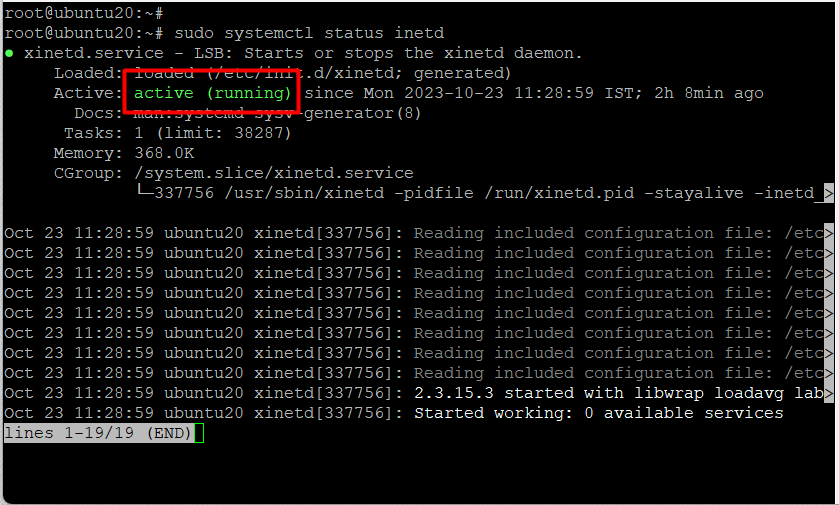
Run the following command to launch the Telnet service:
# sudo systemctl status inetd
Step #3: Configure the Firewall on the Remote System
The final step of the process is to configure the firewall on the target system to allow incoming Telnet connections. The default port is 23, and we’ll use it in this tutorial:
Run the following command on the remote system to allow traffic to port 23:
# sudo ufw allow 23/tcp
Next, restart the firewall service to make sure the new rules are in force:
# sudo ufw reload
Also Read: A Guide on How to Install and Use Linux Screen Command in 2024
How to Use Telnet in Linux
Important: Before working with Telnet in Linux, ensure that the firewall on the remote system allows connection on port 23, the default Telnet port.
The Telnet command has the following syntax:
telnet [options] [remote_server_address] [port]
Here, the [port] and [options] parameters are optional. In addition, the Telnet command accepts both numeric and symbolic addresses for [remote_server_address].
You can enter the telnet command in the terminal to enter the interactive telnet mode.
You can use this interactive shell to connect to remote servers, check the current status of the telnet service, and run commands on connected systems.
Once done, enter quit to leave the Telnet shell and terminate the session:
The telnet Command Options
The telnet command is very flexible, thanks to the extensive flags and options that you can use to execute a number of different tasks. Note that the available telnet command parameters might be different on your system because of the differences in the distribution and the package version.
Specify a Username at Login
Use the -l parameter to specify the username at the start of the Telnet session:
# telnet -l myusername remote-host
Automatically Log In with the Default Credentials
Use the -a parameter to easily log into a Telnet session with the credentials and session details stored in the hidden .telnetrc file. This file is usually located in the user’s home directory.
Bind the Telnet Session to a Network Address
You can bind the Telnet session on the local machine to a specific network address with the -b command. This parameter is very helpful if you have multiple network interfaces with IP addresses.
Change the Default Escape Character
The default escape character in a Telnet session is Ctrl+]. You can change the default option with the -e parameter. Here’s the command to change the default escape character to ^]:
# telnet -e ^] remote-host
Specify the Port
The telnet command uses the default port 23 for Telnet sessions. However, chances are that the remote system allows Telnet sessions on a different port. Use the -p parameter to specify the port for the session.
# telnet -p 2323 remote-host
Set the Terminal Type
You can use several types of terminals for the Telenet session. Use the -t parameter to set the terminal type for the session.
# telnet -t vt100 remote-host
Keep The Telnet Session Alive
Use the -K parameter to enable TCP keep-alive packets to check if the Telnet connection is active.
Record the Telnet Session
You can record the Telnet session with the -r parameter to create logs of the sessions. This option is useful for later analysis.
# telnet -r session.log remote-host
Use the X Display
Use the -X parameter to specify the location of the X11 display.
Use Telnet in the Background
If you plan to use the Telnet service in scripts or process automation, use the -c parameter to keep the session running in the background after you log in and initiate it.
Run Telnet Session in the Quite Mode
By default, Telnet sessions are very informative with detailed messages about the events and status. You can use the -q option to run the session in a quiet mode where most messages are not displayed.
Get Help
Use the -? or –help to get help with the Telnet commands and options.
Popular Telnet Application Scenarios
Telnet is very flexible, and sysadmins can use it for a wide range of administrative activities. Let’s run through several scenarios where Telnet proves extremely useful.
Check for Open Network Ports
Important: We don’t recommend this method for testing for open ports.
Telnet is a useful tool to check whether a particular port on a server is open and accepting connections.
For this, enter the target port number with the telnet command to see if you get a response.
# telnet [server_address] [port]
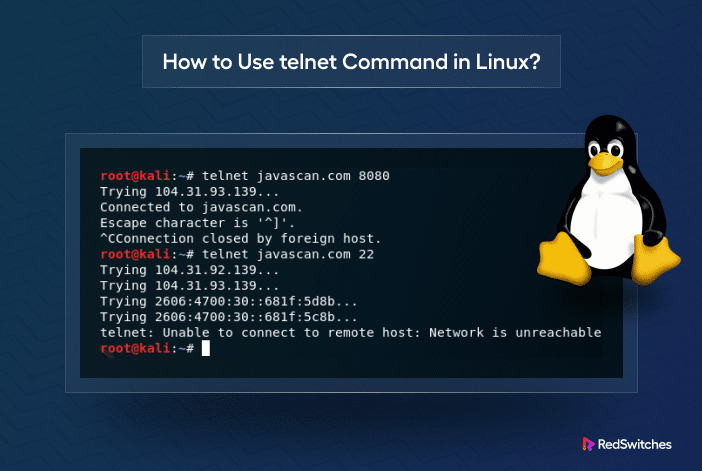
Note that if you don’t mention a port number, the command will use the default port 23. The following command will try to connect to the redswitches server on port 22.
#telnet redswitches.com 22
You will get an error message if the specified port (22) is closed.
Now, let’s change the port in the command to 80. You can see that port 80 is open and accepting connections on the test server.
Download Web Pages to Local Files
You can easily download the HTML source code of a website page to a local file by setting up a Telnet connection to port 80 of the server. This simple trick is used to view, examine, and verify the source code.
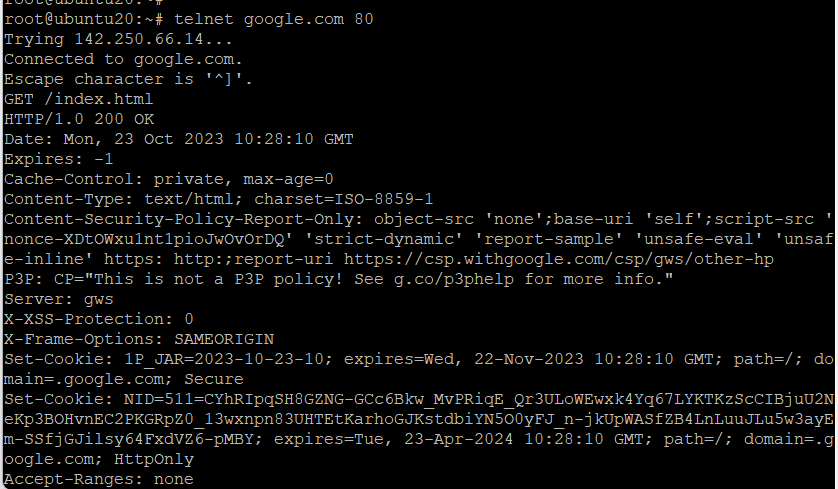
To demonstrate this idea, use the following command to connect to the Google’s server on port 80:
# telnet google.com 80
Once the connection has been made, use the following commands to download the HTML page:
GET /index.html
You can view the source code of the page in the terminal. Now, you can save the Telnet session to save the HTML code.
Test the SMTP Connection
You can test the SMTP server by sending emails straight from the Telnet command line. This is a very useful functionality for testing the SMTP server functionality. Admins use this functionality to test and find issues with email servers.
You’ll need an email server that doesn’t require authentication to test SMTP functionality. For this demonstration, we’ll use the Gmail SMTP server.
Start by logging into the SMTP server with the standard telnet command on SMTP ports (25, 465, 587):
telnet [server_address] [port]
Once connected, say hello to the server with the HELLO command:
HELO [your_IP_address]
Now you’re ready to send the email. Start by adding the sender’s email address:
MAIL FROM: <[email protected]>
Next, add the recipient’s email address:
RCPT TO: <[email protected]>
Finally, add the email body and the subject line:
SUBJECT: This is the email subject.
"Hello"
This is the email body.
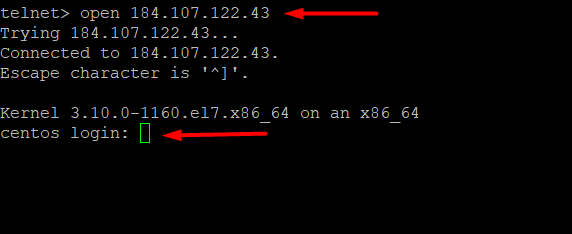
Connect to a Remote Network System
You can connect to a remote system and log into the system in a Telnet session. Note that the process uses cleartext, and we don’t recommend it for exchanging passwords and critical information.
You should also verify that the target system accepts incoming requests in the default 23 (Telnet) port.
Once the connection is established, you can enter the password. Once the information is verified, you can remotely control the target machine.
Conclusion
Despite the lack of encryption, Telnet is a very useful utility for remotely connecting and working with devices, servers, and other systems. We discussed the basics of the Telnet command and how you can use the utility for common administration tasks.
The Telnet command offers a simple way to connect to remote systems. However, SSH is often used instead for critical tasks.
RedSwitches offers the best dedicated server pricing and delivers instant dedicated servers, usually on the same day the order gets approved. Whether you need a dedicated server, a traffic-friendly 10Gbps dedicated server, or a powerful bare metal server, we are your trusted hosting partner.
FAQ’s
Q. What is Telnet, and why should I use it in Linux?
Telnet is a command-line tool in Linux used for remote communication and control. It’s beneficial for accessing devices, servers, and systems over a network. Telnet is useful for various tasks, such as troubleshooting, configuration, and testing.
Q. How do I install Telnet on a Linux system?
On many Linux distributions, you can install Telnet by using your package manager. For example, on Ubuntu, you can use sudo apt-get install telnet.
Q. What are the prerequisites for using Telnet in Linux?
To use Telnet effectively, you need to have the Telnet client software installed on your Linux system. Additionally, you should have proper network connectivity to the remote host you want to access.
Q. How can I use Telnet to connect to a remote host?
You can use the command telnet hostname or telnet IP_address to establish a Telnet session with a remote host. Replace “hostname” with the host’s name or “IP_address” with its IP address.
Q. What are the security considerations when using Telnet in Linux?
Telnet is not a secure network protocol as it sends data in plaintext, making it unsuitable for sensitive or critical operations. It’s advisable to use more secure alternatives like SSH for secure remote connections.
Q. Can I automate Telnet sessions in Linux for scripting and automation?
Yes, you can automate Telnet sessions using shell scripts or other scripting languages like Python. This allows you to perform repetitive tasks and configurations on remote hosts.
Q. How do I terminate a Telnet session in Linux?
To end a Telnet session, you can typically use the command Ctrl+] followed by typing exit telnet and pressing Enter. This will disconnect from the remote host.
Q. Are there graphical Telnet clients available for Linux?
Yes, there are graphical Telnet clients with user interfaces for Linux, such as “Kuickshow” and “Qtnetwork.” These can be installed and used for a more visually intuitive experience.
Q. Where can I find more information about using Telnet in Linux?
You can refer to official Linux documentation, online tutorials, and community forums for more detailed guides and troubleshooting tips on using Telnet in a Linux environment.




![telnet [options] [remote_server_address] [port]](https://www.redswitches.com/wp-content/uploads/2023/10/telnet.png)


