Are you new to Git and struggling with pushing your changes to a remote branch?
Don’t worry, you’re not alone.
Git can be a complex platform, and understanding how to push your changes properly can be challenging for beginners.
Git is a widely used version control system that developers use to track and manage changes to their codebase. One of the key features of Git is the ability to push your changes to a remote repository, making them available to other team members working on the same project.
If you’re wondering how to successfully push your changes to a remote branch in Git, this article is for you.
In this article, we will walk you through the step-by-step process of using the git push command to push your changes to a remote branch. By the end, you’ll have a clear idea of how you can Git push to a remote branch.
But first, let’s see why it is essential to push a branch to a remote repository in Git.
Table Of Contents
- Why Push a Branch to a Remote Repository in Git?
- How to Git Push to Remote Branch
- The Prerequisites
- Push the Main Branch to a Remote Repository
- How to Push a New Local Branch to the Remote Repository
- Push to an Existing Remote Branch
- The Best Practices for Pushing Branches to the Remote Repository
- Troubleshooting Common Errors with git push
- Conclusion
- FAQs
Why Push a Branch to a Remote Repository in Git?
A remote repository in Git is a version of your project that resides on the internet or a private network. This feature allows multiple users to collaborate on a project simultaneously without causing interruptions or disturbances to each other’s work. This promotes a seamless and productive teamwork experience.
Typically hosted on platforms like GitHub, GitLab, or Bitbucket, these repositories act as a hub where all collaborators can fetch or push code changes.
The idea of branches is a core concept in repository structure and management. Each branch represents a distinct development pathway within a repository, providing developers with the capability to tackle features, bug fixes, or experimental options without affecting or altering the primary or ‘master’ branch. When these branches are on a remote repository, they are termed ‘remote branches.’
So, why is pushing to a remote branch crucial?
Pushing changes to a remote branch serves several critical functions.
First, the process ensures that your contributions, whether a new feature or a critical fix, become accessible to other collaborators, fostering collective progress. Additionally, by pushing your changes to a remote branch, you set up an alternative source that kicks in the case of potential local system failures.
Furthermore, pushing to a remote branch is an essential aspect of maintaining a clear history of the project evolution, facilitating easier tracking, reviewing, and, if needed, reverting of changes.
How to Git Push to Remote Branch
Now that you have a proper understanding of how remote branches work and why you should use them, let’s dive into the process. We’ll start with the prerequisites and then discuss the two common scenarios developers encounter when working with remote branches.
The Prerequisites
- You have Git installed on your system.
- A basic understanding of Git commands (git add, git commit).
- A remote repository to work with.
Push the Main Branch to a Remote Repository
The main branch or master branch is like the starting point in a project’s Git folder. When you start a project, it’s created automatically and is always available in the Git repository. If the current repository is created on your local system, you must push it to the remote repository to make it available for others.
Please note that when you run ‘git push,’ your original files remain intact. Git keeps track of the existing commits on the upstream branch and only uploads the new changes from your local repository.
Let’s see how to do it.
Step #1: Check git status
First, check if there are any new files or untracked files in the repository by running the following command:
$ git status
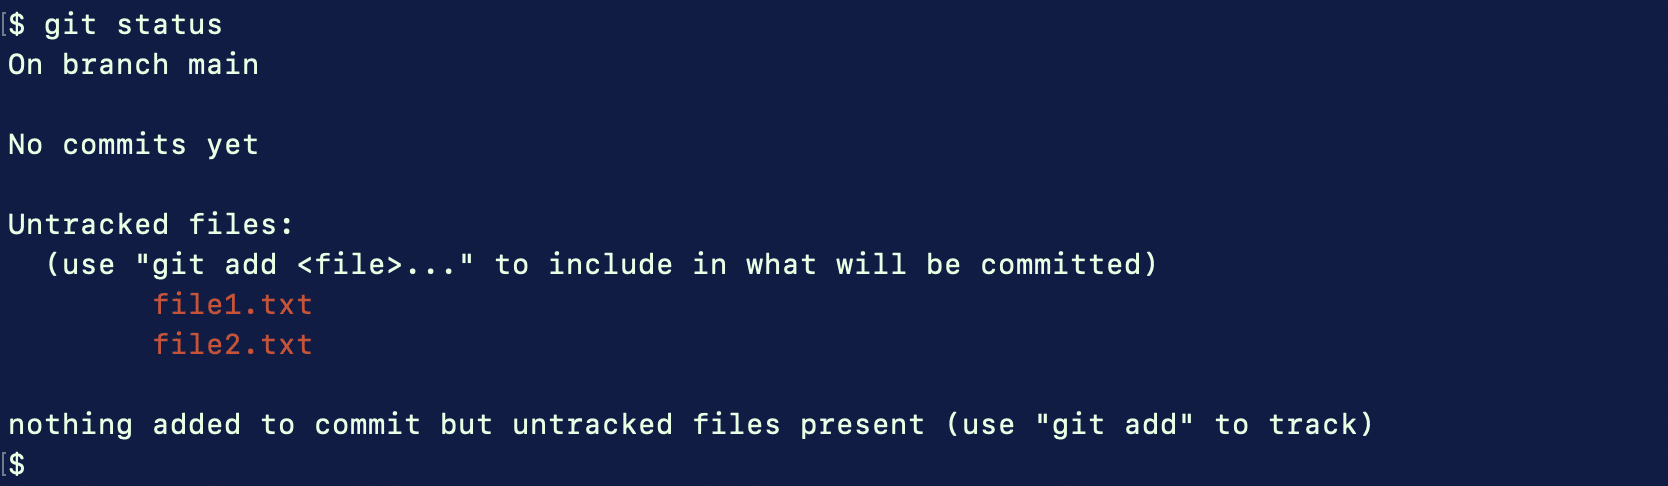
The output of the command will tell you if there are any files in your project that Git isn’t tracking. If there are any, you can add it to Git tracking by using the git add command:
$ git add
Now that Git is tracking all files on the local repository let’s move on to the next step.
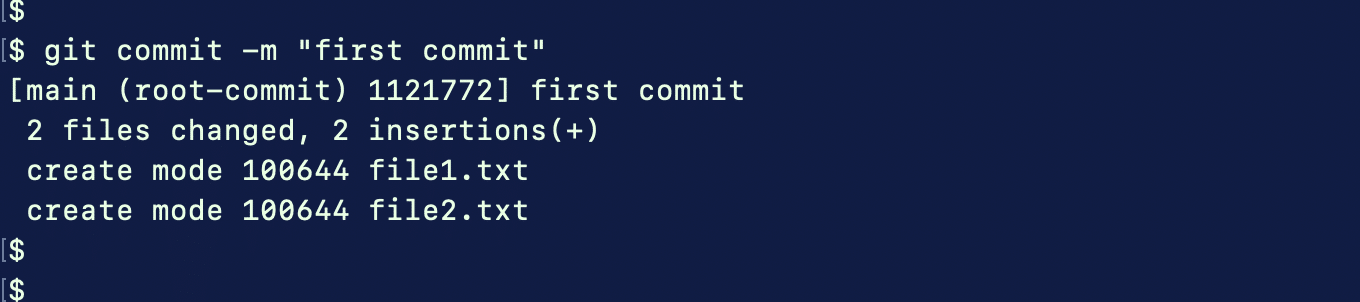
Step #2: Commit the Changes to the Local Branch
Before proceeding, save all changes in your local project. For this, use the following command:
$ git commit -m "<commit message>"
Step #3: Add the Remote Repository
Now, let’s include the remote server in your project by running the following command:
$ git remote add origin <remote_url>
For instance, the following command adds information about the remote repository named Project-AMS.git

Step #4: Switch to the Master (main) Branch
Before you push anything on Git, you should verify that you are on the branch you intend to push. In our case, this is the main branch. So, first, find out which branch you’re on with the git branch command. If you’re not on this branch, use either git switch or git checkout to switch to the main branch.

Step #5: Push the Branch
Once you are on the main branch, push the changes to the remote server with the following command:
$ git push -u <remote_name> <branch_name>
The -u flag attaches the tracking reference for each branch you successfully push.
In this case, the command will be:
$ git push -u origin main
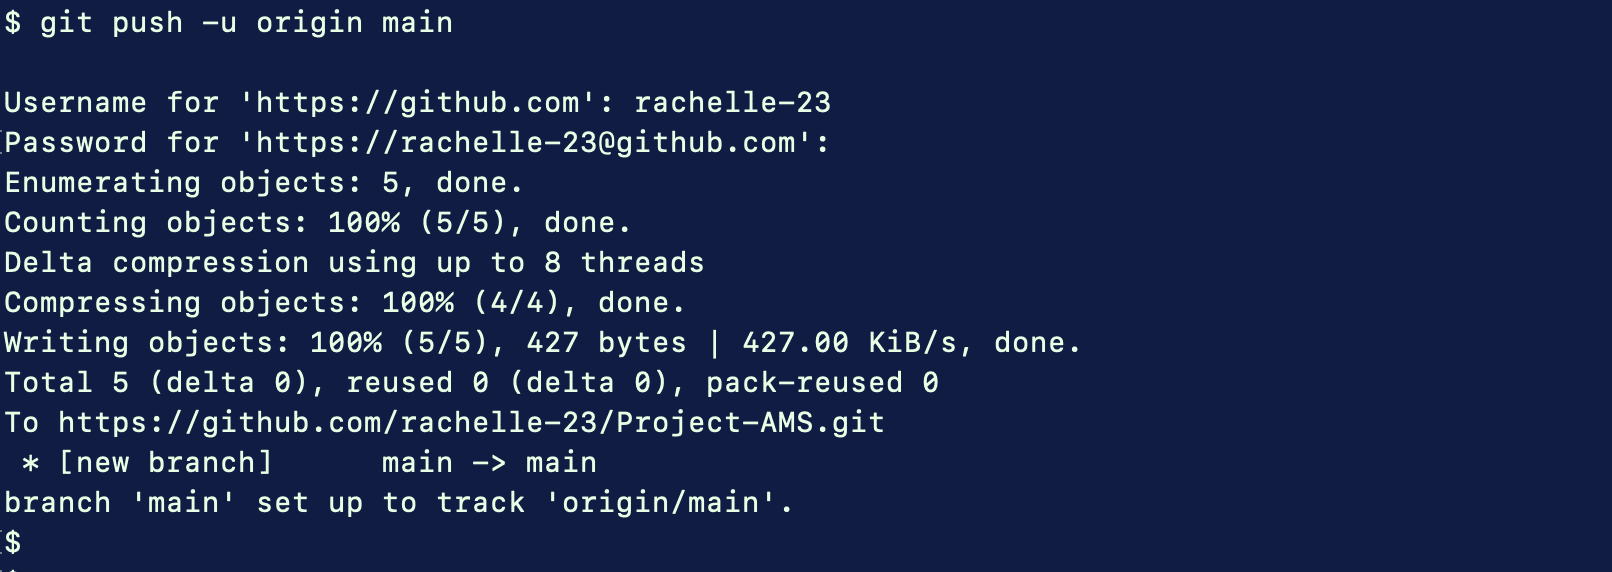
If it’s your first time pushing the branch to the remote repo, Git makes a new branch and adds all the changes. If the branch already exists, Git updates it with the changes, as shown below.
Use the git push -u origin master command if your default branch is named master.
On a related note, you should also know how to list remote branches in a Git repository.
How to Push a New Local Branch to the Remote Repository
If you wish to add a new local branch to the remote repository, you can use the git push command. The process is slightly different with the following steps:
Step #1: Create a New Local Branch
If you already have the branch, skip this step and move to the next step.
Create a new local branch with the git branch <branch-name> command.
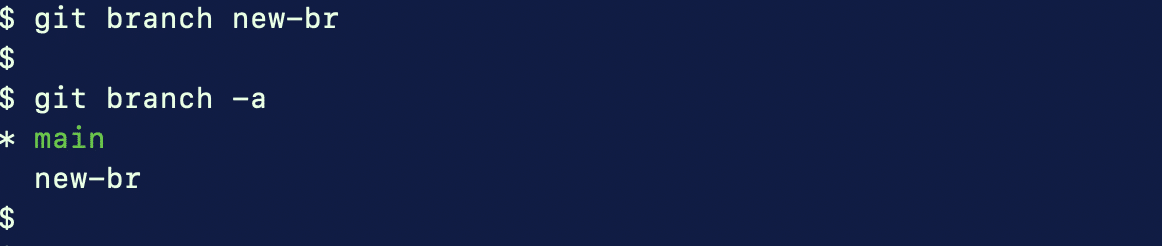
Step #2: Switch to the New Local Branch
You can switch to the new branch with either of the following commands:
git switch <branch name> or git checkout <branch-name>

Step #3: Push the New Branch to the Remote Repository
Once you are ready, push the local branch to the remote repository with the following command:
$ git push –u origin <branch name>
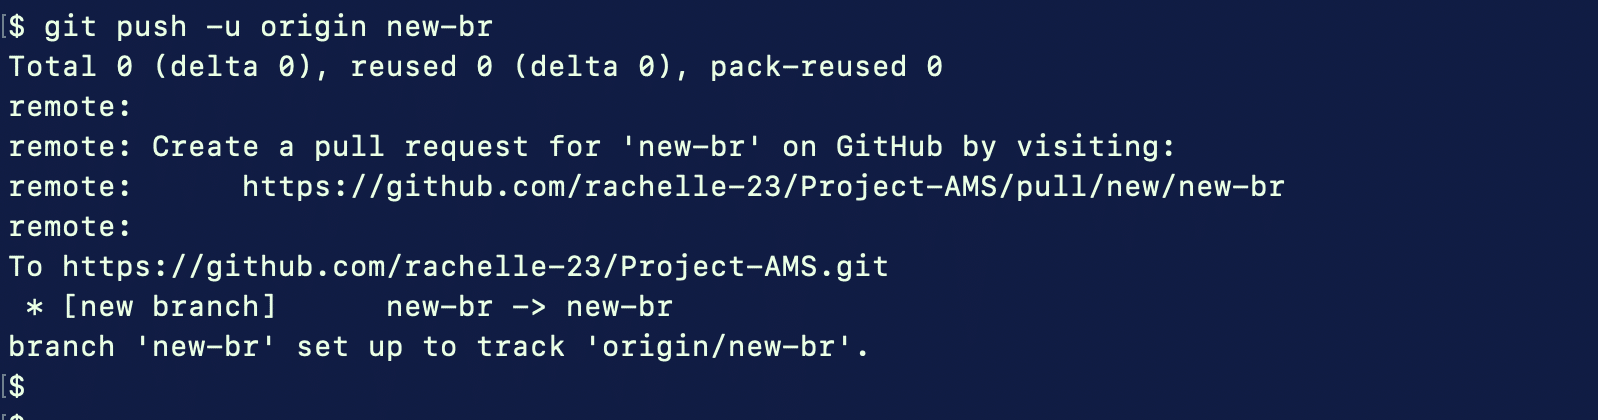
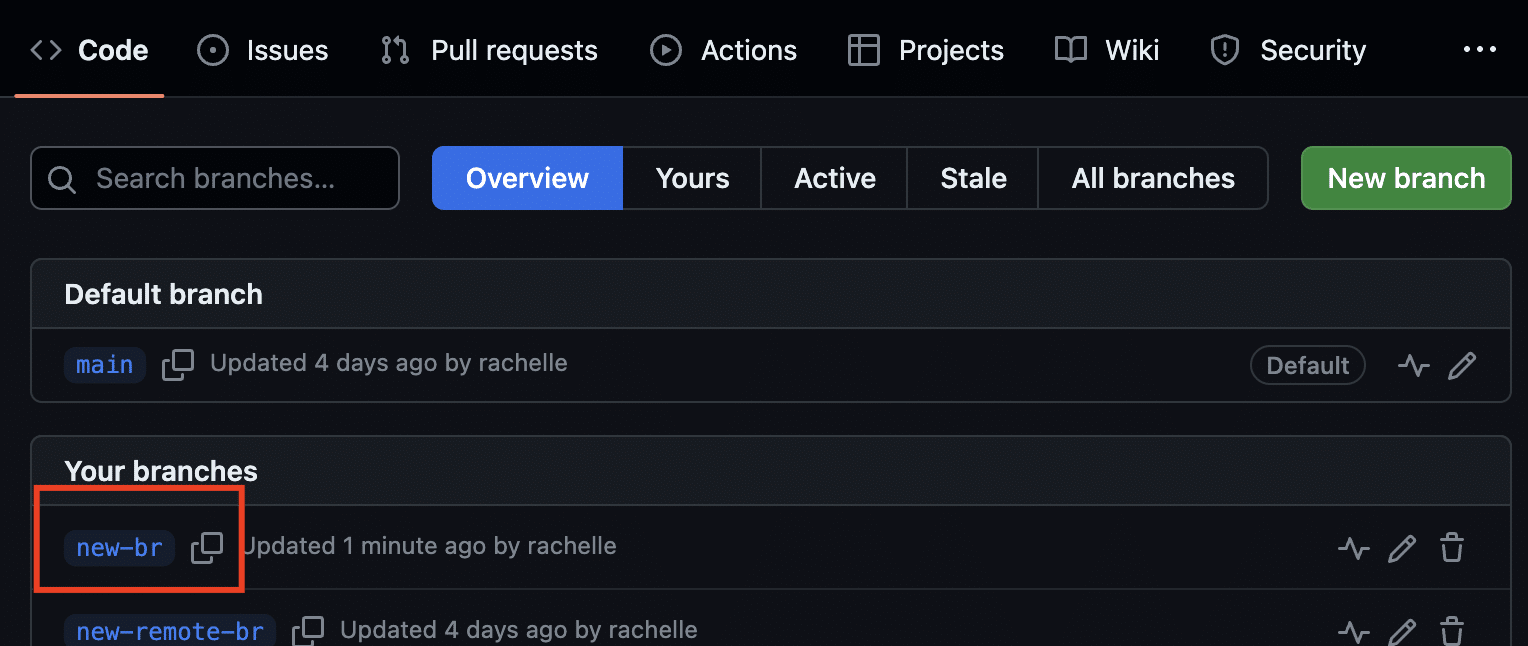
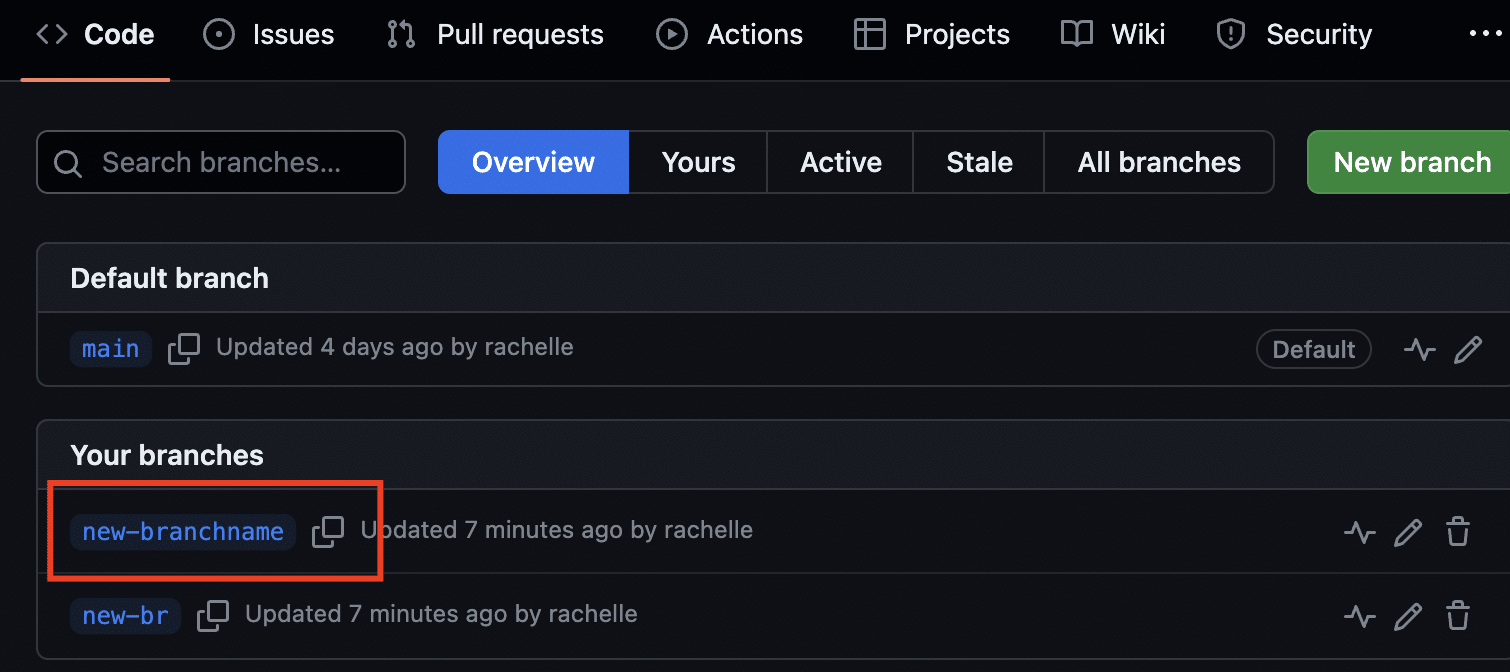
Verifying that the branch has been successfully pushed is always a good idea. For this, navigate to your Git management platform (GitHub, in our case) and expand the branches drop-down menu. If the command has been successful, you will find the new branch listed there.
In case you want to push the new branch with a different name to the remote repository, use the following variation of the git push command:
$ git push origin <branch-name>:<new-branch-name>
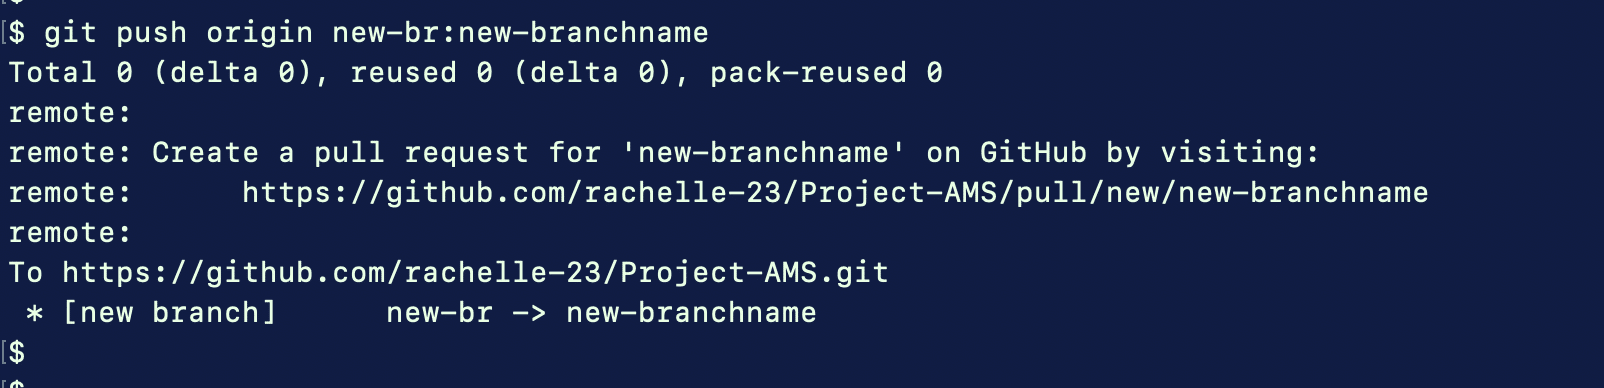
You can see that we have pushed the new-br branch as the new branch called ‘new-branchname’, which will be created in the remote repository.
Push to an Existing Remote Branch
Git allows users to transfer their changes to another branch located in the remote repo by specifying the remote repo’s name, the local branch’s name, and the remote branch’s name.
Let’s explore the steps in this process.
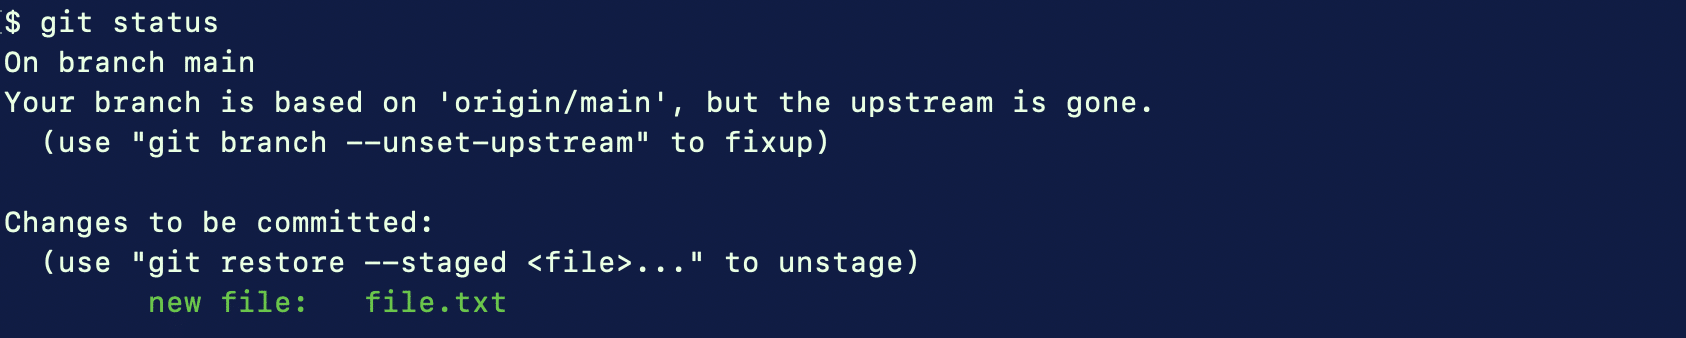
Step #1: Pull Changes From the Remote Repository
Before pushing your changes to the remote repository, We strongly recommend performing a pull operation to fetch any updates from the remote branch and incorporate them into your current local branch.
$ git pull

You can see that there are no differences between the local and remote branches.
Step #2: Switch to the Branch You Want to Push
You can use the git switch or git checkout command to switch to the branch you wish to push to the remote repository.

Step #3:Merge with the Remote Branch
Merge both branches to combine the changes in the local branch with the remote upstream branch with the following command:
$ git merge <remote_name>/<branch_name>

Step # 4: Push the Changes
Now that you know there are no differences between the local and remote branches, use the git push command to push the local branch to an existing remote branch in a remote repository.
$ git push <remote_name> <local_branch>:<remote_branch>
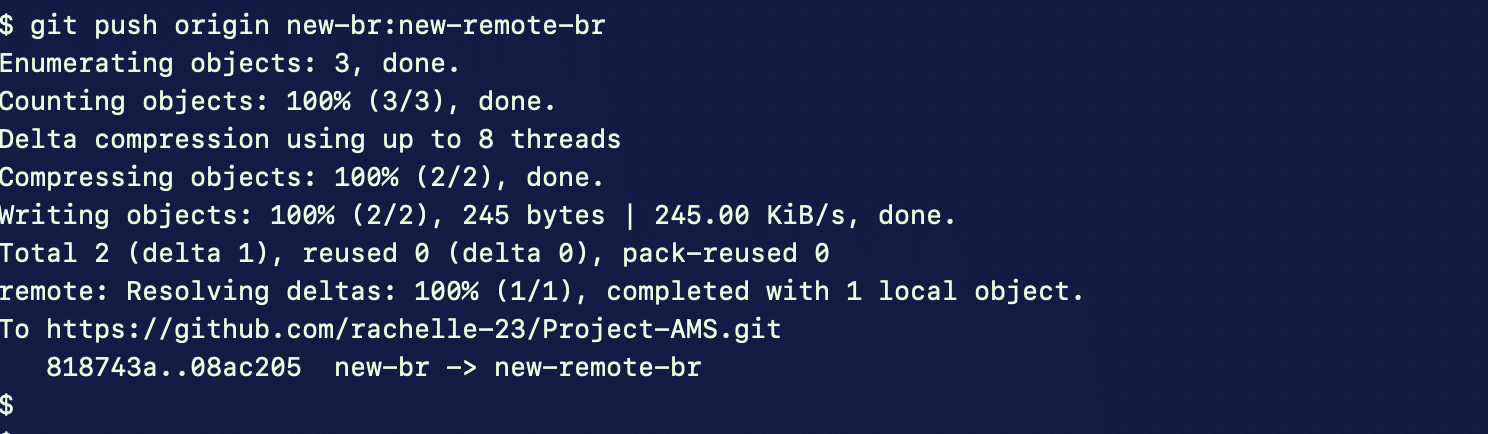
At this point, the local branch changes are pushed to an existing remote branch.
The outcome of the above operations depends upon how you set up the Git structure on your server. We recommend reading our guide to installing Git on Ubuntu to give a perfect start to your project.
The Best Practices for Pushing Branches to the Remote Repository
Now that you know how to Git Push to a remote branch, let’s consider some best practices for the process.
Use Meaningful Branch Names
Choose meaningful and descriptive branch names that indicate the purpose of the branch. For instance, you could use feature/user-authentication for a branch containing a user authentication component or bugfix/issue-123 for a branch containing the fix for issue #123.
This helps other members understand the branch’s intent.
Keep All Branches Updated
Regularly fetch and merge changes from the remote repo’s main branch or master branch into your feature branch to keep it up-to-date.
Rebase Local Changes
Before pushing, consider rebasing your local branch onto the latest changes from the remote branch instead of merging the two branches. This keeps the commit history clean and linear.
Write Clear Commit Messages
Write short and clear messages when you save your work. These messages should describe what you did in each save. Follow a consistent format, such as using a one-line summary and a more detailed description when necessary.
Avoid Pushing Incomplete Works
Only push branches to the remote repository when they are stable and working. Avoid pushing incomplete or broken code because of the long-term impact on the project’s codebase.
Review Your Code Before Merging
Always review your code and run tests before merging a branch. This helps maintain code quality and prevents the introduction of critical errors into the main or master branch.
Clean Up After Merging
Once a branch has been merged, delete it from the local and remote repos to keep the repository clean and organized.
Protect the Main Branch
Consider setting branch protection rules, especially for the main branch, to prevent accidental force-pushes or unauthorized changes that could potentially derail the project.
Use Git Tags
If you are releasing specific versions or milestones, use Git tags to mark these points in the project’s history.
Secure Sensitive Information
Avoid pushing sensitive information (e.g., passwords, API keys) to a repository. Use environment variables or configuration files to manage such data securely.
Regularly Clean Up and Archive Branches
Over time, old branches can clutter your repository. Consider archiving or deleting branches from the local and remote repos that are no longer relevant.
Update Documentation
Update project documentation to reflect changes made in the branches, ensuring that others can understand and use your work.
These best practices will help maintain a clean and organized Git repository and facilitate smooth collaboration with your team or the open-source community.
Also Read: A Comprehensive Introduction to GitOps
Troubleshooting Common Errors with git push
Let’s look at some common errors you may encounter while pushing changes to remote Git repositories.
Error #1: Permission Denied (publickey)
Error Message: Permission denied (publickey)
Solution: Ensure your SSH key is properly configured and associated with your GitHub account. Verify that you have the correct key loaded and your public key is added to your GitHub account.
Error #2: Permission Denied (password)
Error Message: Permission denied (password)
Solution: If you’re using a web link (HTTPS), make sure you typed your GitHub username and password correctly. If you’re using SSH, see that your secret key is set up correctly.
Error #3: Branch Not Up to Date
Error Message: Updates were rejected because the tip of your current branch is behind
Solution: Before pushing, fetch and merge the latest changes from the remote branch with the current branch, or use git pull to update your local branch.
Error #4: Non-Fast-Forward Push
Error Message: To prevent you from losing history, non-fast-forward updates were rejected.
Solution: You usually see this message when someone else has pushed changes to the same branch. Pull those changes, merge or rebase, and then push the branch.
Error #5: Branch Deleted on Remote
Error Message: Error: failed to push some refs to ‘remote’. To prevent you from losing history, non-fast-forward updates were rejected.
Solution: The branch you’re pushing may have been deleted from the remote repository. Check if the branch still exists and that you’re spelling the name correctly.
Error #6: SSL Certificate Error
Error Message: SSL certificate problem: unable to get local issuer certificate
Solution: This is usually a problem with your system’s SSL certificate configuration. Update your certificate bundle or configure Git to ignore SSL certificate checks (Not recommended for security reasons).
Error #7: Push Requires Force
Error Message: Updates were rejected because the tip of your current branch is ahead of its remote counterpart.
Solution: If you’re sure you want to overwrite the remote branch with your local branch, use git push -f (force push). Be cautious when using force pushes, as they can lead to data loss.
Error #8: Branch Name Contains Invalid Characters
Error Message: remote: refs/heads/master:refs/heads/maste[r]: not allowed
Solution: Ensure your branch name follows Git’s branch naming rules. Avoid special characters and spaces in branch names.
Error #9: No Matching Remote Branch
Error Message: error: src refspec branch_name does not match any
Solution: Make sure the remote branch you’re pushing to exists. Check the spelling and case sensitivity of the branch name.
Error #10: Network Connectivity Issues
Error Message: fatal: unable to access ‘repository_url’: Could not resolve host.
Solution: Verify your internet connection and network settings. Ensure you can access the remote repository’s URL in a browser.
Error # 11: Authentication Issues
Error Message: Various authentication-related errors.
Solution: Check your authentication credentials (username, password, SSH keys, or authentication tokens). Make sure you’re allowed to add your changes to the project.
Error #12: No Upstream Branch Error
Error Message: fatal: The current branch <branch-name> has no upstream branch
Solution: Set an upstream branch for your local branch using the –set-upstream or -u option when pushing or pulling. For instance, use git push –set-upstream origin <branch-name>
When troubleshooting Git push errors, it’s crucial to read the error message carefully, as it often provides clues about the underlying issue. Additionally, using Git’s debugging options, like GIT_TRACE=1, can help diagnose problems in more detail.
Conclusion
This comprehensive guide discussed different approaches to transferring local branches to remote repositories in Github. Using the git push command in Git is a valuable skill, particularly in collaborative environments.
You need a robust infrastructure to take the full benefit of Git capabilities. A bare metal server infrastructure streamlines your development process and enhances security. So, If you’re looking for a robust server for your projects, RedSwitches offers the best-dedicated server pricing and delivers instant dedicated servers, usually on the same day the order gets approved. Whether you need a dedicated server, a traffic-friendly 10Gbps dedicated server, or a powerful bare metal server, we are your trusted hosting partner.
FAQs
Q. How do I push a local branch to a remote branch in Git?
To push a local branch to a remote branch in Git, you can use the following command: git push . Replace the remote repository name with the name of your local branch. This will push your local branch to the specified remote branch.
Q. How can I push a local branch to a remote repository with a different name?
If you want to push a local branch to a remote repository with a different branch name, you can use the following command: git push. Replace the remote repository name with the name of your local branch and the name you want to use on the remote repository.
Q. How can I push my local changes forcefully to a remote branch?
To forcefully push your local changes to a remote branch, you can utilize this command: git push -f. This action will replace the remote branch with your local changes, disregarding any conflicting alterations.
Q. How do I push a local branch to a new remote branch?
To push a local branch to a new remote branch, you can use the following command: git push. Replace the remote repository name with the name of your local branch and with the name you want to use for the new remote branch.
Q. How do I push a local branch to the default remote branch?
If you want to push a local branch to the default remote branch, you can use the git push command. This will push your local branch to the remote branch with the same name.
Q. What should I do if the remote branch is not behind the local branch?
If you encounter an error stating that the remote branch cannot be behind the local branch, you can force-push your changes using the following command: git push -f. Remember that this may overwrite any conflicting changes on the remote branch.
Q. How can I push a local Git branch using Git GUI?
If you prefer using Git GUI, follow these steps to push a local branch: 1. Open Git GUI. 2. Select Repository > Push. 3. Choose the remote repository you want to push to. 4. Select the local branch you want to push. 5. Click the “Push” button to push your local branch to the remote repository.
Q. How can I use GitKraken to send my local branch to a remote branch?
To move your local branch to a remote branch using GitKraken, just go through these steps: 1. Launch GitKraken. 2. Pick the local branch you wish to send. 3. Right-click on the branch and pick ‘Push branch.’ 4. Indicate the remote repository for your push. 5. Finally, click ‘Push’ to send your local branch to the remote repository.
Q. Can I push a local branch to multiple remote branches?
You can push a local branch to multiple remote branches by running multiple push commands, specifying each remote branch separately. For example, you can use git push to push to the first remote branch and then use git push to push to the second remote branch.
