The biggest challenge developers face these days is to create applications that run on all platforms and deliver a comparatively similar user experience.
Containerized applications deliver this capability by packing all required code and dependencies in a single, easy-to-manage package called containers.
Since MacOS is a popular software development platform, developers working on MacOS environments often use Docker containers to ensure application portability.
Given all the benefits of Docker for Mac, developers need to know how to install Docker on Mac. This post will cover the details of the process of setting up Docker for Mac. We’ll cover the prerequisites and help you pick the right Docker version for your hardware platform.
Table Of Content
- Introduction
- Prerequisites
- Start Installing Docker on Mac
- Installing Docker Using the Command Line
- Grant Runtime Permission(s)
- Running Docker Toolbox and Docker for Mac on the same host
- Migrating From Docker Toolbox to Docker Desktop for Mac
- Some Common Issues You Might Face While Working With Docker For Mac
- Conclusion
- FAQs
Install Docker on Mac
Before going into the details of the process, let’s start with the prerequisites of the process.
Prerequisites
You need to make certain that your machine fulfills the following prerequisites before you install Docker for Mac:
- macOS 10.13 or higher
- VirtualBox version 4.3.30 or higher because older versions are not compatible with Docker for Mac)
- At least 4GB of RAM (the higher, the better)
Start Installing Docker on Mac
Docker for Mac is an easy-to-use, secure, and reliable way to run Docker on your MacOS machine. It provides a native macOS experience that enables you to use all the major features of Docker without having to set up a virtual machine.
Let’s now discuss the steps involved in installing Docker on a Mac.
Step # 1: Download the Latest Versions
The first step is to download the latest version of Docker from the official website. Note that you should download the version that’s built for your CPU.
If you have a Mac with Apple Silicon, go to the following URL and download the latest stable version:
On the other hand, if you have an Intel processor, you should go to the following URL to download the latest version:
Note that the installation instructions for both types (Apple Silicon and Intel) are the same. The only difference between these two is you can install Rosetta 2 on Mac with Apple silicon to get the best experience with Docker Desktop 4.3.0 using the command below :
softwareupdate --install-rosetta


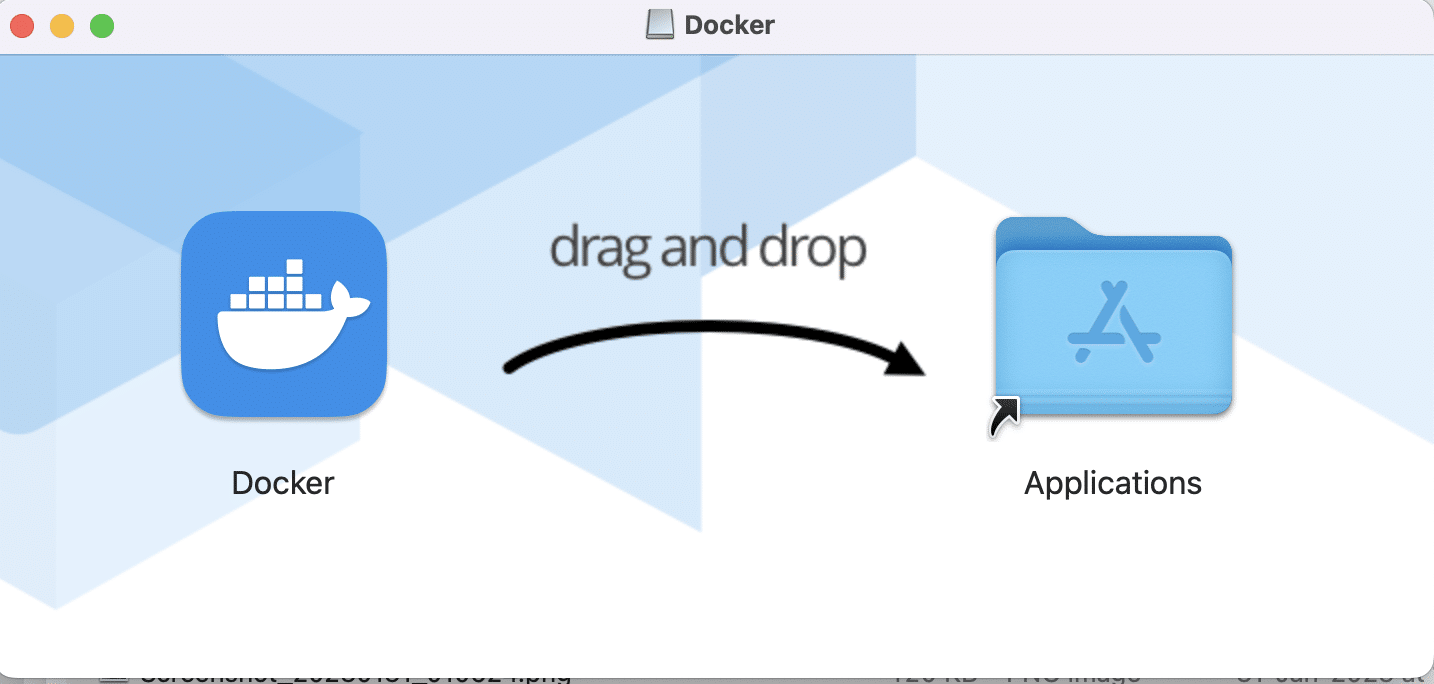
Step # 2: Install the Docker Application
Once the download finishes, simply double-click the installer .dmg file and follow the on-screen recommendations.
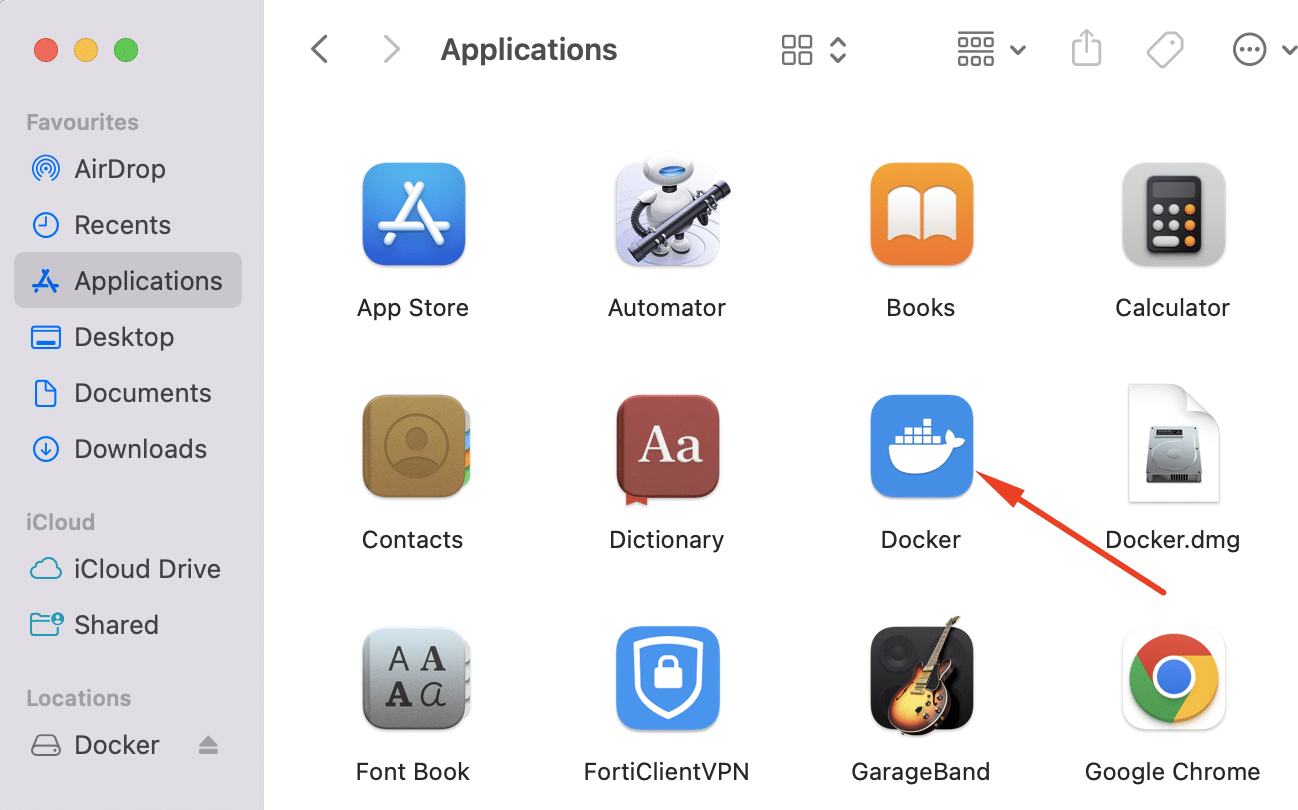
Step # 3: Launch the Docker Application
Once the installation finishes, you need to open your Applications folder and launch Docker for Mac.
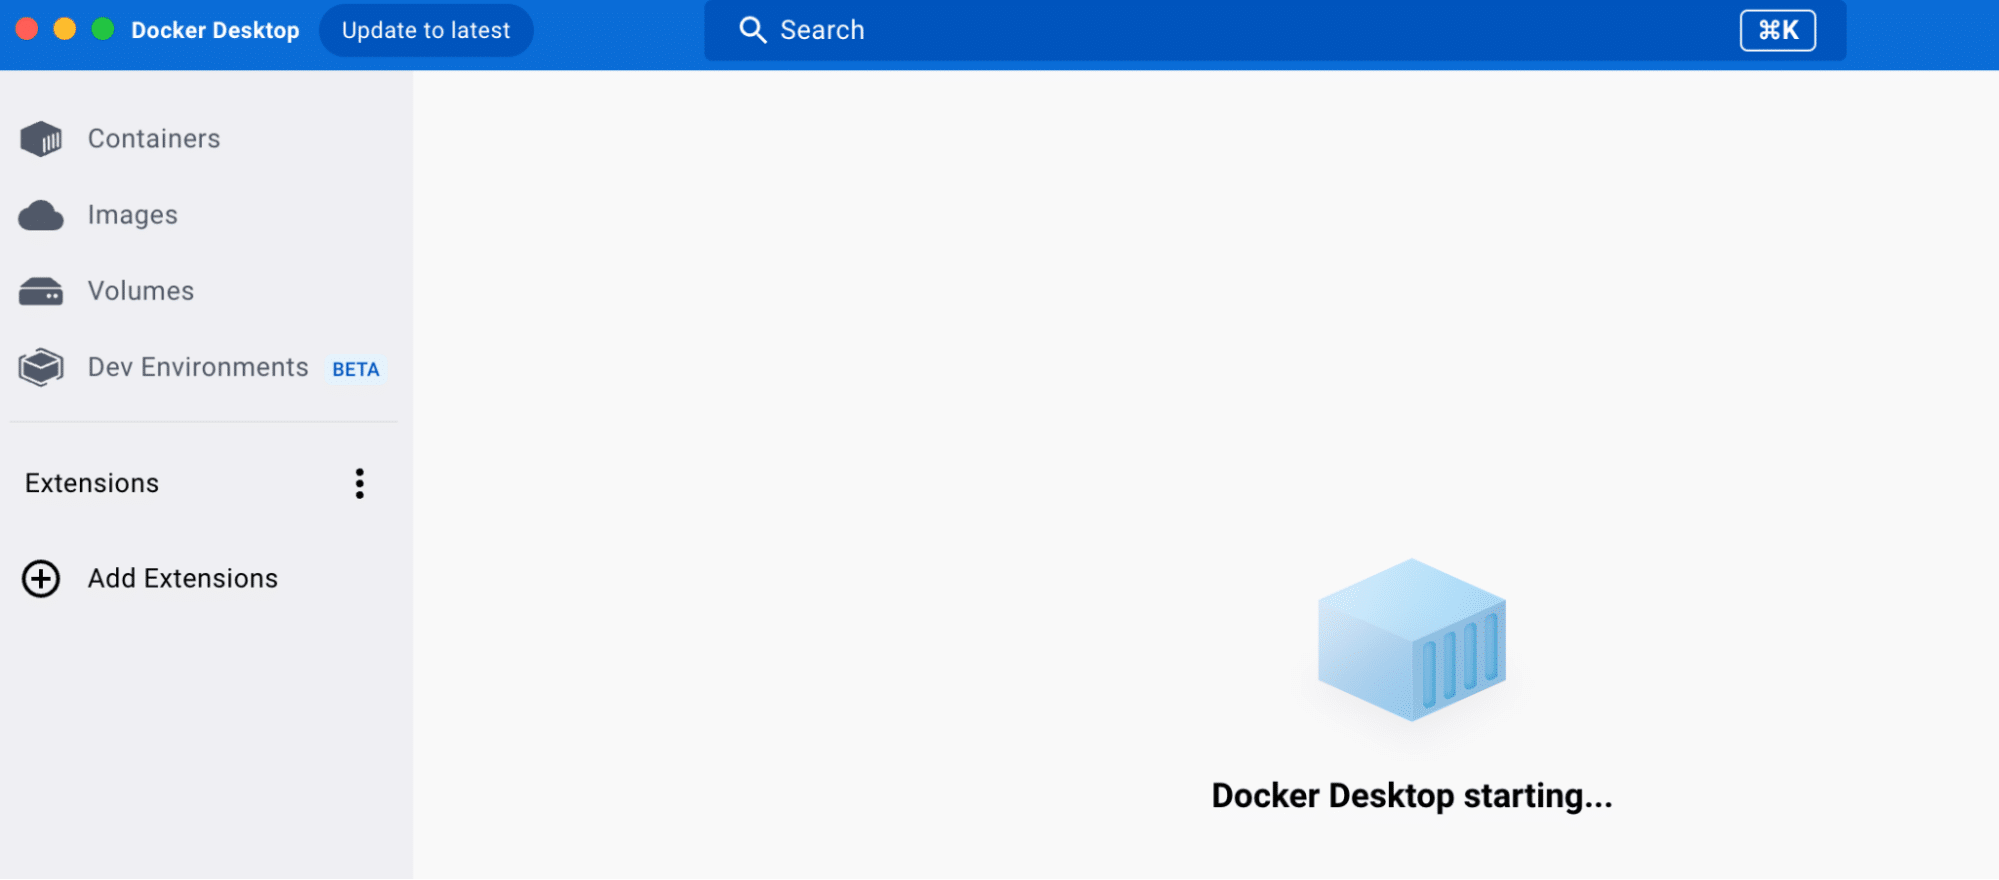
Step # 4: Enter Docker ID
When you launch the app for the first time, you might be requested to enter a Docker ID. If you haven’t got one, you should create one and enter it in the application.
Once logged in, you can use Docker on your Mac!
Installing Docker Using the Command Line
There are times when you wish to install Docker via the command line.
The process is pretty straightforward and starts with downloading the appropriate file from the URLs mentioned above.
Once you download the Docker.dmg file, fire up the terminal and enter the following commands:
# hdiutil attach Docker.dmg
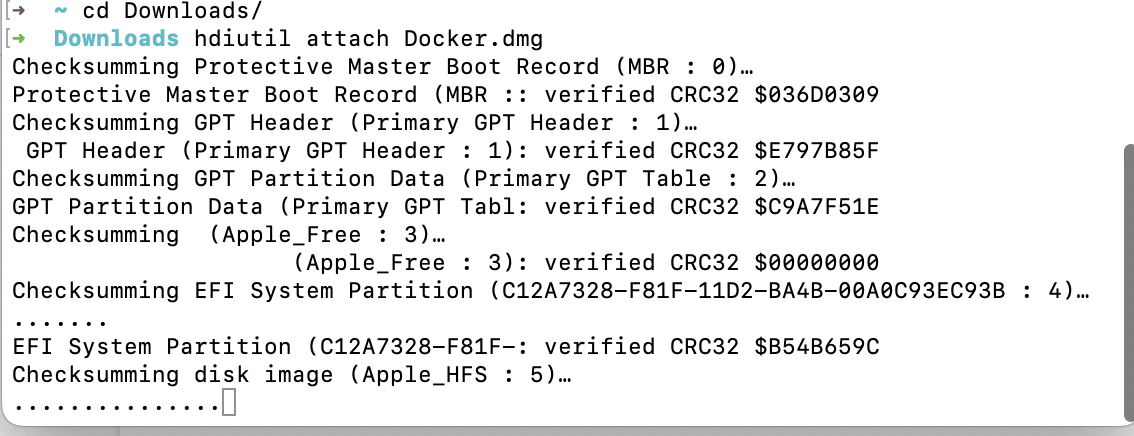
# /Volumes/Docker/Docker.app/Contents/MacOS/install
# hdiutil detach /Volumes/Docker
These commands might take some time to finish because during the process, the system might perform some security checks while installing Docker on Mac.
Grant Runtime Permission(s)
You might find that running Docker on Mac might require you to grant runtime permission. For this, you need to follow these steps:
- Open System Preferences and select Security & Privacy.
- Choose the Privacy tab, and then Full Disk Access from the left-hand menu.
- To change the defaults, click the lock icon in the bottom left corner, and enter your password.
- Click the + icon and select Docker from your Applications folder.
- Click Open to add Docker to the list of programs with full disk access permissions.
- Lastly, restart Docker for Mac to apply the modifications.
Running Docker Toolbox and Docker for Mac on the same host
Docker Toolbox and Docker for Mac can run on the same machine.
Docker Toolbox puts docker, docker-compose, and docker-machine in your Mac’s /usr/local/bin directory. This is also where VirtualBox is present. The boot2docker Linux distribution, the Docker Engine, and certificates are installed on your Mac under $HOME/.docker/machine/machines/default during the installation of Toolbox using docker-machine.
You only get one VM with Docker Desktop for Mac, which Docker maintains for Mac. This is often enough to run your containerized applications. Docker Desktop for Mac automatically updates the Docker client and daemon as updates are officially released.
Another thing to keep in mind is that Docker Desktop for Mac cannot route traffic to containers. As a result, you cannot visit an exposed port on an active container directly from the hosting machine.
Migrating From Docker Toolbox to Docker Desktop for Mac
Since version 18.01.0, the Toolbox image migration option has been removed from Docker Desktop for Mac.
If you need to migrate Docker Toolbox images, we suggest you use the process outlined below. Note that any current Docker image is replaced with the Toolbox images (this migration cannot integrate images from both Docker and Toolbox).
To carry out the migration process, execute the shell commands. Note that the qemu package in both MacPorts and Brew offers a working qemu-img.
Start with the following command:
#brew install qemu
Now to start the process, locate the Toolbox disk images. Usually, the only image is located at ~/.docker/machine/machines/default/disk.vmdk
#vmdk=~/.docker/machine/machines/default/disk.vmdk
file "$vmdk"
/Users/akim/.docker/machine/machines/default/disk.vmdk: VMware4 disk image
In both MacPorts and Brew, the qemu package includes a functioning qemu-img:
#settings=~/Library/Group\ Containers/group.com.docker/settings.json
#dimg=$(sed -En 's/.*diskPath.*:.*"(.*)".*/\1/p' < "$settings")
#echo "$dimg"
/Users/akim/Library/Containers/com.docker.docker/Data/vms/0/Docker.raw
Some Common Issues You Might Face While Working With Docker For Mac
Here’re a couple of issues you might face while working with Docker on a macOS machine.
- When Rosetta 2 is not installed, several command-line utilities do not function. So, if things don’t work as intended, start by checking the status of Rosetta 2.
- The docker-compose 1.x is now outdated. We recommend Compose V2 instead. Type “docker-compose” or choose the Use Docker Compose V2 checkbox under the General Settings tab.
- Pinging the Internet from inside a container does not function as planned. We advise using curl or wget to test the network.
- Data drops may happen when a TCP stream is only partially closed.
- All images do not support the ARM64 architecture. To use emulation to execute (or create) an Intel image, add —the platform Linux/amd64.
Conclusion
Docker is a powerful tool that allows developers to package their applications in a portable and efficient way. By installing Docker on your Mac, you can take advantage of all its benefits and simplify your development workflow.
In this blog post, we’ve walked you through installing Docker Desktop on your Mac, including downloading the appropriate installer, and installing it through the command line. We hope that you found this guide useful and that you’re now ready to start using Docker to build and deploy your applications.
As always, if you have any questions or feedback, don’t hesitate to reach out to the Docker community or consult the official documentation.
FAQ
1- How to check if Docker is installed on Mac?
Launch the terminal and type `docker ps` or `docker info`to check if Docker is installed and running. If the command cannot be found, you may need first to install Docker.
2- What does Docker for Mac do?
Docker Desktop is a one-click installation package for Mac, Linux, or Windows that allows you to create and deploy containerized apps and services.
3- Is Docker Desktop free on Mac?
Docker Desktop is free for small enterprises, individuals, education, and non-commercial open-source initiatives. However, if you’re using Docker Desktop for commercial use, you might need a paid membership.
4- Can we use Docker Desktop offline?
Docker Desktop may be used offline. You cannot, however, access functions that need an active internet connection.
5- Where is the location of Docker Desktop files on the system?
By default, on a macOS system, Docker Desktop is installed at the /Applications/Docker.ap
