In today’s digital landscape, website creation has evolved from a mere option to an indispensable tool, whether you’re a small business, an eCommerce store owner, a blogger, or a webmaster. Your website serves as a virtual storefront, offering a platform to showcase your products, services, or ideas to a global audience. It’s the digital face of your brand, a powerful means to establish your online presence, attract potential customers, and engage with your target audience.
As we step into 2023, learning how to create a website has become more accessible than ever. With an array of tools and resources, including the versatile WordPress platform and its extensive library of plugins and themes, building your website has never been more exciting and straightforward. Whether you’re fueled by passion as an individual or striving for online visibility as a business with the help of SEO plugins, this guide is designed to be your compass on how to create a website from scratch.
Table of Contents
- Determining Website Objectives
- WordPress: The Ultimate Website Builder for Website Creation
- The Significance of Choosing the Right Domain and Hosting Provider
- Introduction to the built-in WordPress site builder:
- Installing WordPress with LAMP When You Have a Bare Metal Dedicated Server
- Creating and managing website content
- Extending website functionality with plugins
- How to create the first page of your WordPress website
- Conclusion
- FAQs
Determining Website Objectives
Creating a website begins with clearly understanding its primary purpose, whether for commerce, sharing ideas, or other intentions. The time and investment you allocate to getting a website up and running should be directed towards a meaningful objective: building an email list, selling products, attracting clients, or something else. Before diving into website development, it’s essential to ask yourself key questions:
- Why are you building the website?
- What features are crucial for its success?
- What will be its focal point?
- How will you measure success in the context of your goals?
The answers to these questions are profoundly personal and actionable, aligning your website’s purpose with your aspirations.
WordPress: The Ultimate Website Builder for Website Creation
WordPress, a robust Content Management System (CMS) in use since 2003, has revolutionized website development. It offers two main versions, WordPress.com (a hosted solution) and WordPress.org (a self-hosted option), unparalleled flexibility, user-friendliness, and scalability.
Whether you’re a novice creating a blog or an expert designing a complex site, WordPress offers extensive customization tools and supports growth. The platform’s widespread popularity stems from its ability to cater to various needs, providing a solid foundation for a successful website. By choosing WordPress, you’re setting off the right path to craft an outstanding online presence.
Key Benefits of WordPress for Website Creation
Our recommendation? Build a WordPress website! We firmly believe it surpasses Wix, Weebly, Shopify, or Squarespace due to the control it grants you over every aspect of the web-building process. WordPress isn’t just a website builder; it reigns as the leading Content Management System (CMS), powering over one-third of the web.
When it comes to creating a website, WordPress distinguishes itself as a premier platform offering a plethora of benefits. This intuitive and user-friendly CMS empowers even those with limited technical expertise to craft professional and visually captivating websites effortlessly. With its extensive library of themes and plugins, WordPress provides unmatched flexibility and customization options, enabling you to tailor your website to your unique needs.
Moreover, WordPress boasts high scalability, catering to small blogs and large eCommerce websites. Backed by a robust community and regular updates, it ensures your eCommerce platform’s security and up-to-date functionality.
Embrace the exciting potential of building your website! With WordPress as your trusted companion, you have access to the tools and resources needed to transform your concepts into a captivating online presence. Whether you’re a small business owner aiming to expand your reach, an eCommerce store owner looking to boost sales, a blogger eager to share your passion, or a webmaster seeking a versatile platform, WordPress opens doors to endless opportunities. Let’s embark on this journey together, unlocking the potential for success and elevating your online presence to new heights.
The Significance of Choosing the Right Domain and Hosting Provider
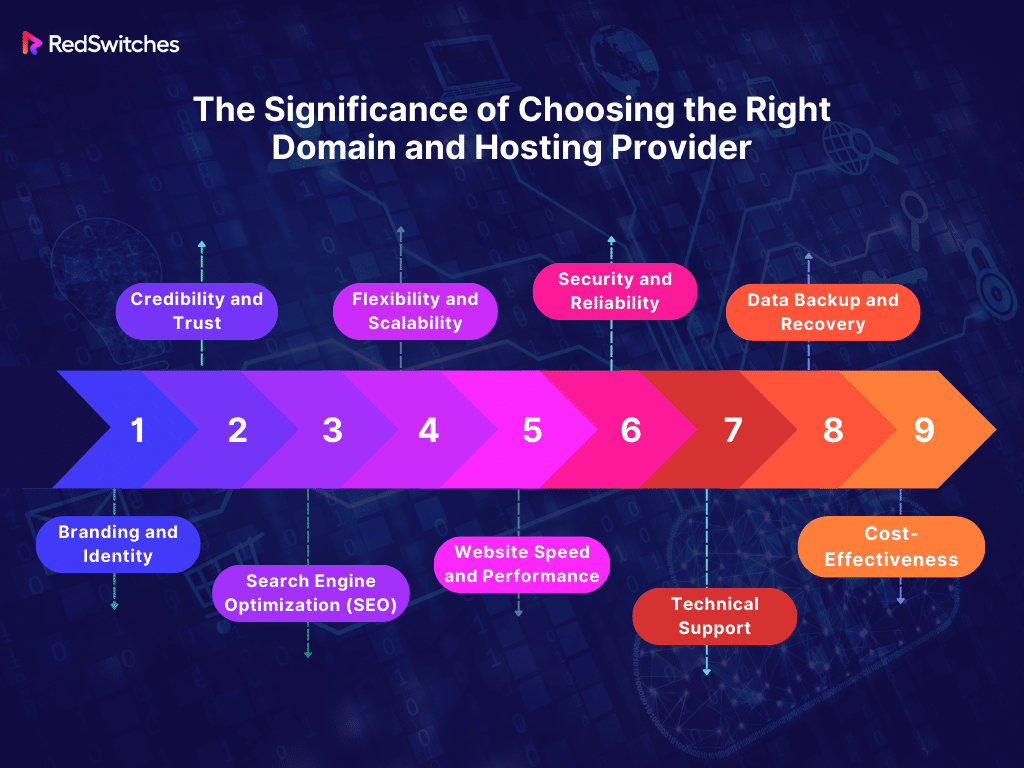
Selecting the appropriate domain name and hosting provider is a pivotal decision when creating a website, whether for personal blogs, business websites, or eCommerce platforms. Here’s why this choice holds immense significance:
Branding and Identity: Your domain is your online identity. It’s the first thing visitors see and remember. Choosing a domain that aligns with your brand or content helps create a strong and memorable online presence.
Credibility and Trust: A custom domain (e.g., yourbusiness.com) instills trust and credibility among visitors. It shows you’re serious about your online presence, which can positively impact user perception.
Search Engine Optimization (SEO): A well-chosen domain can impact your website’s SEO. Including relevant keywords in the domain can improve search engine rankings, making it easier for potential visitors to find your website.
Flexibility and Scalability: Opting for a reliable hosting provider offers flexibility and scalability. It allows you to adapt and grow as your website traffic and needs evolve, ensuring a seamless user experience.
Website Speed and Performance: A reputable hosting provider ensures optimal website speed and performance. Faster websites enhance user satisfaction and positively impact SEO rankings.
Security and Reliability: Reliable hosting providers offer robust security features, protecting your website from threats. A secure website is crucial for safeguarding sensitive data and maintaining user trust.
Technical Support: A good hosting provider offers responsive technical support, assisting you in resolving issues promptly. This support is vital to ensure your website runs smoothly and is accessible to visitors at all times.
Data Backup and Recovery: Reputable hosting services offer regular data backups and easy recovery options in case of unexpected events. This ensures your data is safe and can be restored if needed.
Cost-Effectiveness: Choosing the right hosting provider within your budget is essential. It ensures you get value for your money while effectively meeting your website’s needs.
Your choice of domain and hosting provider significantly impacts your online presence. It influences your brand, website performance, security, and overall user experience. Therefore, carefully evaluating and selecting the best domain and hosting provider for your requirements is essential for a successful online journey.
Introduction to the built-in WordPress site builder:
Initially starting as a blogging tool, WordPress has evolved to offer features that help users build an entire website without additional tools. The built-in site builder allows users with minimal technical expertise to create web pages by arranging elements visually.
Advantages of using the WordPress site builder:
- Drag-and-drop functionality: One of the most user-friendly features of the site builder is its drag-and-drop capability. Users can simply select elements like text boxes, images, or videos and place them wherever they want on the page. This visual approach removes the barriers of dealing with raw code and offers an intuitive design process.
- Customizable templates: WordPress offers a plethora of themes, which are essentially customizable templates. These themes provide a ready-made design structure that you can easily modify using the site builder to match your personal or brand aesthetics.
- No coding knowledge required: While WordPress allows for deep customization using code, its site builder is designed for those unfamiliar with coding. This means you can create a professional-looking site without learning HTML, CSS, or PHP.
Practical steps to build a WordPress website using the site builder:
- Choose a theme: Select a theme that aligns with your content’s nature and the look you desire.
- Customize the layout: With the chosen theme, use the drag-and-drop functionality to move elements around, adjusting the visual layout to your preference.
- Add content: Insert your text, images, videos, and other essential content into the designated areas.
- Implement plugins: Plugins are tools that add functionality to your site. Whether you need a contact form, an image gallery, or SEO tools, there’s likely a plugin.
- Preview and test: Before publishing, preview your site to ensure everything appears as desired. Test links, buttons, and forms to ensure functionality.
- Publish: Once satisfied, hit the ‘Publish’ button to make your website live.
Steps to Create a WordPress Site:
As you have an active domain and hosting, ensure you have also installed WordPress. You are then supposed to perform below websites to build a WordPress site:
- Select a theme: Pick a theme that suits your content and brand.
- Build with the site builder: Use the built-in builder, as detailed above, to design and structure your website.
- Add plugins: Enhance your website’s functionality with essential plugins.
- Create content: Develop pages like ‘Home,’ ‘About,’ ‘Services,’ and ‘Contact.’ Add blog posts if desired.
- Optimize for SEO: Ensure your website is search-engine friendly to increase visibility.
- Launch: After thorough testing, make your website live.
- Maintain and update: Regularly update your content, themes, and plugins to keep your site fresh and secure.
Installing WordPress with LAMP When You Have a Bare Metal Dedicated Server
Many shared or cloud hosting providers offer one-click WordPress installation, but our focus here is on the manual installation of WordPress using a LAMP setup on your dedicated bare metal server.
Step 1 – Install Desired PHP Version
Here we are performing PHP 8.0 installation. To perform an update, you will need to install the Remi and Epel repositories.
#yum install epel-release yum-utils -y
#yum install http://rpms.remirepo.net/enterprise/remi-release-8.rpm
Now enable PHP 8.0 repo:
#yum-config-manager --enable remi-php80
Please install PHP version 8.0 on your system along with the MySQL module.
#yum install php php-mysql
To implement changes, it is necessary to restart the webserver.
#systemctl restart httpd
Step2: Download WordPress
After successfully installing LAMP Stack, navigate to the web directory.
#cd /var/www/html
To download the most recent version of WordPress, enter the following command:
#wget https://wordpress.org/latest.tar.gz
To proceed further, you need to extract the WordPress file in the directory you’re currently in.
#tar xvzf latest.tar.gz

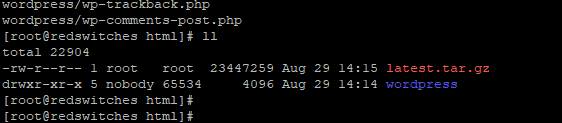
After installing WordPress, you must move the files from the WordPress directory to the web directory.
#mv /var/www/html/wordpress/* /var/www/html
Step 3 – Create a MySQL database
You need a database to store, collect, and retrieve website information. Let’s create a MySQL database. Login to MySQL first:
#mysql -u root -p
Enter the password, and create a database name:
mysql> CREATE DATABASE wordpress;
Next, grant privileges for the specified database, create a new user, and set a password for the user.
mysql> GRANT ALL PRIVILEGES on wordpress.* to 'wordpress_user'@'localhost' identified by 'wordpress_pw';
To implement the changes made, it’s necessary to flush the privileges.
mysql> FLUSH PRIVILEGES;
Exit from mysql by #exit command
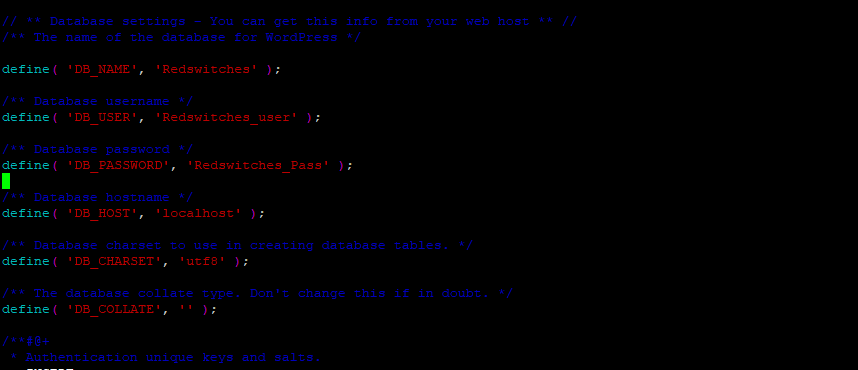
You’ve successfully created a database for your WordPress site. Now, rename wp-config-sample.php to wp-config.php and update the file with the database credentials.
#mv wp-config-sample.php wp-config.php
Open wp-config.php file:
#vim wp-config.php
Change the db name, username, and password
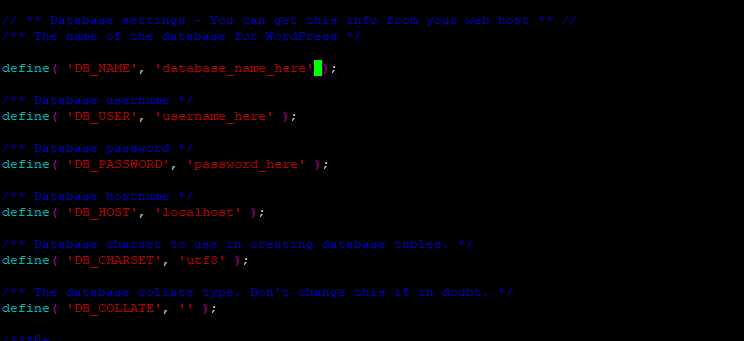
With the database you have created previously,
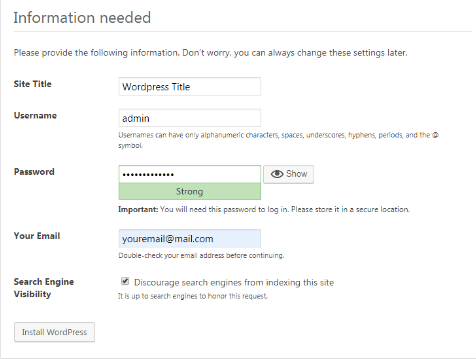
Step 4 – WordPress installation
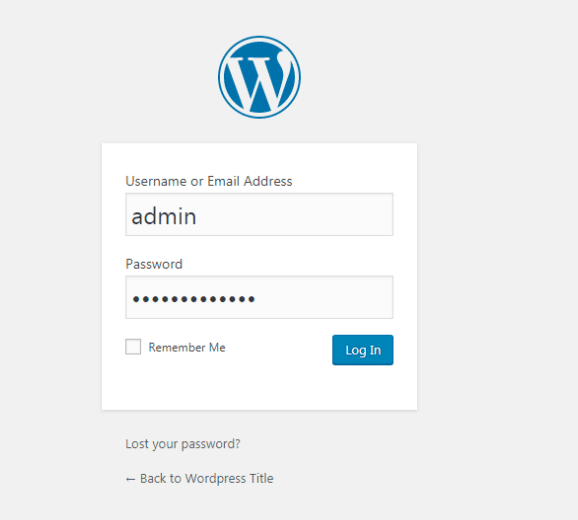
After following the steps in this article, open your browser and enter http://yourdomain.com or your IP address.
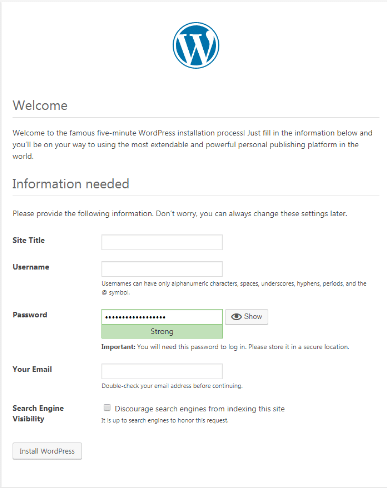
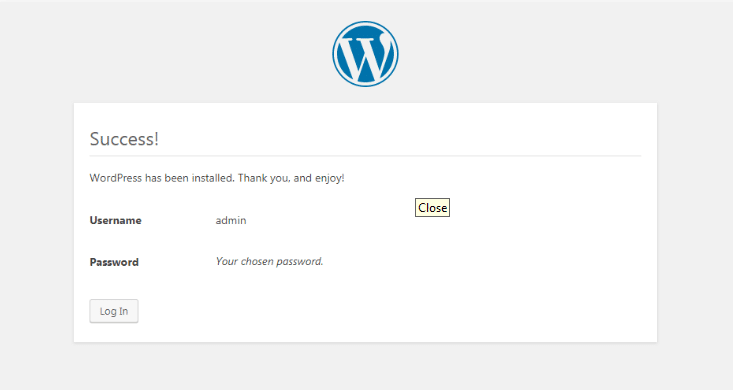
Click on the Install WordPress button after providing your preferences to complete the installation process.
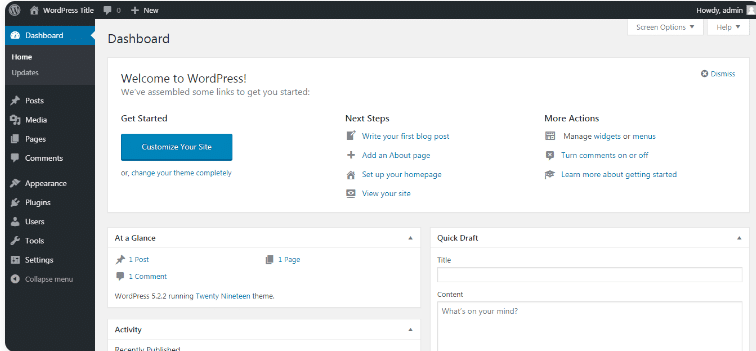
To proceed, please log in to your WordPress Admin Panel.
Manage your WordPress website effectively
Creating and managing website content
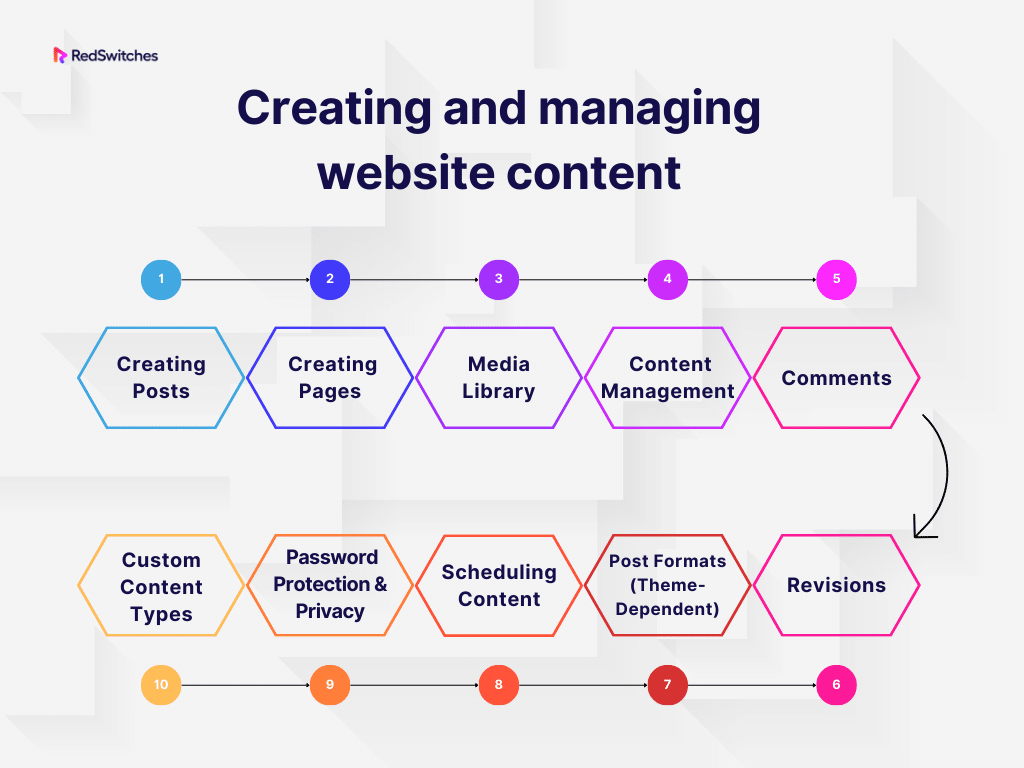
Creating and managing content is fundamental to any website. In WordPress, content is primarily divided into “Posts” (for blog or news articles) and “Pages” (for static content). Here’s a detailed guide to help you navigate content creation and management:
- Creating Posts:
- Navigate to ‘Posts’ > ‘Add New’ from your WordPress dashboard.
- Use the Gutenberg block editor to enter a post title and add content blocks (paragraphs, images, lists, etc.).
- Categorize and tag your post for organization and SEO.
- Set a featured image for the post and then publish or save as a draft.
- Creating Pages:
- Navigate to ‘Pages’ > ‘Add New’, similar to creating posts.
- Use the Gutenberg editor to add content; pages don’t have categories or tags.
- Media Library:
- Accessible under ‘Media’ in the dashboard, it stores all uploaded images, videos, and files.
- Manage and edit media files in the library.
- Content Management:
- Edit existing content in ‘Posts’ or ‘Pages’, and use quick edit or bulk actions for efficiency.
- Comments:
- Manage user feedback under ‘Comments’ – approve, reply, edit, or delete comments.
- Revisions:
- View and restore previous versions of content using the ‘Revisions’ feature.
- Post Formats (Theme-Dependent):
- Themes may support different post formats like ‘Image’, ‘Video’, ‘Quote’, etc.
- Scheduling Content:
- Schedule posts to go live later using the ‘Publish’ meta box.
- Password Protection & Privacy:
- Set specific posts or pages to be private or password-protected.
- Custom Content Types:
- With plugins and advanced setups, handle custom content types like portfolios, testimonials, etc.
To ensure an organized content strategy:
- Plan ahead, setting appropriate categories and tags.
- Use plugins for SEO optimization and custom content types.
- Regularly update content to keep it fresh and engaging.
Extending website functionality with plugins
Plugins are one of WordPress’s most potent features, allowing users to easily extend and enhance their website’s functionality without requiring extensive coding knowledge. Users can add diverse features by installing plugins, from e-commerce capabilities and SEO tools to social media integration and security enhancements.
Think of plugins as apps for your website; just as you’d download an app on your smartphone to add a new function, you’d install a plugin on your WordPress site for a specific feature or enhancement. However, it’s essential to keep plugins up-to-date and come from reputable sources, as outdated or poorly developed plugins can pose security risks and performance issues.
How to create the first page of your WordPress website
Creating your first page on WordPress is thrilling and often serves as your homepage. Here’s a step-by-step guide to help you set it up:
- Log In to Your WordPress Dashboard.
- Navigate to ‘Pages’ > ‘Add New’.
- Enter Your Page Title and use the Gutenberg editor to add content.
- Configure page settings and publish or preview your page.
- Optionally, set this page as your homepage and customize as needed.
Once you’ve set up your first page, you’ve laid the foundation of your website. Dive deeper into customization and plugins as you become more adept with WordPress, enhancing your site’s features and design. For any hosting needs, consider RedSwitches for reliability and performance.
Conclusion
In today’s digital age, mastering WordPress for website creation is essential for an enriched user experience. Platforms like WordPress simplify the process with their user-friendly interfaces. Abundant tools and resources now make it easy, even for beginners, to craft appealing online domains. A reliable hosting provider like RedSwitches is key in this journey, ensuring optimal site functionality and improved search engine rankings.
Embrace this digital quest with the right tools, including a trusted WordPress hosting provider like RedSwitches, to create a compelling digital presence. The possibilities are endless, whether it’s a personal blog or a business platform.
FAQs
Q. What is the first step to creating a website with WordPress?
Begin by choosing a domain name for your website. A domain name is your web address (e.g., yourwebsite.com). You can manage it then from the control panel of the hosting provider.
Q. How do I get a custom domain for my WordPress website?
To get a custom domain, you need to purchase it through a domain registrar or your WordPress hosting provider.
Q. Can I have a custom email address associated with my domain through WordPress?
Yes, WordPress offers options to set up custom email addresses associated with your domain through various email hosting services.
Q. How can I track website performance with Google Analytics on my WordPress site?
Integrating Google Analytics with your WordPress website involves obtaining a tracking code from Google Analytics and adding it to your WordPress site using a plugin or manual installation.
Q. What is the general website creation process with WordPress?
The website creation process with WordPress involves selecting a domain, choosing a hosting plan, installing WordPress, customizing your website’s appearance, adding content, and optimizing it for performance.
Q. What hosting plan is suitable for creating a high-quality website on WordPress?
Opt for a reliable and scalable hosting plan to ensure your website performs well and provides an excellent user experience. Consider factors like speed, storage, and customer support.
Q. Are there different types of websites I can create with WordPress?
Thanks to its flexibility and range of themes and plugins, WordPress supports various types of websites, including blogs, business websites, eCommerce stores, portfolios, forums, and more.
Q. How can third-party plugins enhance my WordPress website?
Third-party plugins offer additional features and functionalities beyond the core WordPress capabilities, allowing you to customize and optimize your website based on your specific needs.
Q. How can I improve the website loading speed on my WordPress site?
Optimizing images, using a reliable hosting plan, utilizing caching plugins, and minimizing unnecessary scripts and plugins can significantly improve your website’s loading speed.
Q. How can I monetize my WordPress website with Google AdSense?
You can monetize your WordPress website with Google AdSense by signing up for an account, getting approval, and placing AdSense ad units strategically on your website.
Q. How can I expand my customer base through my WordPress website?
Engage with your audience through valuable content, optimize for SEO, utilize social media, and provide a seamless user experience to attract and retain visitors, ultimately growing your customer base.
Q. Can I have separate menus for different sections of my WordPress website?
Yes, WordPress allows you to create separate menus for different sections of your website, giving you control over the navigation and structure of your site.
Q. What are Core Web Vitals, and why are they essential for my website?
Core Web Vitals are essential metrics that measure user experience on a website, including factors like page loading speed, interactivity, and visual stability. They are crucial for ensuring a positive user experience.
Q. How can I identify and fix broken links on my WordPress website?
You can use various plugins and online tools to scan your website for broken links and then take appropriate actions to fix them for a seamless user experience.
Q. Where can I find the “Publish Website” button in WordPress?
In WordPress, the “Publish” button is typically in the top right corner of the post or page editor. Clicking this button makes your content live and visible to your website visitors.
