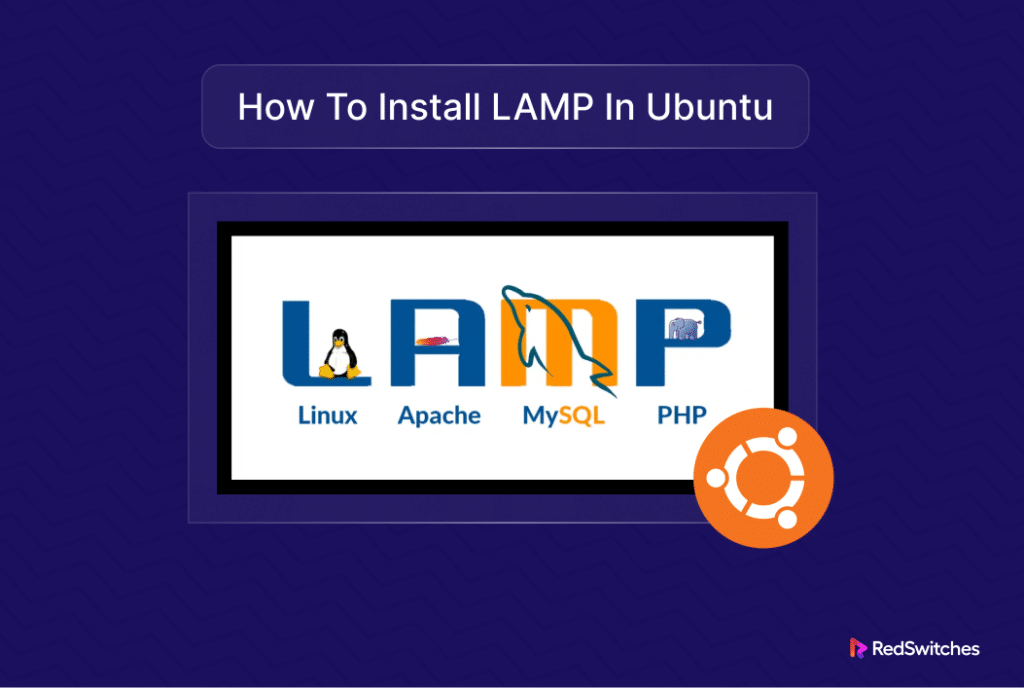
How to install LAMP in Ubuntu is often the first question developers ask when thinking of deploying PHP-based applications.
The LAMP stack is a popular choice for hosting websites and web applications due to its open-source nature and flexibility. Its growing popularity results from the stability the components bring to serving web applications to an increasing volume of visitors.
Given the price (all components are free to use) and wide user base, it’s a go-to option for many organizations. As a result, the setup costs are minimal, and the sysadmins can customize the entire stack to fit the requirements of their projects without worrying about conflicts that can impede stack performance.
In this article, we will provide a simple and easy-to-follow guide for installing each component of the LAMP (Linux, Apache, MySQL, and PHP) stack on your Ubuntu 22.04 server. We will show you how to create a virtual host for your web projects and test database connectivity.
Let’s start with the basic definitions before going into the technical details of how to install the LAMP stack in the Ubuntu 22.04 server.
Table Of Contents
- What is LAMP Stack?
- Prerequisites to Setting Up LAMP Stack on Ubuntu 22.04
- Install LAMP Stack on Ubuntu 22.04
- Create a Virtual Host for Your Website
- Test PHP Processing on the Web Server
- Troubleshoot LAMP Stack Installation
- Conclusion
- FAQs
What is LAMP Stack?
The LAMP stack has four components – an OS layer (Linux/ Ubuntu), a web server (Apache), a DBMS (MySQL), and a scripting language (PHP) that is used to interact with the database and the webserver to prepare responses to the incoming requests from the application frontend.
Typically, in the Ubuntu 22.04 environment, Ubuntu is the OS layer upon which the other three components are installed. Apache is the web server of choice, mainly because of its sustained performance under increasing loads, and MySQL is a popular choice for DBMS.
Finally, PHP is the scripting language of choice because of its versatility and popularity as a backend scripting language. This combination is prevalent in the Ubuntu community because all three components are available as native Ubuntu repositories.
However, if a project requires a different component, you can easily substitute one of these three with an alternative. For instance, you might need NGINX as the web server or MariaDB as the DBMS. Similarly, you can use Python or Perl as the scripting language without affecting the stack’s performance.
Thanks to the flexibility of the open-source software, you can easily make the switch without affecting the overall architecture of the stack.
Now that you understand LAMP stack architecture, it is time to set up a LAMP stack on your Ubuntu machine.
Prerequisites to Setting Up LAMP Stack on Ubuntu 22.04
To set up a LAMP stack, you need a server running Ubuntu 22.04. At the minimum, you should have the following:
- A basic firewall on the server.
- A non-root user account with administrator (sudo) privileges.
Now that we’ve sorted out the Linux part in LAMP, we will go ahead with installing and configuring the other three components of the stack.
Install LAMP Stack on Ubuntu 22.04
In this section of our guide on how to install LAMP in Ubuntu, we’ll follow the acronym and start with installing the Apache server. Next, we’ll install MySQL and finish the installation process by setting up PHP.
As mentioned earlier, you can substitute your preferred components by downloading and installing the appropriate packages.
Install Apache Web Server
Apache is a popular web server that powers as much as 30% of the websites on the Internet. It is open source and can be configured to accommodate a diverse range of projects.
Start the installation process by updating the server package index:
# sudo apt update
Next, start installing Apache with the following command:
# sudo apt install apache2
You’ll be asked to authorize the installation process. For this, at the prompt, press Y and then Enter.

Configure the Firewall
After the installation process finishes, you’ll need to configure the server firewall to allow HTTP traffic to the Apache server.
Since we have Ubuntu on the test server, we’ll configure the Uncomplicated Firewall (UFW), the default firewall configuration tool. It offers several app profiles, configuring the firewall to allow traffic for specific applications.
Use the following command to list all currently available UFW application profiles:
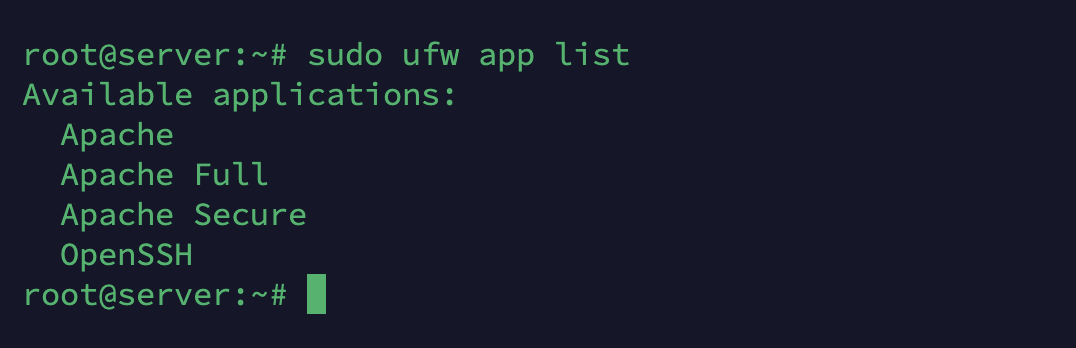
Here’s a brief description of these profiles:
- Apache: This profile opens only port 80 for unencrypted web traffic.
- Apache Full: This profile opens both port 80 (for unencrypted web traffic) and port 443 (for TLS/SSL encrypted traffic).
- Apache Secure: This profile opens only port 443 for TLS/SSL encrypted traffic.
Since we want to allow both unencrypted and encrypted traffic on our test server, we’ll opt for the Apache Full profile. However, you can enable any other profile to suit your requirements.
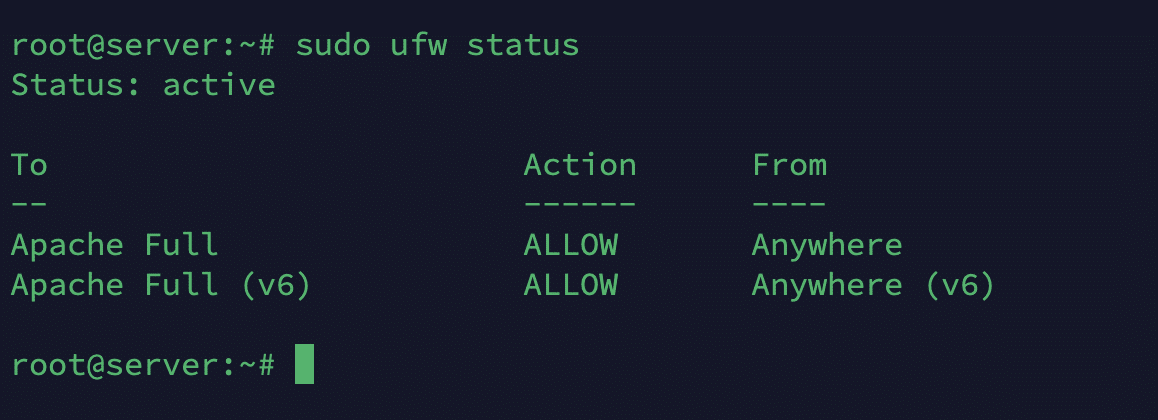
Let’s use the following command to enable the Apache Full profile:
# sudo ufw allow in "Apache Full"
Next, verify that the profile has been enabled by checking the status with this command:
# sudo ufw status
The final step in Apache installation is checking if the server is publicly accessible. This would also verify that the firewall rules have been properly updated to allow traffic to and from the Apache server.
We’ll visit the test server’s public IP address in the web browser.
If both the server and the UFW profile are in order, you should see the default Ubuntu 22.04 Apache web page showing relevant information about the server. Here’s how the page should look:

Install MySQL DBMS
The next step is the installation of MySQL DBMS.
The database is an important component of any web stack because it serves data that the stack uses in creating responses to visitors. A DBMS stores and manages application data, allowing other stack components to extract relevant data on demand.
As mentioned earlier, we’ll install MySQL server in this demonstration because it is very popular in the industry and works well with all other stack components, particularly PHP.
Use the following command to install MySQL server on Ubuntu 22.04.
# sudo apt install mysql-server
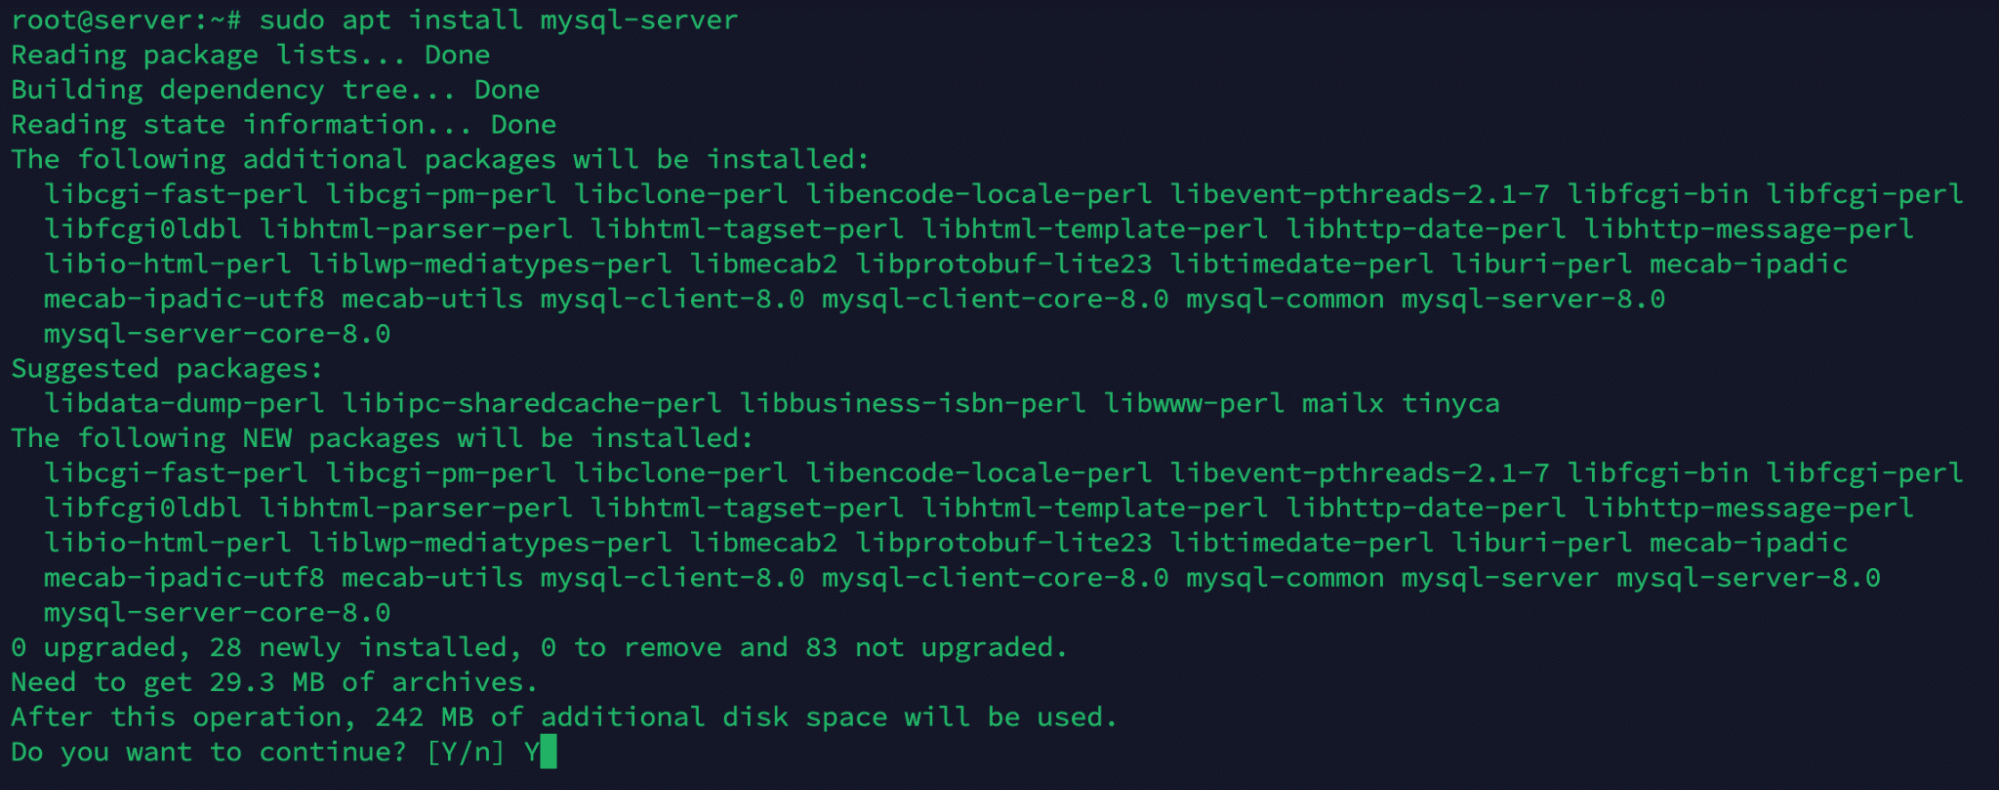
As with the Apache installation process, you’ll be prompted to authorize the installation process. Press Y and then press Enter to continue the process.
You should understand that a default MySQL installation is not secure. As MySQL will hold critical application data, enhancing its security is crucial.
MySQL provides a convenient script to secure the DBMS installation on your Ubuntu server. This script improves security by altering default settings and tightening access controls, effectively securing your database against unauthorized access.
Run the following command to launch the security script:
# sudo mysql_secure_installation
The script will start by asking if you want to configure the VALIDATE PASSWORD component. Press Y and you will be asked to select a level of password validation.
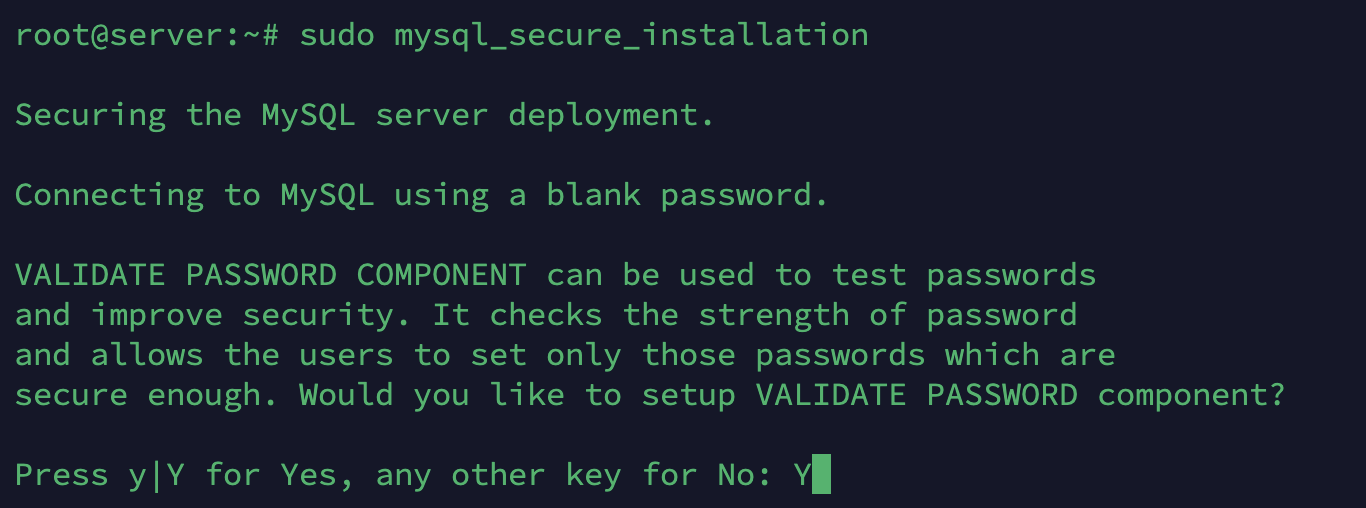

Next, you will be asked to select and confirm the password for the MySQL root user.
Important: This is the root user for the MySQL server only. It is not the root user for the Ubuntu server.
Since you enabled the VALIDATE PASSWORD component, you will be shown the strength of your MySQL root password.
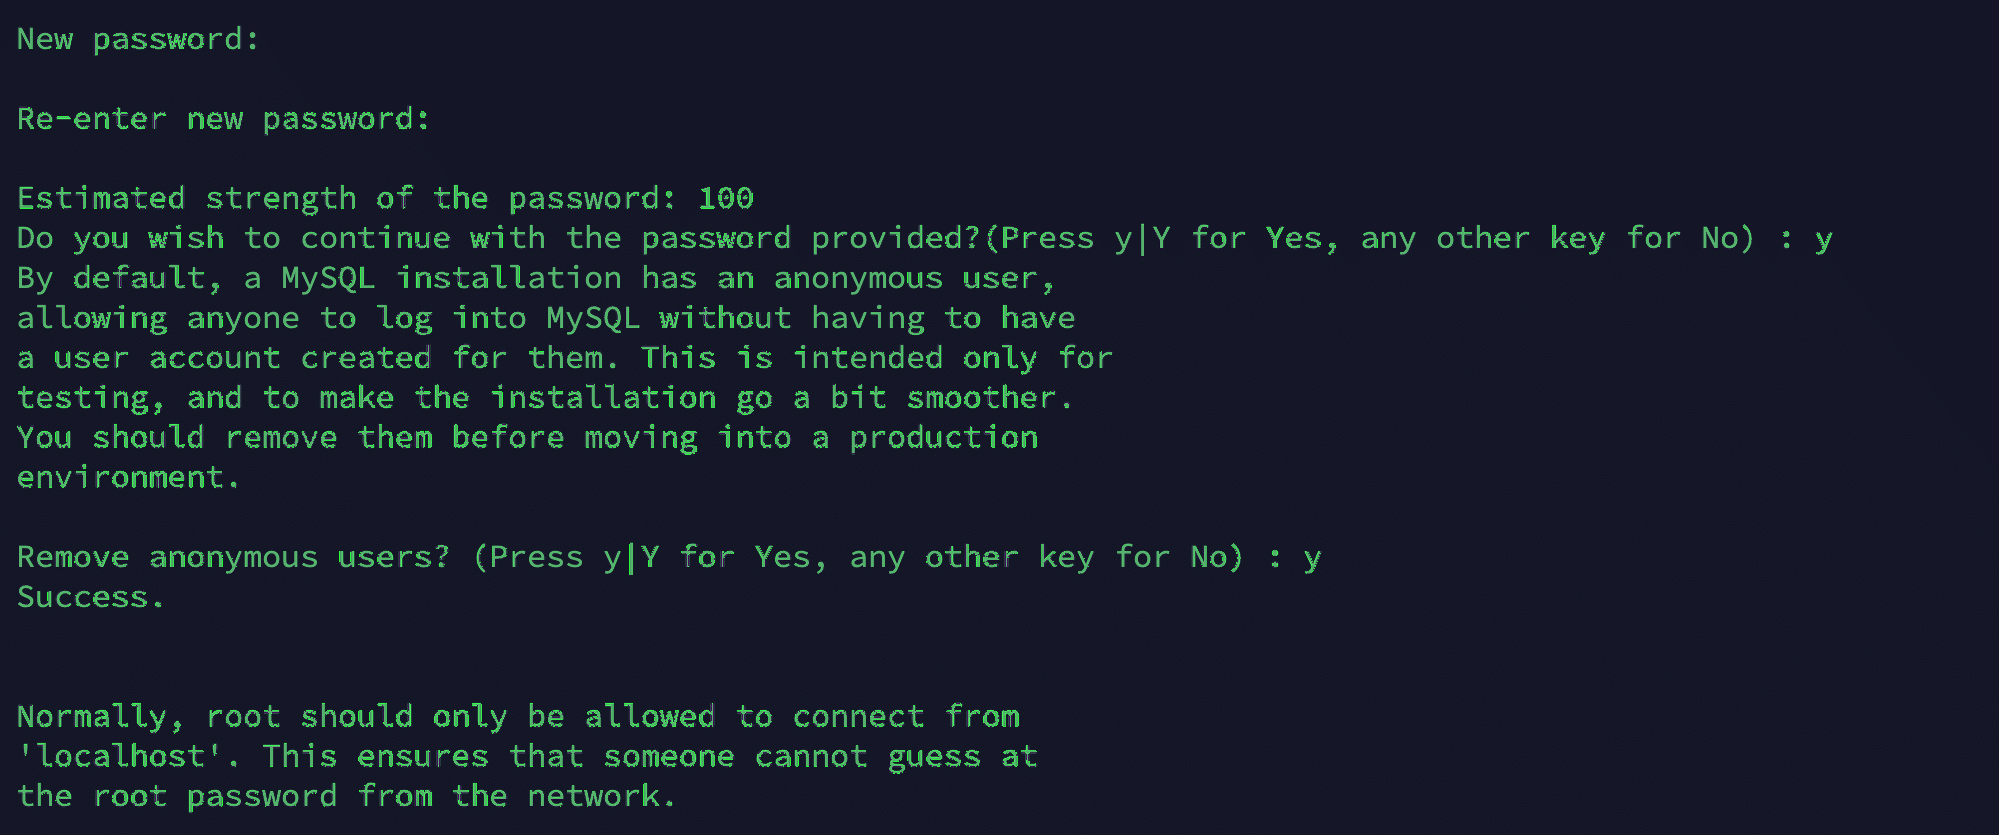
Next, you’ll be asked if you want to continue with the password. If you are happy with your current password, enter Y for “yes” at the prompt:
For all other questions, press Y and hit the Enter key at each prompt.
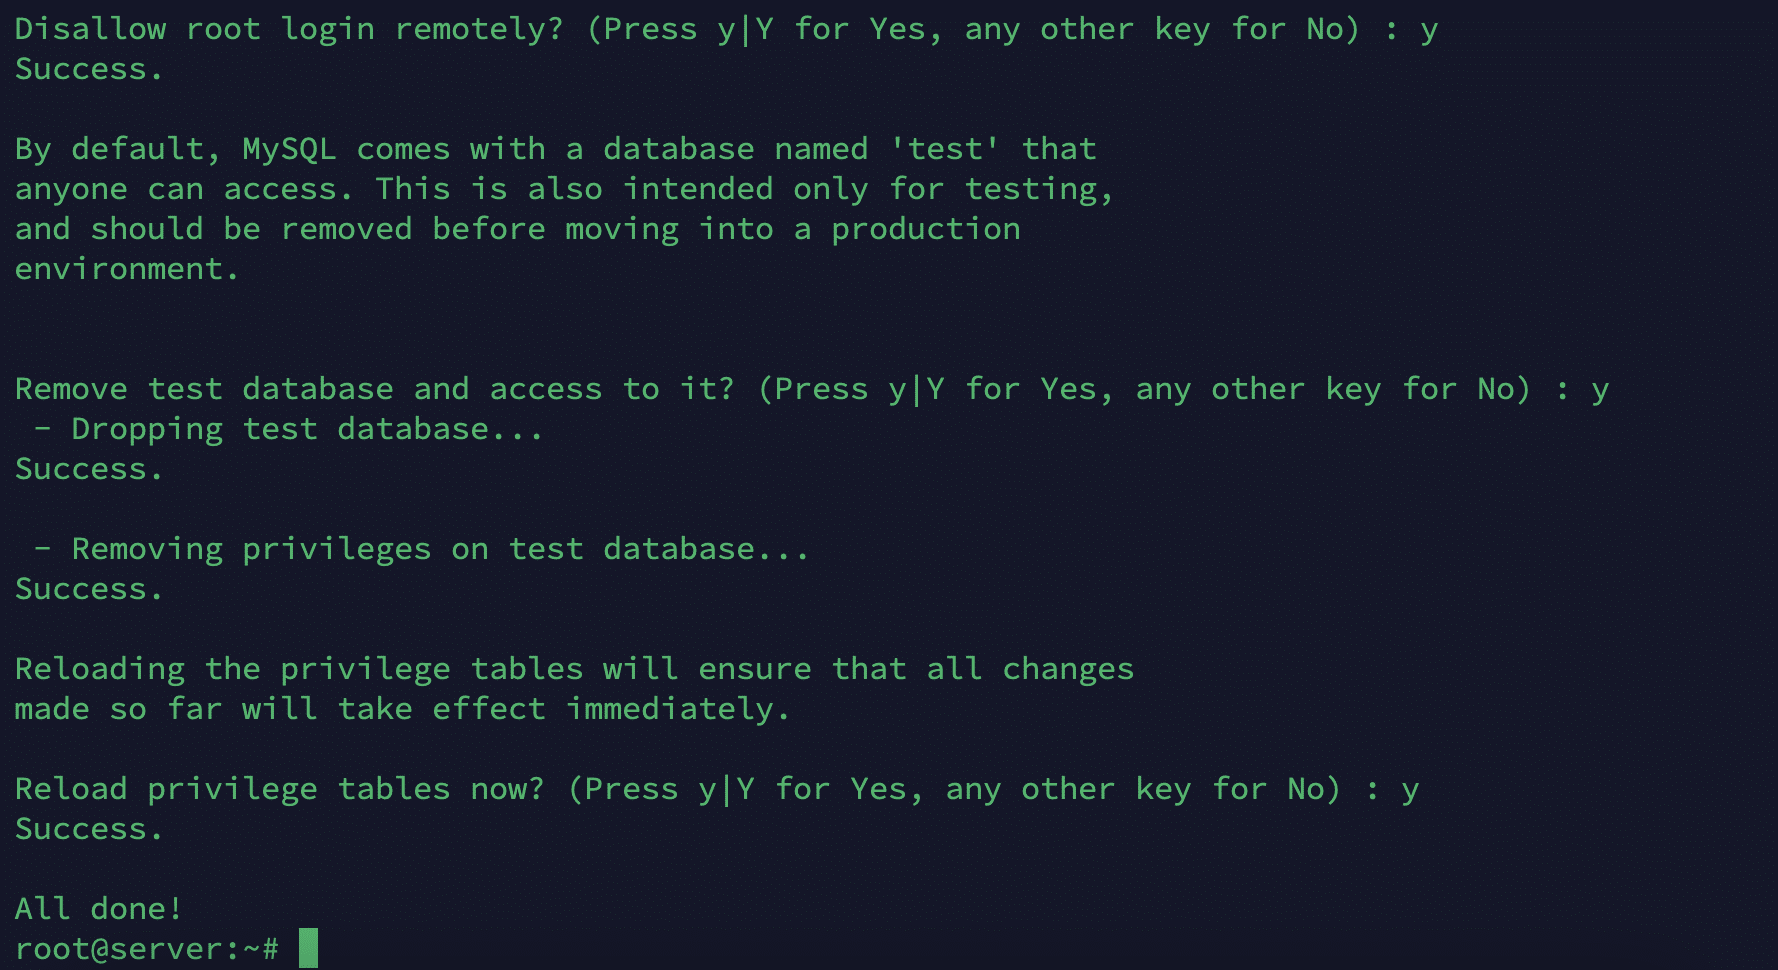
During the script execution, the script will remove anonymous users and the test database, disable remote root logins, and load new rules. This is important because it immediately enforces the changes you made in the script execution.
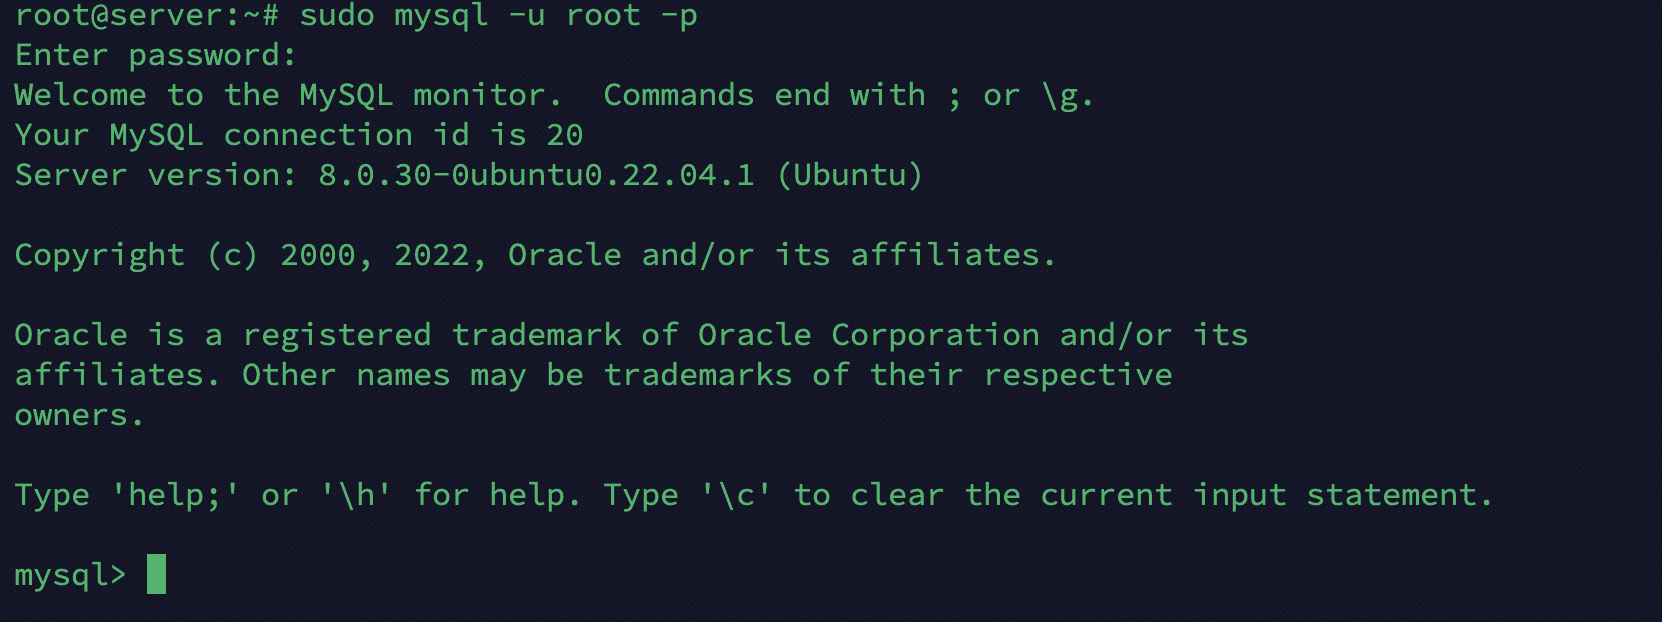
After the script finishes, you should always verify that you can log in to the MySQL server with the new credentials. For this, use the following command:
# sudo mysql -u root -p
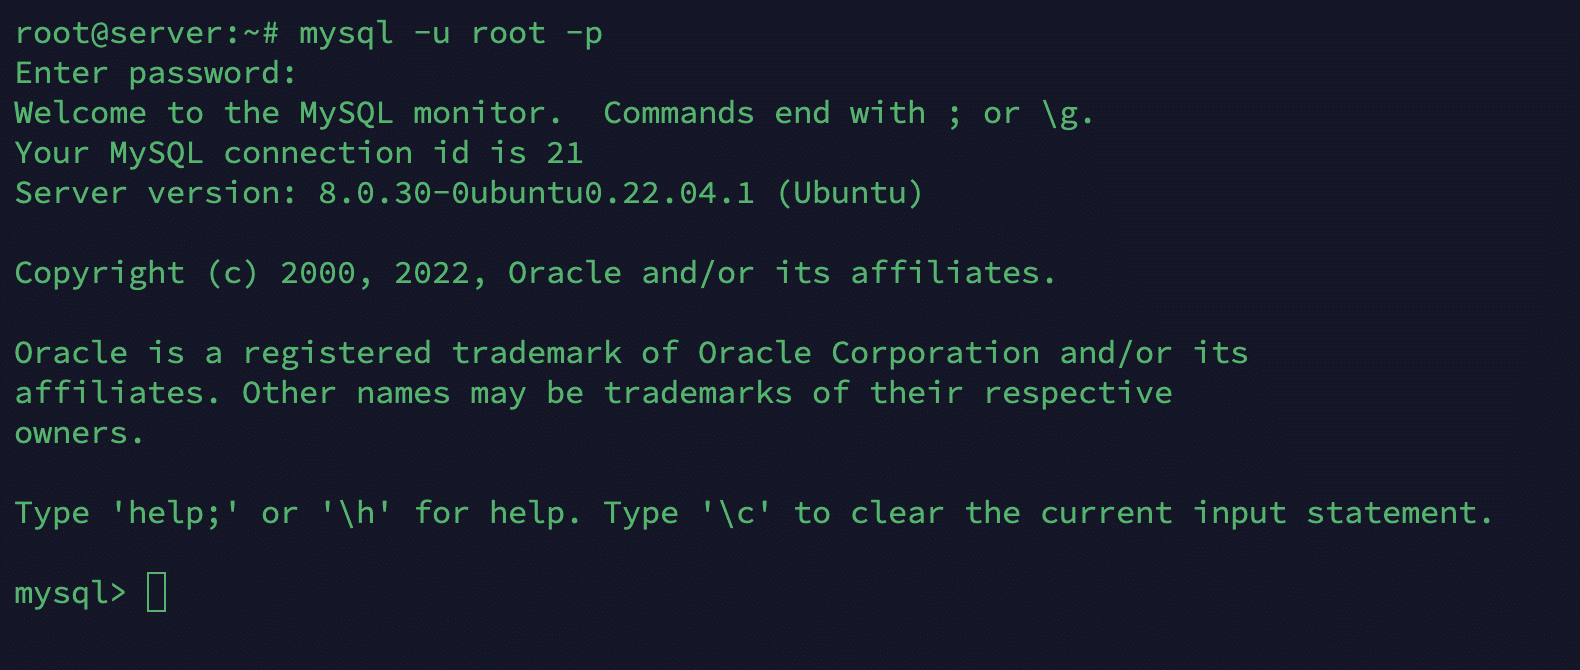
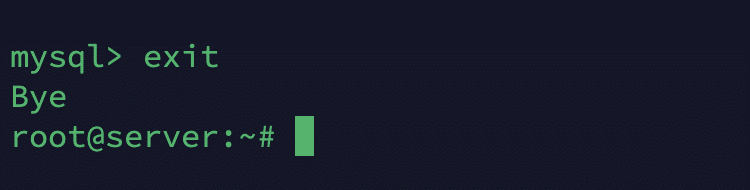
Enter the password, and you’ll see the welcome message and the MySQL shell prompt. Since everything appears to be working correctly, exit the MySQL console with the following command:
# mysql> exit
Next, let’s install PHP, the final component in the LAMP stack.
Install PHP
PHP, the final component of our LAMP stack, is used to serve the content of dynamic pages to visitors.
Note that during the installation process, we’ll also install the php-mysql package, which is used to enable communication between PHP and MySQL server. We’ll also use the already-installed libapache2-mod-php package, which will allow Apache to handle PHP files. Other core PHP packages will be automatically installed as dependencies.
Let’s start the process with the following command:
# sudo apt install php libapache2-mod-php php-mysql
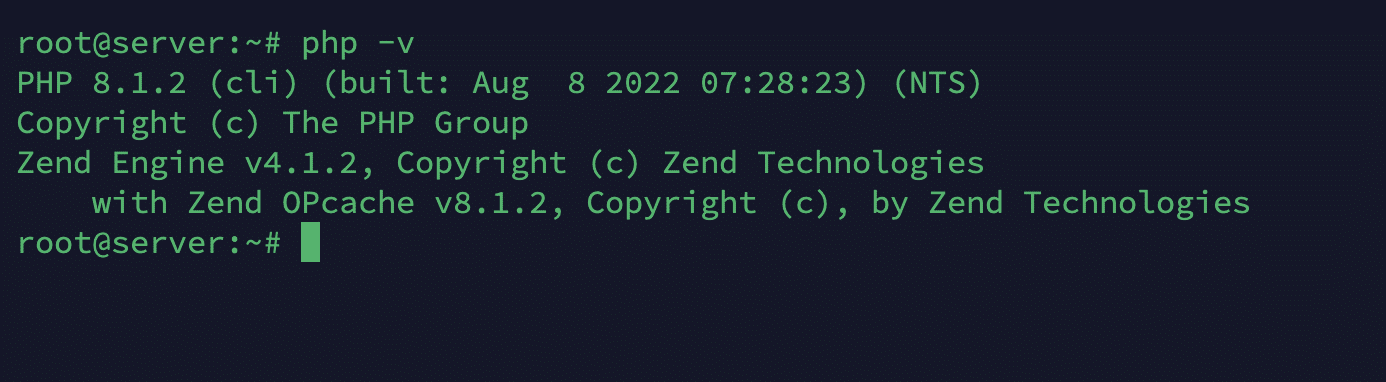
After the process finishes, you must confirm that PHP has been installed properly by printing out the version information by running the following command:
# php -v
At this point, the LAMP stack has been properly installed and is ready for final testing, where we’ll execute a test PHP script.
But before that, it is a good idea to set up a proper Apache Virtual Host to hold your website’s files and folders.
Create a Virtual Host for Your Website
By default, you’ll find a single virtual host on the Apache Ubuntu 22.04 server. This host serves files and assets from the /var/www/html directory. Essentially, this is the folder where all your application’s files and folders are stored and accessed by Apache.
However, If you want to run multiple websites on a single server, creating a separate virtual host configuration file for all websites you plan to host on the server is a good idea.
Important: We’ll set up a test domain (redswitches.com) for this demonstration. You should replace this with your own domain name.
To set up the virtual host for redswitches.com, we’ll leave the default /var/www/html alone and create a directory structure within /var/www for the redswitches.com site.
In this configuration, if a user request doesn’t match redswitches.com (or another website hosted on this server), /var/www/html would be used as the default directory for the response.
We’ll start by creating the directory for redswitches.com with the following command:
# sudo mkdir /var/www/redswitches
Next, assigning the directory ownership with the $USER environment variable. At this point, the ownership will be assigned to the current system user:
# sudo chown -R $USER:$USER /var/www/redswitches

Once you assign the ownership, create a new configuration file in Apache’s sites-available directory using your preferred command-line editor. We prefer Nano, so we’ll use it in the following command:
# sudo nano /etc/apache2/sites-available/redswitches.conf
This command will create a new, blank file and open it in the text editor. In this file, we’ll enter the following basic configuration details for redswitches, the test domain name we’re using for this example.
<VirtualHost *:80>
ServerName redswitches.com
ServerAlias www.redswitches.com
ServerAdmin webmaster@localhost
DocumentRoot /var/www/redswitches
ErrorLog ${APACHE_LOG_DIR}/error.log
CustomLog ${APACHE_LOG_DIR}/access.log combined
</VirtualHost>
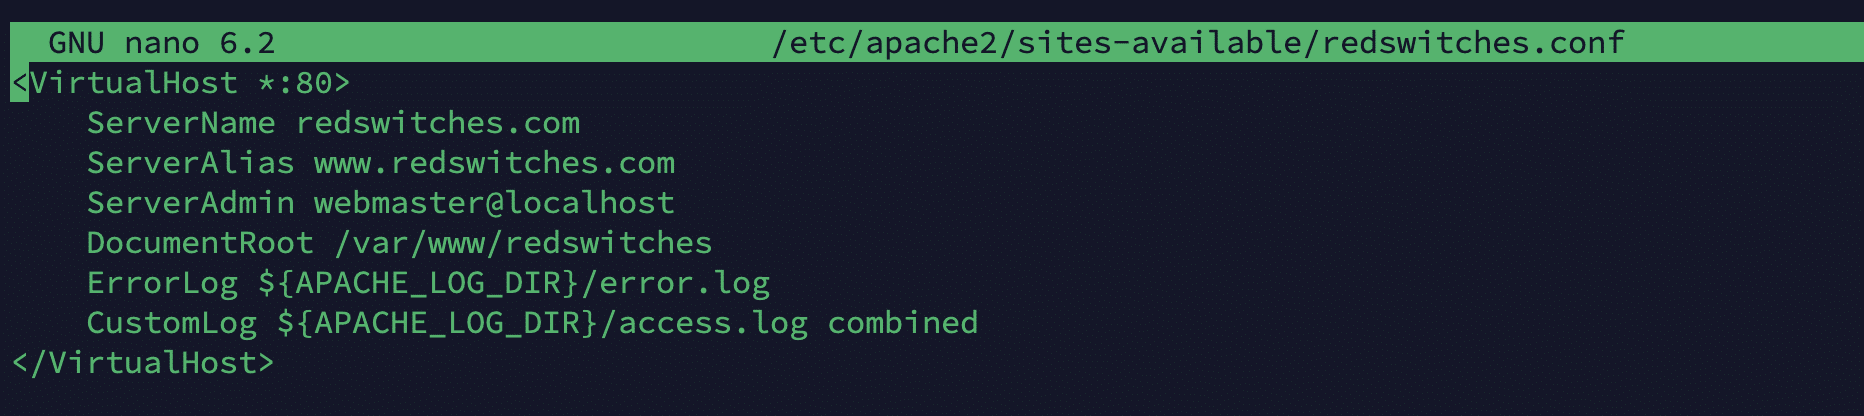
Save and close the file when you’re done. If you’re using nano, press CTRL+X, then Y and Enter.
In this VirtualHost configuration, you can see that we’re telling Apache to serve redswitches.com from the /var/www/redswitches (the web root directory for the domain).
Tip: If you’d like to test Apache without a domain name, add the pound sign (#) at the beginning to comment out the lines for ServerName and ServerAlias.
Now that we’ve configured the new VirtualHost for our test domain, it is time to enable it. For this, we’ll use the following command:
$ sudo a2ensite redswitches
You should know that the Apache server comes with a default website used when the server isn’t mapped to a custom domain name. Since we have a domain name (redswitches.com), we want to disable Apache’s default website so there’s no chance of the default configuration overriding our custom configuration for our test domain.
For this, use the following command:
# sudo a2dissite 000-default
Another important thing to consider is syntax accuracy in the configuration file. We’ll run the following command to verify that the configuration file doesn’t contain syntax errors:
# sudo apache2ctl configtest
Finally, restart the Apache service so these changes take effect:
# sudo systemctl reload apache2
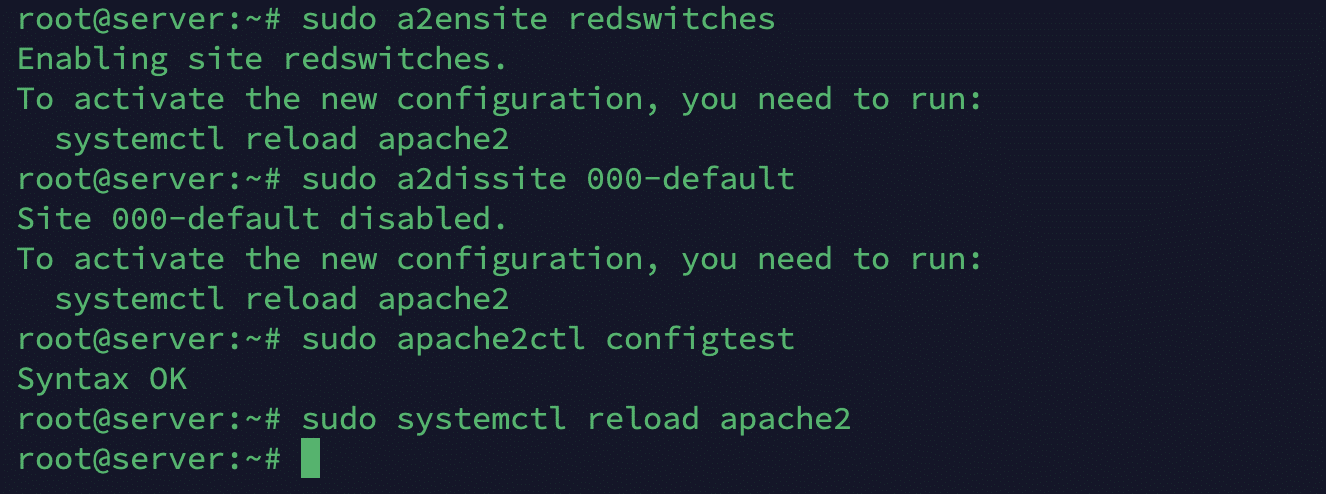
Your new website is now active.
However, the web root /var/www/redswitches remains empty. This means the visitors won’t see anything when they visit the test domain.
To rectify this, create a new index.html file in that location to test that the virtual host works as expected. We’ll use Nano as our editor.
# nano /var/www/redswitches/index.html
Add the following HTML code to the file.
<html>
<head>
<title>RedSwitches website</title>
</head>
<body>
<h1>Hello World!</h1>
<p>This is the landing page of <strong>Redswitches.com</strong>.</p>
</body>
</html>
Save and close the file. Next, launch your web browser and access the test domain or the server’s IP address.
You’ll see the following page generated from the HTML code you added to the index.html file.

Next, we’ll create a PHP file to test that PHP is correctly installed and configured on your server.
Test PHP Processing on the Web Server
Now that you have a custom location to host your website’s files and folders, it’s time to verify that the Apache server can handle and process requests for PHP files.
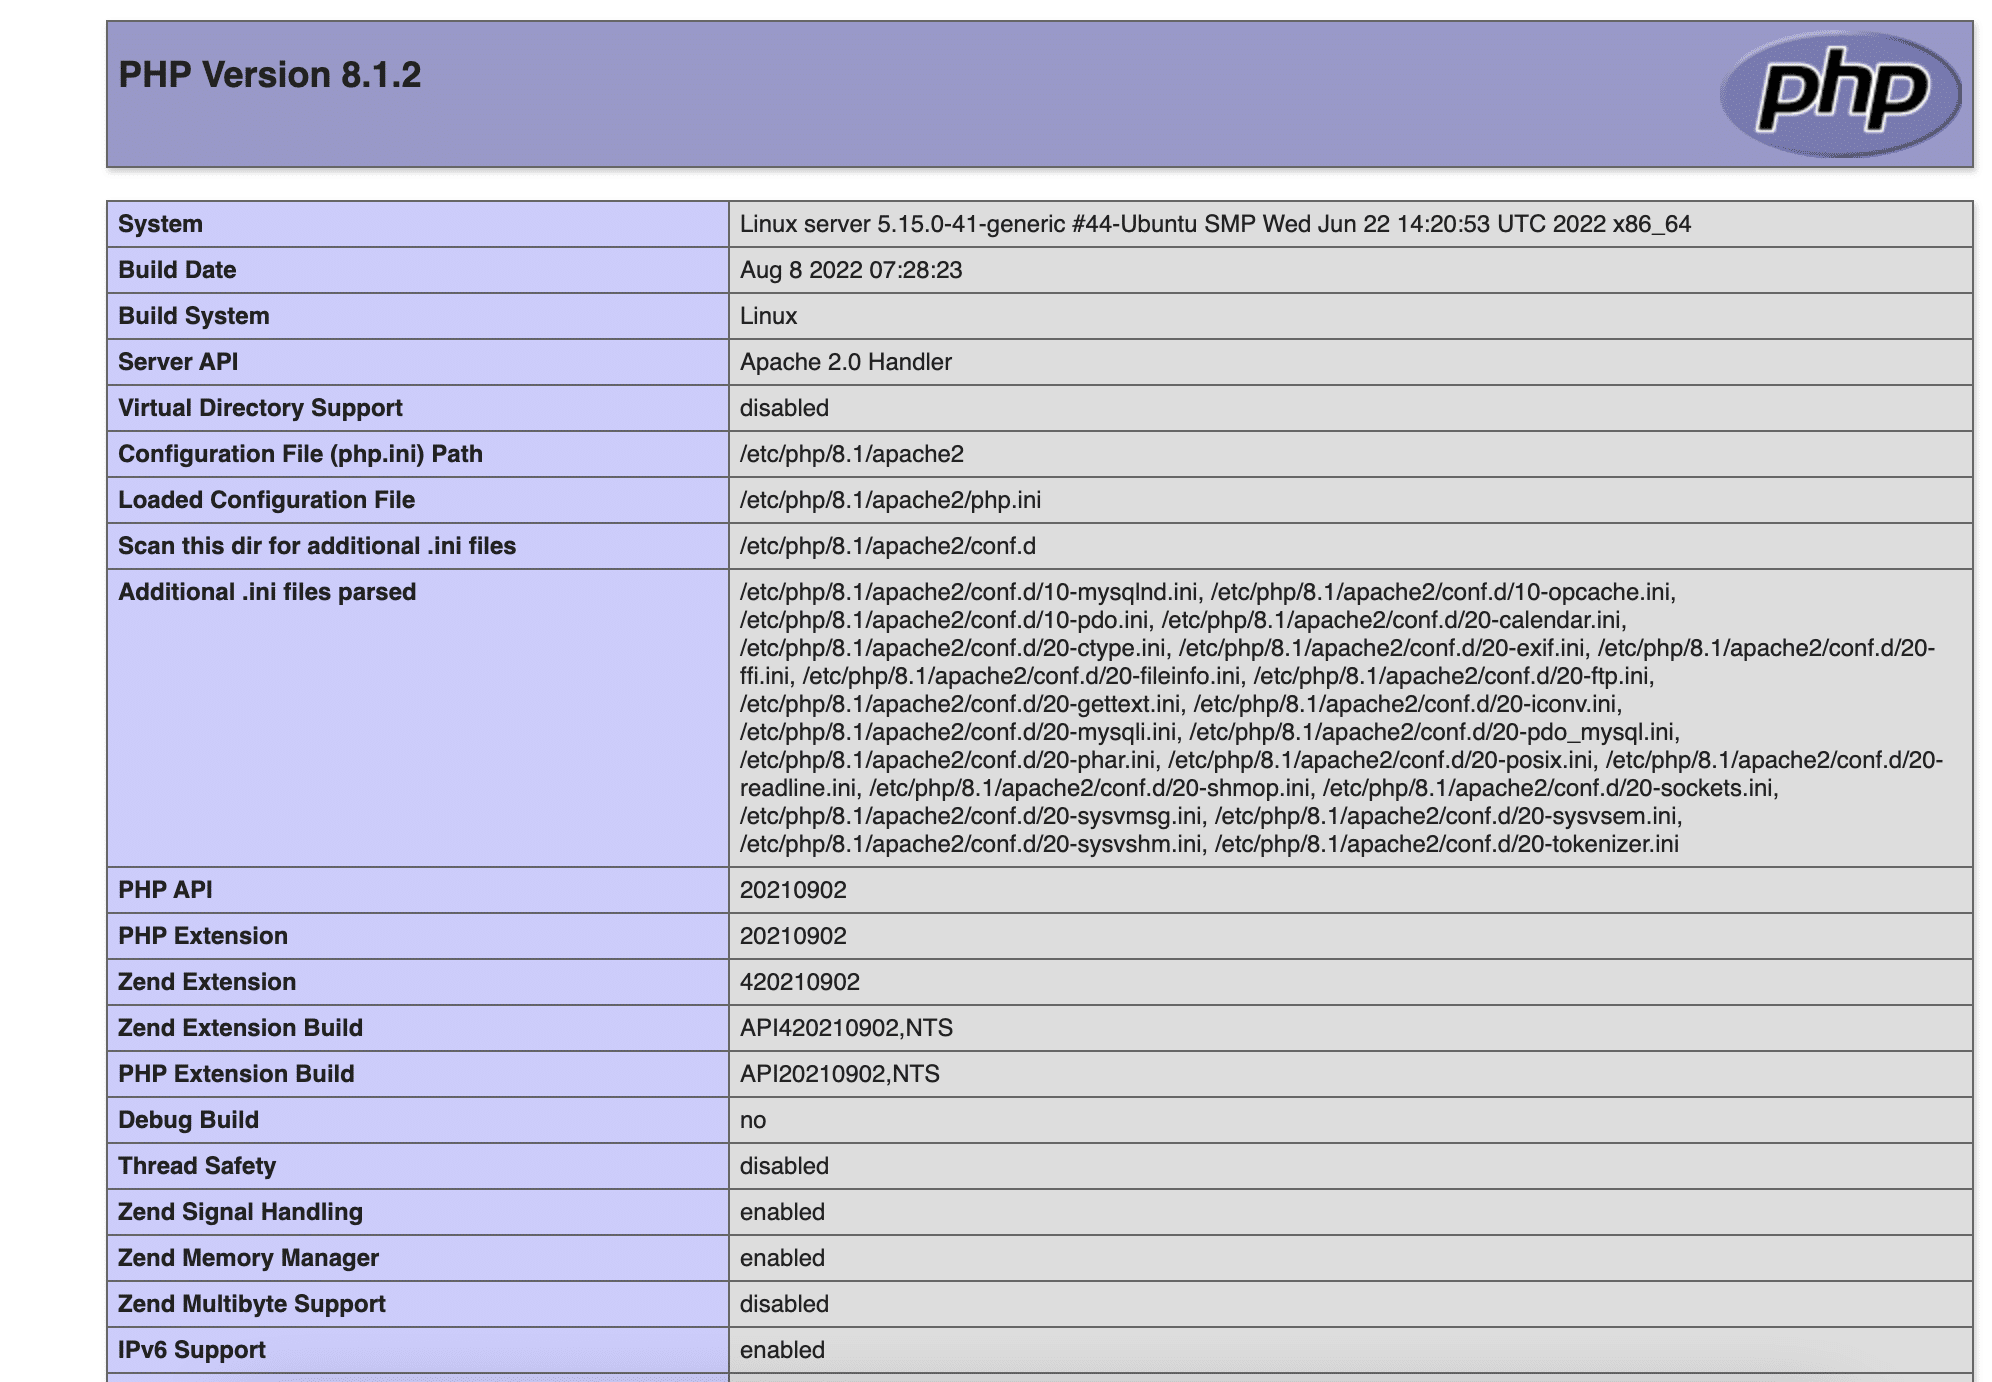
For this, we’ll create a PHP test script that executes phpinfo(), a PHP function that lists all necessary information about the PHP installation.
To start testing, create a new file named info.php inside the custom web root folder (in our case, the folder for redswitches.com):
$ nano /var/www/redswitches/info.php
This will open a blank file. Add the following valid PHP code:
<?php
phpinfo();
Once done, save and close the file.
To test this script, go to your web browser and access the domain name or the server’s IP address, followed by the script name:
http://server_domain_or_IP/info.php
If Apache is appropriately configured for processing PHP scripts, you’ll see the following page:
Add A New User, Test Table, and Data to the Test Database
The next step is to check the connection between PHP and the database (MySQL in this case).
We’ll begin by creating a new database and user and then test the connection between PHP and MySQL.
First, connect to the MySQL console with the MySQL root user:
#mysql -u root -p
You are now in the MySQL console (the prompt changed to mysql> to indicate this). Next, create a new database (we’ll name it demo) by running the following command:
# mysql > CREATE DATABASE demo;

Now, create a new database user and grant it full privileges for demo, the custom database you’ve just created.
The following command creates a new user named demo_user that authenticates with the caching_sha2_password method. As you can see, we have set the user’s password as RedSwitches@123.
Important: We strongly recommend NOT using this password. Set a different strong password.
# mysql > CREATE USER demo_user@'%' IDENTIFIED BY 'RedSwitches@123';

Now give this user permission for the demo database:
# mysql > GRANT ALL ON demo.* TO 'demo_user'@'%';

This will give the demo_user database user full privileges over the demo database ONLY. This means that this user cannot create or modify other databases on the server.
Now exit the MySQL shell with the following command:
# mysql > exit
Test if the new user has the proper permissions by logging in to the MySQL console again, this time using the credentials for the new user (demo_user):
$ mysql -u demo_user -p
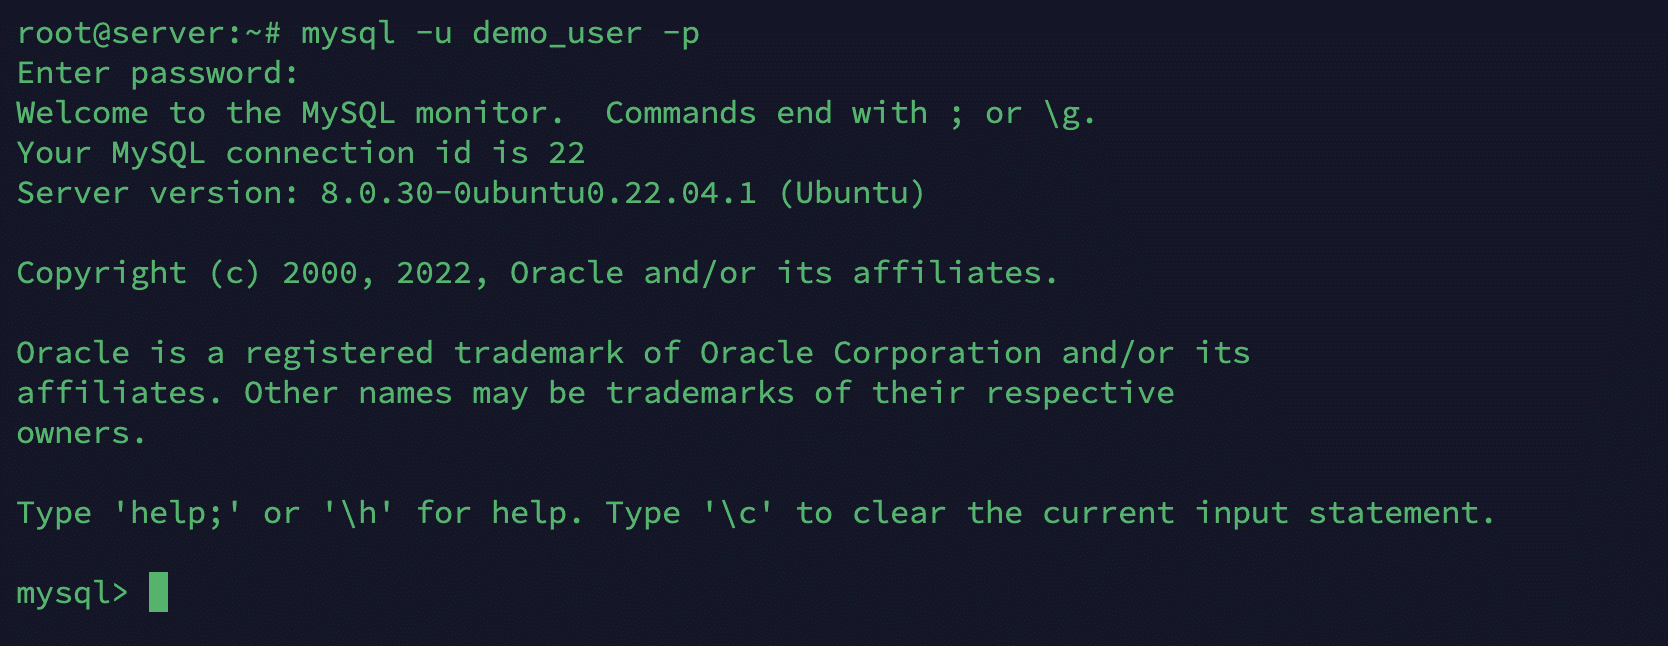
Notice the -p flag in this command, which will prompt you for the password. After logging in to the MySQL console, confirm that you have access to the demo database with the following command:
# SHOW DATABASES;
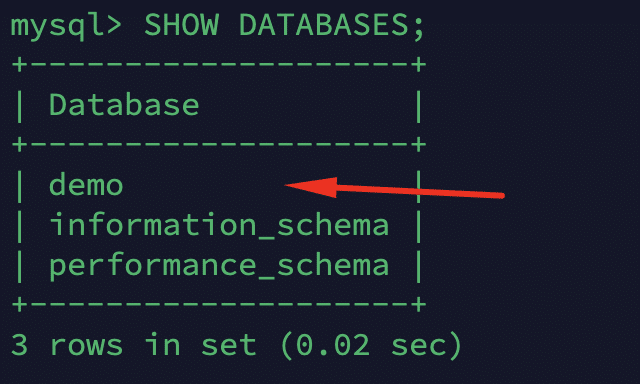
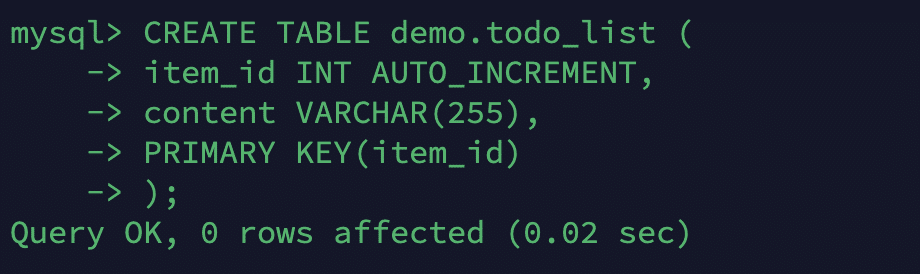
As you can see, the user can access the demo database. Next, create a test table and name it todo_list. For this, run the following command:
mysql > CREATE TABLE demo.todo_list (
item_id INT AUTO_INCREMENT,
content VARCHAR(255),
PRIMARY KEY(item_id)
);
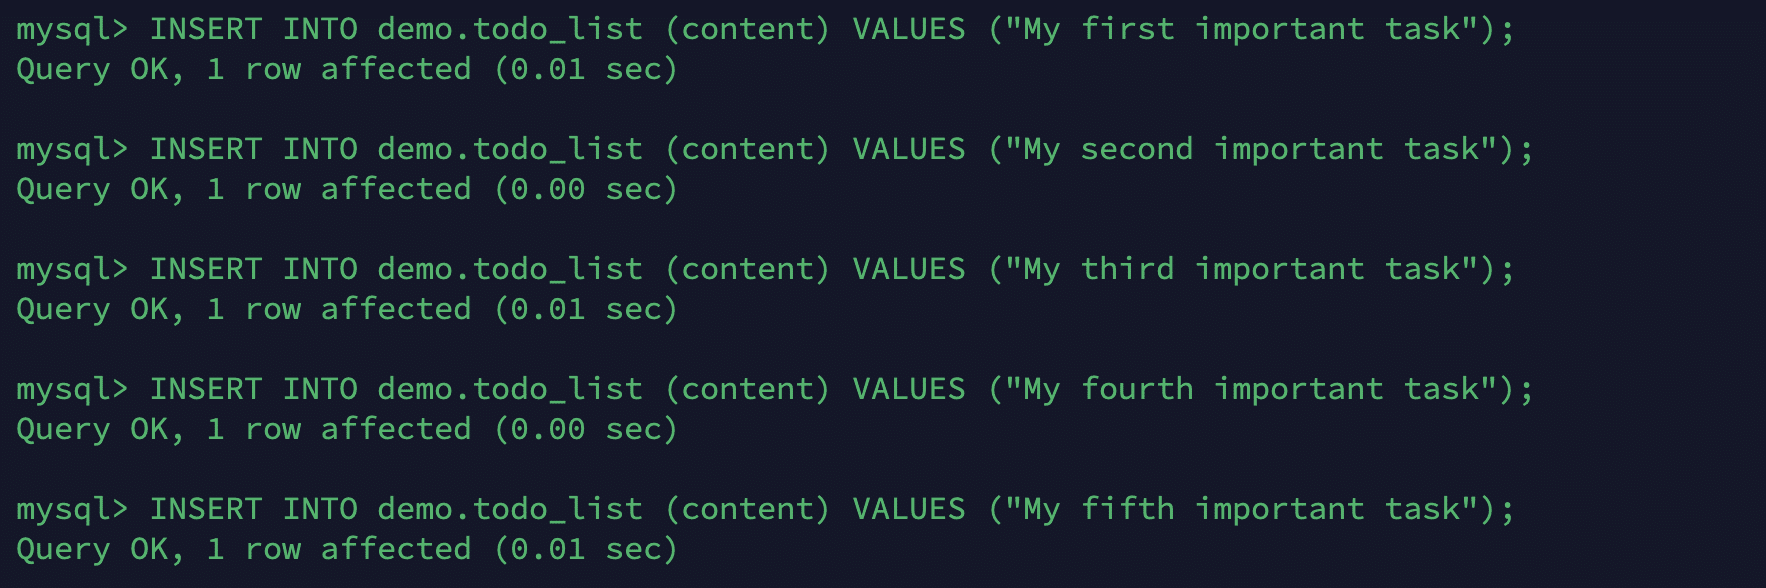
Now, we’ll insert a few rows of data in the test table. To ensure that the rows contain different values, we’ll repeat the next command a couple of times with different values:
# mysql > INSERT INTO example_database.todo_list (content) VALUES ("My first important task");
After adding data to the table, it is always a good idea to confirm that the data has been successfully saved. For this, run the following command:
# mysql > SELECT * FROM demo.todo_list;
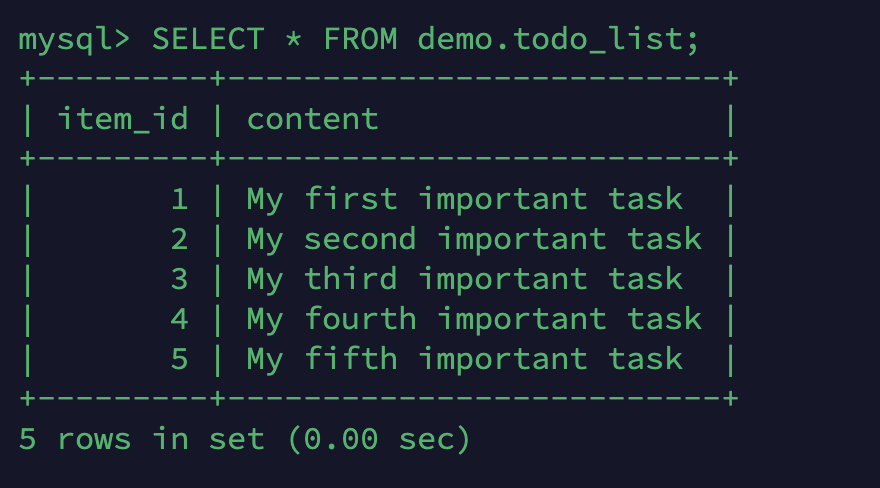
After confirming that the test table has valid data, exit the MySQL console:
# mysql > exit;
Test PHP Database Connection
Now that the test database is ready, we can proceed to create the PHP script that will connect to the MySQL server and query for content.
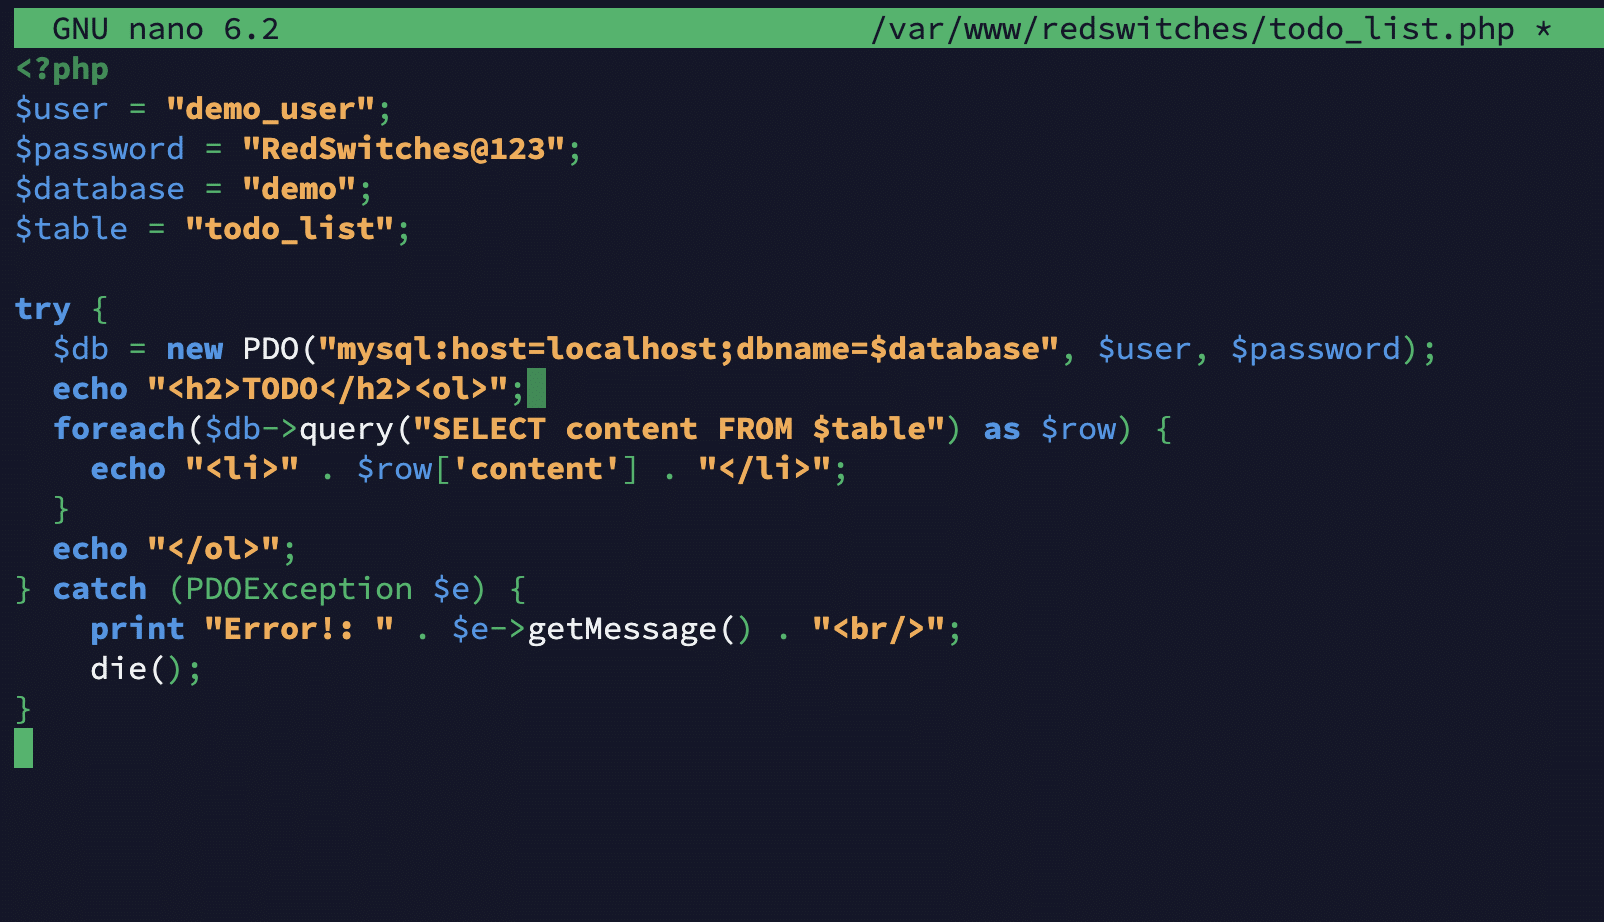
For this, we’ll create a new PHP file in the custom web root directory using Nano, our preferred editor:
# nano /var/www/redswitches/todo_list.php
In the black file, add the following PHP code.
Important: Remember to replace the demo_user and password with the credentials of the user you created in the previous step.
<?php
$user = "demo_user";
$password = "RedSwitches@123";
$database = "demo";
$table = "todo_list";
try {
$db = new PDO("mysql:host=localhost;dbname=$database", $user, $password);
echo "<h2>TODO</h2><ol>";
foreach($db->query("SELECT content FROM $table") as $row) {
echo "<li>" . $row['content'] . "</li>";
}
echo "</ol>";
} catch (PDOException $e) {
print "Error!: " . $e->getMessage() . "<br/>";
die();
}
This script connects to the demo database and queries for the content of the todo_list table. If successful, it will list down the contents. If there’s a problem with the database connection, it will throw an exception.
Save and close the file when you’re done editing. Now access the server’s domain name or public IP address and add /todo_list.php.
If you see something similar to the following output, the PHP component is properly configured to interact with the database.
http://your_domain_or_IP/todo_list.php

That means your PHP environment is ready to connect and interact with your MySQL server.
Troubleshoot LAMP Stack Installation
As you saw, installing a LAMP stack on Ubuntu 22.04 is a multi-step process. As such, there are a lot of places where things can go wrong. This section presents some troubleshooting tips that you can apply to discover why the LAMP stack isn’t up and running on the Ubuntu server.
Tip #1: Test After Each Step
The first tip is also the easiest to miss. We recommend testing the stack after each step so that you can verify that the components are correctly installed and activated. For this, keep the public URL of the server open in a separate tab and force-refresh to test after you complete a step.
Tip #2: Confirm the Domain Name and/or IP Address
If the test site fails to load in the browser, always verify the domain name and the IP address you used to access the test site. When you use an incorrect domain name to access the test site, you’ll often receive an HTTP Request Timeout error.
If you’re using the correct address, check the DNS information to see if you have changed these records. Remember that any changes in DNS records could take more than 24 hours to propagate.
Tip #3: Check if the Apache Server is Active
Apache server can unexpectedly shut down, or the service might fail to respond without warning you. If the test site fails to respond, check Apache status and restart the service.
Tip #4: Be Careful About Credentials
While setting up the LAMP stack, you’ll create database users. Note down the credentials carefully, especially in the case of alphabets in the password. Also, check that the user has proper privileges for the database.
Tip #5: Check Variables in Configuration Files
It’s common to mistype variable names or their values in configuration files. So, if you run into any issues after setting up a component, double-check the config files for mistakes such as misspelled variable names or values.
Tip #6: Review the Logs
When all else fails, check the error logs to find the warning for the failed step. A Google search for the warning can often point you in the right direction.
Conclusion
Congratulations! You’ve successfully installed the LAMP stack on your Ubuntu system. This powerful combination provides the foundation for hosting dynamic websites and applications.
Are you looking for a robust hosting solution? RedSwitches offers the best dedicated server pricing and delivers instant dedicated servers, usually on the same day the order gets approved. Whether you need a dedicated server, a traffic-friendly 10Gbps dedicated server, or a powerful bare metal server, we are your trusted hosting partner.
FAQs
Q. What is the LAMP stack, and why would I want to install it on Ubuntu 22.04?
LAMP stack is a combination of open-source software that works together to enable a server to host dynamic websites. It includes Linux as the operating system, Apache as the web server, MySQL as the database server, and PHP as the programming language. Installing the LAMP stack on Ubuntu 22.04 lets you set up a robust web server environment to host your applications and websites.
Q. How do I install the LAMP stack on Ubuntu 22.04?
You can install the LAMP stack on Ubuntu 22.04 by following a series of steps that involve installing the Apache web server, MySQL database server, and PHP modules. Additionally, you may need to perform an initial server setup and configure various settings as per your requirements.
Q. What is the significance of the Apache HTTP server in the LAMP stack?
Apache HTTP server is a crucial component of the LAMP stack that works as the web server to host your web applications and websites. It receives and processes client requests and serves the requested content, making it an essential part of the LAMP setup.
Q. How can I install Linux as part of the LAMP stack on Ubuntu 22.04?
Linux is the operating system in the LAMP stack. In installing the LAMP stack on Ubuntu 22.04, you need to have Ubuntu 22.04 installed as the Linux operating system. Ensure that your server is running Ubuntu 22.04 for the LAMP stack setup.
Q. What are the specific versions of PHP, Apache, and MySQL included in the LAMP stack for Ubuntu 22.04?
The specific versions of PHP, Apache, and MySQL may vary, but typically, you can install the latest stable versions available for Ubuntu 22.04. You can check for the latest available versions in the official Ubuntu repositories or respective project websites.
Q. Can I install PHP modules for specific functionalities in the LAMP stack on Ubuntu 22.04?
Yes, you can install various PHP modules to extend the functionality of PHP in the LAMP stack on Ubuntu 22.04. PHP modules provide additional features and capabilities for your PHP applications and can be installed as per your requirements.
Q. What steps are involved in configuring the MySQL database server in the LAMP stack on Ubuntu 22.04?
Configuring the MySQL database server in the LAMP stack on Ubuntu 22.04 involves setting up databases, creating users, granting privileges, and securing the server. This ensures that your MySQL server is properly configured to store and manage data for your web applications.
Q. How do I connect to my server after installing the LAMP stack on Ubuntu 22.04?
After installing the LAMP stack on Ubuntu 22.04, you can connect to your server using SSH (Secure Shell) from the terminal or using a remote desktop tool. This allows you to access and manage your LAMP server from the perspective of Linux and carry out various administrative tasks.
Q. What typical LAMP applications can I host on the stack installed on Ubuntu 22.04?
Some typical LAMP applications you can host on the stack installed on Ubuntu 22.04 include content management systems like WordPress, e-commerce platforms, web applications, and various PHP-based projects. The versatility of the LAMP stack allows you to host a wide range of web-based applications.
Q. What are the initial server setup tasks after installing the LAMP stack on Ubuntu 22.04?
The initial server setup tasks after installing the LAMP stack on Ubuntu 22.04 may include securing the server, setting up firewall rules, configuring user accounts, enabling necessary services, setting up domain names, and other administrative tasks to ensure the proper functioning and security of the server.
