Ubuntu Server is a very popular option for deploying enterprise apps and business application infrastructure. It is well known for its stability, performance, and adaptability to diverse server scenarios.
The preference for the command line (CLI) over a graphical user interface (GUI) is a critical aspect of the speed and responsiveness of the Ubuntu Server.This absence of a GUI is not accidental. Many server admins prefer the CLI because of the perception that CLI offers a streamlined approach to server operations, making task execution efficient and straightforward.
However, the CLI can be daunting for users coming from GUI-rich environments. These users often prefer clicking over typing and often don’t want to work with the commands.
The big question then is – why should you consider adding a GUI to their Ubuntu Server, and how?
In this article, we’ll try to answer these questions. We’ll go into the details of installing GUI on Ubuntu Server. You will get a detailed roadmap that you can follow to set up a GUI on your Ubuntu Server.
However, we’ll start with why you should consider installing a GUI on an Ubuntu Server.
Table Of Content
- Why Consider Adding a GUI to Ubuntu Server
- How to Install a GUI on Ubuntu Server
- Testing the GUI Environment
- Reversing the Course – Removing the GUI
- Conclusion
- FAQs
A GUI Can Be an Asset for Your Ubuntu Server Experience
Here are a couple of reasons why you should consider installing a GUI on your Ubuntu Server;
More User-Friendly Server Management
We can’t stress the familiarity of a graphical interface enough. Many new users already use a GUI for their desktop Linux experience. This familiarity translates to quicker adoption in the Ubuntu Server environment, where admins need to quickly execute several related tasks.
Intuitive Application Access and Usage
Most of the server management applications now support a native GUI. In fact, developers have rewritten the latest versions of many utilities to incorporate a GUI-centric approach for a more intuitive experience. Users can see all options on the screens and optimize their experience by taking advantage of the GUI elements rather than typing a long list of flags and arguments.
Seamless Remote Management
In today’s interconnected and distributed infrastructure world, remote server management is an essential operational requirement. Server admins can better use remote access protocols like VNC and RDP (and the apps built on these protocols) with a GUI to handle server tasks remotely.
How to Install a GUI (Desktop) on Ubuntu Server
Now that you know the “why” behind installing a desktop on your Ubuntu Server, let’s go into the technical details of the process. We’ll start with the prerequisites and then go into the details of installing the desktop of your choice.
Prerequisites of Installing a GUI on Ubuntu Server
Before you install a GUI on your server, you need to run a compatibility check to determine that your chosen desktop environment doesn’t overload server resources and slow it down.
Every desktop environment, be it the resource-intensive GNOME or the lightweight XFCE, has unique requirements. You should assess available server resources, especially RAM and processing capacity, to ensure the desktop doesn’t affect the operation of other deployed applications.
The Step-by-Step Guide to Setting Up a GUI on Your Ubuntu Server
Follow these steps to install your choice of desktop on your Ubuntu Server.
Step #1: Connect to the Server
Connect to your server via an SSH client to ensure secure communication for the credentials and important commands.
Step #2: Refresh and Update Package Index
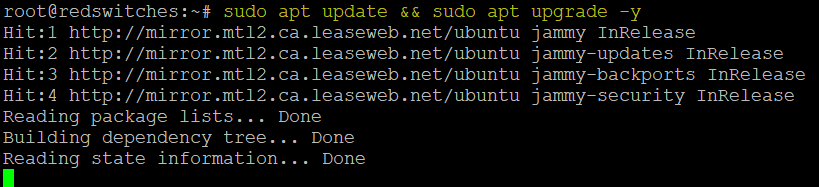
Before installing anything on the server, it is always a good idea to ensure you’re running the latest version of all packages. For this, run the following command:
# sudo apt update && sudo apt upgrade -y
Step #3: Pick Your Desktop Environment
Ubuntu supports several popular desktop environments that you see in the Linux circles. Here are our recommendations
GNOME: This is the “default” desktop environment of Ubuntu Desktop versions.
KDE Plasma: GNOME’s direct competitor for Linux desktop space. It has a sleeker look and feel.
XFCE: A traditional lightweight environment that focuses on performance rather than looks.
MATE: Offers a mix of performance and visual style.
If you want a pure Ubuntu experience, we recommend GNOME or KDE. If you are in a low-resource environment, we recommend XFCE. Finally, if you want a mix of visual elements and low resource consumption, consider MATE.
Step #4: Install Your Chosen Desktop Environment
We’ll now discuss how you can install these desktops on your Ubuntu Server:
GNOME
Run the following command to install GNOME:
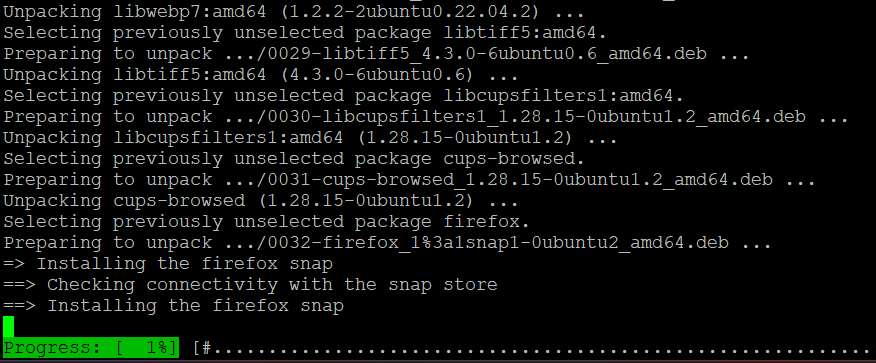
# sudo apt install -y ubuntu-desktop
The command will start downloading packages and dependencies for the GNOME desktop. You can see a progress bar at the bottom of the command output.
KDE Plasma
Run the following command to install KDE Plasma on your server:
# sudo apt install -y kde-plasma-desktop
XFCE & LXDE
Run the following command to install XFCE on your server:
# sudo apt install -y xfce4 xfce4-goodies
While XFCE is very resource-efficient, LXDE consumes even fewer resources and is ideal for older systems.
# sudo apt install -y lxde
MATE
Run the following command to install MATE on your Ubuntu Server:
# sudo apt install -y mate-desktop
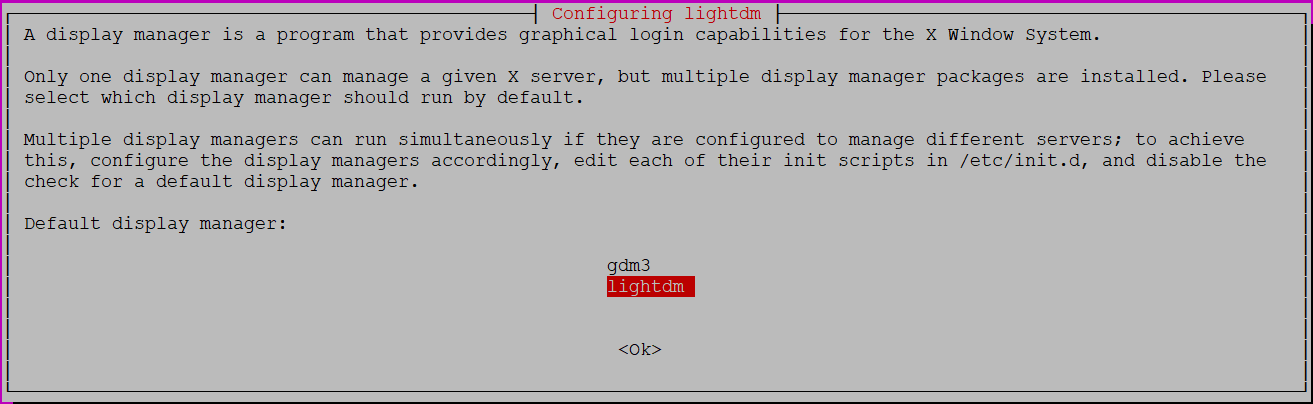
Step #5: Integrate a Display Manager
After the desktop environment, you should install a Display Manager, a related component that manages user sessions and offers capabilities such as login screen management, user login authentication, and customization.
Display Managers are usually paired with the desktop environment, and we strongly recommend installing the associated component with the following command:
For GNOME or Unity, run the following command to install GNOME Display Manager (gdm):
# sudo apt install -y gdm3
For KDE Plasma, run the following command to install the Simple Desktop Display Manager (sddm):
# sudo apt install -y sddm
For XFCE and LXDE, run the following command to install LightDM:
# sudo apt install -y lightdm
If you need a really lightweight option, we recommend going with SLiM.
Start by installing SLiM with the following command:
#sudo apt install -y slim
Next, enable and launch it with the following command:
#sudo systemctl enable slim
#sudo systemctl start slim
For this demonstration, we’ll use LightDM is used as the Display Manager.
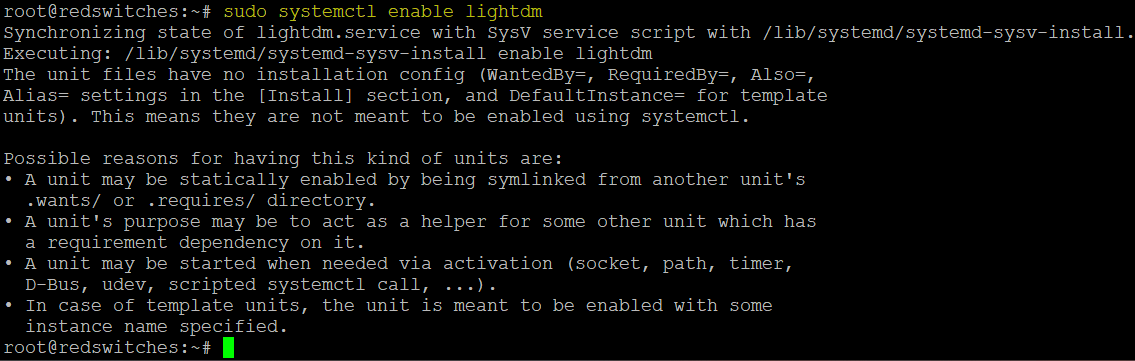
Once installed, enable and start your display manager. Since we are using lightdm, we’ll run the following commands to enable and start it:
#sudo systemctl enable lightdm
#sudo systemctl start lightdm
Step #6: Finalize the Process
At this point, you have installed a desktop environment and a display manager. Now, reboot the server to allow the changes to take effect. Run the following command in the terminal:
# sudo reboot
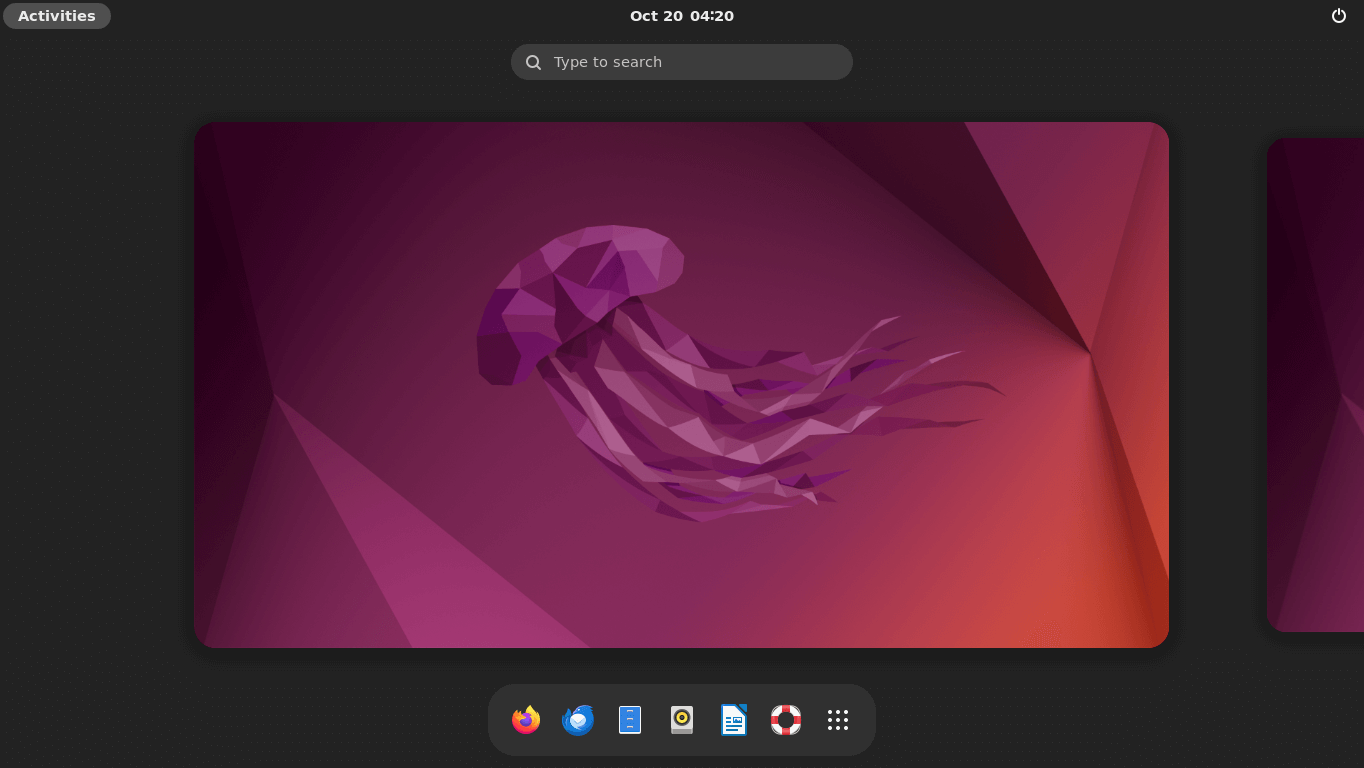
Once the system comes back up, you can see the new display manager and the desktop environment.
Test the GUI Environment
We’ll now test the GUI environment by connecting to the Ubuntu Server with a Windows machine.
Find the Remote Desktop Connection tool by running a search in the Start Menu. Launch the tool, enter the IP address of your Ubuntu Server, and click Enter.
You’ll be prompted to enter your Ubuntu username and password.
If all goes well, you should be greeted with the Ubuntu desktop!
Reversing the Course – Remove the GUI
You might want to remove the desktop environment and the display manager from the Ubuntu Server because you wish to revert to the CLI environment or want to try out a different desktop environment or display manager.
Fortunately, removing the installed GUI from the Ubuntu server is a simple matter of uninstalling the packages from the server. For instance, if you installed GNOME, the default Ubuntu desktop environment, you can remove it with the following command:
# sudo apt purge ubuntu-desktop gnome-desktop-data gnome-session gdm3 && sudo apt autoremove
To uninstall the display managers from your Ubuntu server, use the apt command with the purge option. This option is often used because it removes the packages and their configuration files.
Here are the commands to remove the four display managers we mentioned earlier:
For GNOME or Unity’s GDM3:
#sudo apt purge -y gdm3
For KDE Plasma’s SDDM:
#sudo apt purge -y sddm
For XFCE or LXDE’s LightDM:
#sudo apt purge -y lightdm
For the lightweight SLiM:
#sudo apt purge -y slim
After you have purged these packages, it’s a good idea to run the autoremove command to clean up any unused dependencies:
#sudo apt autoremove -y
Conclusion
A GUI for your Ubuntu Server is not just about aesthetics or ease. It’s about simplifying and optimizing the execution of the traditional CLI tasks.
While a GUI does come with its set of challenges, notably security and resource consumption, with the proper precautions and policies, it can be a game-changer for your server operations.
Boost Your Hosting with RedSwitches
We offer premium dedicated servers and hosting solutions, perfect for businesses looking to scale and maintain robust online operations.
If you’re looking for a robust server for your Ubuntu projects, we offer the best dedicated server pricing and deliver instant dedicated servers, usually on the same day the order gets approved. Whether you need a dedicated server, a traffic-friendly 10Gbps dedicated server, or a powerful bare metal server, we are your trusted hosting partner.
FAQs
Q. What is the default display manager used in Ubuntu?
The default display manager for Ubuntu, especially when using the GNOME desktop environment, is gdm3.
Q. Are there lightweight desktop environments available for Ubuntu server edition?
Yes, you can try several lightweight desktop environments such as LXDE, XFCE, and MATE for your Ubuntu Server.
Q. Which desktop environment is set as default in Ubuntu?
The GNOME desktop environment is the default desktop environment in Ubuntu.
Q. What is the difference between a display server and a display manager?
A display server manages the graphics hardware and provides the rendering process, while the display manager manages user authentication, providing a graphical login screen for users to log in to their desktop environment sessions.
Q. Why do some installation processes require root user permissions?
Some installation processes, especially when using commands like sudo apt-get install, need root user permissions because they make system-level changes that could affect other users and the system’s overall security.
Q. Is an internet connection always required to install popular desktop environments?
While it’s possible to install some environments from local sources, the majority of installation processes, especially when using sudo apt-get update or sudo apt-get install, require an active internet connection to fetch packages from online repositories.
Q. Is it safe to add a graphical interface to a production server?
Adding a graphical interface to a production server can consume more resources and potentially introduce vulnerabilities. However, with proper security precautions, like ensuring user authentication and secure SSH access, it can be managed safely.
Q. What is the tasksel manager, and how is it related to desktop environments?
tasksel is a software tool in Ubuntu that allows users to install multiple related packages as a coordinated “task.” It can simplify the installation process of various desktop environments by grouping necessary packages together.
Q. How can I remotely access my Ubuntu server’s graphical interface?
Once you have an active graphical interface, use remote connection tools that use VNC or RDP to ensure secure user authentication and SSH access.
Q. Can I use apt-get install to set up the MATE desktop or other popular desktop environments on my server?
Yes, you can use sudo apt-get install mate-desktop or the equivalent for other desktop environments to set up these environments on your Ubuntu server.
