How to Install Kubernetes Cluster on Ubuntu 22.04 in 3 Steps
Learn how to configure and install Kubernetes on Ubuntu 22.04 with this step-by-step tutorial for container orchestration. Set Kubernetes Cluster in 3 steps

Kubernetes has become a cornerstone in modern software deployment, offering a robust platform for automating containerized applications’ deployment, scaling, and management.
Installing Kubernetes is a crucial step in setting up this CI/CD pipeline. During the installation phase, you can optimize several settings to ensure Kubernetes is set up properly according to your requirements.
This guide is tailored for beginners and aims to provide a simple, step-by-step walkthrough on installing Kubernetes on Ubuntu 22.04.
Install Kubernetes on Ubuntu 22.04
Before going into the details of the steps involved in the installation process, let’s review the prerequisites:
Prerequisites
Before diving into the installation process, ensure that you have the following:
- Two or more servers running the Ubuntu 22.04 operating system.
- sudo privileges on your user account.
- Stable internet connectivity for downloading necessary packages.
- Command line access.
Step #1: Set Up Docker on Ubuntu 22.04
Kubernetes uses Docker to create, run, and manage containers on each node in the cluster. Kubernetes uses Dockers to set up and manage containers and containerized applications during operations.
Containers are lightweight and portable packages that contain the core codebase and dependencies an application needs to run.
By using Docker, Kubernetes can easily deploy and manage these containers, making it easier to handle applications and their environments across different computers and servers.
As a result, Kubernetes can achieve consistency, efficiency, and scalability in application deployment and management.
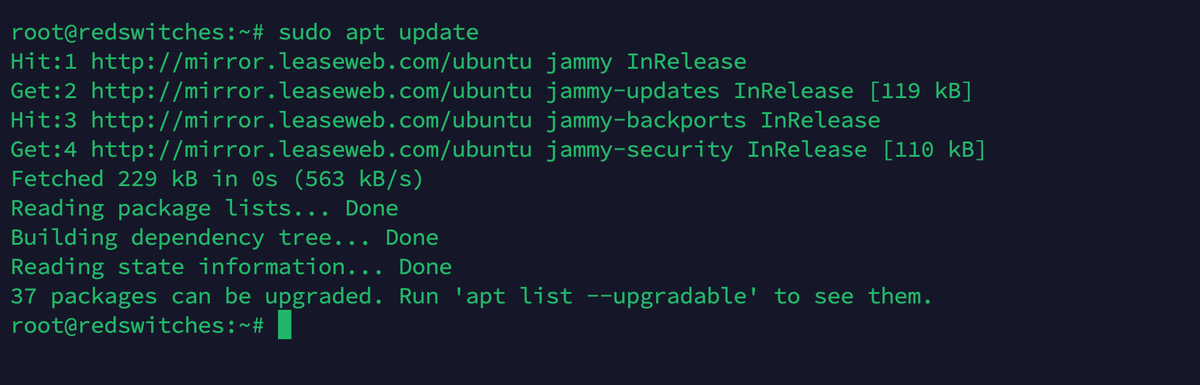
Update Server Package List
Start by updating the package list to ensure you get the latest version of Docker.
# sudo apt update
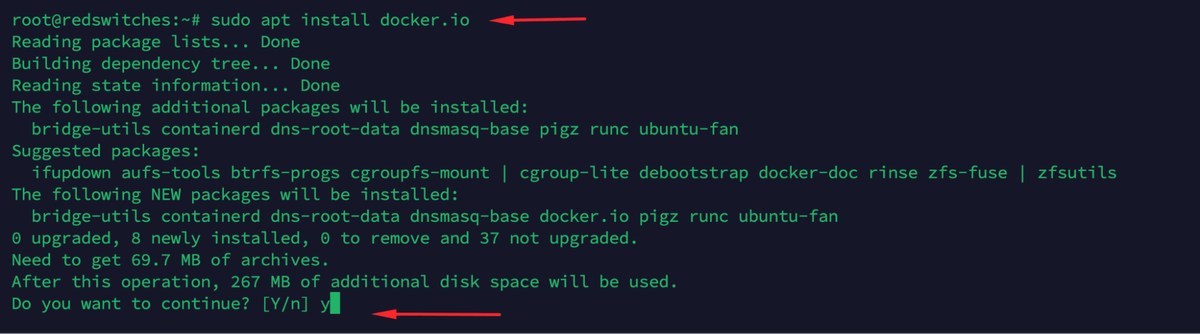
Install Docker
Install Docker using the following command:
# sudo apt install docker.io
Verify the Installation
After the installation finishes, you can verify that Docker is installed correctly by printing the version information.
# docker --version

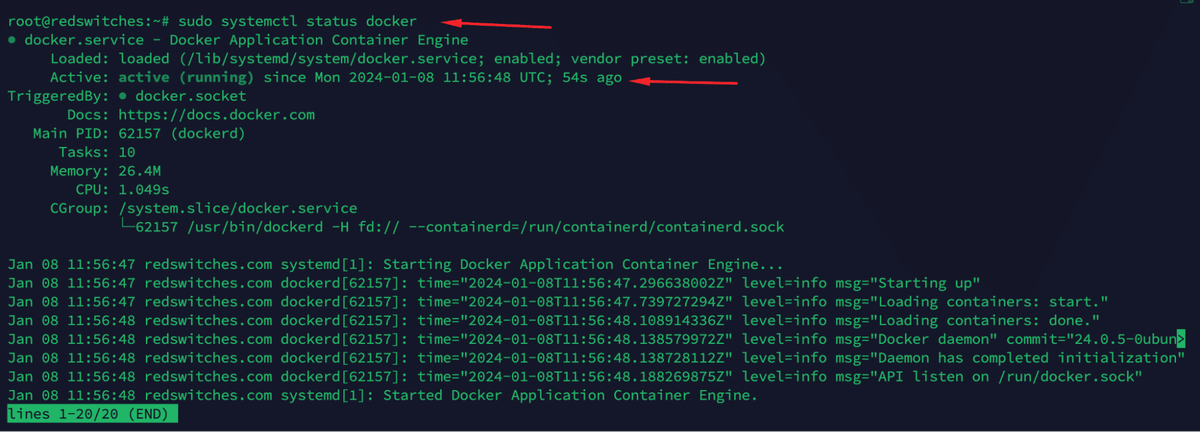
Check Docker Service Status
Next, you should check the status of Docker to see if it’s running properly.
# sudo systemctl status docker
If Docker is up and running, you’ll see a status indicating it’s active.
If it’s not active, you can start Docker with the following command:
# sudo systemctl start docker
Enable Docker on Server Boot
Since Kubernetes works closely with Docker, you should make sure that it starts whenever you boot or restart the server. For this, run this command:
# sudo systemctl enable docker
Step #2: Install Kubernetes on Ubuntu 22.04
Now that you have Docker on your system, the next step is to install Kubernetes on your system. Note that the following steps will work on all Ubuntu-based systems.
Add the Kubernetes Signing Key
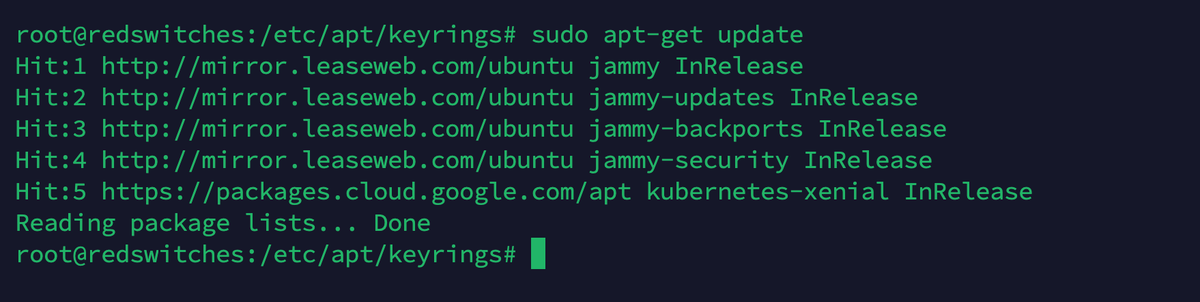
First, update the package list with the following command:
# sudo apt-get update
Kubernetes packages are digitally signed, and you need to add the signing key for security reasons.
For this, run the following commands in the sequence:
# sudo mkdir /etc/apt/keyrings
# curl -fsSL https://packages.cloud.google.com/apt/doc/apt-key.gpg | sudo gpg --dearmor -o /etc/apt/keyrings/kubernetes-archive-keyring.gpg
# echo "deb [signed-by=/etc/apt/keyrings/kubernetes-archive-keyring.gpg] https://apt.kubernetes.io/ kubernetes-xenial main" | sudo tee /etc/apt/sources.list.d/kubernetes.list
# sudo apt-get update
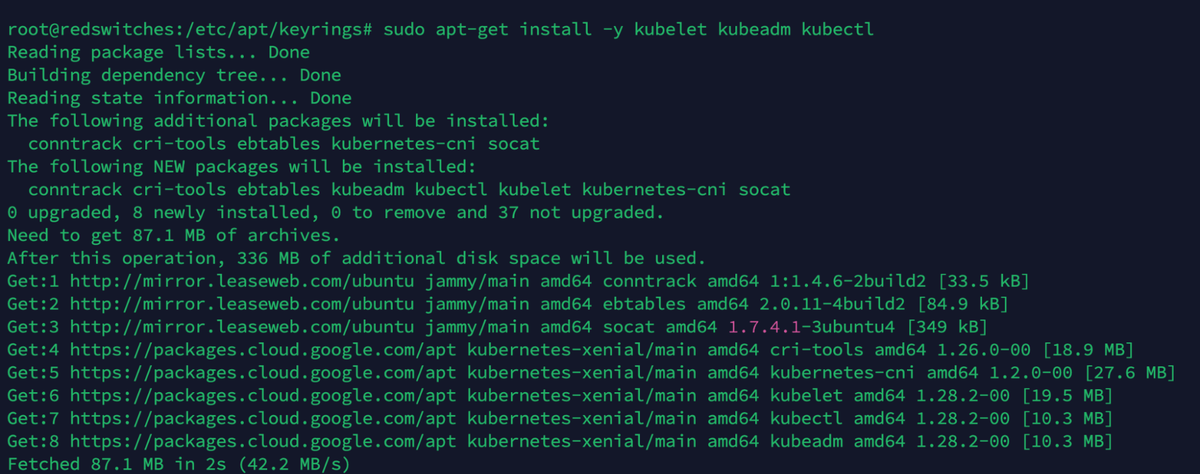
Install Kubernetes Components (kubeadm, kubelet, and kubectl)
Kubernetes cluster operations depend upon three critical components that take care of cluster and node management. Here’s a short overview of these components.
kubeadm: Used for setting up and starting a Kubernetes cluster efficiently. It handles the nitty-gritty details of getting all the components within the cluster up and running (like the Kubernetes Master and node configurations). Think of it as a helper that sets up the playground where your applications will run.
kubelet: This component runs on each node in the Kubernetes cluster. Its job is to make sure that containers are running in a Pod. It takes instructions from the Master and ensures that the containers mentioned in the instructions are running and healthy. You can think of kubelet as the worker who ensures that everything functions as expected on each machine in the cluster.
kubectl: This is a command-line tool that lets you communicate with the Kubernetes cluster. You use it to deploy applications, inspect and manage cluster resources, and view logs. It’s like a remote control for interacting with your cluster, giving you the ability to control everything within your Kubernetes environment.
Run the following command to install these components:
# sudo apt-get install -y kubelet kubeadm kubectl
Once installed, kubeadm is used to bootstrap the cluster, kubelet is the component that runs on all of the machines in your cluster and carries out tasks like starting pods and containers, and kubectl is the command line utility to talk to your cluster.
Mark the Packages to Not be Updated Automatically
Since these components are critical to Kubernetes cluster operations, we recommend stopping automatic updates to these packages as part of the apt-get upgrade.
Run the following command to mark these packages.
# sudo apt-mark hold kubelet kubeadm kubectl

Step #3: Prepare for Kubernetes Deployment
Now that everything is in place, let’s focus on related tasks such as disabling swap spaces, loading container modules, and configuring Kubernetes networking.
Disable All Swap Spaces
Before initializing Kubernetes, it’s important to disable swap on your system. Kubernetes works best when swap is off, as it needs to have control over how memory is allocated to its processes.
We recommend disabling swap with the swapoff command without requiring a system reboot:
# sudo swapoff -a
In addition, you should make sure that swap remains off after rebooting by editing the /etc/fstab file and commenting out or deleting any lines referring to swap.
Load the Required containerd Modules
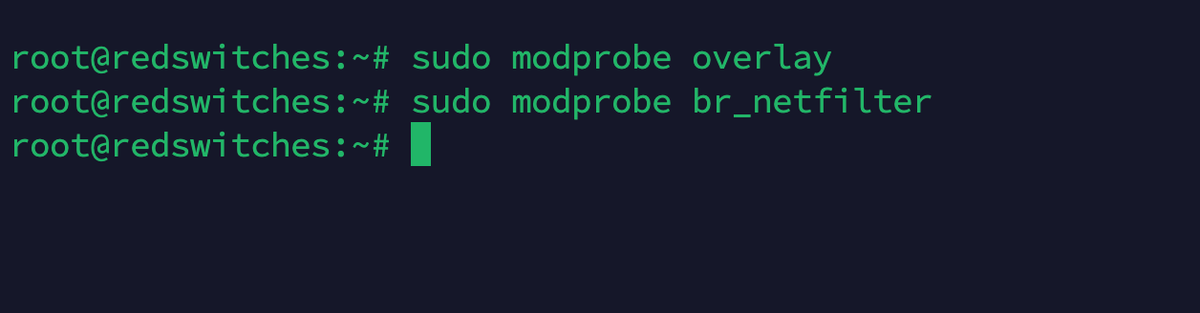
Kubernetes uses containerd as its container runtime by default. To ensure it runs smoothly, it should load the required kernel modules.
Using modprobe to Add Modules
The modprobe command is used to add or remove modules from the Linux kernel. For containerd, you may need to load overlay and br_netfilter modules with these commands:
# sudo modprobe overlay
# sudo modprobe br_netfilter
Configure Kubernetes Networking
Proper network configuration is crucial for Kubernetes as it allows pods to communicate with each other and outside environments without any breaks.
Open the kubernetes.conf File
Kubernetes networking can be configured through the kubernetes.conf file. Usually, this file is located in /etc/sysctl.d/ or a similarly named directory. If it doesn’t exist, you can create it with the following command that uses the Nano editor:
# sudo nano /etc/sysctl.d/kubernetes.conf
Add Networking Parameters
In the file, add the following lines to set networking parameters:
net.bridge.bridge-nf-call-ip6tables = 1
net.bridge.bridge-nf-call-iptables = 1
net.ipv4.ip_forward = 1

These settings ensure that packets are properly processed by iptables, a part of the Linux firewall.
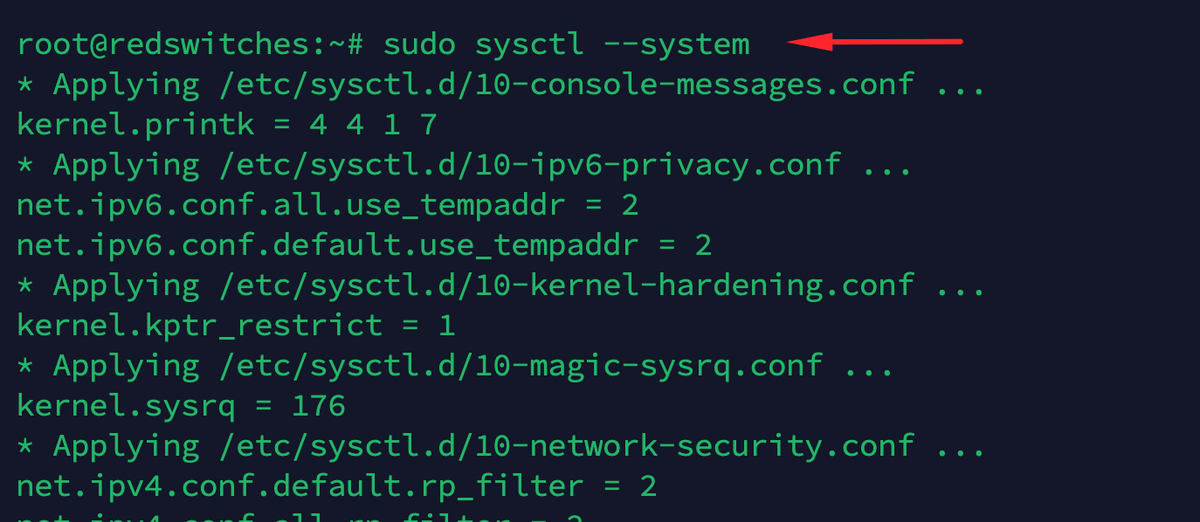
Reload the Configuration
After saving the file, run the following command to apply these settings without restarting the system:
# sudo sysctl --system
This command reloads all system configuration files, including the one you just edited.
Assign Unique Hostnames
Assigning unique hostnames to each server node is a crucial step in setting up a Kubernetes cluster. Unique hostnames help in identifying and managing nodes without any conflicts arising because of routing issues.
Here’s how you can assign a unique hostname to each server node:
1. Log into Your Server Node
Start by logging into the first server you want to set up as part of your Kubernetes cluster. This can be done through SSH or any other remote access method you prefer.
2. Check the Current Hostname
Before changing the hostname, you might want to check the current hostname with the following command:
# hostname
3. Decide on a Naming Convention
It’s important to have a consistent naming convention for the cluster nodes. A popular scheme is to name the master node as master-node and worker nodes as worker-node1, worker-node2, etc.
4. Change the Hostname
Use the hostnamectl command to change the current hostname. For instance, to set the hostname of a master node to master-node, you would use:
# sudo hostnamectl set-hostname master-node
Similarly, use the following command to set the hostname of a worker node to worker-node1:
# sudo hostnamectl set-hostname worker-node1
Repeat these steps for each server node in your Kubernetes cluster, ensuring each has a unique, identifiable hostname.
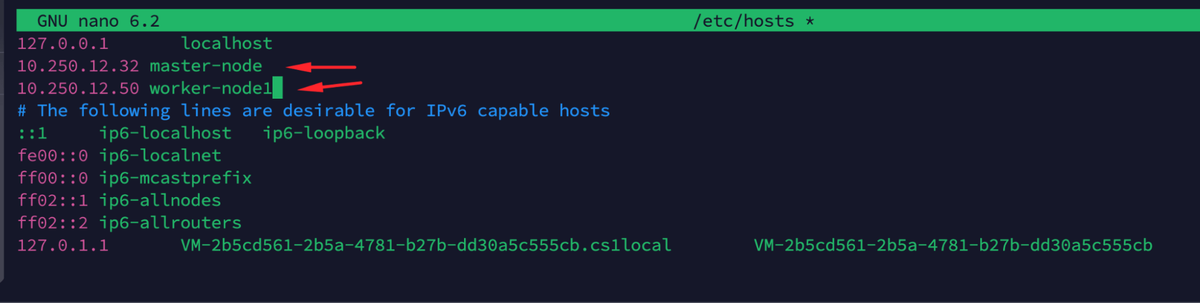
5. Edit the Hosts File
It’s also a good idea to update the /etc/hosts file with the new hostname(s) to ensure that the local resolution of hostnames works correctly.
Open the file in your preferred editor. We are using Nano with the following command:
# sudo nano /etc/hosts
Add a line with the server’s IP address followed by the new hostname.
6. Restart the Server (Optional)
Although it’s not always necessary, sometimes you may need to restart the server for the changes to take full effect. For this, reboot the server with the following command:
# sudo reboot
7. Verify the Changes
Once the server is back up, log in again and run the hostname command to ensure the hostname was successfully changed.
Initialize Kubernetes on the Master Node
Initializing the master node is a critical step in setting up a Kubernetes cluster. It involves the following steps.
1. Edit kubelet Configuration
Open the kubelet file in a text editor to begin configuring your Kubernetes node. If you prefer Nano, use the following command:
# sudo nano /etc/default/kubelet
Add the following line to specify the cgroup driver:
KUBELET_EXTRA_ARGS="--cgroup-driver=cgroupfs"
Save the file and exit the editor.
2. Reload kubelet Configuration
Apply the new settings and restart the kubelet service with the following command:
# sudo systemctl daemon-reload && sudo systemctl restart kubelet
3. Configure Docker Daemon
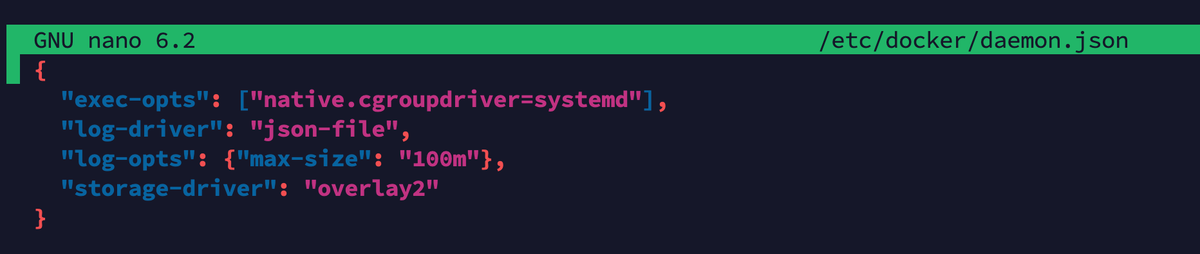
Kubernetes nodes rely on Docker, so you need to adjust its settings as well. For this, open the Docker Daemon’s JSON file in your preferred editor. We will run the following command to open this file in Nano:
# sudo nano /etc/docker/daemon.json
Add the following configuration to align Docker with Kubernetes:
{ "exec-opts": ["native.cgroupdriver=systemd"], "log-driver": "json-file", "log-opts": {"max-size": "100m"}, "storage-driver": "overlay2" }
Save the file and exit.
4. Restart the Docker Service
After editing the Docker configuration, reload and restart the Docker service:
# sudo systemctl daemon-reload && sudo systemctl restart docker
5. Adjust kubeadm Configuration
Edit the kubeadm configuration file for further customization:
# sudo nano /etc/systemd/system/kubelet.service.d/10-kubeadm.conf
Add this line to manage swap settings:
Environment="KUBELET_EXTRA_ARGS=--fail-swap-on=false"
Save and exit.

6. Restart the kubelet Service
Restart the kubelet service to apply the latest changes:
#sudo systemctl daemon-reload && sudo systemctl restart kubelet
7. Initialize the Kubernetes Cluster
Now, initialize your Kubernetes master node with the following command:
# sudo kubeadm init --control-plane-endpoint=master-node --upload-certs
8. Set Up Kubernetes Configuration Directory
If you can’t find it, create a directory for the Kubernetes configuration:
# mkdir -p $HOME/.kube
9. Copy the Kubernetes Configuration
Ensure you have the necessary configuration file in place:
# sudo cp -i /etc/kubernetes/admin.conf $HOME/.kube/config
10. Update Configuration File Ownership
Change the ownership of the configuration file to your user:
# sudo chown $(id -u):$(id -g) $HOME/.kube/config
Deploy Flannel Pod Network
In a Kubernetes cluster, smooth communication between different nodes is crucial for hassle-free operations. This is where a properly configured pod network comes into play.
We’ll now explore how to deploy a pod network using the Flannel network manager. Flannel is a popular and straightforward tool for setting up a Kubernetes network.
Let’s begin with a look at how a pod network works.
What is a Pod Network?
In Kubernetes, a pod is the smallest deployable unit you can create and manage.
A pod network is a virtual network that connects these pods across different nodes in the cluster. This network is essential for allowing pods to communicate with each other, regardless of which node they are on.
Why Use Flannel?
We chose Flannel for its simplicity and ease of use. It creates an overlay network that allows pods to communicate across different nodes. This makes it an ideal choice, especially for those new to Kubernetes.
Install Flannel Using kubectl on the Master Node
To install Flannel, use the following kubectl command:
# kubectl apply -f
https://github.com/flannel-io/flannel/releases/latest/download/kube-flannel.yml
This command fetches and applies the Flannel configuration directly from its GitHub repository.
Untaint the Master Node
By default, the master node is set to not allow pods. To change this and allow pods on the master node, remove the taint with:
# kubectl taint nodes --all node-role.kubernetes.io/control-plane-
This step is optional and is typically used in single-node clusters or for specific configurations.
Join Worker Node to Kubernetes Cluster
Expanding your Kubernetes cluster by adding worker nodes is a straightforward process that contains the following steps:
1. Stop and Disable AppArmor
AppArmor is a security module that might conflict with Kubernetes. As such, we recommend disabling it before continuing forward.
First, stop the service with the following command:
# sudo systemctl stop apparmor
Next, disable the module with the following command:
# sudo systemctl disable apparmor
2. Restart containerd
Now, you need to restart the container runtime, containerd to ensure it uses the changes. Run the following command for this:
# sudo [systemctl](https://www.redswitches.com/blog/restart-nginx-web-server/) daemon-reload && sudo systemctl restart containerd
3. Apply the kubeadm join Command
Use the kubeadm join command from the Master node to connect your worker node to the cluster. You need to run the command on the worker node:
# sudo kubeadm join [details from master node]
4. Check the Status of Node
After joining a worker node, check its status from the master node:
# kubectl get nodes
This command lists all the nodes in your cluster, showing the newly added worker node.
Conclusion
Installing Kubernetes on Ubuntu 22.04 provides a solid foundation for deploying and managing containerized applications. We covered all critical steps of the process and used several third-party utilities to configure critical components, such as Docker.
RedSwitches offers the best dedicated server pricing and delivers instant dedicated servers, usually on the same day the order gets approved. Whether you need a dedicated servers, a traffic-friendly 10Gbps dedicated server, or a powerful bare metal server, we are your trusted hosting partner.
FAQs
Q. What is Kubernetes?
Kubernetes is an open-source container orchestration platform that automates the deployment, scaling, and management of containerized applications.
Q. How do I install Kubernetes on Ubuntu 22.04?
You can install Kubernetes on Ubuntu 22.04 by following this step-by-step tutorial using tools like kubeadm and configuring the cluster using containerd runtime.
Q. What is containerd, and why is it used in Kubernetes installation?
Containerd is a high-level runtime that provides an industry-standard interface for container runtimes. It is used in Kubernetes installation to manage container images, container execution, and networking.
Q. What is the role of worker nodes in a Kubernetes cluster?
Worker nodes are the machines in a Kubernetes cluster where containerized applications are deployed and managed. They work together with the control plane to maintain the desired state of the cluster.
Q. How can I install containerd on Ubuntu 22.04?
You can install containerd on Ubuntu 22.04 by using the apt package manager and configuring it as the default container runtime for Kubernetes.
Q. What is the process to install kubectl for managing a Kubernetes cluster?
To install kubectl, the command-line tool for interacting with a Kubernetes cluster, you can use the apt package manager and follow the official Kubernetes package installation guide.
Q. How do I initialize a Kubernetes cluster with kubeadm on Ubuntu 22.04?
You can initialize a Kubernetes cluster with kubeadm on Ubuntu 22.04 by following the step-by-step instructions provided in this guide or use Kubernetes official documentation.
Q. What is the Kubernetes control plane and how is it set up on Ubuntu 22.04?
The Kubernetes control plane is the core component that manages the cluster’s state and coordinates all activities. You can set it up on Ubuntu 22.04 using kubeadm and other related commands.
Q. What are the main configuration steps for installing a Kubernetes cluster on Ubuntu 22.04?
The main configuration steps for installing a Kubernetes cluster on Ubuntu 22.04 include installing and configuring containerd runtime, initializing the cluster with kubeadm, and setting up the control plane and worker nodes.
Q. What is the command to install kubelet on an Ubuntu 22.04 server?
You can install kubelet on an Ubuntu 22.04 server using the appropriate apt command provided in this installation guide.
Ameya Barwe
Team Lead & Senior Systems Administrator
Ameya Barwe is a Team Lead and Senior Systems Administrator at RedSwitches, where he has spent over four years running Linux hosting operations and leading the systems team. His background spans project management, technical support, and hands-on Linux and Unix administration, with a focus on keeping infrastructure fast, stable, and secure across AWS and Google Cloud.
Ubuntu vs Linux: Key Differences Explained
Linux is the kernel, while Ubuntu is a complete operating system built on it. This guide breaks down their key differences, use cases, and when to choose each.
Reduce Docker Image Size: Best Practices to Slim Your Images
Docker image size can become a serious issue as you add more code to the image. Learn how to reduce Docker image size and optimize Dockerfiles for production to speed up CI/CD pipelines and improve container efficiency.
Best Linux Distros 2026, Full Guide for Beginners, Developers, Gamers & Servers
Match your hardware, workflow, and skill to the right Linux distro in 2026. Compare 23 top picks, Mint, Ubuntu, Fedora, Arch, Bazzite, covering beginners, developers, gamers, and servers.
Power Your Next Project With Bare Metal
10 min delivery, zero setup fees, and 24/7/365 human engineers across 20+ global locations.