Whether you use apt or dpkg as your preferred package manager, the underlying process of installing and maintaining packages in an Ubuntu environment remains similar.
The process involves locking files so that only a single process can access it at a specific time. This mechanism prevents issues originating from multiple processes trying to access and update files.
The /var/lib/dpkg/lock file is essential in Ubuntu because it helps manage the installation, upgrading, and removal of packages on the system. If this file is locked or can’t be accessed, it causes problems with necessary updates and installations, resulting in an error.
The message Could not get lock /var/lib/dpkg/lock is a common error in Ubuntu. This happens when the system processes try to do multiple things simultaneously, and they all need to use the same file, usually the /var/lib/dpkg/lock file.
In this article, we will discuss some fixes you can try to resolve this error. But first, let’s take a quick look at the underlying causes.
Table Of Contents
- What is Could not get lock Ubuntu Error
- How to Fix Could not get lock Error in Ubuntu
- The Prerequisites
- Fix #1: Check Running Applications
- Fix #2: Wait it Out
- Fix #3: Reboot the System
- Fix #4: Clear the Caches
- Fix #5: Check for Software Updates
- Fix #6: Address Automatic Updates
- Fix #7: Examine the Running Processes
- Fix #8: Check for Active Package Managers
- Fix #9: Address the Stuck Services and Files
- Fix #10: Delete the Lock Files
- Conclusion
- FAQs
What is Could not get lock Ubuntu Error
The error Could not get lock /var/lib/dpkg/lock happens when two parts of the system try to use the /var/lib/dpkg/lock file simultaneously.
The problem comes in various types, but the one you often see is this one:

Another way this error might show up in newer versions of Ubuntu is:

What Causes the Error
Let’s look at some reasons that can cause this issue:
- Corrupted package manager files: When important files in the package management system get corrupted, you can’t use or change them. This can occur because of software problems, issues with the file system, or package corruption.
- Simultaneous package manager operations: When different package managers like apt, apt-get, or dpkg try to work at the same time, they can try to access and isolate the same lock file. As a result, this error pops up when users try to install or update multiple packages simultaneously. The package management systems try to use lock files, resulting in the error.
- Background processes using the package manager: Issues occur when a program is already using a package manager in the background while a user tries to run it from the terminal. Background processes can include automatic updates or tasks the system performs without your direct input.
- Incomplete or interrupted operations: This error could occur when an earlier attempt to install or update a package didn’t finish properly. This issue could occur because the power went out, the system was turned off, or someone canceled the process manually.
How to Fix Could not get lock Error in Ubuntu
The error Could not get lock /var/lib/dpkg/lock is connected to how Ubuntu updates itself.
It happens when the system tries to install or update packages using services like dpkg or apt. Ubuntu immediately launches the update service, which searches for and installs updates using the package manager.
The system uses a self-locking method, based on lock files, to ensure that two tasks/processes don’t try to update the system simultaneously. The error happens when the service can’t get the required lock to access important files.
This error indicates a disruption in important tasks such as installing or updating packages. In addition, the error could point to issues caused by outdated software or security issues on your system.
The Prerequisites
Before you try the following fixes, make sure you have the following:
- A system running a stable Ubuntu version (our test system has Ubuntu 22.04)
- A sudo or root privileges user account.
Fix #1: Check Running Applications
Start by checking to see if any other programs are in the process of installing new apps or upgrading the system. In particular, you should make sure that no updates or installs are underway by checking programs like Software Updater or other package managers.
Also, check all open terminal windows to ensure no updates or installations are happening. If there are, wait for them to finish before you continue with your next installation.
Fix #2: Wait it Out
At times, the error goes away on its own after some time. We recommend waiting for about 10 minutes from seeing the error before trying to install the software again.
During this time, any background processes related to managing packages can finish up, releasing the lock and making the next installation process smoother.
Fix#3: Reboot the System
If the error continues, a simple fix is to restart your computer. This clears any remaining lock problems and gives you a fresh start for the next installation try.
Run the following command to reboot the system:
# reboot
![]()
The command doesn’t show any status message but restarts your computer. Once the system is back online, try installing the software again to see if the Could not get lock /var/lib/dpkg/lock error is fixed.
Fix #4: Clear the Caches
At times, this error comes from installations or updates that got interrupted halfway. When you’re installing or updating a package, the system first downloads the needed files and keeps them in a cache before making the changes to the system.
When an installation or update process is cut short, it leaves behind cache files that might be incomplete or corrupted. So, a way to solve the “Could not get lock /var/lib/dpkg/lock” error is to remove those cache files.
Run this command to clear the cache:
# sudo apt clean
![]()
The command gets rid of all the files in the cache directory located at /var/cache/apt/archives/. This step helps avoid issues that might arise from incomplete or corrupted package management tasks, increasing the chances of fixing the error.
Fix #5: Check for Software Updates
When fixing the error, consider the possibility that it might be connected to outdated software. In addition to enhancing the system’s stability, this fix is a great way of updating the current system package index.
We recommend running this command to initiate this fix:
# sudo apt update

After that, upgrade the software to the newest versions using:
# sudo apt upgrade

Fix #6: Address Automatic Updates
Ubuntu’s automatic updates bring in software updates and security fixes.
In rare cases, these automatic updates conflict with manual tasks like managing packages, causing the Could not get lock error. To avoid these clashes, you can tweak the settings for automatic updates.
Here are the steps to change these settings.
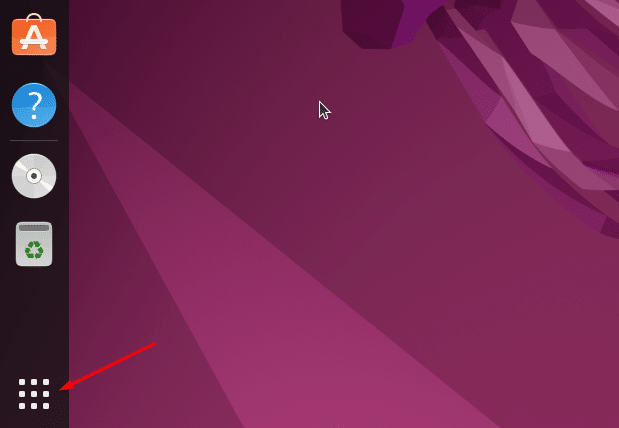
Select the Show Applications option, the icon with nine dots at the bottom-left corner.
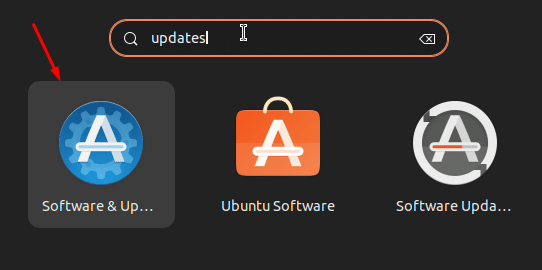
In the Search Bar, type updates.
The system will show the Software & Updates application.
Click the Updates tab.
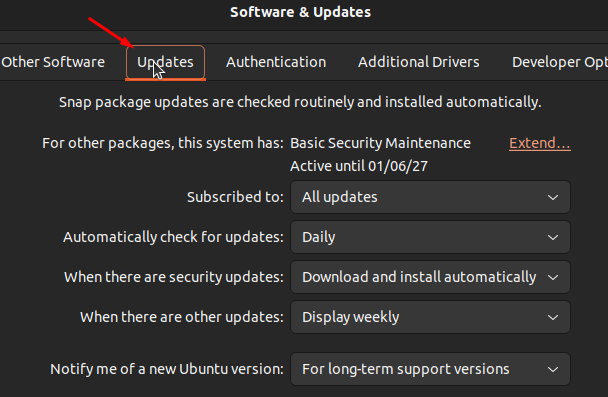
Here, you can optimize the settings for automatic updates.
Start by choosing how often updates should happen and whether security updates should be installed automatically. You can temporarily disable this option to see if this resolves the issue.
However, we recommend keeping the automatic security updates ON to maintain the system’s security. This guarantees that crucial security fixes are applied without requiring manual action. Ideally, you can reduce the download frequency or notify you instead of automatically downloading the updates.
Fix #7: Examine the Running Processes
If there’s an ongoing update or installation, chances are the process is holding onto the lock and causing the Could not get lock /var/lib/dpkg/lock error. That’s why checking the running processes is a simple way of discovering whether the system is experiencing a lock conflict.
Check apt Processes
Run this command in the terminal to show the processes currently connected to apt:
# ps aux | grep -i apt

We used the grep utility to filter out and display any processes that are using apt. The results display various processes connected to the apt command, indicating an ongoing upgrade task. Alternatively, users can also see daily update messages indicating that the system is performing routine updates.
We recommend waiting for these tasks to be completed or stopping any unnecessary processes.
Check dpkg Services
Checking ongoing dpkg processes is important to avoid conflicts between simultaneous operations that lead to the Could not get lock /var/lib/dpkg/lock error because conflicting processes try to use the Debian Package Manager (dpkg) simultaneously.
To investigate the issue, start by running the following command to check active dpkg processes:
# ps aux | grep -i dpkg

The output shows the running dpkg processes.
Fix #8: Check for Active Package Managers
Different file managers can maintain several lock files in addition to the standard /var/lib/dpkg/lock. Some examples include:
- /var/lib/dpkg/lock-frontend
- /var/lib/apt/lists/lock
- /var/cache/apt/archives/lock
In practical terms, these files are meant to stop two instances of apt or dpkg from using the same files simultaneously.
You can view a list of files that are currently in use by apt or dpkg by running the following lsof command:
# sudo lsof [lock_file_name]
For example, see if the /var/lib/dpkg/lock file is currently in use by running the following command in the terminal:
# sudo lsof /var/lib/dpkg/lock
![]()
If the file is not in use, you usually don’t see any status message. On the other hand, if the file is in use by any package manager, the output will display the process ID (PID). This could indicate that a process is stuck and the file is “locked” by the process.
In such a situation, follow the steps outlined in the next method to resolve the issue.
Fix #9: Address the Stuck Services and Files
If you have a stuck apt or dpkg process, you can use its PID to terminate it with the following kill command syntax:
# sudo kill [PID]
To apply this fix, first, get the process ID for the package manager.. For instance, use the following command to find the PID for dpkg:
# ps aux | grep -i dpkg

As you can see, the dpkg-query -l process is active. Look for the PID in the second column and the service name in the last column.
Now, use the PID to terminate the process with the following command:
# sudo kill 9080
![]()
Run the following command one more time to confirm that the process has terminated:
# ps aux | grep -i dpkg
Note that the process is no longer visible in the output. If the service is still running, forcefully stop the process by adding the -9 option to the kill command:
# sudo kill -9 [PID]
![]()
The command doesn’t display anything, but it likely fixes the problem.
Fix #10: Delete the Lock Files
If none of the previous fixes work, delete the lock files as a last resort. To do this, use the rm command. For instance, delete the /var/lib/dpkg/lock file using:
# sudo rm /var/lib/dpkg/lock
![]()
Similarly, you can delete the /var/lib/apt/lists/lock file using a similar command:
# sudo rm /var/lib/apt/lists/lock
![]()
You can also use the rm command to delete the /var/lib/dpkg/lock-frontend lock file.
# sudo rm /var/lib/dpkg/lock-frontend
![]()
Finally, get rid of the /var/cache/apt/archives/lock file using:
# sudo rm /var/cache/apt/archives/lock
![]()
After getting rid of the lock files, we recommend repairing the broken packages. This is essential for completing interrupted installations, sorting out dependencies, and ensuring the package management system is in a consistent and working condition.
Deleting the lock files and repairing the package index are critical steps in minimizing the chances of encountering the Could not get lock /var/lib/dpkg/lock error.
Run the following command by using the following command:
# sudo dpkg --configure -a
![]()
Conclusion
Tackling the Could not get lock /var/lib/dpkg/lock error on Ubuntu is essential for smooth software installations and updates. We explored various straightforward methods like checking for ongoing processes, adjusting update settings, and deleting lock files. Remember, patience is key, and waiting for ongoing operations to complete can sometimes resolve the issue.
For a reliable hosting solution, consider Redswitches dedicated hosting. With our dedicated servers, you can enjoy enhanced performance and full control over your environment, minimizing the chances of encountering such errors. Don’t let technical glitches slow you down—switch to RedSwitches dedicated hosting for a seamless and efficient experience!
We offer the best dedicated server pricing and deliver instant dedicated servers, usually on the same day the order gets approved. Whether you need a dedicated server, a traffic-friendly 10Gbps dedicated server, or a powerful bare metal server, we are your trusted hosting partner.
FAQs
Q. What does the error “Could not get lock” mean in Ubuntu Linux?
This error message typically occurs when Ubuntu’s apt package management system is unable to acquire the dpkg frontend lock to install or update several packages at the same time, resulting in the system displaying the error “Could not get lock.”
Q. How can I fix the “Could not get lock” error in Ubuntu Linux?
To fix this error, you can try opening a terminal and removing the lock file using the following procedure.
Q. What is the procedure to remove the lock file causing the error on Ubuntu?
You can remove the lock file by running the command “sudo rm /var/lib/dpkg/lock” in the terminal, which will remove the lock and allow you to perform the necessary updates or installations.
Q. Are there other ways to fix Ubuntu’s “Could not get lock” error?
Another method to resolve this error is to wait for a few minutes and retry the update process, as sometimes the lock is released automatically after a short period.
Q. What should I do if the error still occurs after removing the lock file?
If the error persists, you can reboot the system and then try to perform the update or installation again to see if the issue has been resolved.
Q. When does the “Could not get lock” error occur in Ubuntu Linux?
This error occurs when the system’s dpkg or apt process cannot access the same file, typically when attempting to install or update several packages simultaneously.
Q. I received the “Could not get lock” error message while using the dpkg command. How can I fix it?
If you encounter this error while using the dpkg command, you can try removing the lock files and then retrying the command to see if the issue is resolved.
Q. What version of Ubuntu does the “Could not get lock” error commonly affect?
The error can occur on various versions of Ubuntu, including Ubuntu 18.04 and later versions, during the apt package manager process.
Q. Is there a specific way to acquire the dpkg frontend lock in Ubuntu to prevent the “Could not get lock” error?
Unfortunately, there is no specific way to directly acquire the dpkg frontend lock, but by following the correct procedures and ensuring that no other processes are accessing the same file, you can minimize the chances of encountering this error.
Q. What could result in the “Could not get lock” error in Ubuntu Linux?
The error could result from multiple processes attempting to access the same lock file, leading to a conflict and displaying the “Could not get lock” error message.
