Whether you’re managing a website, an application, or a server, ensuring data integrity and privacy is a core consideration. Secure Socket Layer (SSL) certificates are crucial to safeguarding digital assets. These certificates encrypt data transmitted between servers and clients, thwarting malicious interception.
Before acquiring an SSL certificate, you need to generate a Certificate Signing Request (CSR).
A CSR serves as an application for a digital certificate. This cryptographic file, generated on the server where you intend to install your certificate, sets the stage for generating an SSL Certificate.
A typical CSR file packs essential details like the common name, organization, and country. Certificate Authorities (CAs) use this file as the cornerstone for generating the certificate. Moreover, it can also contain the public key that would be included in the SSL certificate, all securely signed with the corresponding private key.
In this short tutorial, we’ll walk you through the process of generating a CSR using OpenSSL, a robust open-source tool widely used for managing SSL/TLS protocols and certificates.
Table Of Contents
- Generate an OpenSSL Certificate Signing Request
- How to Verify Certificate Information from CA
- Conclusion
- FAQs
Generate an OpenSSL Certificate Signing Request
Let’s now dive into the steps in the process of generating an openSSL CSR. But before that, let’s review the prerequisites.
The Prerequisites
Before delving into the CSR generation process, ensure you have the following:
- Access to a server where OpenSSL is installed.
- Root privileges on the server.
We also recommend checking the OpenSSL version (and updating if necessary) to ensure that you have the latest version on your system.
Generating a CSR involves a straightforward process, requiring a series of commands and configuration adjustments on your Linux server.
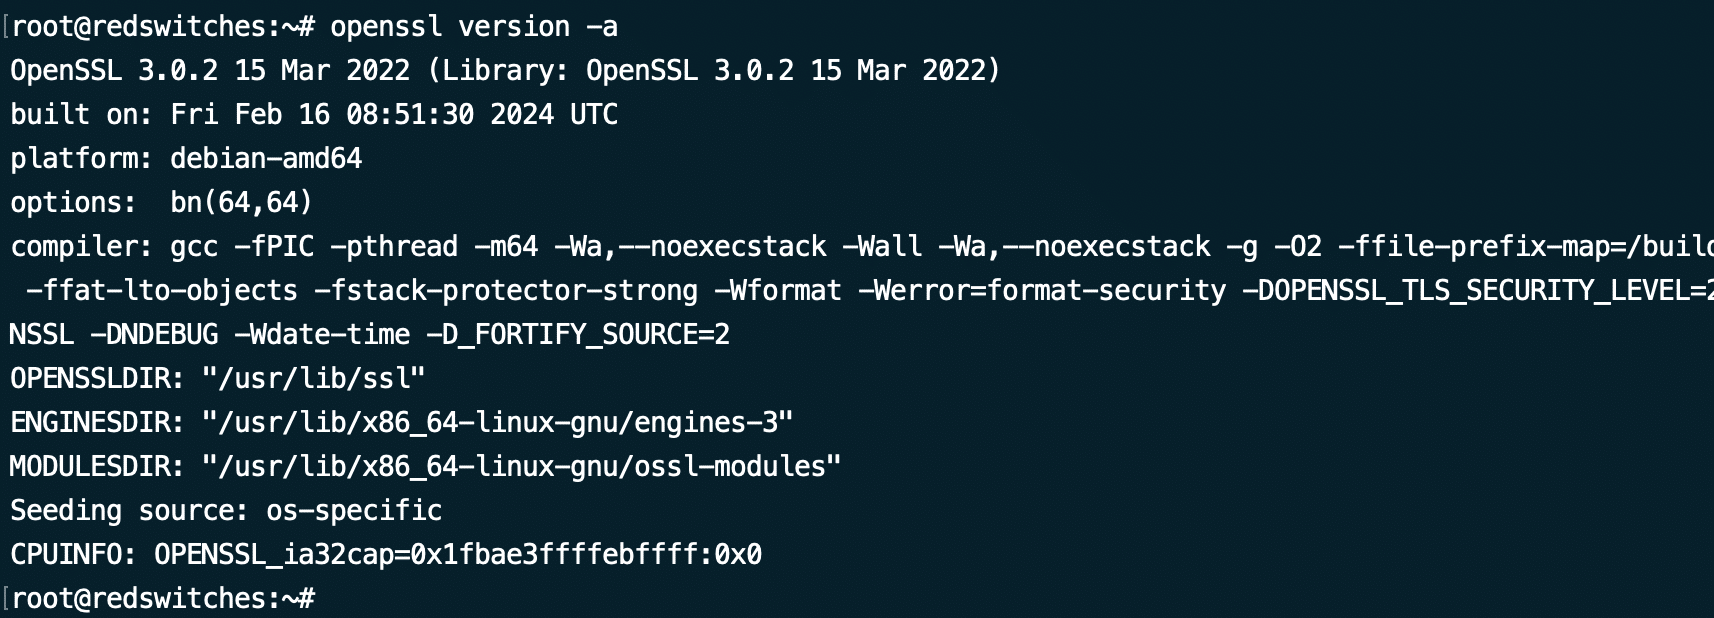
Step #1: Verify OpenSSL Version
Let’s first log in to the server and check the OpenSSL version.
The version of OpenSSL installed on your system determines the cryptographic algorithms available for key generation and the supported protocols. When you are troubleshooting potential issues, we strongly recommend this step to root out specific problems.
You should note that OpenSSL supports Transport Layer Security (TLS) versions 1.0 through 1.3. However, certain cryptographic algorithms have been deprecated due to identified security vulnerabilities.
Run the following command to print out the OpenSSL version and related information:
# openssl version -a
Step #2: Create an RSA Private Key and CSR
We strongly recommend generating a fresh private key every time you create a CSR.
Run the following command to generate a private key and CSR simultaneously:
# openssl req -new -newkey rsa:2048 -nodes -keyout <yourdomain>.key -out <yourdomain>.csr
Remember to replace yourdomain.key and yourdomain.csr with appropriate domain names.
Here’s a breakdown of this long command:
- openssl: Initiates the OpenSSL command.
- req: Signals your intention to generate a CSR.
- -new -newkey: Generates a new key.
- rsa:2048: Creates a 2048-bit RSA private key.
- -nodes: Signifies no DES, indicating the private key should not be encrypted in a PKCS#12 file.
- -keyout: Specifies the domain for which the key is being generated.
- -out: Designates the name for saving the CSR file.
You’ll be prompted to enter information about your organization, including Common Name (CN), Organization (O), Country (C), etc.
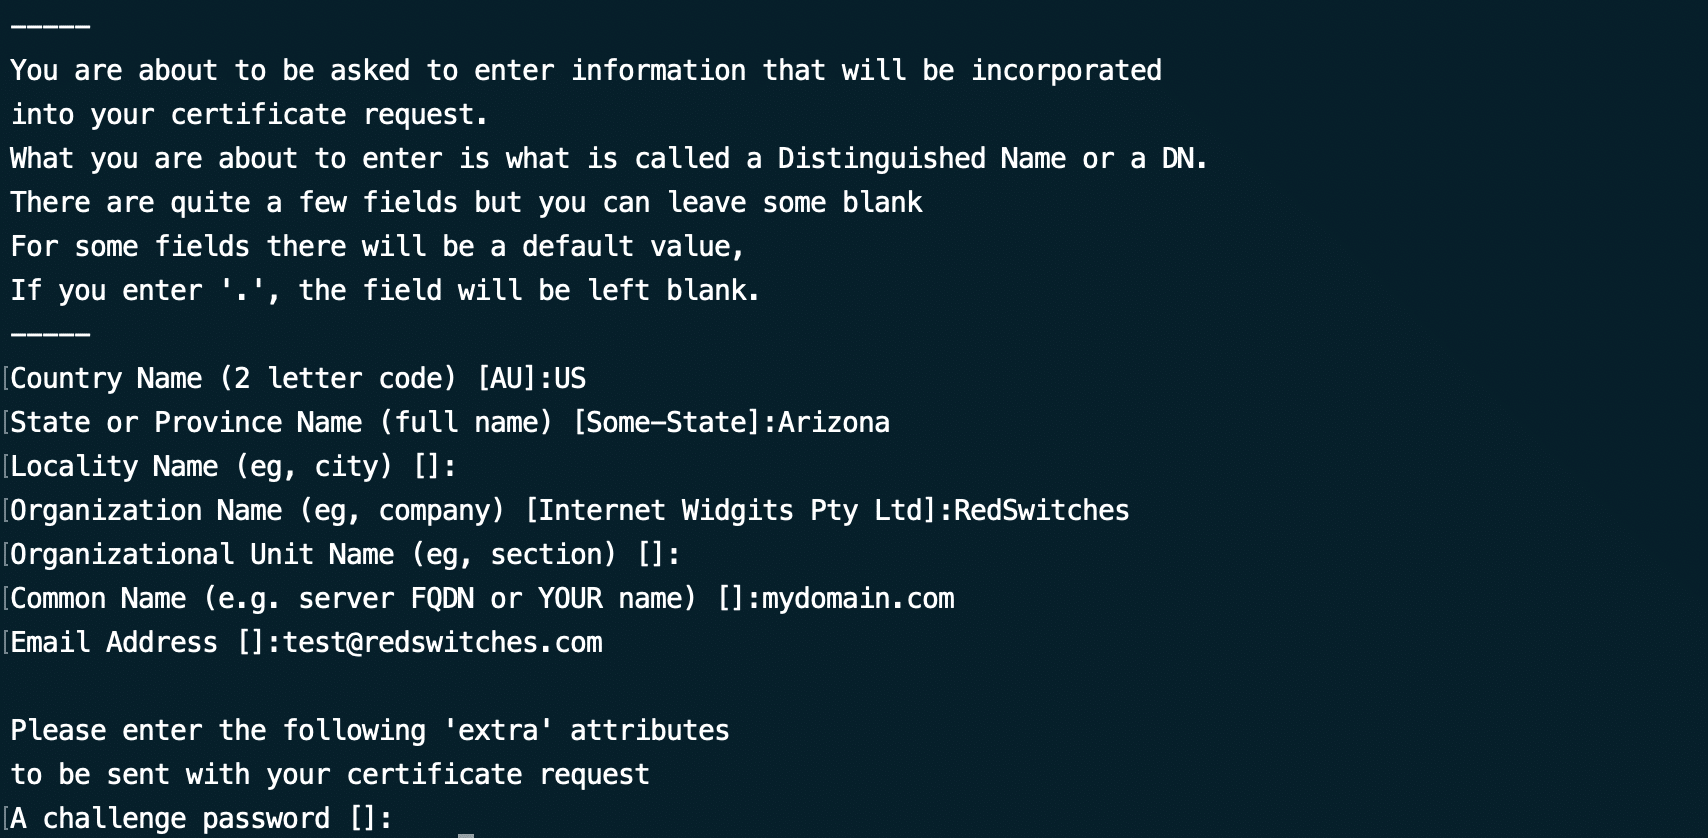
Please carefully provide the prompted information. For instance, the Common Name (CN) should be the fully qualified domain name (FQDN) of the website or server for which you’re placing the SSL certificate request.
Likewise, the Organization Name and Unit Name should exclude the following characters:
< > ~ ! @ # $ % ^ * / \ ( ) ? . , &
Also, when prompted to input a challenge password, you can bypass this step by simply pressing Enter. However, if you do decide to set a challenge password, be aware that you will consistently be prompted to enter it whenever you start the web server.
Step #3: Locate and Verify the Certificate Signing Request
Once you’ve completed the prompts, the CSR file (usually named yourdomain.csr) and the private key file (usually named yourdomain.key) will be generated in the current directory. We strongly recommend securely storing the private key as it’s crucial for SSL certificate installation.
Next, run the following command to locate CSR files on your system:
# ls *.csr

This command searches for all CSR files on the system. The output should display a list of certificate signing requests. The relevant CSR file you need to examine is the one matching the domain name you specified in Step 2, followed by the .csr extension.
After generating the CSR file, it’s crucial to verify its accuracy and ensure it hasn’t been tampered with. As such, you should inspect the contents of the CSR file before submitting it to a Certificate Authority (CA) by running the following command:
# openssl req -text -in [file_name].csr -noout -verify
The -noout flag suppresses the file output, while the -verify flag validates the signature, safeguarding against modifications.
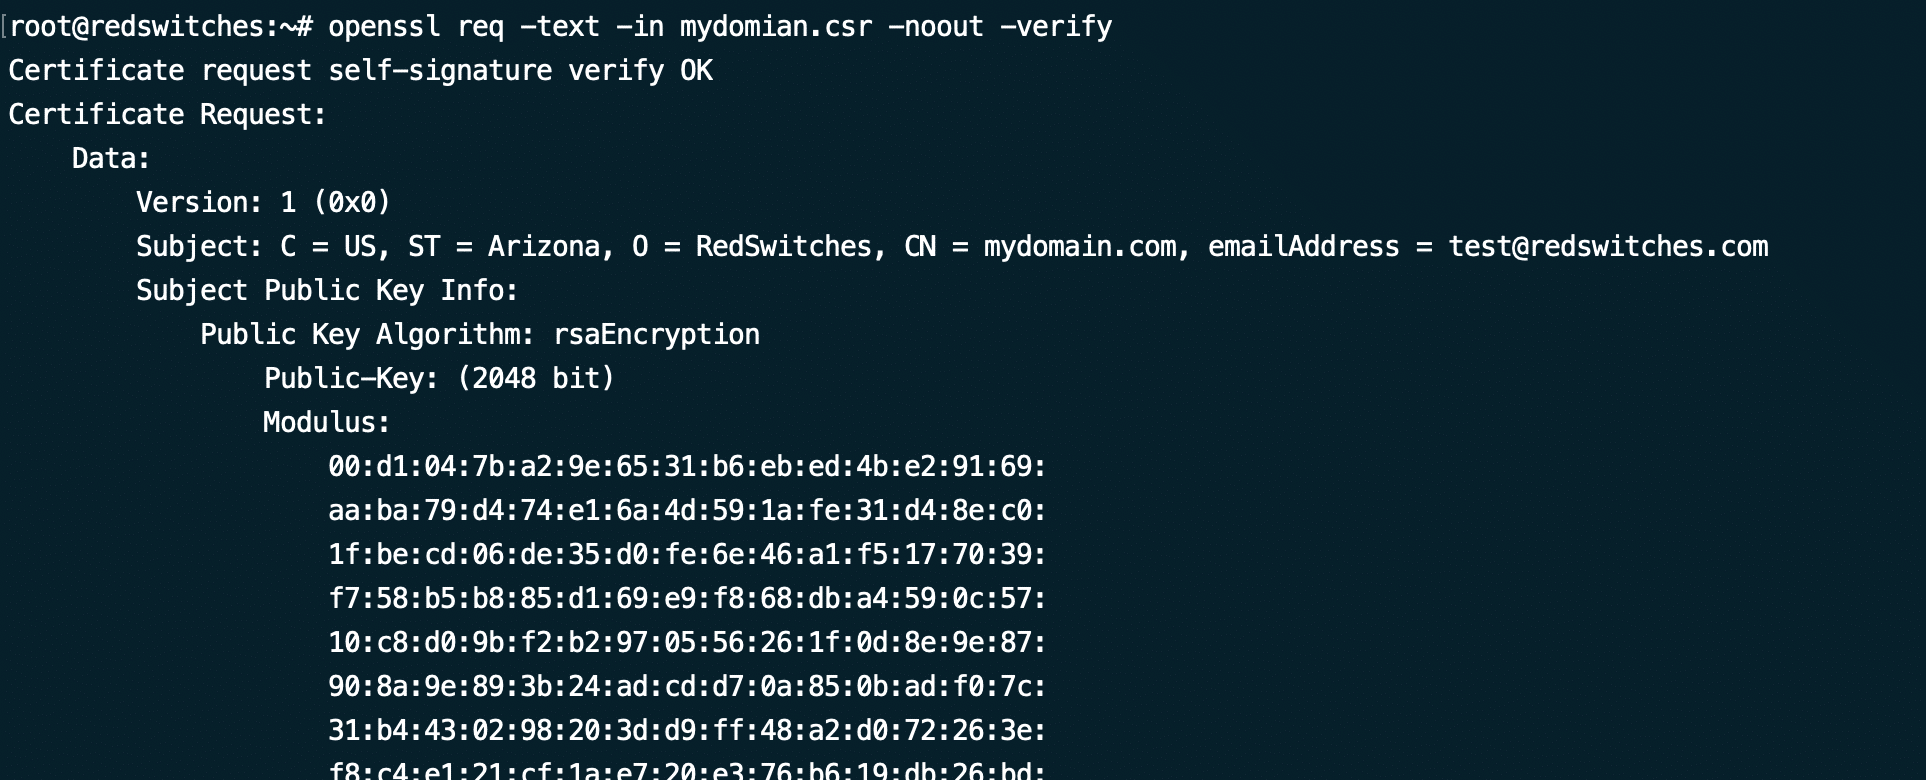
The output confirms whether the file passed verification and displays the information supplied during CSR creation. If any details are incorrect, generate a new CSR file and rectify the errors.
Step #4: Submit the CSR as Part of Your SSL Certificate Generation Request
After generating the CSR, submit it to a Certificate Authority (CA) along with any other necessary documents and payment for certificate issuance. The CA will validate your details and provide the SSL certificate.
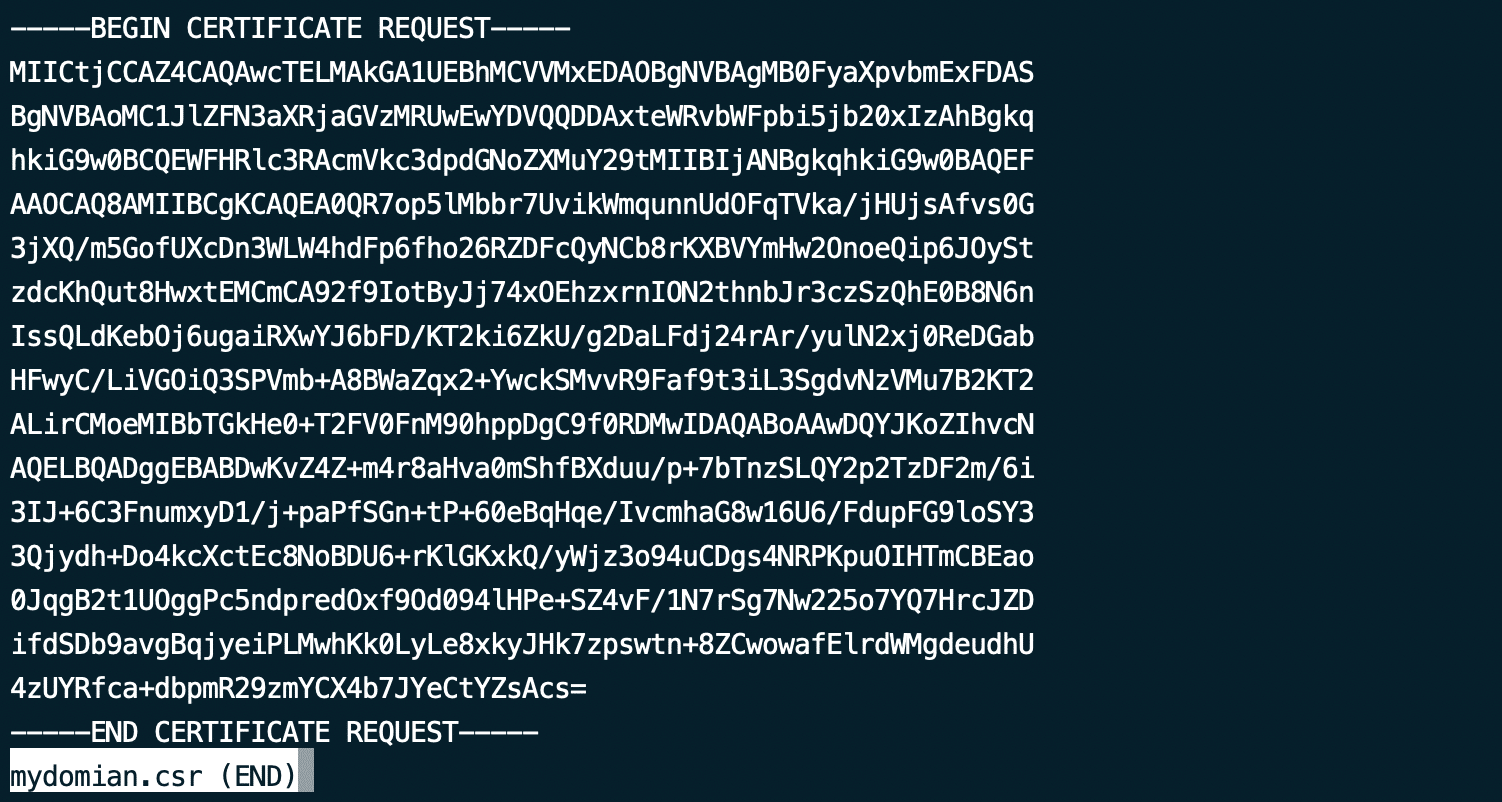
To extract the alphanumeric code from the .csr file, open it using a text editor and copy the content. For instance, you can utilize the following command to open the file in Nano:
# sudo nano [file_name].csr
Copy the entire text and paste it into the submission form to request your SSL certificate from a Certificate Authority. Some CAs might offer the option to upload the generated .csr file directly.
Sending the private key to the Certificate Authority (CA) is unnecessary. Upon receiving your SSL certificate, the private key stored on the server will be paired with it, facilitating encryption for client-server communication.
Also Read: 12 Ways of Fixing ERR_SSL_VERSION_OR_CIPHER_MISMATCH Error
How to Verify Certificate Information from CA
Upon receiving your certificate, we strongly recommend ensuring its information aligns with your private key. To verify this, utilize the following openssl command that displays the contents of your certificate:
# openssl x509 -text -in [file_name].crt -noout
Furthermore, you can check the certificate’s validity, its issuer, and its revocation status (if CRL or OCSP information is accessible) using the following syntax:
# openssl verify [file_name].crt
Conclusion
Generating a CSR with OpenSSL is a fundamental step in securing your digital assets. By following the outlined process, you can create a CSR efficiently and securely. Remember to keep your private key safe and submit the CSR to a trusted CA for SSL certificate issuance.
If you’re looking for a reliable hosting provider to host your server securely, consider RedSwitches. With our bare metal hosting solutions, you can ensure robust performance and unparalleled security for your digital infrastructure.
So, if you’re looking for a robust server for your Linux projects, we offer the best dedicated server pricing and deliver instant dedicated servers, usually on the same day the order gets approved. Whether you need a dedicated server, a traffic-friendly 10Gbps dedicated server, or a powerful bare metal server, we are your trusted hosting partner.
FAQs
Q. Can I use the same CSR for multiple SSL certificates?
No, each SSL certificate requires a unique CSR. Generate a new CSR for each certificate you intend to acquire.
Q. Is there a way to verify if my CSR is correctly formatted?
Yes, you can use OpenSSL to verify the CSR’s contents and structure. Run openssl req -text -noout -verify -in yourdomain.csr to validate your CSR.
Q. Can I generate a CSR without OpenSSL?
While OpenSSL is widely used and highly versatile, there are alternative tools and platforms available for generating CSRs, but OpenSSL remains a popular choice due to its reliability and extensive features.
Q. What is the command to generate a 4096-bit key for the CSR?
The command to generate a 4096-bit key is: openssl req -new -newkey rsa:4096 -nodes -keyout server.key -out server.csr
Q. Can I generate a CSR without entering the two-letter state or province code?
No, the state or province code is a required field when generating a CSR.
Q. Is it possible to skip any optional fields when generating a CSR?
Yes, you can skip optional fields when generating a CSR if you choose to do so.
Q. What is a self-signed SSL certificate, and how can I generate one on Linux?
A self-signed SSL certificate is a certificate that is signed by the same entity that created it. You can generate a self-signed SSL certificate using OpenSSL on Linux.
Q. What tool is commonly used to generate CSRs on a Linux server?
OpenSSL is an open-source utility commonly used to generate CSRs on a Linux server.
