Redis is a freely available, in-memory data structure store. Users can implement it as a database, cache, and message broker.
Thanks to this versatility, Redis is an invaluable component in web projects and applications.
If macOS is your preferred development environment, you can easily install Redis on macOS and experiment with its features and capabilities in a local environment.
In this tutorial, we’ll guide you through installing Redis in your macOS environment. We will discuss two scenarios below where you can opt for different ways of installing Redis.
Table Of Contents
- How to install Redis on macOS
- Setting Up and Configuring Redis on Mac
- How to Uninstall Redis on Mac
- Conclusion
- FAQs
How to install Redis on macOS
We will now demonstrate the two methods you can use to install Redis on Mac.
The Prerequisites
Before you start, ensure you have the following:
- A Mac computer running a stable recent macOS version.
- Familiarity with using the command line.
Let’s look into the two methods in detail.
Option #1: Install Redis on Mac Using Homebrew
Homebrew is a widely used package manager for macOS. It streamlines the software installation and management process.
Before going ahead, you should make sure you have it on your system.
If you don’t have it, you can install Homebrew by executing the following command in your terminal:
| % /bin/bash -c “$(curl -fsSL https://raw.githubusercontent.com/Homebrew/install/HEAD/install.sh)” |
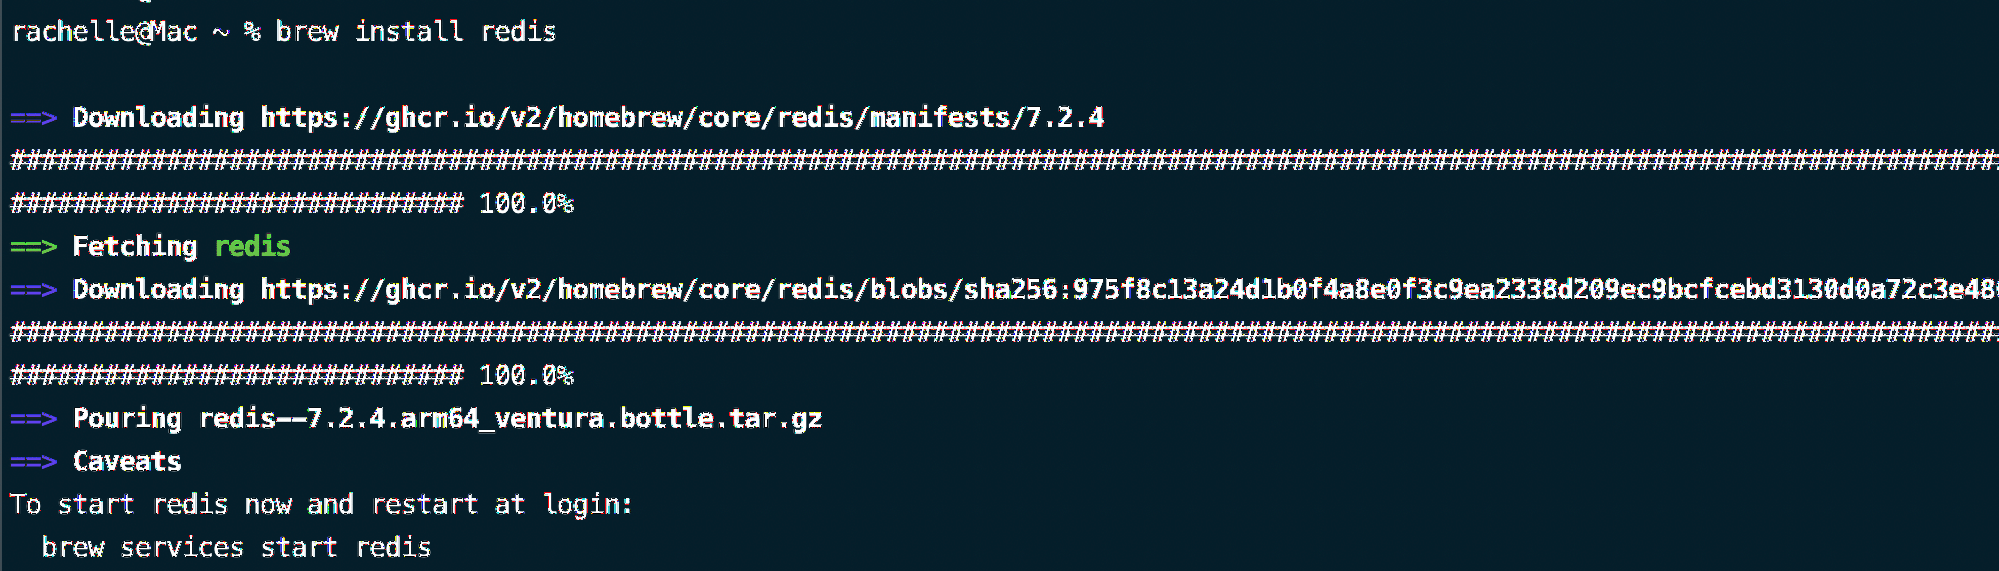
Once Homebrew is installed, run the following command to update Homebrew and install Redis:
% brew update |
You will see something similar to the following in the terminal as the output of these commands:
Option #2: Install Redis on Mac Manually Without Homebrew
If you prefer not to use Homebrew, you can still install Redis manually.
Create a directory for Redis and switch over to this directory with the following command:
% mkdir redis && cd redis |
Now, run the following command to download the latest stable version of Redis from the Redis download page:
| % curl -O http://download.redis.io/redis-stable.tar.gz |

Once the download finishes, extract the file and switch over to the extracted directory:
| % tar xzvf redis-stable.tar.gz % cd redis-stable |
Once in the directory, compile Redis by running the following commands:
% make
|
Once the process finishes, you have successfully installed Redis on mac.
Setting Up and Configuring Redis on Mac
Depending on the installation method, there are two ways to launch Redis on your system.
If you installed Redis using Homebrew, start it with the following brew services command:
% brew services start redis |

If you installed Redis without Homebrew or opted for a manual route, use the command:
% redis-server |
Once the Redis starts, you will see the following welcome screen:

Start the Redis Server
You can start the newly installed Redis server in two ways:
Use launchctl
Start Redis with the following launchctl command:
% launchctl load ~/Library/LaunchAgents/homebrew.mxcl.redis.plist |
Use the Redis Configurations File
You can also start Redis using the configuration file (usually located at /usr/local/etc/). For this, run the following command:
% redis-server /usr/local/etc/redis.conf |
Launch Redis on Server Boot
In most cases, you will want the Redis service to start at the server boot so that you don’t have to start it manually.
Run the following command to launch Redis at server boot:
% ln -sfv /usr/local/opt/redis/*.plist ~/Library/LaunchAgents |
Stop Redis from Launching at Server Boot
Alternatively, if you wish to disable Redis service at server boot, run the following command
% launchctl unload ~/Library/LaunchAgents/homebrew.mxcl.redis.plist |
Test Redis Server
You can test if the Redis server is running by using the following command:
% redis-cli ping |
If the server is running, you will see the response PONG.

How to Uninstall Redis on Mac
If you no longer need Redis on your Mac, you can uninstall it using Homebrew. Run the following command to uninstall Redis from your system:
% brew uninstall redis |
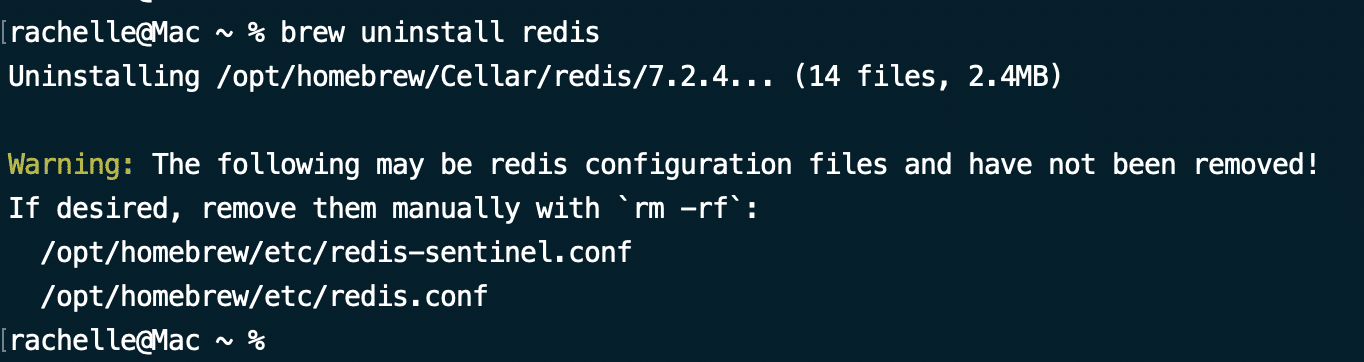
The process may leave residual files that may cause conflicts with other operations. You can remove these Redis files from your hard drive using the following command:
% rm ~/Library/LaunchAgents/homebrew.mxcl.redis.plist |
You can install Redis on most Debian-based distributions by following our tutorial on installing Redis on Ubuntu.
Conclusion
Installing Redis on your Mac is a straightforward process, whether you choose to use Homebrew or install it manually. Once installed, you can start experimenting with Redis and exploring its features. Whether you’re a developer looking to integrate Redis into your applications or simply curious about its capabilities, having Redis installed on your Mac opens up a world of possibilities.
If you’re considering deploying Redis in a production environment, you might want to explore hosting options such as bare metal servers provided by RedSwitches. Their reliable hosting services can ensure optimal performance and scalability for your Redis deployments.
FAQs
Q. How can I install Redis on my Mac?
There are a few methods to install Redis on a Mac. The most common ways include using Homebrew or downloading the Redis source code directly.
Q. Can I install Redis on my Mac without using Homebrew?
Yes, you can install Redis manually without Homebrew. This involves downloading the Redis source code from the official website, compiling it, and installing it on your system.
Q. How can I verify that Redis is installed and running correctly on my Mac?
After installation, you can verify Redis is running by typing redis-server in your terminal window. Additionally, you can check the status of the Redis service using the command brew services list.
Q. Is it possible to configure Redis to start automatically when my Mac boots up?
Yes, if you installed Redis using Homebrew, you can configure it to start automatically on boot by running brew services start redis. Alternatively, you can manually create a launch agent to start Redis on boot.
Q. How do I get Redis to run?
To run Redis, you can start the Redis server by executing the redis-server command in your terminal.
Q. What is Redis used for?
Redis serves as an in-memory data structure store, typically employed as a database, cache, streaming engine, and message broker. Its reputation rests on its exceptional performance, scalability, and adaptability across diverse applications.
Q. How to install Redis in Node.js?
You can install Redis in a Node.js application using the redis package available on npm. Simply run npm install redis in your project directory to install the Redis client for Node.js.
Q. Is Redis still free?
Yes, Redis is still free and open-source under the BSD license. You can use Redis freely in both commercial and non-commercial projects without any licensing fees.
