If you have an Ubuntu server and are looking for an effective solution for managing containerized applications, you should look into Portainer.
Docker is a popular solution for managing containers on Ubuntu servers and Portainer enhances the capabilities of the deployed containers.
This article introduces Portainer and covers the process you can use to install Docker Portainer on Ubuntu 20 servers.
However, let’s first get to know Portainer in more detail.
Table Of Content
- What is Docker Portainer?
- Install Docker Portainer on Ubuntu
- Step # 1: Create the Docker Volume
- Step # 2: Install the Portainer Server
- Step # 3: Access the Portainer Dashboard
- Optional Step: Add More Environments to the Portainer Installation
- Step 4: Deploy Container Using Portainer
- Conclusion
What-is-Docker-Portainer
Portainer is a free and open-source container management platform. It simplifies the deployment and management of Docker environments on desktop, cloud, and edge servers. It provides an intuitive graphical user interface (GUI) to enable users to quickly configure, deploy, and manage their Docker environments without requiring any command line or scripting expertise.
Install Docker Portainer on Ubuntu
You can easily deploy Portainer as a small container on any Ubuntu machine that can run Docker.
The Portainer Server, used to manage environments, networks, and containers, is the primary component of the Portainer system. The component installed on another Docker system to allow communication with the server is called the Portainer Agent.
Prerequisites
The following are the prerequisites of installing Docker Portainer on an Ubuntu machine.
- A server running Ubuntu with the latest version of Docker installed.
- A user with administrator privileges.
The Details of How to Install Docker Portainer on Ubuntu
To install Portainer and test the installation, follow the instructions below.
Step # 1: Create the Docker Volume
Portainer uses a Docker volume to hold data.
So, for starters, create a Docker volume using the following command for the Portainer Server:
# docker volume create portainer_data
If the operation is successful, you’ll see the name of the volume in the terminal.
Step # 2: Install the Portainer Server
When installing the server, you need the latest version to ensure the best performance. You can find the most recent image for the Portainer Community Edition on Docker Hub.
Pull the image and launch a Portainer Server container using the docker run command:
# docker run -d -p 8000:8000 -p 9443:9443 --name portainer \

--restart=always \

-v /var/run/docker.sock:/var/run/docker.sock \

-v portainer_data:/data \

portainer/portainer-ce:2.9.3
Portainer uses the secure port 9443 to expose the user interface. Unless you intend to use edge agents, using port 8000 (used for edge computing), is optional.
Once the container starts, the docker run process retrieves the required images. You can verify that Portainer is active by running the following command:
# docker ps
The command displays a list of active containers. Look for the Portainer container and confirm that its status is Up.
Step # 3: Access the Portainer Dashboard
Portainer is well known for its user interface. You can access the Portainer web UI in a browser.
For this, follow these steps
- Visit the following address in the browser: https://localhost:9443
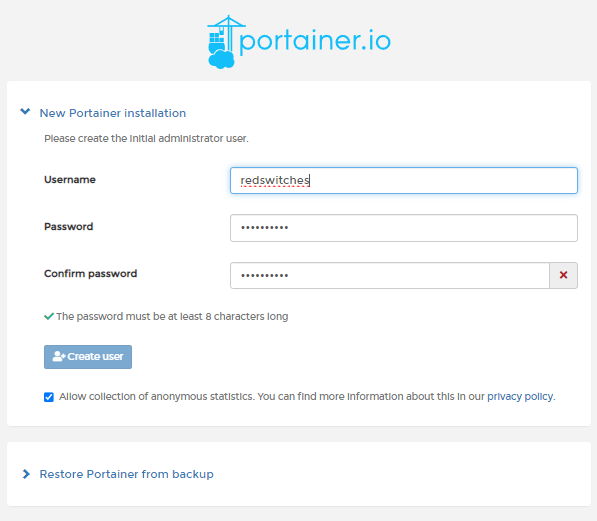
- When you first log into the Portainer dashboard, the system prompts you to enter a password for the admin user. Select the Create user button after entering the password twice.
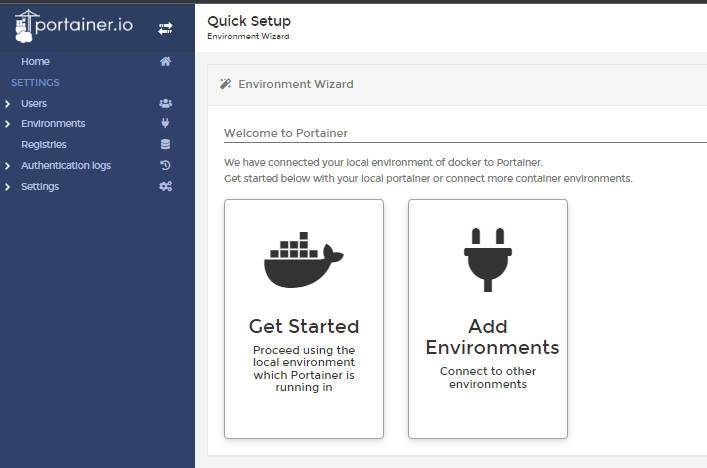
- Now the environment wizard will begin.
- Select the Get Started button to access the dashboard and launch Portainer in a local environment. Click Add Environments to add additional environments when setting up the first one.
Optional Step: Add More Environments to the Portainer Installation
Within the Portainer UI, you can manage various Docker environments. For this, a Portainer Agent instance must be installed in each environment. The agent then communicates with the server on port 9001.
You can easily add additional environments to Portainer by following these steps.
- On the system where you want to add the environment, type the following command to launch a Portainer Agent container:
# docker run -d -p 9001:9001 --name portainer_agent --restart=always -v /var/run/docker.sock:/var/run/docker.sock -v /var/lib/docker/volumes:/var/lib/docker/volumes portainer/agent:2.9.3
Wait for Docker to initiate the container and pull the required images.
- You require the IP address of the system hosting the environment to register the new environment in Portainer. Use the command `ip a` to get the IP if you are unsure of it.
# ip a
The command lists the network interfaces on your system. Make a note of the main interface’s IP address.
Now let’s move to Portainer server UI.
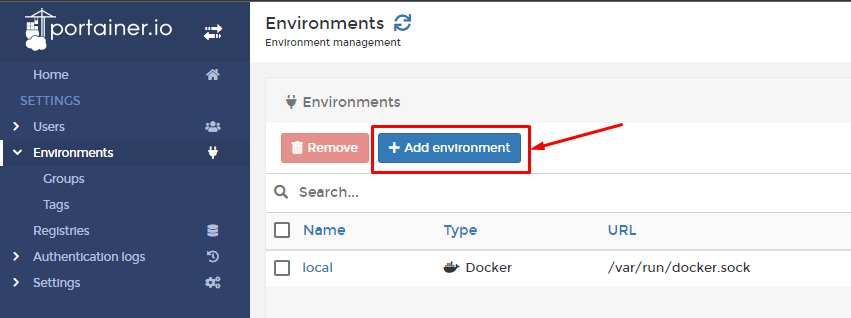
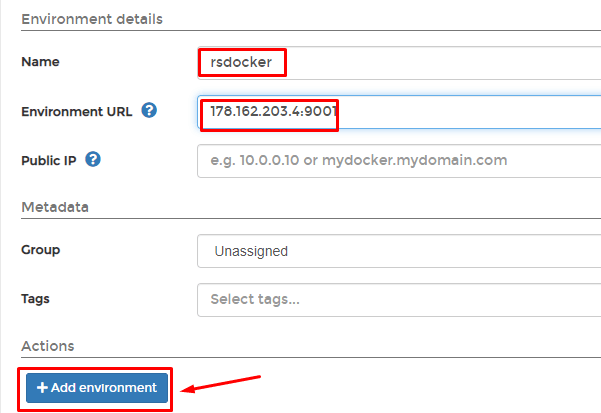
- Click on the “Select Environments” option in the left menu, then click “Add environment.”
Create Environment page collects all necessary information about the environment.
- In the Name field, enter the name of the environment.
- Portainer Agent needs the URL of the system it will be running on in the Environment URL field.
[ip-address]:9001
- When the setup is complete, click the Add environment button under Actions.
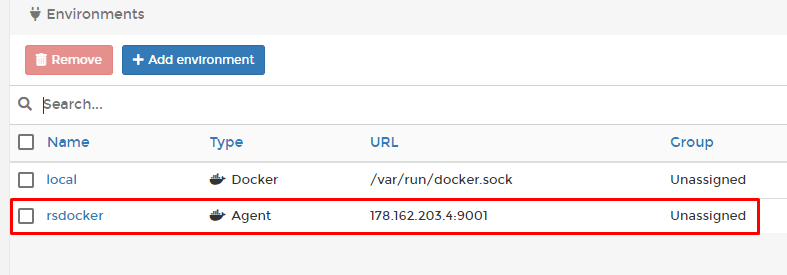
Now the new environment will be visible on the Environments page.
Step 4: Deploy Container Using Portainer
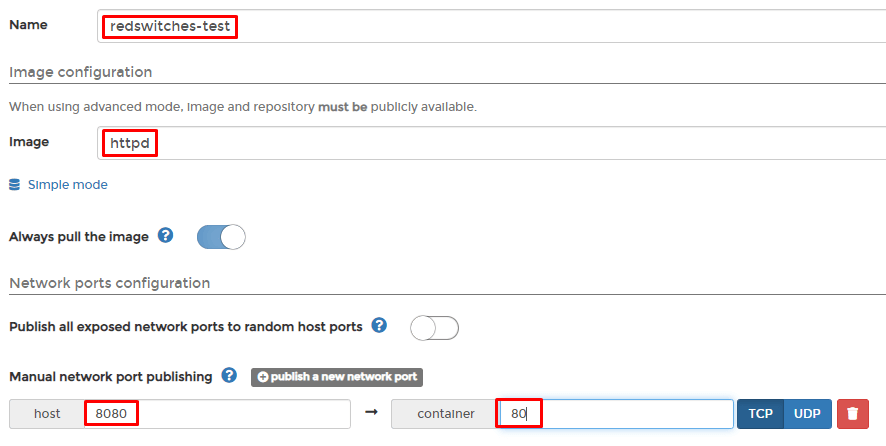
You can test your Portainer configuration by launching a practice Docker container. Installing an Apache HTTP Server instance requires the steps listed below.
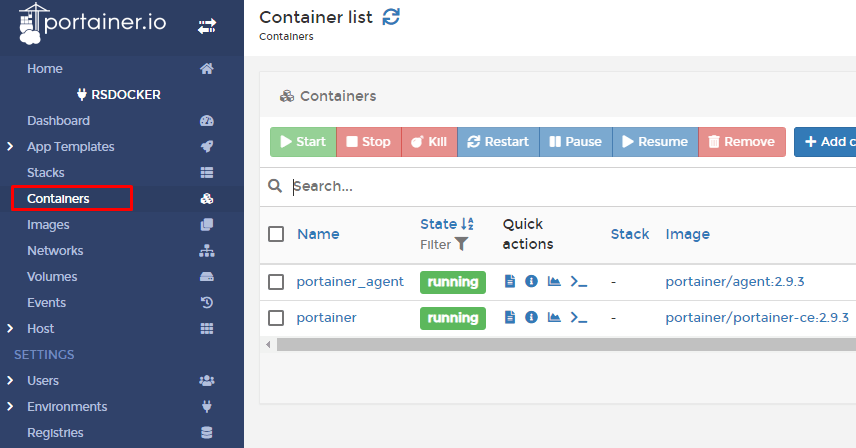
- Open the Containers page by selecting Containers from the menu on the left.
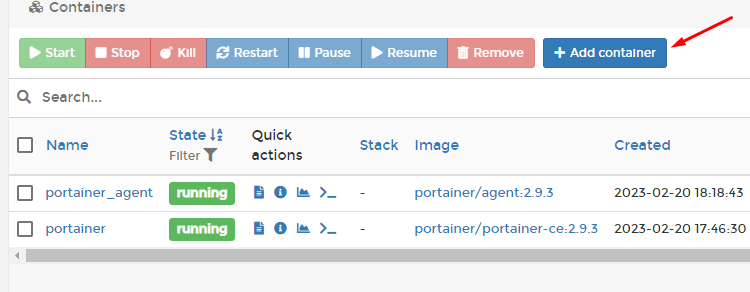
- Go to the action bar and select the Add container button.
- The container’s name, the image’s name, and the connection ports should all be specified for the container you wish to run.
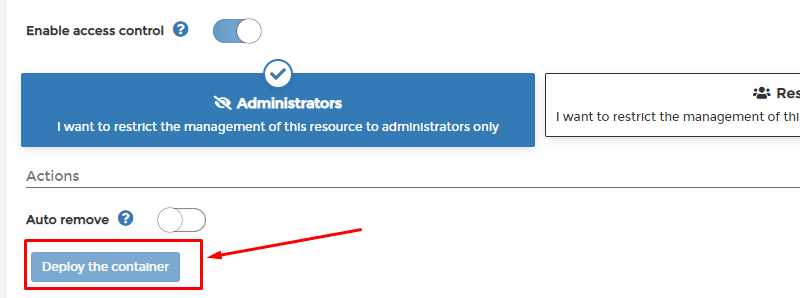
- Click the Deploy the container button at the bottom of the page after you have done configuring the container.
Hold off until Portainer deploys the container. The state of the container will be running once it is prepared.
- You can access your Apache server by opening a new browser tab and typing in the IP address of your environment, followed by the port number assigned to the container. Once you do this, you should see a confirmation message from the server.
Conclusion
This short tutorial introduces Docker Portainer on Ubuntu 20 and goes into the details of how to install Portainer to manage Docker containers on Ubuntu.
We also discussed how you can add additional environments to the Docker system. We hope that you can easily set up Docker Portainer on your Ubuntu machine.
FAQ
Q. Do I need to install Docker before Portainer?
The most recent version of Docker must be installed and operational before you can begin. Your Portainer Server instance’s host computer should have sudo access enabled. The UI and a TCP tunnel server are exposed by default on Portainer Server over ports 9443 and 8000, respectively.
Q. What is the use of Docker Portainer?
Portainer can monitor your Docker setup, interact with containerized apps, and quickly deploy new stacks. Your container management can be centralized around a single application using a Portainer instance to connect to multiple Docker hosts.
Q. Is Portainer useful?
Portainer is a helpful software for managing your Docker containerized applications.
Q. How do I access Portainer?
Visit http://localhost:9000 in your web browser, which is the Portainer’s default URL, to access the dashboard. To proceed, you must enter a strong password and the default username, admin.
