
Anaconda is a popular Python distribution used in data science and scientific computing. It is specifically designed to provide a comprehensive set of scientific libraries and dependencies for the Python programming language.
Widely utilized in machine learning and artificial intelligence applications, Anaconda simplifies the installation and management of complex software environments, making it an essential tool for data scientists and researchers.
Since Ubuntu is a preferred Python development platform, you will need to install Anaconda on Ubuntu before you can use it for your projects.
In this step-by-step guide, we will cover the process of installing Anaconda on Ubuntu to allow you to harness its powerful capabilities. Next, we will cover the steps for updating Anaconda and creating virtual environments for your projects.
Table Of Contents
- Install Anaconda on Ubuntu
- How to Update Anaconda on Ubuntu
- Create and Activate Anaconda Environments
- Conclusion
- FAQs
Install Anaconda on Ubuntu
The process of installing Anaconda on Ubuntu has three main steps: downloading the latest version, verifying the integrity of the installer, and executing the bash installation script. Note that our test system has Ubuntu 20.04.
However, before going into the details, let’s look into the prerequisites for the process.
The Prerequisites
- A system running Ubuntu 20.04 or a more recent version
- An account with root or sudo privileges
Step #1: Update the Local Package Index and Get curl
Start by updating the local package index of the Ubuntu machine. For this, launch the terminal and execute the following command:
# sudo apt-get update
Next, we need to make sure that curl is on the system so that we can use it in the next steps. So, if it is not installed on your system, install it by running:
# sudo apt-get install curl
Step #2: Download the Latest Version of Anaconda
For this demonstration, we will install the Anaconda version 2020.02. However, we strongly recommend visiting the Anaconda Developer’s download page to ensure you get the newest release.

Navigate to the download page where Anaconda versions are listed. Make a note of the URL corresponding to your desired version.
Next, switch to the /tmp directory in your command terminal by running the following command:
# cd /tmp
Now, use curl to download the Anaconda installer using the URL you noted earlier. For instance, in our case, the complete curl command will be as follows:
# curl -O https://repo.anaconda.com/archive/Anaconda3-2020.02-Linux-x86_64.sh

Also Read: How to Set or Change User Agent with cURL: A Step-by-Step Guide
Step #3: Verify the Checksum of the Download
We recommend checking the checksums to ensure the authenticity and integrity of downloaded files.
Open your terminal and enter the following command:
# sha256sum Anaconda3-2020.02-Linux-x86_64.sh
Your system will display a series of letters and numbers, known as the checksum or hash. For instance, here’s the output of our test system:
2b9f088b2022edb474915d9f69a803d6449d5fdb4c303041f60ac4aefcc208bb Anaconda3-2020.02-Linux-x86_64.sh
Compare this checksum to the one provided in the Anaconda documentation for the corresponding version to ensure the file hasn’t been tampered with.
Step #4: Run the Anaconda Installation Script
After verifying the integrity of the download, you need to run the Anaconda installer (a Bash script).
Run the installation script with the following command:
# bash Anaconda3-2020.02-Linux-x86_64.sh

Follow the prompts of the installer, reviewing and agreeing to the license agreement when prompted. During the process, you can choose the default installation location or specify a different one.

After installation, you’ll be prompted to add Anaconda3 to your PATH in ~/.bashrc. Choose yes to use conda without changing directories.
==> For changes to take effect, close and re-open your current shell. <==
If you'd prefer that conda's base environment not be activated on startup,
set the auto_activate_base parameter to false:
conda config --set auto_activate_base false
Thank you for installing Anaconda3!
Step #5: Install VSCode Editor (Optional)
The installer may prompt you to install Microsoft Visual Studio Code Editor. Decide whether to proceed with the installation by typing yes or no accordingly.
Step #6: Activate and Test Installation
Activate the Anaconda installation by entering the following command:
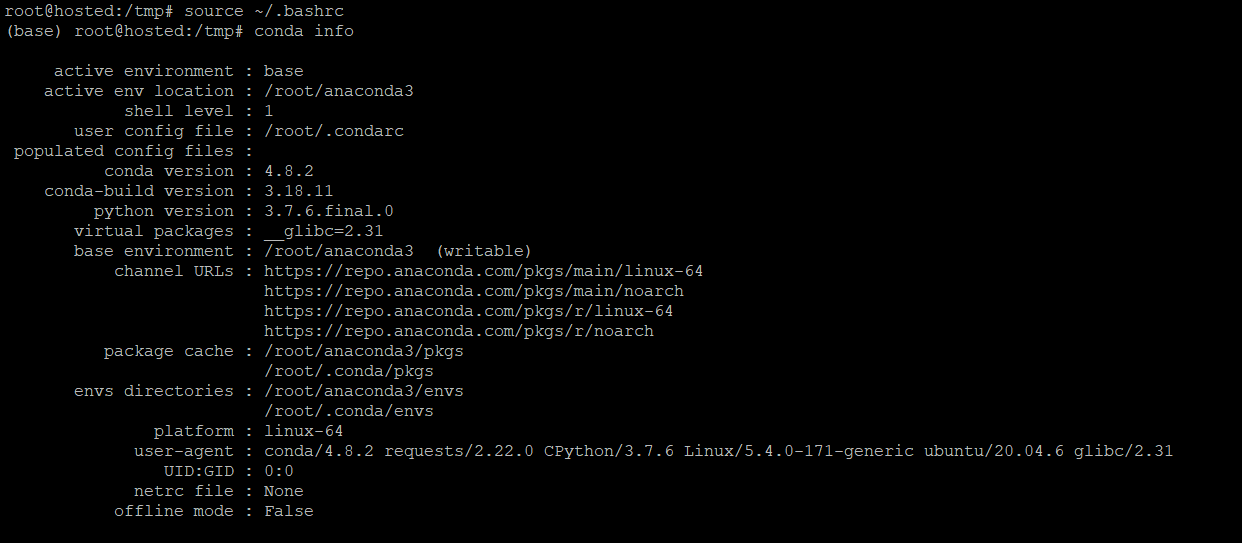
# source ~/.bashrc
To test the installation, use the conda info command:
# conda info
This command should display information about your Anaconda installation, confirming that it was successful.
How to Update Anaconda on Ubuntu
We recommend updating Anaconda on Ubuntu systems as soon as the developers release a stable version.
Before updating the Anaconda package, we recommend updating the conda package manager by running the following command:
# conda update conda
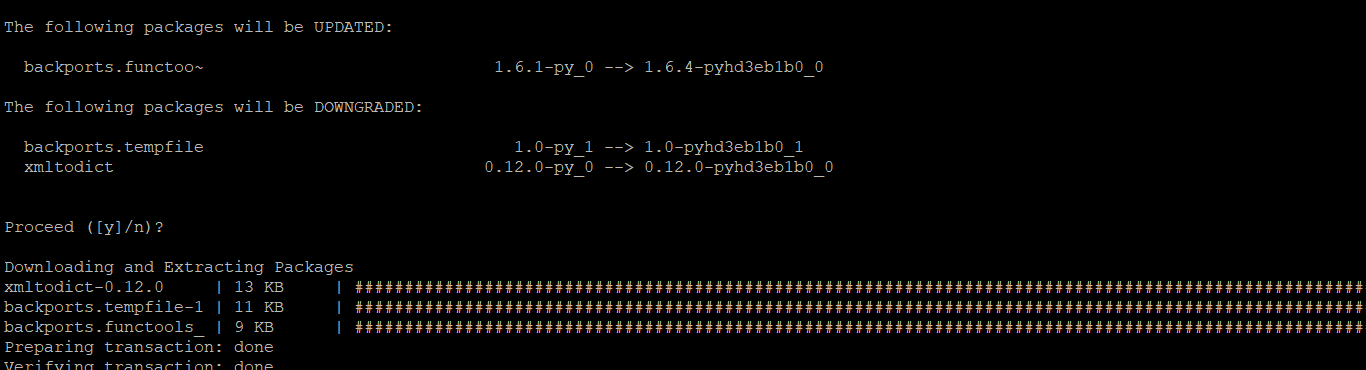
Then, update the Anaconda package with:
# conda update anaconda
Create and Activate Anaconda Environments
Let’s see how we can create a new Python 3 virtual environment for our project. This environment is built using the base Anaconda installation and brings all essential packages and libraries in an isolated setting.
We will demonstrate the process by creating an Anaconda virtual environment named test_environment:
# conda create --name test_environment python=3
Next, activate the newly created environment by running the following command:
# conda activate test_environment
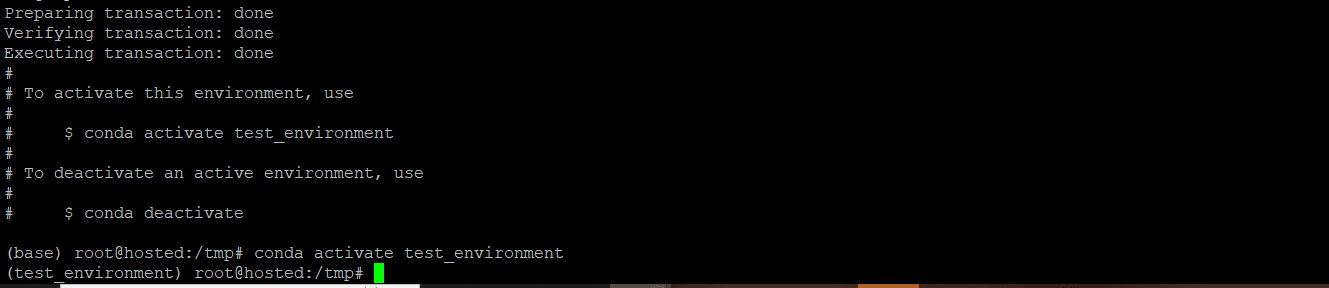
You’ll know the environment is activated when the command prompt changes to include the name of the virtual environment (test_environmnet).
Conclusion
This tutorial covered the step for installing Anaconda on Ubuntu 20.04 or later versions. We began by downloading the latest version of Anaconda from the official website, verifying its integrity using checksums, and running the installation script. Additionally, we discussed optional steps such as installing the Visual Studio Code Editor and updating Anaconda.
Following these instructions, you should have Anaconda successfully installed on your Ubuntu system. Whether you’re a data scientist, researcher, or developer, Anaconda offers a comprehensive suite of tools and libraries to streamline your workflow and accelerate your projects.
Ready to take your data science projects to the next level? Consider leveraging powerful and scalable dedicated servers from RedSwitches, a leading provider of high-performance dedicated hosting solutions.
We offer the best dedicated server pricing and deliver instant dedicated servers, usually on the same day the order gets approved. Whether you need a dedicated server, a traffic-friendly 10Gbps dedicated server, or a powerful bare metal server, we are your trusted hosting partner.
FAQs.
Q. What is the default installation location for Anaconda?
Anaconda typically installs to a default location on your system. However, during the installation process, you have the option to specify a different location if needed.
Q. What are the license terms for Anaconda?
Anaconda is distributed under a user-friendly license agreement, which you’ll be prompted to review and accept during the installation process.
Q. Can I install additional packages with Anaconda?
Yes, Anaconda includes a powerful package management system that allows you to easily install, update, and remove individual packages as needed.
Q. How can I manage different versions of packages with Anaconda?
Anaconda’s environment manager, conda, enables you to create and manage separate environments with different versions of packages to suit your project requirements.
Q. How do I initialize conda in my bash command prompt?
You can initialize conda in your bash command prompt using the conda init command. This ensures that conda commands are available in your shell.
Q. Can I install individual packages with Anaconda?
Yes, you can install individual packages using the conda install command followed by the package name.
Q. What is the significance of package management in Anaconda?
Package management in Anaconda allows you to easily install, update, and manage dependencies for your Python projects, ensuring smooth workflow and reproducibility.
Q. How do I create and manage conda environments?
You can create and manage conda environments using commands such as conda create, conda activate, and conda deactivate. This allows you to isolate dependencies for different projects.
Q. What additional support does RedSwitches offer for Anaconda users?
RedSwitches, a leading provider of powerful and scalable dedicated servers, offers hosting solutions optimized for data science and analytics projects. They provide expert support and infrastructure tailored to the needs of Anaconda users, ensuring smooth operation and optimal performance.
