Downloading files is a routine task for many users and administrators, whether installing a new package or updating the installed applications.
Linux offers wget, a non-interactive network downloader, to simplify getting files from a diverse range of sources. It is a powerful tool that enables users to retrieve files in almost all scenarios.
In this tutorial, we will go into the details of how wget works in a Linux environment. After a brief look at installing the utility, we will see ten use cases where you can use the wget command to get resources from online sources.
Table Of Contents
- Prerequisites
- What is wget?
- Verifying the Presence of wget
- Install the wget Command Line Tool
- wget Basic Command Structure
- wget List of Options
- Examples of Using wget
- Example #1: Download a File from the Internet
- Example #2: Download and Rename a File
- Example #3: Download and Save a File to a Specific Directory
- Example #4: Limit the Download Speed
- Example #5: Resume Interrupted Downloads
- Example #6: Download Multiple Files
- Example #7: Download Web Page
- Example #8: Download in Background
- Example #9: Adjust the Number of Retry Attempts
- Example #10: Bypass Server Certificate Verification
- Example #11: Modify the User Agent
- Conclusion
- FAQs
Prerequisites
- A system running a mainstream Linux distribution
- A user account with root or sudo privileges
What is wget?
Before getting into the details of using the wget command in downloading files, let us understand what it is and what its pros and cons are in your processes.
wget is a powerful command-line utility designed to facilitate efficient file downloads, particularly in situations with unreliable or slow network connections. It can reinitiate interrupted downloads from the point of interruption, eliminating the need to restart the download from the beginning.
Additionally, wget excels in recursive download situations where it can download entire directories, replicating the structure and content of websites at the download location.
You can use the utility in terminal commands and incorporate it into scripts and cron jobs. In fact, you can use it in all situations where you need to download resources without requiring continuous user presence or active login.
Let’s explore some key advantages and potential drawbacks associated with using wget.
Advantages of wget
wget offers a variety of features and advantages, some of which include:
Continuation of Downloads
wget is capable of resuming downloads that have been disrupted, an invaluable option when downloading large files on unreliable network conditions.
Bandwidth Management
It can limit the bandwidth used during downloads, facilitating more efficient use of network resources.
Wide Protocol Support
The utility supports all popular protocols, including HTTP, HTTPS, and FTP. This greatly enhances its importance as a robust tool for downloading from diverse sources.
Ease of Automation
Given its comprehensive command-line interface, wget can seamlessly integrate into scripts or automated processes for managing recurring download tasks.
Potential Downsides of Using wget
If you are considering wget for your operations, we suggest you consider these risks:
Accidental Bulk Downloads
Because of the utility’s recursive download capability, there’s a risk of unintentionally downloading extensive amounts of data or entire websites.
Risk of Overloading Servers
The recursive downloading capability can also lead to excessive server load, potentially violating the terms of service of websites.
Security Vulnerabilities
Utilizing wget to download from untrusted sources or through malicious links can introduce security risks such as malware or phishing attacks.
Incomplete Website Copies
When performing recursive downloads, wget might not fully capture websites that rely heavily on dynamic content or interactive features. In these cases, you will usually get partial local replicas.
Legal Implications
Using wget to download copyrighted or proprietary material without authorization may lead to legal challenges.
Verifying the Presence of wget
It’s quite common to find wget pre-installed on many Linux systems.
However, we recommend confirming if the utility is available and ready for use on your machine. For this, execute the command in its simplest form with no additional options:
# wget
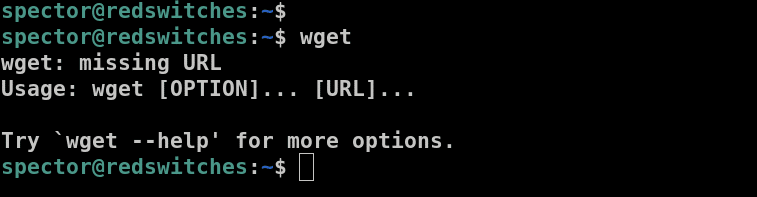
As you can see, wget is available on our test system, and the error indicates that we missed essential command parameters.
Alternatively, if wget is not installed, the terminal will display an error message indicating the command is not found on the system:

We have a comprehensive tutorial on resolving the wget not found error.
Install the wget Command Line Tool
If you discover that wget isn’t installed on your device, you can set it up yourself.
We will now discuss how you can set up and install wget on various operating systems, including Ubuntu/Debian, CentOS, Windows, and macOS.
Install wget on Ubuntu/Debian
Before installing wget on Ubuntu, we strongly recommend updating the package index with the following command:
# sudo apt update

Next, install the tool on Ubuntu with the following command:
# sudo apt install wget

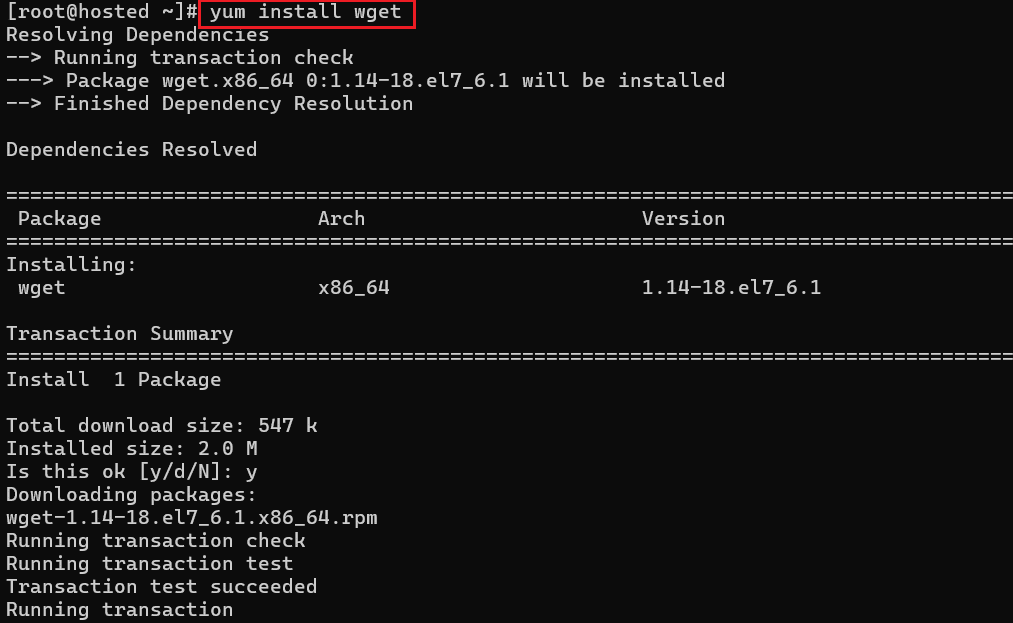
Install wget on CentOS/Fedora
To install wget on CentOS or Fedora, use the following command:
# sudo yum install wget
Set Up wget on Windows
For installing and setting up wget on Windows, follow these steps:
- Download the wget package for Windows.
- Extract the downloaded file
- After installation, move the wget.exe file into the system32 directory.

Execute wget in the Command Prompt.
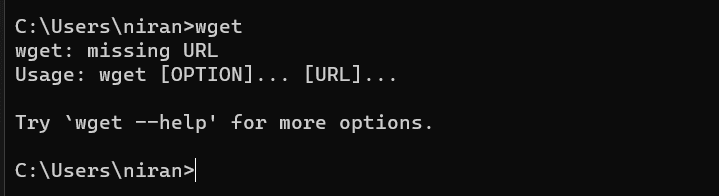
You will see the standard missing URL error that indicates that wget is now available on your system.
Set Up wget on macOS
To get wget working on macOS, you’ll need to start by installing Homebrew (a popular package manager for macOS), as macOS often doesn’t include this tool by default.
Once Homebrew is set up, you can proceed to install wget using the following command:
$ brew install wget
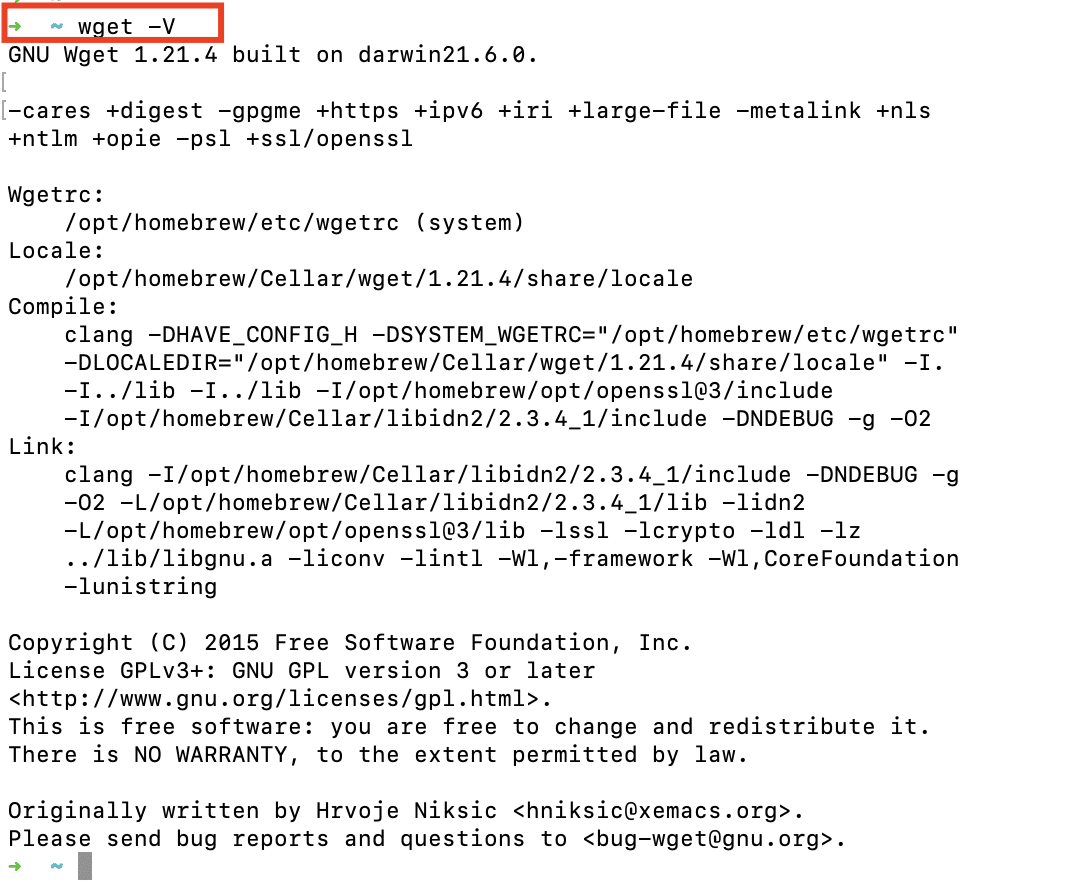
Once the process finishes, we recommend the following command to verify version information:
$ wget -v
wget Basic Command Structure
The default wget command structure is as follows:
# wget [option] [url]
You can execute wget by simply providing a URL without any additional options. This basic usage initiates the download of the resource found at the specified URL, adhering to the default parameters for the downloading activity.
However, adding options to the command allows for customization of the downloading procedure.
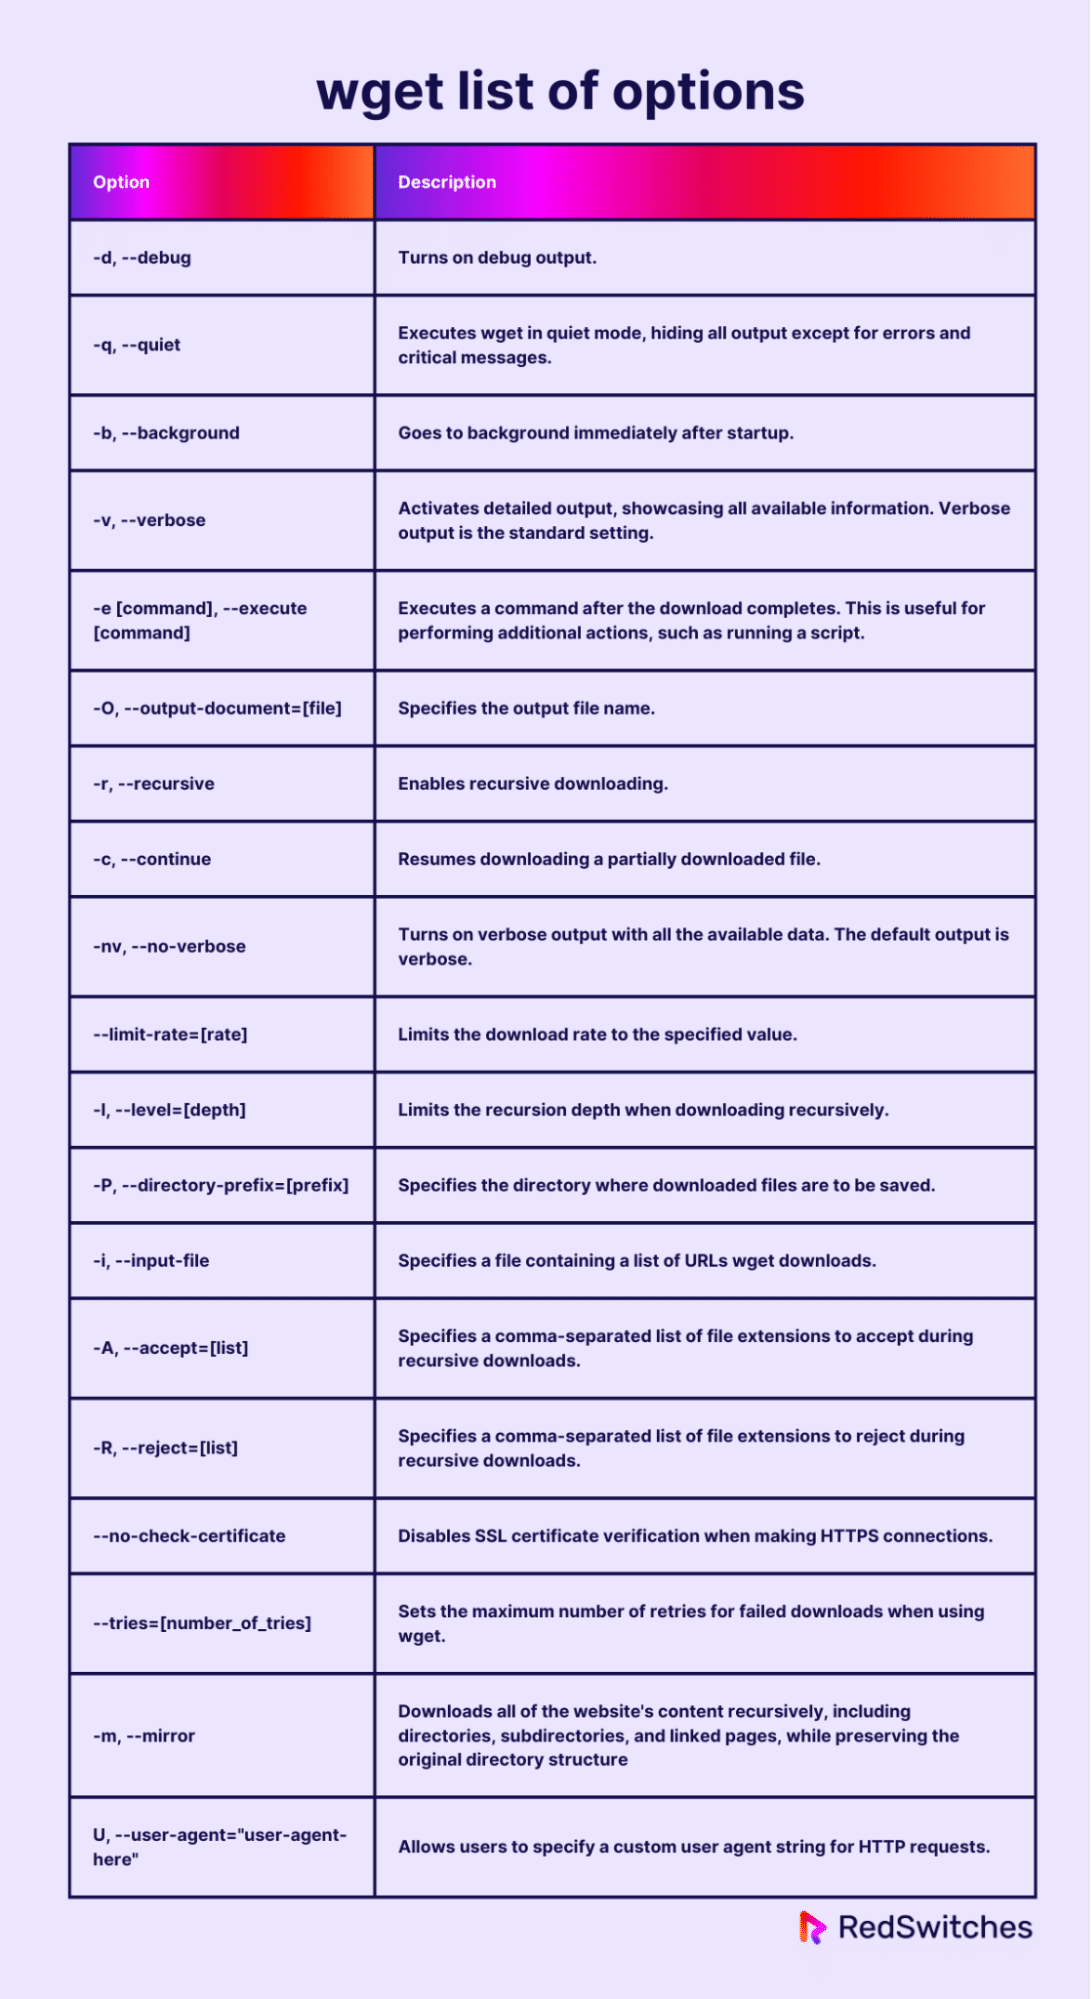
wget List of Options
The options used with wget dictate how content is downloaded from the given URL. The following table presents a list of some of the most frequently used wget parameters.
Examples of Using wget
Thanks to its wide range of options, you can use wget in a number of situations. We will now cover some practical examples of how you can use wget in these scenarios.
Example #1: Download a File from the Internet
Use the following basic syntax to download a file from the given URL:
# wget [URL]
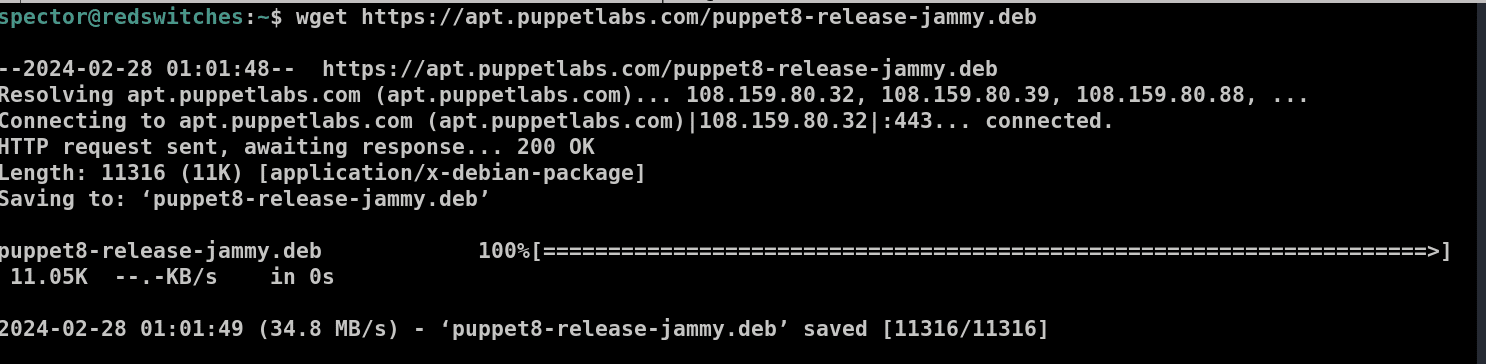
For instance, if you need to download the Puppet server package for Ubuntu, you would use:
# wget https://apt.puppetlabs.com/puppet8-release-jammy.deb
Example #2: Download and Rename a File
You can download a file and assign it a specific name upon saving it to the local disk with the -O option. The command in this situation will be as follows:
# wget -O [desired_file_name] [URL]
The -O option enables you to rename the file as part of the download process. This helps organize your downloads or use more descriptive names.
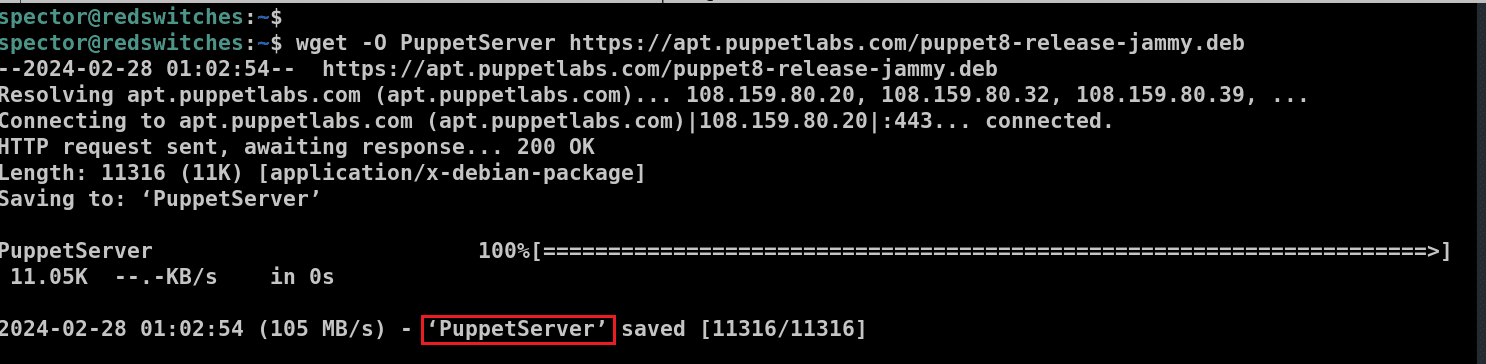
For instance, to download and rename the file as ‘PuppetServer’, the command would be:
# wget -O PuppetServer https://apt.puppetlabs.com/puppet8-release-jammy.deb
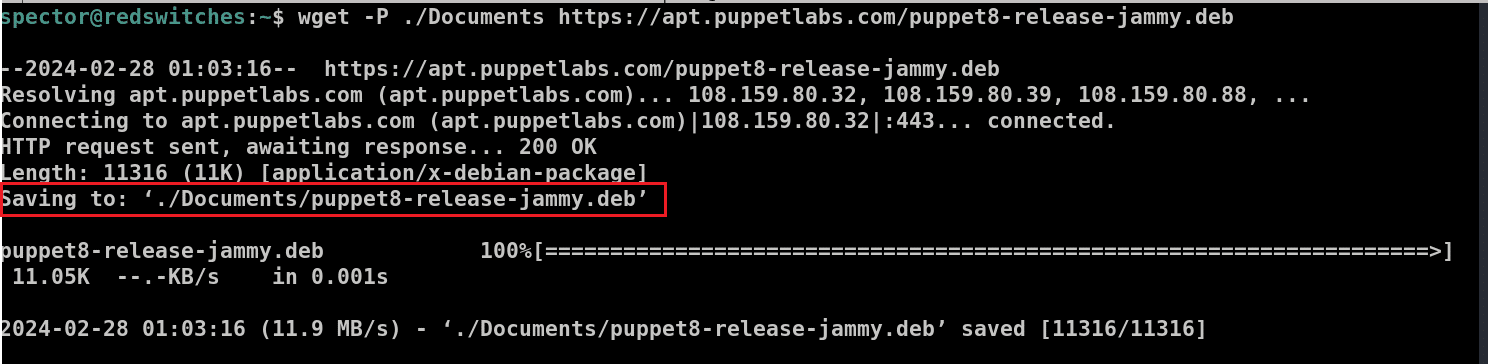
Example #3: Download and Save a File to a Specific Directory
The default behavior of the utility is to save files to the current working directory. You can change this behavior by directing wget to download to an alternative location by using the -P option:
# wget -P [desired_directory] [URL]
For instance, to save the Puppet server package into the Documents folder, you could execute the command:
# wget -P ./Documents https://apt.puppetlabs.com/puppet8-release-jammy.deb
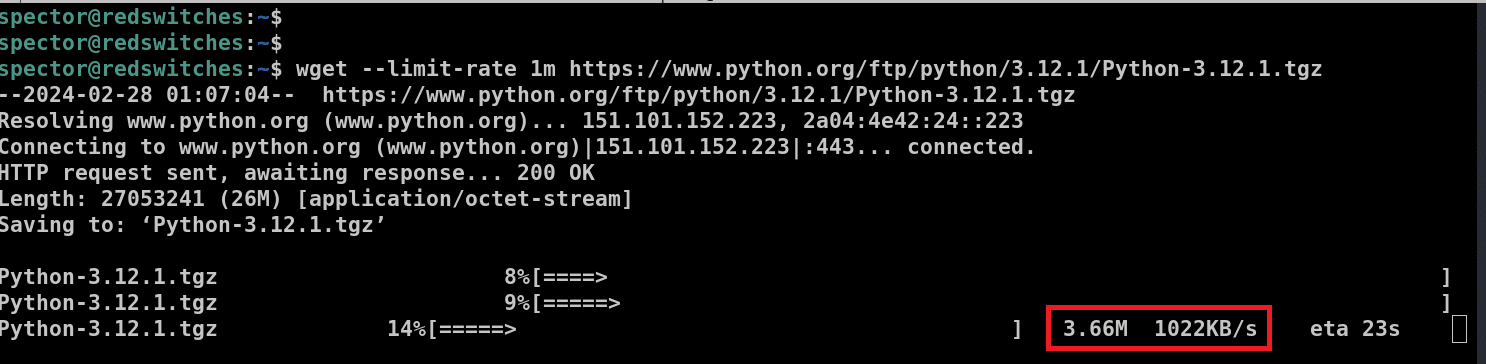
Example #4: Limit the Download Speed
Downloading large files can potentially consume all available bandwidth. You can avoid this problem by setting a maximum download speed limit. This speed can be specified in kilobytes (k) or megabytes (m). The command structure is:
# wget --limit-rate [speed_limit] [URL]
For instance, to download Python3 for Linux with a download speed capped at 1 megabyte per second, the command would be:
# wget --limit-rate 1m https://www.python.org/ftp/python/3.12.1/Python-3.12.1.tgz
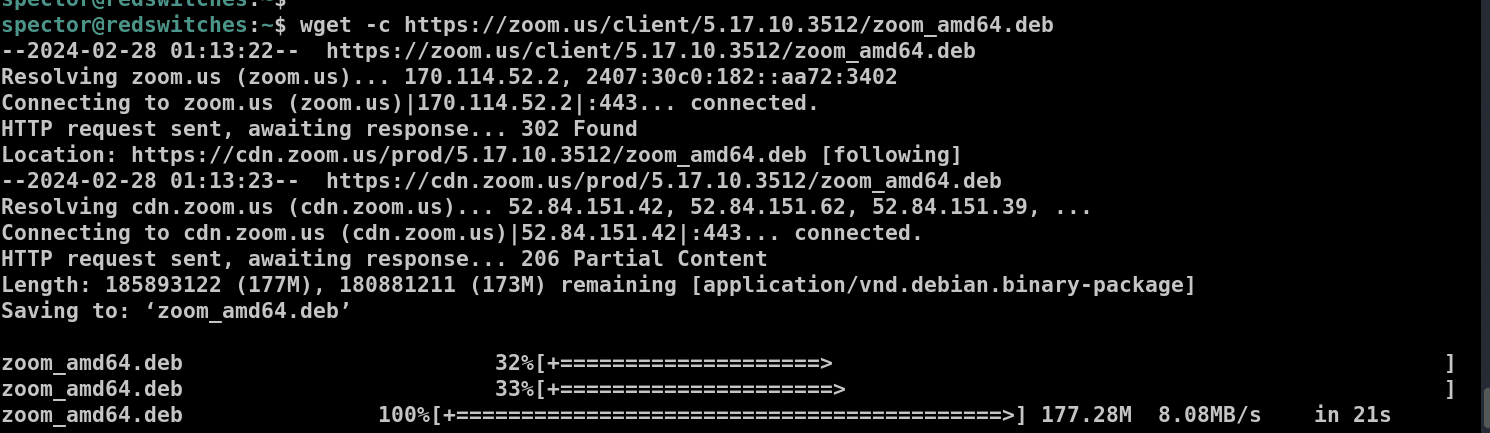
Example #5: Resume Interrupted Downloads
A valuable feature of wget is that you don’t need to restart a download from the beginning after an interruption, such as a connection loss. It can pick up right from where it left off. This feature is especially handy for large files or unreliable connections.
To resume a download, use the following syntax:
# wget -c [URL]
For example, to resume the download of an interrupted file, use the following command:
# wget -c https://zoom.us/client/5.17.10.3512/zoom_amd64.deb
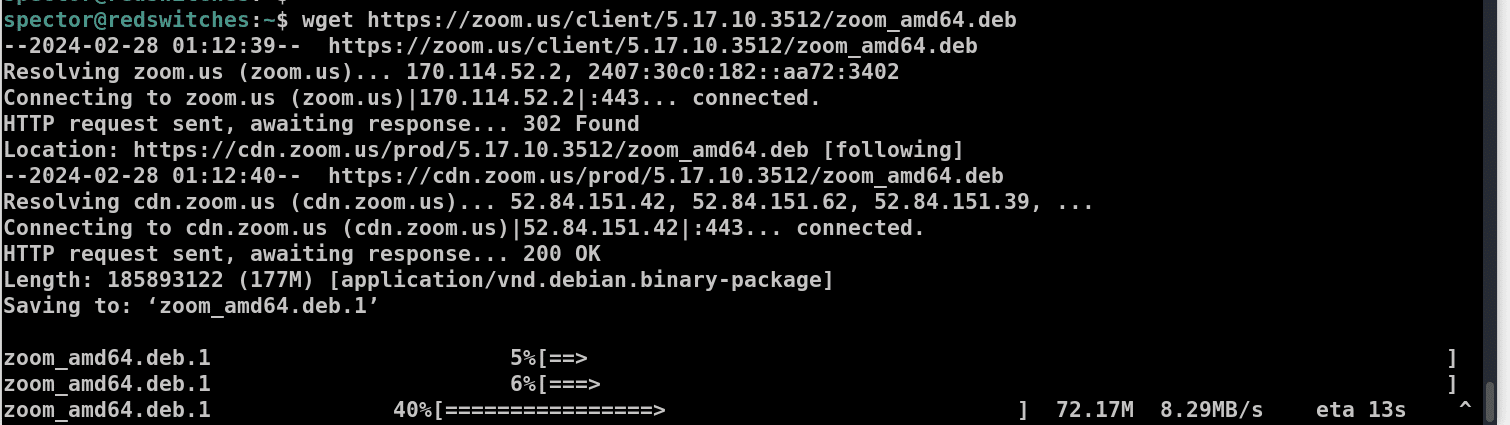
To resume installation, run:
# wget -c https://zoom.us/client/5.17.10.3512/zoom_amd64.deb
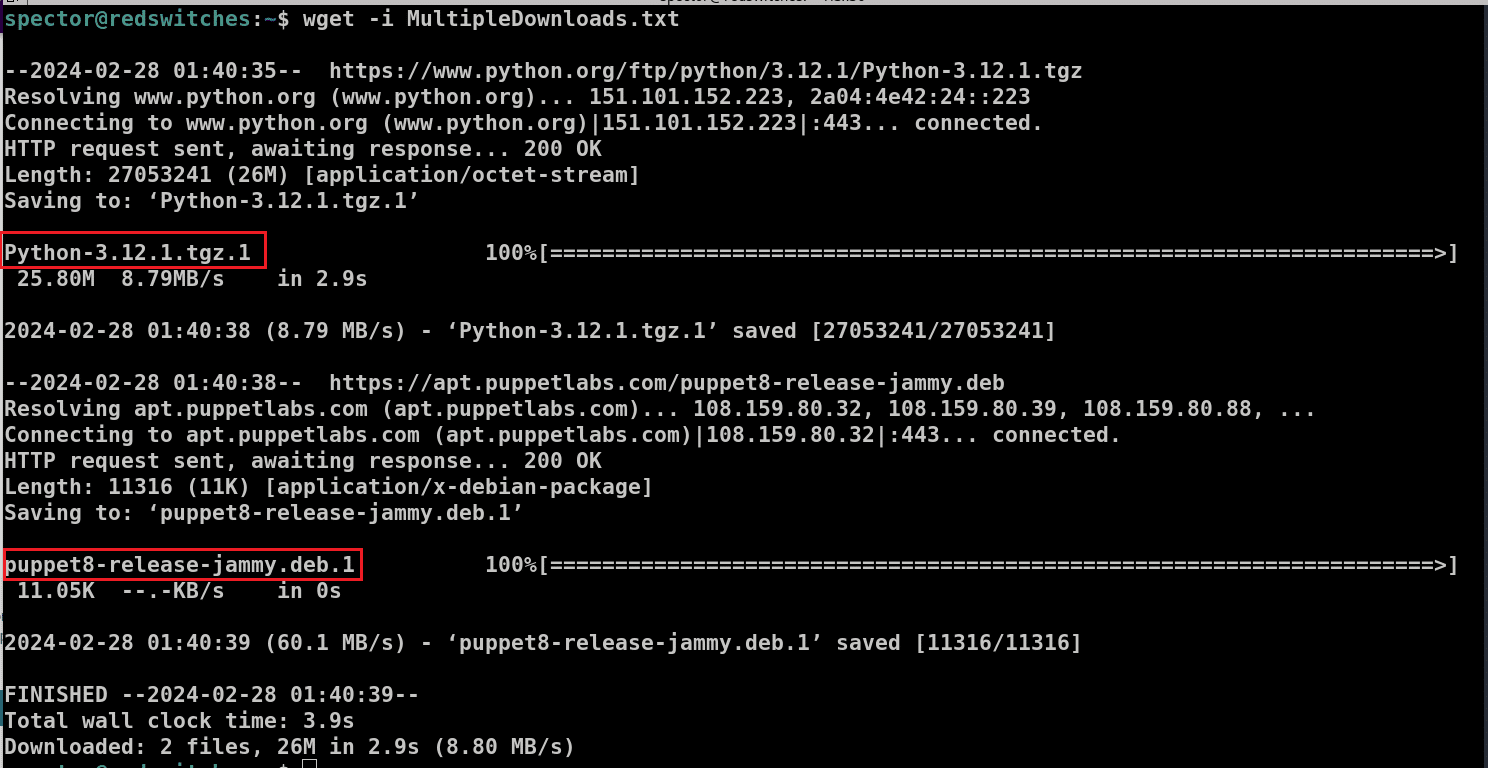
Example #6: Download Multiple Files
wget allows downloading multiple files at the same time with the -i option
# wget -i [file_name]
The process has the following steps:
- Start by making a new file named MultipleDownloads.txt (or any name you prefer) and open it in your preferred text editor. For this demonstration, we’ll use Vim:
# vim MultipleDownloads.txt
- Add the list of the URLs for the files you intend to download. Remember to place each URL on a new line.

- Save the file and close it.
- Execute the wget command in the terminal and pass the text file as a parameter:
# wget -i MultipleDownloads.txt
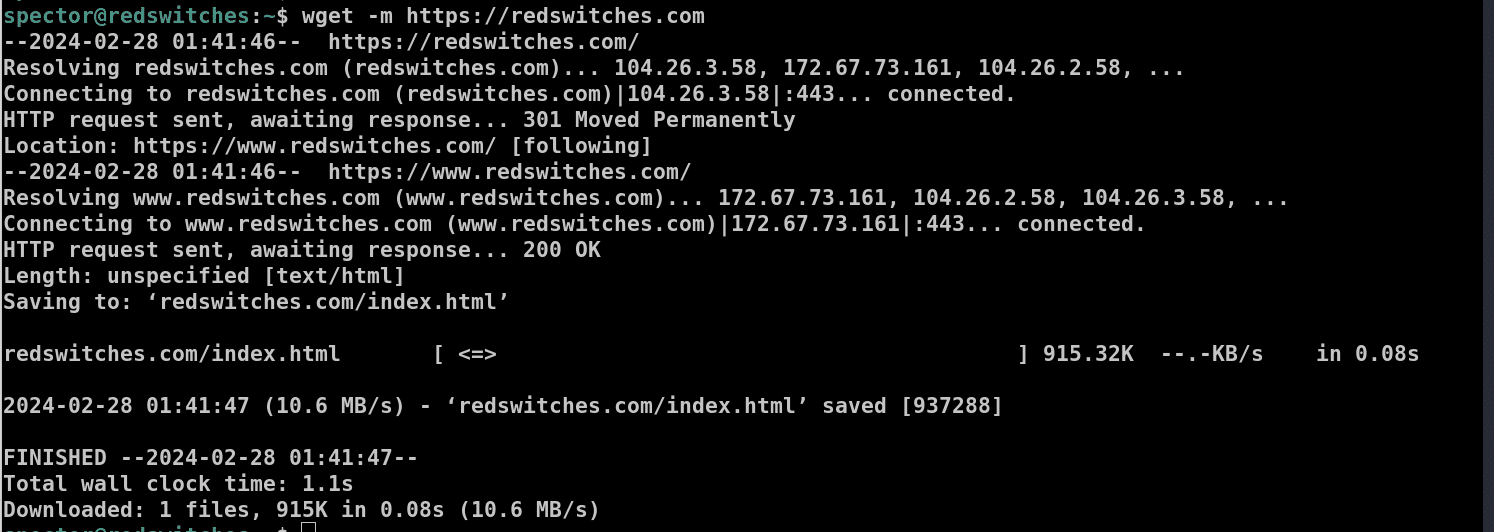
Example #7: Download Web Page
wget can download a full website by utilizing the -m (mirror) option. This command instructs wget to replicate the specified website locally. The basic syntax for mirroring a website is:
# wget -m [URL]
For instance, to create a mirror of the RedSswitches website, you would use:
# wget -m https://redswitches.com
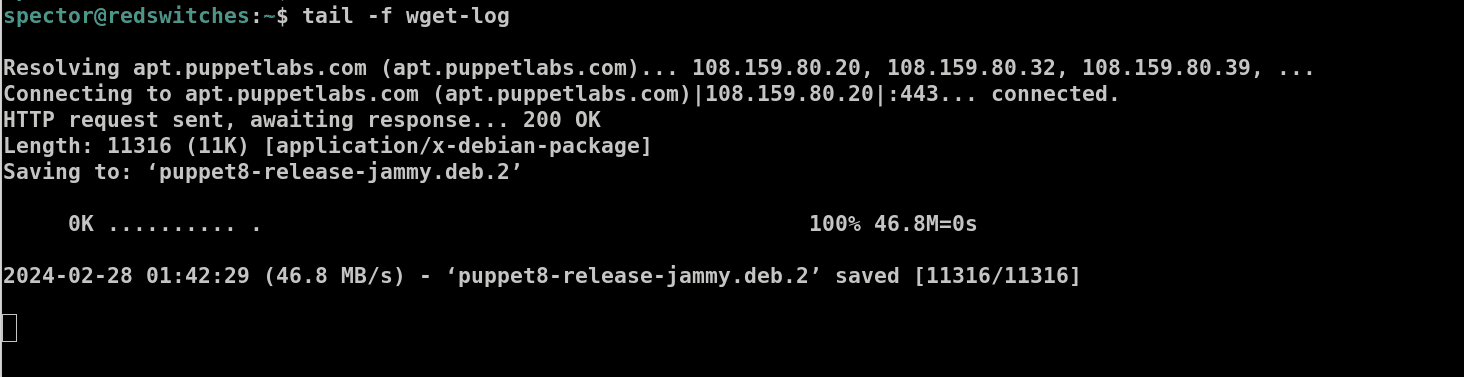
Example #8: Download in Background
wget offers the capability to perform downloads in the background, which is particularly useful for large files that take a long time to download. To initiate a background download, use -b option
# wget -b [URL]
For example, to download the Puppet package in the background, the command would be:
# wget -b https://apt.puppetlabs.com/puppet8-release-jammy.deb

While the download is running in the background, you can check the download status with the tail command:
# tail -f wget-log
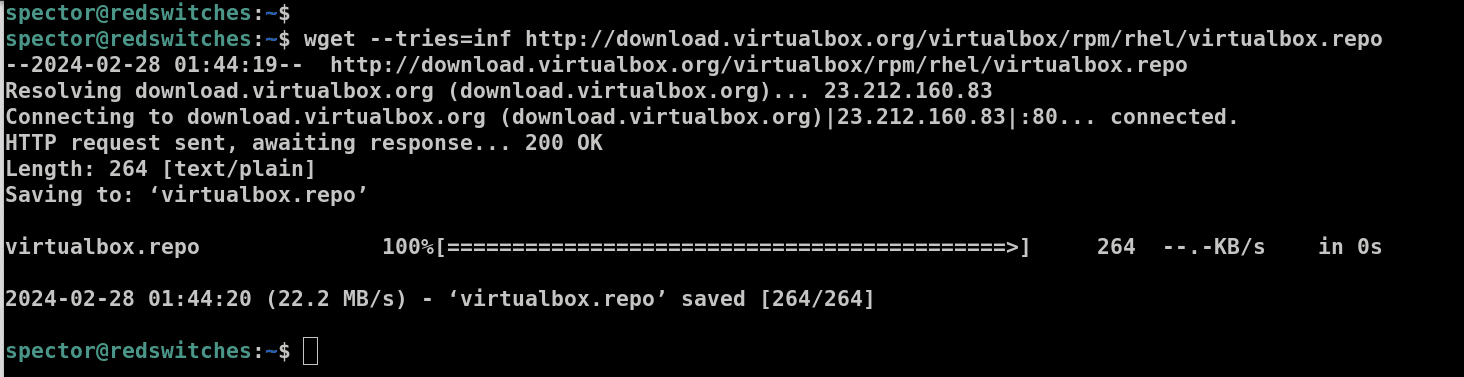
Example #9: Adjust the Number of Retry Attempts
Sometimes, network issues can interrupt downloads. wget offers a solution that allows users to specify the number of retry attempts. By default, wget is configured to retry up to 20 times.
We recommend the following command syntax to adjust the number of retry attempts:
# wget --tries=[desired_retry_attempts] [URL]
The default number of retry attempts helps handle temporary connection problems. You can opt for unlimited retry attempts by using 0 or inf for an infinite number of tries.
For instance, consider the following command:
# wget --tries=inf http://download.virtualbox.org/virtualbox/rpm/rhel/virtualbox.repo
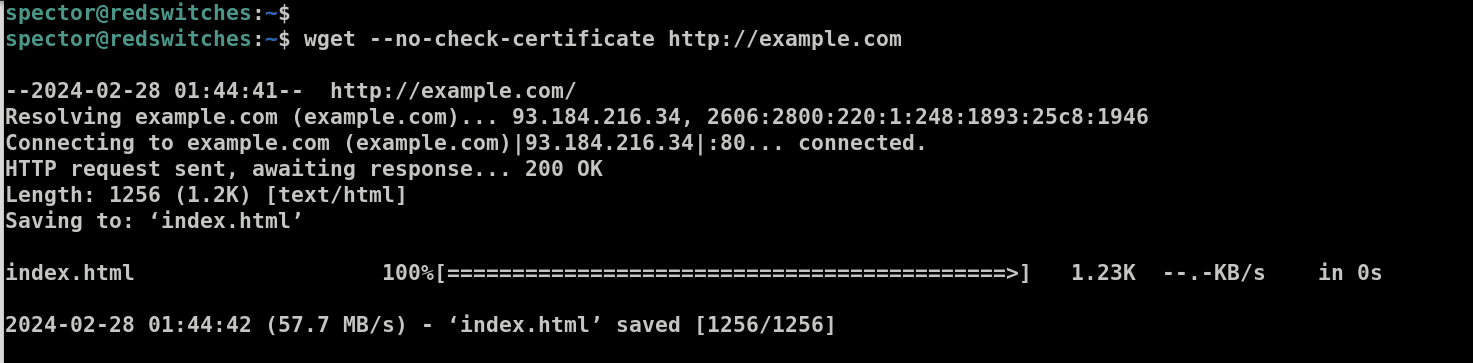
Example #10: Bypass Server Certificate Verification
wget typically verifies the SSL/TLS certificate of the server to ensure authenticity and avoid any security incidents. This verification helps ensure you’re downloading from the intended source and not a malicious imposter site.
By default, If the certificate is invalid or untrusted, wget will halt the download.
To override this security check, you can use the –no-check-certificate option, which instructs wget to proceed with the download regardless of the certificate’s validity. This option should be used with extreme caution and only when you are confident enough in the website’s identity.
The command syntax is:
# wget --no-check-certificate [URL]
For instance, if you need to download from http://example.com and you know the site is safe despite its untrusted certificate, you can use:
# wget --no-check-certificate http://example.com
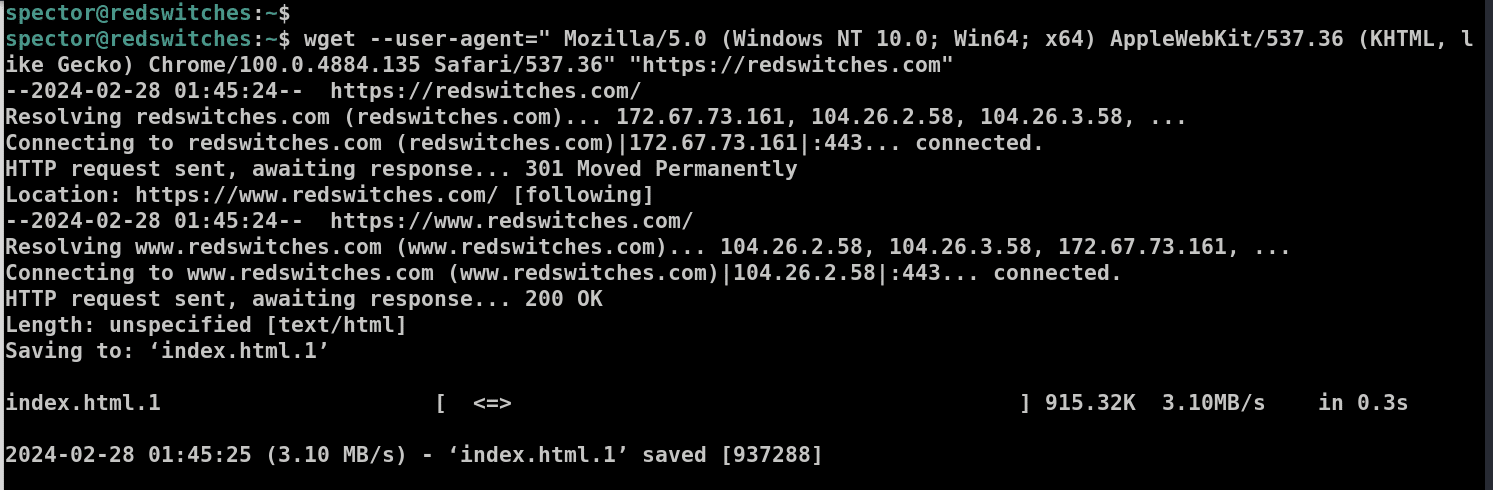
Example #11: Modify the User Agent
wget mimics a web browser when it downloads web pages. Sometimes, you might encounter access restrictions or forbidden connections, often due to the website blocking certain client browsers with a specific User-Agent.
The User-Agent is information that a client browser sends to a web server to identify itself. If you’re facing connection issues, altering the user agent in the command might help you bypass these restrictions.
You can find a list of user agent strings online to choose the one that suits your needs. To change the user agent in wget, use the following syntax:
# wget --user-agent="Desired-User-Agent-String" "[URL]"
or the shorthand version:
# wget -U "Desired-User-Agent-String" "[URL]"
For instance, to make wget appear as Chrome (version 100) to the server, you could use:
# wget --user-agent="Mozilla/5.0 (Windows NT 10.0; Win64; x64) AppleWebKit/537.36 (KHTML, like Gecko) Chrome/100.0.4884.135 Safari/537.36" "https://redswitches.com"
Conclusion
The wget command is a versatile tool that simplifies the process of downloading files and websites from the internet. You can now confidently use wget to enhance command-line proficiency. For those requiring robust and reliable hosting solutions, especially in scenarios demanding large-scale data handling and downloading,
RedSwitches Bare Metal Hosting Provider offers an optimal infrastructure, ensuring high performance and reliability for your downloading tasks and beyond. So, if you’re looking for a robust server for your Linux projects, we offer the best dedicated server pricing and deliver instant dedicated servers, usually on the same day the order gets approved. Whether you need a dedicated server, a traffic-friendly 10Gbps dedicated server, or a powerful bare metal server, we are your trusted hosting partner.
FAQs
Q. What is the wget command in Linux?
wget is a command-line utility in Linux that allows users to download files from the internet.
Q. How to use wget command to download a single file?
To download a single file using wget, you can use the command: # wget [file URL].
Q. How can I limit the download speed using wget?
You can limit the download speed in wget by using the `–limit-rate=[speed]` option. For example, # wget –limit-rate=100k [file URL].
Q. Can wget resolve links and download files recursively?
Yes, wget can resolve links and download files recursively by using the `-r` or `–recursive` option.
Q. How to interact with REST APIs using wget?
You can interact with REST APIs using wget by adding custom headers like the `–header=”Authorization: Bearer [token]“` option.
Q. What is the syntax for using wget command in Linux with examples?
The syntax for using wget in Linux is # wget [options] [URL]. For example, # wget -r [website URL] to download recursively.
Q. How do you download files from the FTP server using wget?
To download files via FTP using wget, you can use the command: # wget ftp://username:[email protected]/file.zip.
Q. Can wget limit download progress or show download progress?
Yes, wget can show download progress using the `-q` or `–show-progress–quiet` option to limit download progress messages.
Q. How do FTP protocol and wget differ in usage?
The FTP command is generally used for both uploading and downloading files, requiring client software to connect to an FTP server. wget, on the other hand, is used for downloading files from the command line and does not directly support file uploads.
Q. How can I ensure wget doesn’t create a log file?
If you don’t specify the -o or -a options, wget will not create a log file. However, output will be sent to the terminal. To suppress terminal output as well, you can redirect it to /dev/null (in Unix-like systems).
