The PostgreSQL open-source database is one of the most popular DBMSs in the market. It’s been around for more than 30 years and is regularly updated to maintain its cutting edge. It is often used to power eCommerce platforms, payment transactions, and data warehouses.
PostgreSQL supports all important SQL functions like triggers, user-defined types and functions, and subqueries. As a result, it is preferred as the storage component of web apps and SaaS products.
Installing PostgreSQL 13 on CentOS 7 is a simple process that requires downloading the repository and then installing it on the CentOS machine. In this article, we’ll discuss this process and then go into the details of changing the default PostgreSQL password.
However, let’s first discuss the benefits PostgreSQL brings to any system.
Table Of Content
PostgreSQL Benefits
PostgreSQL comes with a host of benefits, including:
- PostgreSQL supports a wide range of development platforms, including SQL, R, JS, and Python.
- JSON has native support, and consequently, you can work with both rational and non-relational data.
- Support for custom complex types that help you better structure the database for your particular dataset.
- Full-text search is supported so that you can work with unstructured and semi-structured text data.
- Multiple authentication and access control options simplify the security aspects of the DBMS and the app.
Install PostgreSQL 13 on CentOS 7
Now that you have a clear idea of the benefits of PostgreSQL, let’s install PostgreSQL 13 on CentOS 7 machine.
You need to use the official PostgreSQL repository to ensure you get the latest version. However, if your project requirements require a different version, you can also choose an older version from the official PostgreSQL website.
Important: You need an account with admin privileges to install PostgreSQL on the CentOS server.
Here’re the steps of the installation process.
Access Your Server
The first step is to access your virtual and bare-metal server with an SSH client of your choice. We prefer PuTTY because it’s open source and widely available.
Download PostgreSQL Repository RPM
The next step is to download the appropriate PostgreSQL version from the official website.
Remember that we’re installing PostgreSQL 13 on CentOS 7, and thus, we’ll need the RPM version of the repository. You can get it from the website’s RedHat page.
Scroll all the way down to the section where you can directly download the RPM package. You can go to the next page, where you can download the appropriate RPM package.
Alternatively, you can enter the following command in the terminal:
# sudo yum install -y https://download.postgresql.org/pub/repos/yum/reporpms/EL-7-x86_64/pgdg-redhat-repo-latest.noarch.rpm
Note: Replace "EL-7-x86_64" with the appropriate repository name for CentOS 7.
Install PostgreSQL on CentOS 7
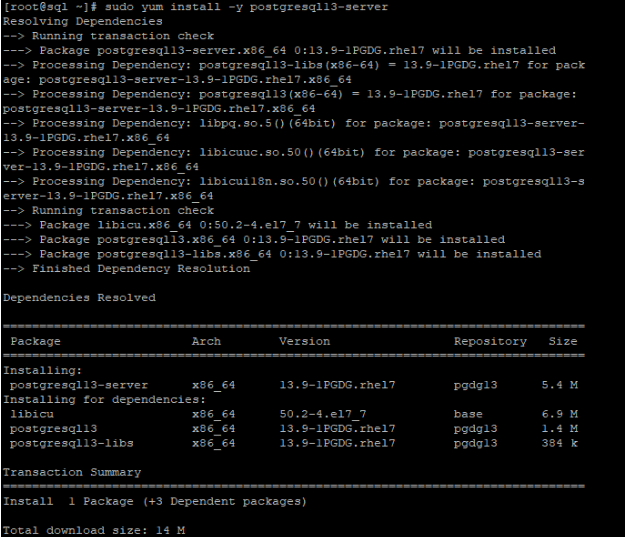
After downloading, you can proceed to install the PostgreSQL 13 server. For this, run the following command:
# sudo yum install -y postgresql13-server
This command will install the core files and download any dependencies.
Initialize the Database Cluster
Now that the PostgreSQL 13 server is installed, the next step is to initialize the database cluster. This is a storage area on the physical storage device where PostgreSQL will store the data.
Use the following command to initialize the database cluster:
# sudo /usr/pgsql-13/bin/postgresql-13-setup initdb

Start and Enable the PostgreSQL Database
The installation part is now over, and you can launch the database in a two-step process.
Start the PostgreSQL service with the following command:
# sudo systemctl enable postgresql-13
Next, enable PostgreSQL to start automatically at server boot time with the following command:
# sudo systemctl start postgresql-13
After completing these steps, you should have a working installation of PostgreSQL on your CentOS 7 system.
Check the PostgreSQL Database Status
After installing PostgreSQL on CentOS, it’s always a good idea to check the database status to verify that everything is working as intended. For this, enter the following command in the terminal:
# sudo systemctl status postgresql-13
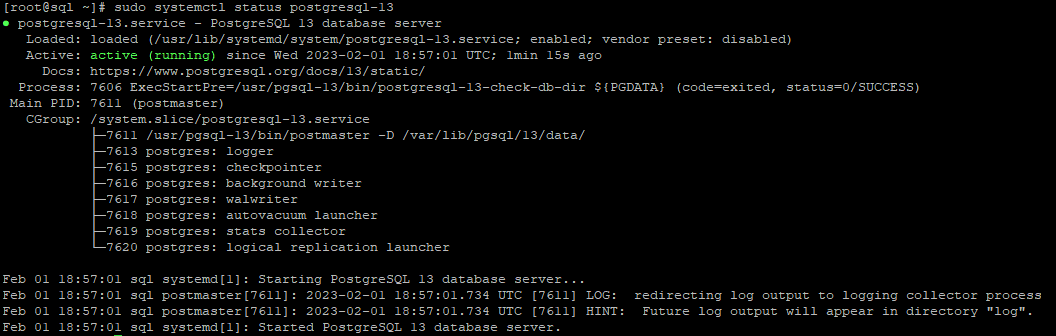
As you can see, the database status is active, with additional information pointing out the process ID and service details.
As you saw, the process of installing PostgreSQL on CentOS is pretty straightforward. Now, after the installation, we’ll go into some basic housekeeping tasks.
Basic PostgreSQL Operations
The following are some tasks that you might have to carry out to manage the users and the database(s).
Connect to the PostgreSQL Database
To connect to the PostgreSQL database, start by switching to the postgres, the default PostgreSQL user:
# sudo su postgres
![]()
Note that this superuser doesn’t need a password.
Next, start PostgreSQL:
# psql
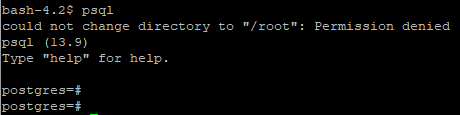
This command launches the PostgreSQL service. You’ll notice that the prompt changes to postgres=#.
If you need help, just type help or add/h before a command.
When you’re done, simply enter \q to quit PostgreSQL and return to the shell.
Change Postgres Default Password
Every PostgreSQL installation comes with a user named postgres. It is essential that you change postgres default password to add a security layer to the installation.
Fortunately, changing the password for a Postgres database is a simple process that can be accomplished through the command line. Here are the steps to change postgres default password:
Connect to the Postgres server as the postgres user by running the following command:
# sudo -u postgres psql
Alternatively, you can change the password from the PostgreSQL prompt. To do this, first, connect to the prompt:
# sudo -u postgres psql

To change the password, run the following command. Be sure to replace NewPassw0rd with your new password:
# ALTER USER postgres PASSWORD 'NewPassw0rd';
To enable these changes, restart PostgreSQL (remember to add the proper version number to the command):
# sudo service postgresql-13 restart
![]()
Create a New User in PostgreSQL
When it comes to changing psql default password, an alternative approach is to create a new user. Since this user is different from the standard user (that everybody knows about), creating this user improves the security of the PostgreSQL database.
To create a new user, switch to the postgres user and type out the following command:
# createuser --interactive
Enter the name of the user and enter y or n for the question about the user being a superuser.

Log in to PostgreSQL to validate the new user:
# psql
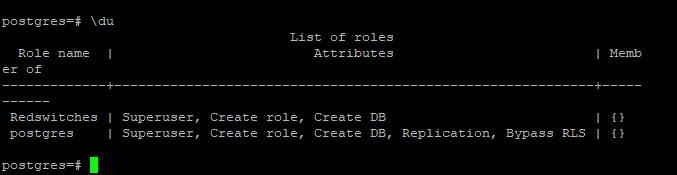
Now, to verify that the user has been created and active, enter the following command at the postgres prompt:
postgres=# \du
Conclusion
This article describes the process of installing PostgreSQL 13 on CentOS 7. We also covered how you can change the postgres default password, add a new user, and connect to the PostgreSQL database.
PostgreSQL is a power-packed DBMS that has become an essential component of many web projects. Let us know if the process we outlined above worked for you.
FAQs
Q1: Can I install PostgreSQL 13 on CentOS 7 without adding the PostgreSQL repository?
A1: No, the PostgreSQL repository is required to install PostgreSQL 13 on CentOS 7. You can add the repository by running the command sudo yum install https://download.postgresql.org/pub/repos/yum/reporpms/EL-7-x86_64/pgdg-redhat-repo-latest.noarch.rpm.
Q2: How can I check if PostgreSQL 13 is installed on my CentOS 7 system?
A2: You can check if PostgreSQL 13 is installed on your CentOS 7 system by running the command rpm -qi postgresql13-server.
Q3: How do I start the PostgreSQL 13 service on CentOS 7?
A3: You can start the PostgreSQL 13 service on CentOS 7 by running the command sudo systemctl start postgresql-13.
Q4: How do I create a new PostgreSQL 13 database on CentOS 7?
A4: You can create a new PostgreSQL 13 database on CentOS 7 by following these steps:
Log in to the PostgreSQL server: sudo -u postgres psql
Create a new database: CREATE DATABASE mydatabase;
Create a new user: CREATE USER myuser WITH ENCRYPTED PASSWORD ‘mypassword’;
Grant privileges to the user on the database: GRANT ALL PRIVILEGES ON DATABASE mydatabase TO myuser;
