How to Change DNS Server on Ubuntu 20.04
Learn how to set DNS servers on Ubuntu 20.04 with this guide, including GUI and command-line methods. Improve your ubuntu DNS settings now!
Understanding Ubuntu DNS settings is critical for all Linux users. Whether you aim to use Google’s popular 8.8.8.8 or 8.8.4.4 DNS, Cloudflare’s privacy-focused 1.1.1.1, or any other public DNS service, you should know how to find the current DNS information and change them if needed.
This guide will walk you through changing DNS nameservers on Ubuntu 20.04, ensuring a smoother and potentially faster internet connection. We will also discuss how to set up BIND9 Ubuntu to configure DNS server operations.
The Prerequisites
Before we dive into customizing DNS Nameserver settings on Ubuntu 20.04, ensure that you meet the following prerequisites:
- A system running Ubuntu 20.04.
- An account with administrative rights.
- Basic familiarity with the Linux command line interface (CLI).
Method #1: Change DNS Nameserver From the GUI
Ubuntu allows you to change DNS nameserver information from the GUI. We recommend this method if you are uncomfortable with working with CLI or want to quickly change DNS configuration.
We will now mention the major steps in this process.
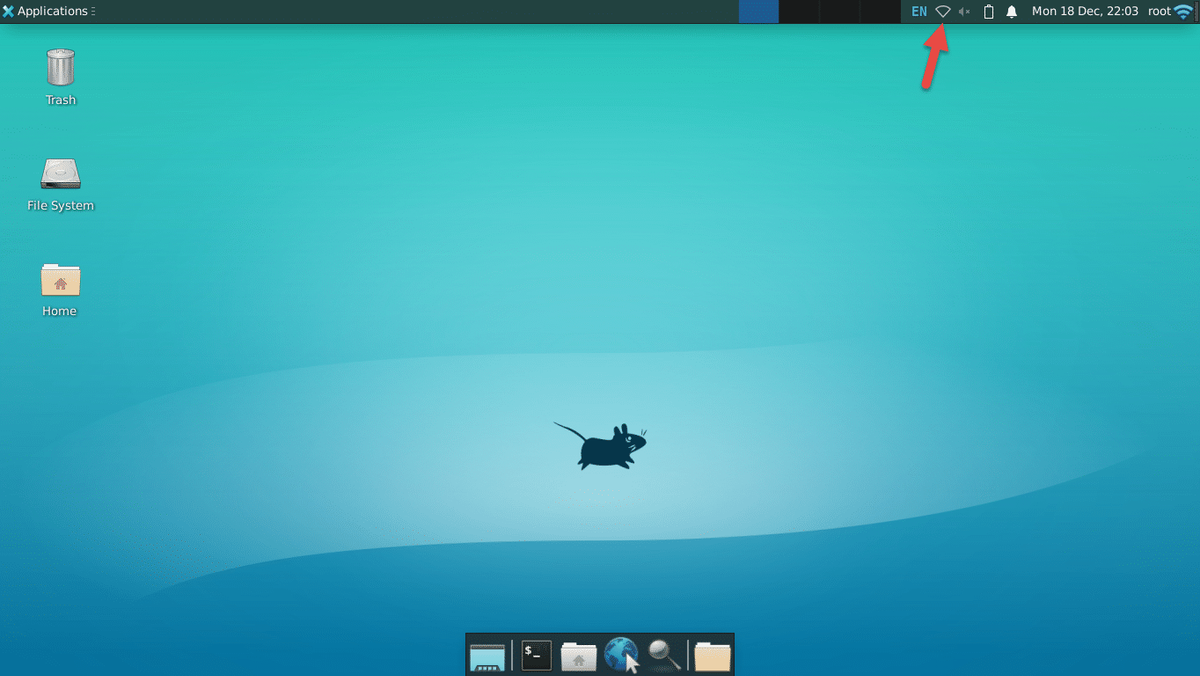
Step #1: Search ‘Network’ in Settings
Search for Network in the Settings menu. This will open the central location where you can manage all network-related settings.
Step #2: Select Your Network Connection
In the Network Settings window, you’ll see a list of available network connections (wired, Wi-Fi, etc.).
Click on the connection you want to modify. If it’s a wired connection, it’s typically listed as “Wired” or “Ethernet.” Wireless connections are listed under “Wi-Fi.”
Step #3: Access the DNS Settings
After selecting the connection, click the gear icon to access its settings. Depending on your protocol, navigate to the IPv4 or IPv6 tab.
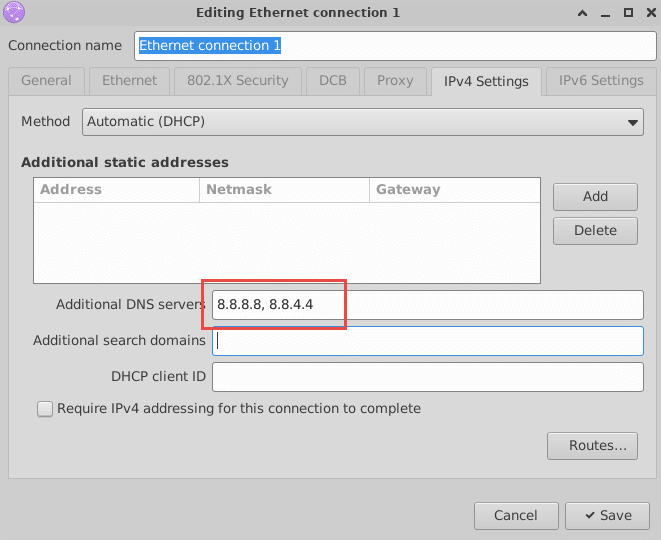
Step #4: Change DNS Settings
Start by toggling off the Automatic switch. This will allow you to set DNS servers manually.
Enter the DNS addresses you want to use in the provided field. You can enter multiple addresses separated by commas.
Note: You might also want to turn off the Automatic toggle forDHCP if you are setting a static IP address.
Step #5: Apply Changes
Click Apply to save your changes.
You should disconnect and reconnect to your network for the changes to take effect.
To test the new DNS settings, you can open a terminal and use ping or nslookup commands to check domain resolution.
Method #2: Change DNS Nameserver Information in the Server’s Config File
You can quickly change the DNS server in the Ubuntu 20.04 environment by editing the server’s configuration file.
With the introduction of netplan in Ubuntu 18.04 and later versions, you have a robust tool for managing and editing network settings. The strength of the tool lies in its ability to apply network configurations from YAML files. As a result, you can benefit from the automation of image installation and configuration.
Let’s check the steps in the process of changing the DNS nameserver using netplan:
Step #1: Find the netplan Configuration Files
Changing the DNS service configuration requires making changes in the netplan configuration files. These files are typically located in the /etc/netplan/ directory. You can list the contents of this folder using the following command:
# ls /etc/netplan/

Step #2: Edit the Configuration File
Open the 01-netcfg.yaml file in a text editor like Nano or Vim.
For the demonstration, we’ll open it with Vim:
# sudo vim/etc/netplan/01-netcfg.yaml
Find the relevant network interface section and add the new DNS server information:
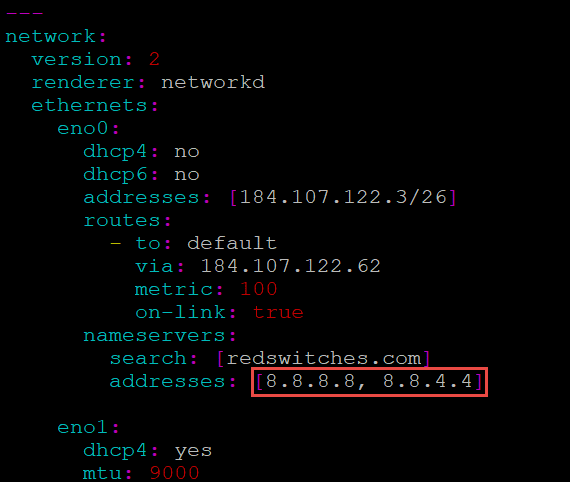
Save and close the file.
Step #3: Activate Changes
Now run the following command to load the changes you made in the config file.
# sudo netplan apply
You might not see any indication of the success of the changes. You can confirm the changes by running the following command:
# resolvectl status | grep "DNS Server" -A2
This command will display your current DNS server information

Ubuntu Flush DNS Cache
DNS cache is a great way of speeding up DNS name resolution on your Ubuntu server.
A DNS cache is a temporary storage for previous DNS lookup results. As a result, the DNS process checks this cache before initiating an external DNS lookup. At its core, the DNS cache has individual compressed resource records about all previous DNS resolutions.
Depending upon the implementation, a DNS cache contains the following elements:
- Resource data contains information about a record, including the address and hostname.
- Record type stores the type (A or AAAA record).
- Record name stores the DNS entry’s domain name.
- Time-to-live (TTL) contains the number of seconds the record will remain valid.
- Class corresponds to the record’s protocol group.
- Resource data length contains the actual resource value.
The first step on flushing DNS cache is to run the following command that refreshes the DNS cache:
# systemd-resolve --flush-caches
Note that this command doesn’t produce any status message. That’s why, we recommend running this command to verify the success of the flushing operation:
# systemd-resolve --statistics
When you run these commands to flush DNS cache, the following actions happen:
- The contents of the cache (stored resolved DNS queries and records) are deleted.
- All incoming DNS resolution requests trigger extended DNS lookup.
- In addition to forwarding the responses to the requesting agent, the results are added to the cache (depending on the rules). This initiates the rebuilding of the cache.
Popular DNS Tools for Troubleshooting DNS Operations
Errors in DNS name resolution are common and shouldn’t be a blocker in the server operations.
We will introduce two simple tools that you can use to discover and pinpoint the issues in DNS name resolution.
dig
dig stands for domain information groper.
It is often the sysadmins’ go-to tool for interrogating DNS name servers. You can use it to initiate DNS lookups from the terminal. The utility presents the outcome of the query. It is well known for its flexibility that comes from its range of flags and switches that extend the default behavior. Usually, the Ubuntu dig package is available in a default Ubuntu installation.
The standard usage of dig is as follows:
# dig @server IP
If you omit the IP address, the utility will query the root address.
You can extend the capabilities of the utility with the following flags:
-4: Restrict to IPv4
-6: Restrict to IPv6
-b: Set the source IP address
-f: Switch the batch mode
-p: Set the port for the query
-v: prints the utility version
Ifconfig
The Ubuntu ifconfig utility is a versatile tool for displaying the TCP/IP configurations of the server. The utility is often used at the system boot time to set up the network interfaces connected to the server. You can use the utility by running the following syntax in the terminal:
# ifconfig [target interface] [options]
You can further extend the capabilities of ifconfig with these flags:
-a: Displays information about all system network interfaces.
-d: Displays the interfaces that are down
-l: Lists all available interfaces. However, this flag does not provide additional information about the interfaces.
-u: This flag only shows interfaces that are up and active.
Install and Configure BIND9 on Ubuntu
Released in 1986, BIND is perhaps the most popular domain name server software suite today. It comes with all essential tools (including dig) required for working with DNS services.
BIND9 is the latest version of the software suite that comes with support for databases for storing zone information.
Let’s see how to install and configure BIND9 on an Ubuntu server.
Step #1: Upgrade Server Packages
Start by updating the server package index to ensure you have the latest stable version on your system. For this run this apt command in the terminal:
# sudo apt upgrade -y

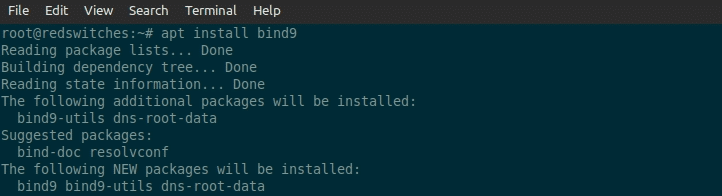
Step #2: Install the BIND9 Package on Ubuntu
You can install BIND9 on Ubuntu by running the following command that fetches all required packages and installs them on the system:
# sudo apt install bind9
Step #3: Configure BIND9 on Ubuntu
After installation, you need to configure BIND9 by creating and editing DNS configuration files that contain essential data and directives for smooth DNS operations.
The first file that we will edit is the named.conf file. This file contains information about the active DNS zones that the system should check when resolving a DNS query.
Open named.confin your preferred editor.
Add the following line to the file:
options { directory "/var/cache/bind"; }; zone "example.com" { type master; file "/etc/bind/db.mysite.com"; };
This line points to db.mysite.com, the file that contains DNS information about the mysite.com domain. We recommend replacing mysite with your domain name.
Step #4: Configure the Zone File
Next, you should create and configure the zone file specified in the named.conf file. This file is created in the**/etc/bind/**folder.
Create the file and name it db.mysite.com. You should replace mysite.com with your domain name
Now add the following line in the file:
@ IN SOA ns1.mysite.com. admin.example.com. ( 1; Serial 604800; Refresh 86400; Retry 2419200; Expire 604800); TTL ; @ IN NS ns1.mysite.com. ns1 IN A [Server_IP_Address]
Remember to replace mysite.com with your domain name. In addition, you should also enter the server IP address at the end of the line.
Step#5: Restart the BIND Service
Finally, you should restart the BIND9 service to ensure all changes are in effect and the system loads the latest configuration files. For this, run the following command:
# sudo service bind9 restart
What are DNS Services?
All devices on the Internet have a unique IP address that other devices use to locate and communicate to the device. DNS (Domain Name System) services are essential for translating human-friendly domain names into the IP addresses that the networks use for their operations.
Properly configured DNS services are essential for ensuring continued connectivity of the devices on the network to other networks and the general Internet. In addition to helping users work with friendlier website and server names, DNS services are used to point a server or hosted application to a device (usually a server)that can offer the best level of services to the user.
These services and the DNS servers are usually implemented in a hierarchy.
How Do DNS Services Work?
The main process of DNS domain name resolution services is to convert a hostname into an IP address. This process generally involves the following four types of DNS servers:
- DNS Recursor is the first server that receives the DNS service request from the applications (usually web browsers and email clients)running on the connected devices. The Recursor initiates the process of resolving the user’s DNS query.
- Root nameserveris the next link in the chain. This nameserver usually stores references to other nameservers that deliver DNS name resolution services to the networked devices.
- TLD nameserver is the top-level domain server responsible for resolving the last part of a domain name. Usually, these parts are ,com and .net. Once the TLD nameserver has resolved its portion of the DNS domain name, it refers to the last stop in DNS resolution.
- Authoritative nameserver is responsible for resolving the rest of the DNS query. If it has the relevant information, it packages and returns the response to the query to the DNS Recursor that originated the request.
Restart DNS Services
When you run DNS services after making changes to the configuration files, some users are surprised that the changes are not reflected in the system settings.
To resolve this issue, we highly recommend restarting DNS services. This final step stops and reinitiates the DNS services on the system. During this process, the system reloads setting options from the DNS configuration files.
The standard way of restarting DNS service is to call your system service manager and call the restart command. For instance, in systems running Linux distributions with SystemD, you can restart DNS services with this command:
# systemctl restart <DNS service manager>
Working With DNS FIles
On most Linux Linux systems, the DNS services use configuration files to set operational parameters.
For instance, the system uses a DNS file to see how to resolve a domain name to a corresponding IP address. On many systems, this file is named resolv.conf, indicating that it is a configuration file.
This file is usually located in the /etc folder (the full path is /etc/resolv.conf). Many network management utilities (such as systemd-resolved and NetworkManager) ise this DNS file to determine the parameters for resolving domain names.
We do not recommend editing these files because they are often generated automatically by the utility working on the system. This is because these utilities may overwrite your changes when they restart operations.
However, if you must, we suggest editing these files in your preferred editor. Since these files are essentially text files, you can edit them in these text editors without breaking the file.
Why Should You Set a Custom DNS on Ubuntu?
In most cases, a system’s default DNS settings offer optimal performance. However, there are scenarios in which you should consider switching to a third-party DNS provider. In general, you can get the following benefits when you update Ubuntu DNS settings:
- Speed: Some DNS servers are faster than others, leading to quicker domain name resolution because of lower latency. Slow domain name services can significantly impact query speed and related operations.
- Reliability: A reliable DNS server ensures consistent internet access.
- Security and Privacy: Certain DNS providers offer enhanced security features and privacy protections. Security-focused DNS for server operations adds another
- Bypass Restrictions: Some DNS servers can help bypass regional restrictions and censorship.
Conclusion
Setting up a custom DNS server on Ubuntu 20.04 is a straightforward process that can significantly improve your internet experience. Whether you choose the GUI method or the terminal approach, you can easily make this change. Enjoy the benefits of faster, more secure, and reliable internet browsing!
FAQs
Q: What is a DNS server, and why would I need to change it on Ubuntu 20.04?
A DNS server translates domain names into IP addresses. You should change it on Ubuntu 20.04 to improve internet speed security or to access region-restricted content.
Q: How can I find out my current DNS server on Ubuntu 20.04?
<hg You can find out your current DNS server by running the command systemd-resolve –status in the terminal and looking for the “DNS Servers” entry.
Q: What are the steps to change the DNS server on Ubuntu 20.04?
Changing the DNS server on Ubuntu 20.04 includes editing the Netplan configuration files, specifying the new DNS server addresses, and applying the changes.
Q: Can I change the DNS server on Ubuntu 20.04 using the Network Manager GUI?
Yes, you can change the DNS server on Ubuntu 20.04 using the Network Manager GUI by accessing the network connection settings, selecting the appropriate connection, and entering the new DNS server addresses.
Q: How do I change the primary DNS server on Ubuntu 20.04 using the command line?
You can change the primary DNS server on Ubuntu 20.04 using the command line by editing the Netplan configuration files and specifying the new primary DNS server address.
Q: What are DNS records, and why are they essential when changing DNS servers on Ubuntu 20.04?
DNS records are essential for mapping domain names to IP addresses and other data. When changing DNS servers on Ubuntu 20.04, it’s crucial to ensure that DNS records are correctly updated to avoid disruptions in network services.
Q: Can I simultaneously set a static IP and change the DNS server on Ubuntu 20.04?
Yes, you can set a static IP and change the DNS server on Ubuntu 20.04 simultaneously by appropriately configuring the Netplan files to include both the static IP and the new DNS server addresses.
Q: How do I change the secondary DNS server on Ubuntu 20.04?
You can change the secondary DNS server on Ubuntu 20.04 by specifying the new secondary DNS server address in the Netplan configuration files and the primary DNS server address.
Q: Is changing the DNS server on Ubuntu 20.04 to use Cloudflare’s DNS resolver possible?
Yes, changing the DNS server on Ubuntu 20.04 to use Cloudflare’s DNS resolver by entering the Cloudflare DNS server addresses in the Netplan configuration files is possible.
Q: What precautions should I take before changing the DNS server on my Ubuntu 20.04 server?
Before changing the DNS server on your Ubuntu 20.04 server, it’s essential to have a backup of the current network configuration files and be aware of any potential network disruptions during the transition to the new DNS server.
Prakash
System Administrator
Prakash works as a System Administrator at RedSwitches (Leaders in offering Instant bare metal dedicated servers), focusing on service, security, patching, migration, and support. With more than a decade of experience in server admin and security, Prakash is the go-to guy for ensuring excellent uptime for clients. When he is not working, he spends his free time with his family and playing video games.

Sons Of The Forest Dedicated Server Setup Guide 2026
Set up a Sons of the Forest dedicated server in 2026 with SteamCMD, UDP ports 8766, 27016, 9700, config files, Windows, Linux Docker, backups, and fixes.

Soulmask Dedicated Server Setup: The Ultimate Guide 2026
Set up a Soulmask dedicated server in 2026 with SteamCMD, Windows/Linux app IDs, ports, Docker notes, GameXishu.json, backups, and fixes.

Bannerlord Dedicated Server Setup Guide 2026
Set up a Bannerlord dedicated server in 2026 with SteamCMD, auth token, port 7210, config files, Linux/Windows steps, and fixes for visibility or join issues.
Power Your Next Project With Bare Metal
10 min delivery, zero setup fees, and 24/7/365 human engineers across 20+ global locations.