NGINX, a high-performance web server, is renowned for its versatility and efficiency in managing web traffic effectively.
This open-source software is designed for all practical scenarios, including web serving, reverse proxying, caching, load balancing, and media streaming. Its key ability to act as a reverse proxy enhances the security, performance, and scalability of web applications.
In this comprehensive tutorial, we’ll explore how to set up and utilize NGINX as a reverse proxy.
Table Of Contents
- How to Set Up NGINX as a Reverse Proxy
- The Prerequisites
- Step #1: Install NGINX
- Step #2: Configure Auto-Launch
- Step #3: Unlink the Default Configuration File
- Step #4: Create the New Configuration File
- Step #5: Configure the Server Block
- Step #6: Link and Activate New Configuration File
- Step #7: Test and Restart NGINX
- Step #8: Test Reverse Proxy
- NGINX Reverse Proxy: Additional Configuration Options
- Benefits of Using NGINX as a Reverse Proxy
- Conclusion
- FAQs
How to Set Up NGINX as a Reverse Proxy
Setting up NGINX as a reverse proxy is crucial to redirect incoming traffic to various backend servers based on URL to ensure efficient load distribution, resource accessibility, security, and performance.
To configure NGINX as a reverse proxy to act as a bridge between client devices and backend servers, follow these step-by-step instructions.
The Prerequisites
Before diving into the setup process, ensure you have the following:
- A server or virtual machine running a mainstream Linux distribution.
- A user account with root or sudo access.
Step #1: Install NGINX
To set up an NGINX reverse proxy, first update your repository index. On Debian-based systems, use the command:
# sudo apt update
Now, install NGINX with the following command:
# sudo apt install nginx
Once the installation is complete, we strongly recommend verifying the NGINX version by running the following command:
# nginx -v

Step #2: Configure Auto-Launch
Once the NGINX is installed, the system automatically sets up several essential directories and files for its configuration and operation.
You can now start the NGINX service with the systemctl command:
# sudo systemctl start nginx
Note that this command only outputs a message in case of an error or warning.
Alternatively, you can configure NGINX to launch on reboot automatically by running the following command:
# sudo systemctl enable nginx
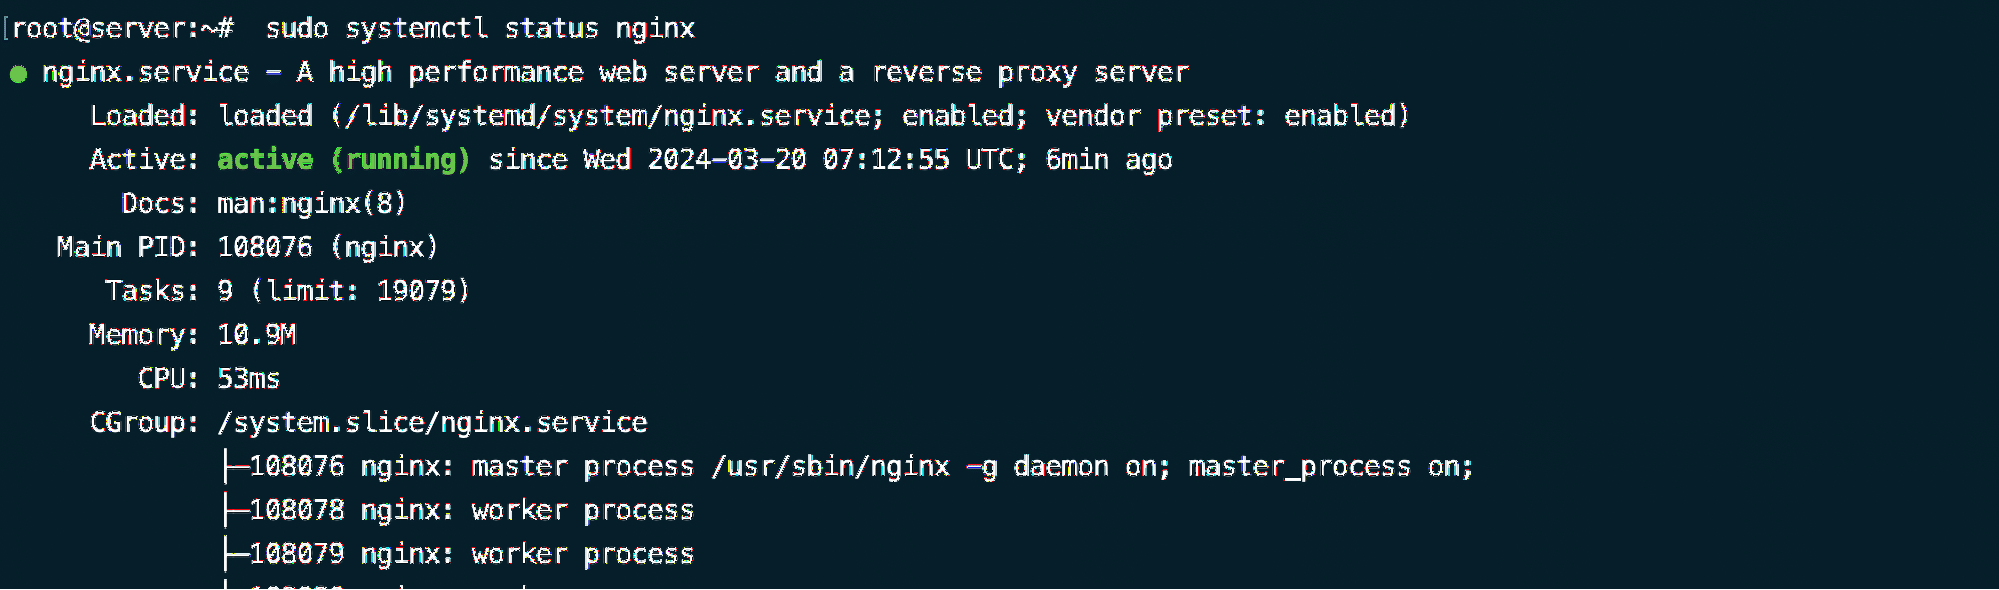
Once done, verify the NGINX service status:
# sudo systemctl status nginx
Step #3: Unlink the Default Configuration File
NGINX comes with a default configuration file named nginx.conf, usually found in /etc/nginx/.
However, to set it up as a reverse proxy, create and link a custom configuration file.
Start by removing the symbolic link to the default file to avoid conflicts with the custom configuration:
# sudo unlink /etc/nginx/sites-enabled/default
Note that the /etc/nginx/sites-enabled/ directory contains symbolic links to the configurations in sites.

Step #4: Create the New Configuration File
Now, let’s create a new NGINX configuration file for your reverse proxy setup.
You can use your preferred text editor to create and edit the configuration file. We will run the following command to create this file with Vim:
# sudo vim /etc/nginx/sites-available/reverse-proxy
Step #5: Configure the Server Block
Set up the NGINX server to function as a reverse proxy and listen on port 80, using the proxy_pass directive to forward proxy requests to the backend server.
Add the following lines to the new configuration file:
server {
listen 80;
server_name localhost;
location / {
proxy_pass http://127.0.0.1:8000;
proxy_set_header Host $host;
proxy_set_header X-Real-IP $remote_addr;
proxy_set_header X-Forwarded-For $proxy_add_x_forwarded_for;
proxy_set_header X-Forwarded-Proto $scheme;
}
}
The configuration comprises a server {…} block responsible for handling requests meeting specified conditions. Let’s look into other parameters in detail:
- listen 80: Specifies that the server listens for incoming HTTP requests on port 80.
- server_name localhost: Specifies the domain name that the server block is designated to handle. In this example, localhost is utilized to illustrate how the reverse proxy functions.
- location / {…}: Location block specifies configuration for the designated URI path. This setup matches all requests (/) in this instance.
- proxy_pass http://127.0.0.1:8000: Indicates the backend server to which NGINX forwards incoming requests. Here, the local host address on port 8000 (127.0.0.1:8000) is employed as a substitute backend. In a real-world scenario, remember to map this line to an actual backend server URL.
- proxy_set_header: Directs the setting of HTTP headers for the proxied (forwarded) request. These headers are forwarded to the backend server, furnishing more details about the client’s request. The example contains the Host header, the client’s IP address, and the scheme (HTTP or HTTPS).
This configuration forwards all requests directed to localhost to the address http://127.0.0.1:8000.
Save and exit the vim editor.
Step #6: Link and Activate New Configuration File
After creating the new configuration file, you should create a symbolic link from the sites-available directory to the sites-enabled directory to activate the new configuration:
# sudo ln -s /etc/nginx/sites-available/reverse-proxy /etc/nginx/sites-enabled/
NGINX utilizes configurations linked to /etc/nginx/sites-enabled to serve requests directly, eliminating the need for duplicate configuration files in multiple locations.
Step #7: Test and Restart NGINX
Once the NGINX reverse proxy configuration is completed, enable the settings, test for syntax errors, and apply the changes.
Start by running the following command to test the NGINX configuration for syntax errors:
# sudo nginx -t

If any NGINX reverse proxy issues are detected, it indicates where they are and you can correct the issue. If no configuration errors are reported, restart NGINX to apply the changes:
# sudo systemctl restart nginx
Step #8: Test Reverse Proxy
To verify that the reverse proxy is functioning, set up a simple test page on a backend server and configure NGINX to proxy requests to it.
Start by creating a new directory with the mkdir command:
# mkdir sample_backend && cd sample_backend
Next, create a new file that would function as a landing page. For this, use the following Vim command:
# vim index.html
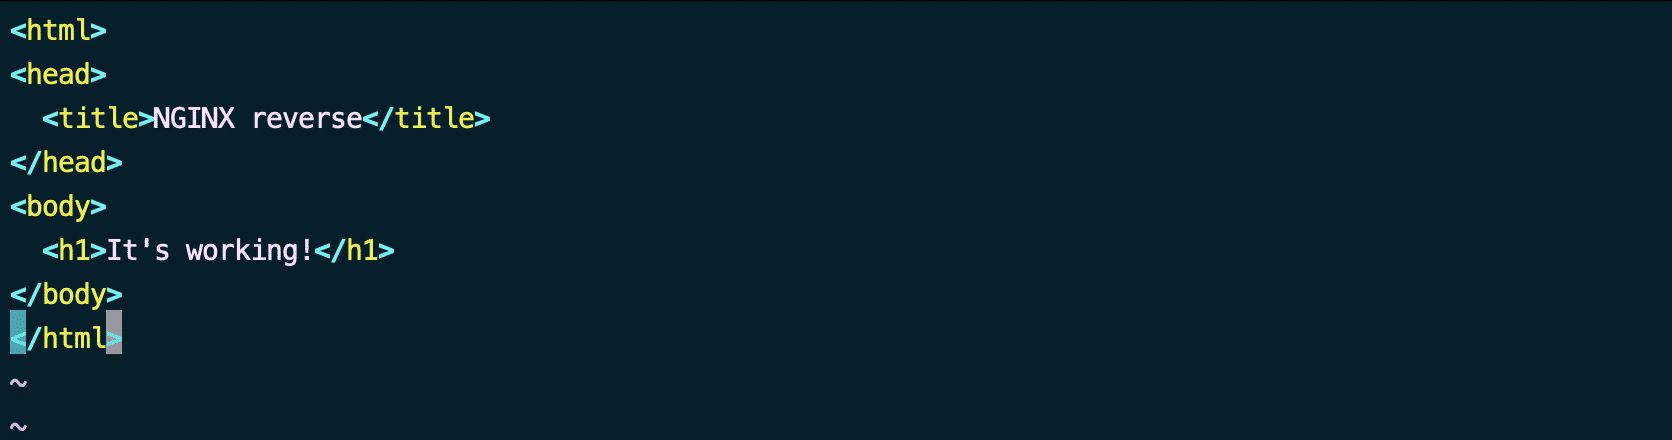
Next, add the following code to it:
<html>
<head>
<title>NGINX reverse</title>
</head>
<body>
<h1>It’s working!</h1>
</body>
</html>
Save and close the file.
Execute the backend server from the directory containing the index.html file using the command:
# python3 -m http.server

This command initiates an HTTP server and serves the index.html page.
Generate a cURL request to localhost in a new terminal tab to view the page:
# curl localhost
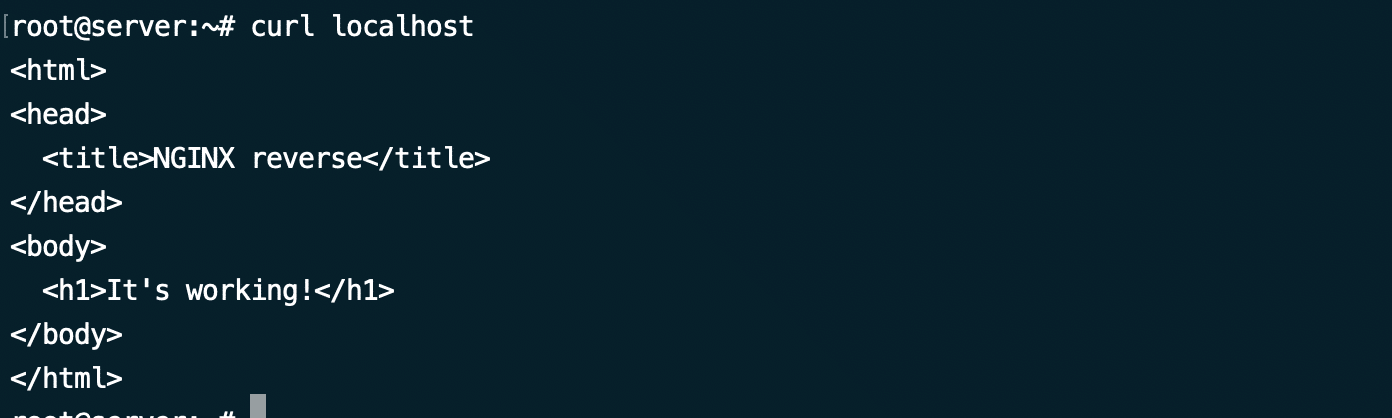
Alternatively, you can access the page from a web browser by entering NGINX’s IP address or domain name.
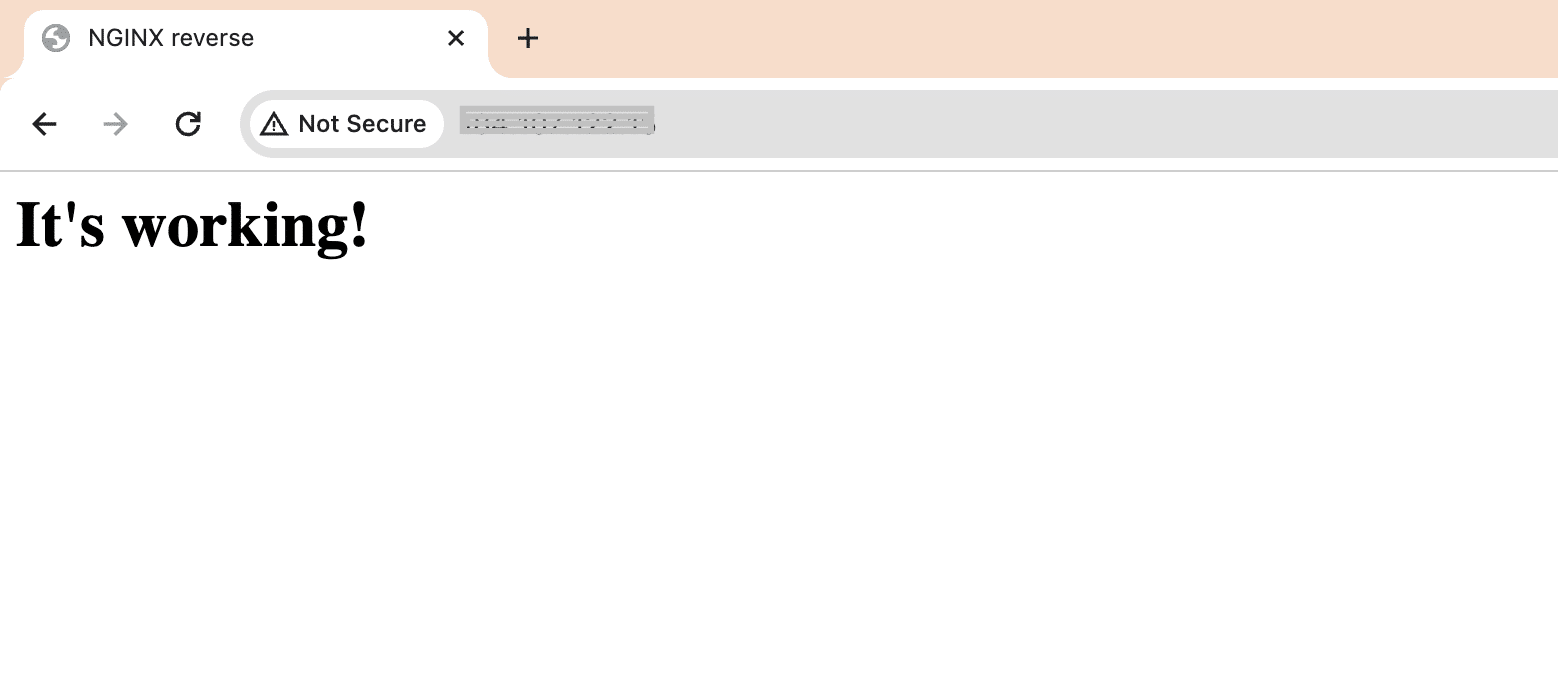
In both scenarios, the reverse proxy intercepts the client’s request and redirects it to the backend server. The backend server then replies with the HTML page, confirming that the NGINX reverse proxy is configured accurately.
NGINX Reverse Proxy: Additional Configuration Options
While setting up NGINX as a reverse proxy, you have the flexibility to fine-tune its configuration to meet specific requirements. Here are some additional configuration options you can explore:
1. Proxy Buffers
NGINX uses buffers to store data temporarily during data transfer between clients and backend servers. Configuring buffer sizes can significantly impact performance, especially when dealing with large files or high traffic volumes.
To configure proxy buffers, you can adjust parameters such as proxy_buffer_size, proxy_buffers, and proxy_busy_buffers_size in your NGINX configuration file. Properly sizing these buffers can help optimize memory usage and prevent buffer overflow issues.
2. Request Headers
NGINX allows you to manipulate request headers before forwarding them to backend servers. This feature is particularly useful for modifying or adding headers to requests based on specific conditions or requirements.
You can use directives like proxy_set_header to modify existing headers or use add_header to add new headers to outgoing requests. This capability enables you to customize request headers to comply with backend server requirements or enhance security measures.
3. Load Balancing
NGINX provides robust load-balancing capabilities, allowing you to distribute incoming traffic across multiple backend servers for improved performance and fault tolerance. You can configure various load balancing algorithms, such as round-robin, least connections, or IP hash, to suit your application’s needs.
Consider the following sample load balancing configuration:
http {
upstream backend_servers {
least_conn; # Load balancing algorithm: least connections
server backend1.sample.com weight=3;
server backend2.sample.com weight=2;
server backend3.sample.com weight=1;
server backup_backend.sample.com backup;
}
server {
listen 80;
location / {
proxy_pass http://backend_servers;
}
}
}
Additionally, NGINX supports dynamic configuration updates, enabling seamless scaling and the addition or removal of backend servers without disrupting ongoing traffic.
4. Caching
Caching frequently accessed content at the reverse proxy level can significantly reduce response times and alleviate the load on backend servers. NGINX offers powerful caching mechanisms that allow you to cache both static and dynamic content efficiently.
By configuring directives like proxy_cache, proxy_cache_key, and proxy_cache_valid, you can control caching behavior and cache expiration policies. NGINX also supports cache purging and cache bypassing mechanisms, giving you granular control over cached content.
Here is a sample cache configuration:
http {
proxy_cache_path /path/to/cache keys_zone=my_cache:10m max_size=10g;
server {
listen 80;
location / {
proxy_cache my_cache;
proxy_cache_valid 200 302 10m;
proxy_cache_valid 404 1m;
proxy_pass http://backend_servers;
}
}
}
5. Security
Securing your reverse proxy setup is crucial for protecting against potential threats and vulnerabilities. NGINX offer s various security features and best practices to safeguard your infrastructure and applications.
You can implement SSL/TLS encryption using NGINX’s built-in SSL module to establish secure communication channels between clients and the reverse proxy.
Additionally, NGINX also supports these features to ensure security:
Access \Control Mechanism: This set of controls includes IP whitelisting, rate limiting, and authentication to restrict access and mitigate malicious activities. You can also add specific addresses or networks to control client access to backend servers. For instance, consider the following configuration that denies all incoming requests except for those originating from the allowed IP address:
deny all;
allow 192.168.1.0/24;
Request Filtering: NGINX allows for filtering and rate-limiting requests using diverse criteria. Implement filters based on geographic location (geo), user agent (map), or request rate (limit_req).
Security Headers: Enhance security by incorporating HTTP security headers, which protect against common web vulnerabilities. You can opt for headers such as Content-Security-Policy, X-Content-Type-Options, and X-Frame-Options to fortify request security.
SSL/TLS Termination: Utilize the reverse proxy as a termination point for clients’ SSL/TLS connections. This ensures secure redirection from HTTP to HTTPS, leveraging pre-installed certificates to maintain encryption integrity.
Furthermore, regularly updating NGINX and implementing security patches is essential to address any known vulnerabilities and ensure the ongoing security of your reverse proxy environment.
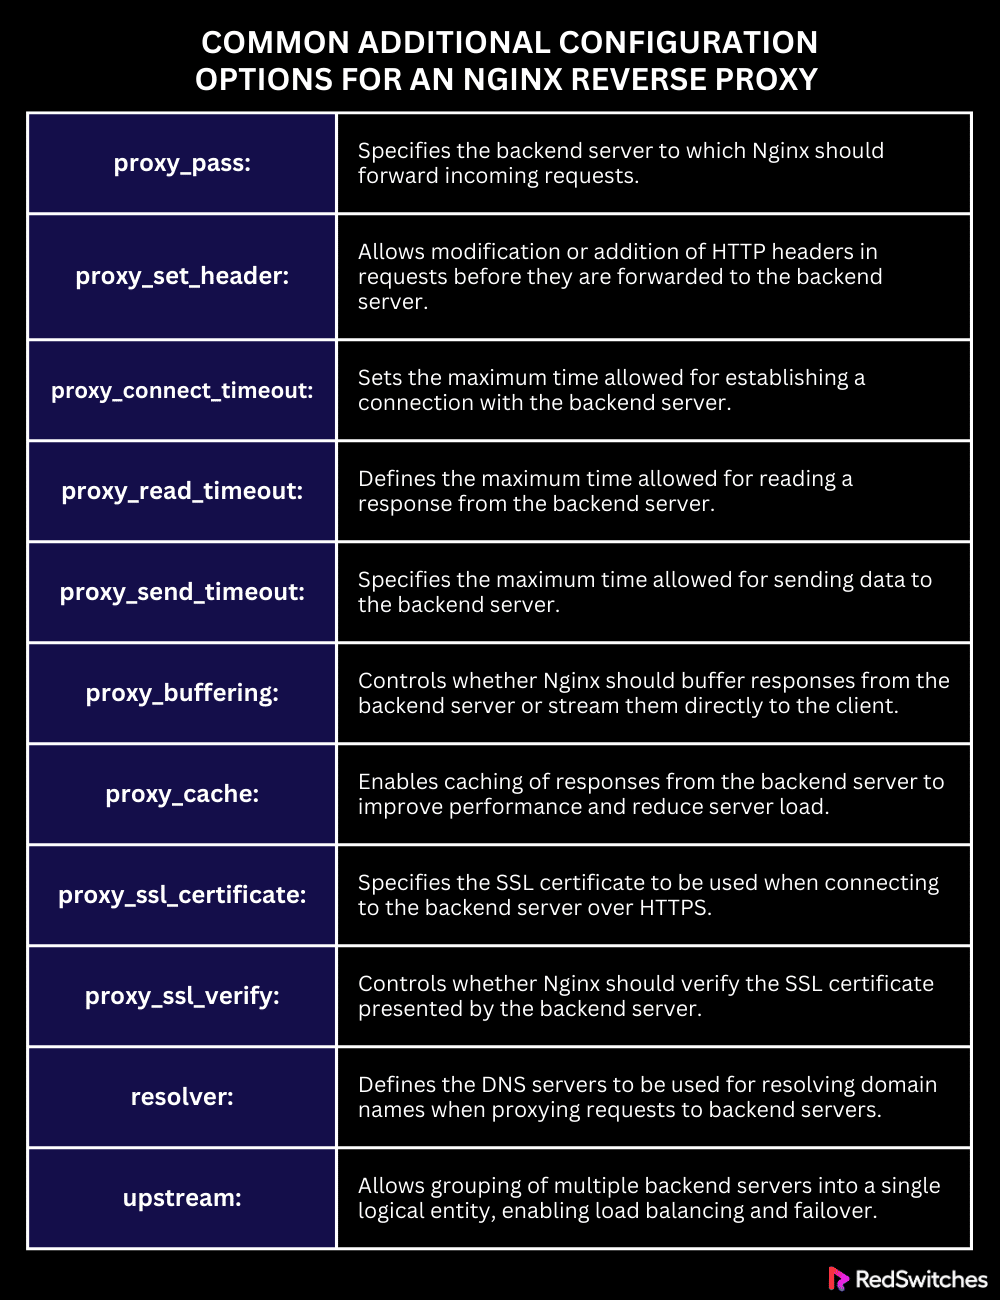
Some common additional configuration options for an NGINX reverse proxy include:
Benefits of Using NGINX as a Reverse Proxy
NGINX is often used for enhancing web server performance, scalability, and security. The key benefits of employing NGINX as a reverse proxy are as follows:
- High Performance: NGINX utilizes minimal resources, rendering it optimal for handling extensive data volumes and surges in traffic demands.
- Scalability: NGINX seamlessly accommodates traffic spikes, making it suitable for projects of varying scales, ranging from small-scale endeavors to large-scale infrastructures.
- Ease of Configuration: Its straightforward configuration syntax simplifies setup and management, streamlining operations and reducing complexity.
- Community Support: NGINX benefits from a vibrant and engaged user community. Its extensive documentation offers numerous examples, tutorials, and other resources, facilitating ease of use and troubleshooting.
Conclusion
By now you would know how to successfully set up and leverage NGINX as a powerful reverse proxy to enhance the performance, security, and scalability of your web applications. It is imperative to have a reliable hosting solution like RedSwitches to complement your NGINX setup.
RedSwitches is your global dedicated hosting partner, offering bare metal hosting solutions tailored to enhance your Ruby development experience. We offer the best-dedicated server pricing and deliver instant dedicated servers, usually on the same day the order gets approved. Whether you need a dedicated server, a traffic-friendly 10Gbps dedicated server, or a powerful bare metal server , we are your trusted hosting partner.
FAQs
Q. What is a Reverse Proxy Server?
A reverse proxy server is a type of proxy server that sits between clients and backend servers, intercepting client requests and incoming traffic and forwarding them to the appropriate backend server. Unlike a forward proxy, which is typically used to protect clients by hiding their IP addresses and providing anonymity, a reverse proxy is deployed in front of servers to enhance performance, scalability, security, and reliability.
Q. Can I use NGINX as a reverse proxy for multiple backend servers?
Yes, NGINX supports proxying requests to multiple backend servers, allowing you to distribute traffic among them efficiently.
Q. How can I monitor and analyze traffic passing through NGINX?
NGINX provides various logging options and integration with monitoring tools to track and analyze traffic patterns effectively.
Q. Is NGINX suitable for handling high-traffic websites?
Yes, NGINX is renowned for its ability to handle high volumes of traffic efficiently, making it an excellent choice for high-traffic websites and applications.
Q. How does NGINX handle dynamic and static content as a reverse proxy?
NGINX can efficiently serve both dynamic and static content. For dynamic content, NGINX can pass requests to backend servers (e.g., application servers) using proxy directives like proxy_pass. For static content, NGINX can serve it directly from disk, benefiting from its high performance and low resource usage.
Q. What is the purpose of the proxy_set_header Connection directive?
The proxy_set_header Connection directive allows NGINX to control the behavior of the Connection header in requests forwarded to proxied servers. It can be used to optimize connection handling between NGINX and backend servers.
Q. What are some common NGINX proxy directives used in reverse proxy configurations?
Common NGINX proxy directives include proxy_pass, proxy_set_header, proxy_connect_timeout, proxy_read_timeout, proxy_send_timeout, and proxy_cache, among others. These directives allow fine-tuning of NGINX’s reverse proxy behavior to meet specific requirements.
Q. How does NGINX use the pass directive in reverse proxy configurations?
The pass directive (often seen as proxy_pass) specifies the backend server to which NGINX should forward requests. It plays a crucial role in reverse proxy configurations, determining where requests should be sent for processing.
Q. Can NGINX cache content in reverse proxy configurations?
Yes, NGINX can cache both dynamic and static content in reverse proxy configurations using directives like proxy_cache. Caching content can significantly improve performance by reducing the load on backend servers and speeding up response times for subsequent requests.
