Virtualization lies at the heart of modern networking and service delivery infrastructure.
Virtual machines allow you to benefit from the physical infrastructure by allocating resources to current projects with minimal wastage. This ability to create and manage multiple virtual machines (VMs) on a single physical server is crucial to building, managing, and distributing software services in business environments.
The Kernel-based Virtual Machine (KVM) is an open-source virtualization technology built into Linux to create virtual machines. It is designed explicitly for Linux environments running on x86 hardware with virtualization extensions (Intel VT or AMD-V).
In this tutorial, you will learn how to install KVM on Ubuntu 20.04. Next, we will show you how to run multiple VMs, each capable of executing a separate stack of operating system and software, including unmodified Linux or Windows images.
Table Of Contents
- Verify KVM Compatibility on Ubuntu 20.04
- Install KVM on Ubuntu 20.04
- Create a Virtual Machine on Ubuntu 20.04
- Conclusion
- FAQs
Verify KVM Compatibility on Ubuntu 20.04:
Before you can install KVM, we recommend checking that your system meets the hardware requirements, such as CPU virtualization support.
Launch the terminal and run the following egrep command to get the relevant information from the /proc/cpuinfo file:
# egrep -c '(vmx|svm)' /proc/cpuinfo

If the output shows 0, the processor on your system lacks KVM compatibility. Alternatively, if the output is of any other number, your CPU supports virtualization (either Intel VT-x or AMD-V).
While not strictly necessary, KVM acceleration can significantly improve VM performance. You can verify support for KVM acceleration by running this command:
# sudo kvm-ok
If you have KVM acceleration support on your system, you will see the following status message:

Conversely, you might need to install a cpu-checker if the output shows an error message.
You can install the cpu-checker by running the following command in the terminal:
# sudo apt install cpu-checker
Remember to restart the terminal to make sure appropriate configuration files are loaded up in the new session.
You’re now set to commence KVM installation.
Install KVM on Ubuntu 20.04
Let’s start the KVM installation process, which usually has three steps.
The Prerequisites
Before diving into the installation process, ensure you have the following:
- A system running Ubuntu 20.04
- A CPU with virtualization extensions (Intel VT-x or AMD-V)
- A minimum of 4GB RAM (for multiple virtual machines, we recommend adding a GB of RAM for each VM)
- A user account with root or sudo permissions
Step #1: Install KVM Packages
Start by updating the system package list by running the following command:
# sudo apt update
Next, install the necessary KVM packages:
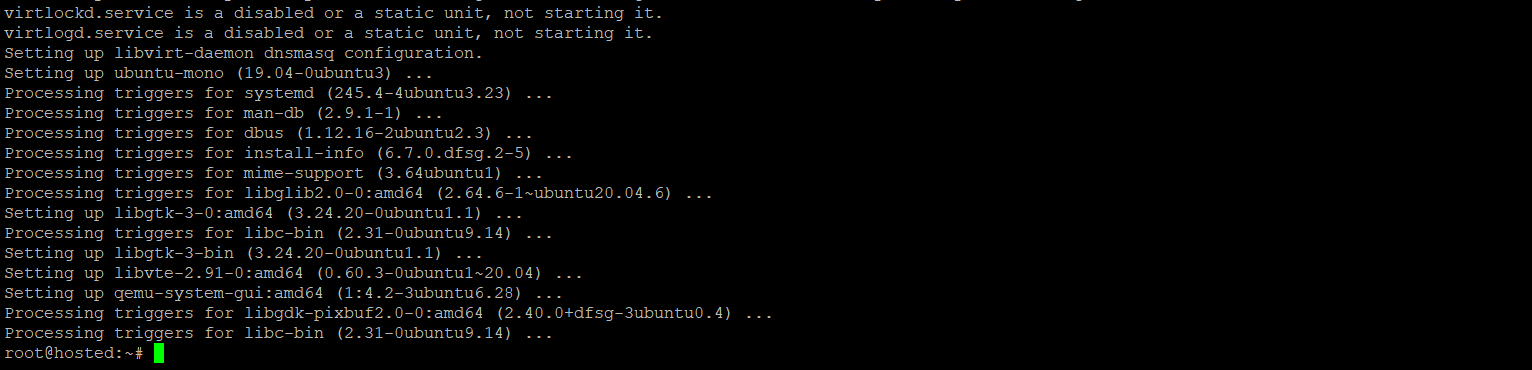
# sudo apt install qemu-kvm libvirt-daemon-system libvirt-clients bridge-utils
This command initiates the installation of four essential KVM packages:
- qemu-kvm
- libvirt-daemon-system
- libvirt-clients
- bridge-utils
When prompted, press Y to confirm the installation.
Step #2: Grant User Authorization
Users must belong to the libvirt and kvm groups to operate virtual machines. We recommend the following common to add a user to the libvirt group:
# sudo adduser 'username' libvirt

While you run the command, replace username with the desired username.
Now, repeat the process for adding a user to the kvm group by running this command:
# sudo adduser 'username' kvm

Step #3: Verify Installation
We recommend running the virsh command to check the installation status:
# virsh list --all
If the output is empty, KVM is installed successfully (as indicated by the no running VMs):

Alternatively, you can verify the libvirtd status with the following command:
# sudo systemctl status libvirtd
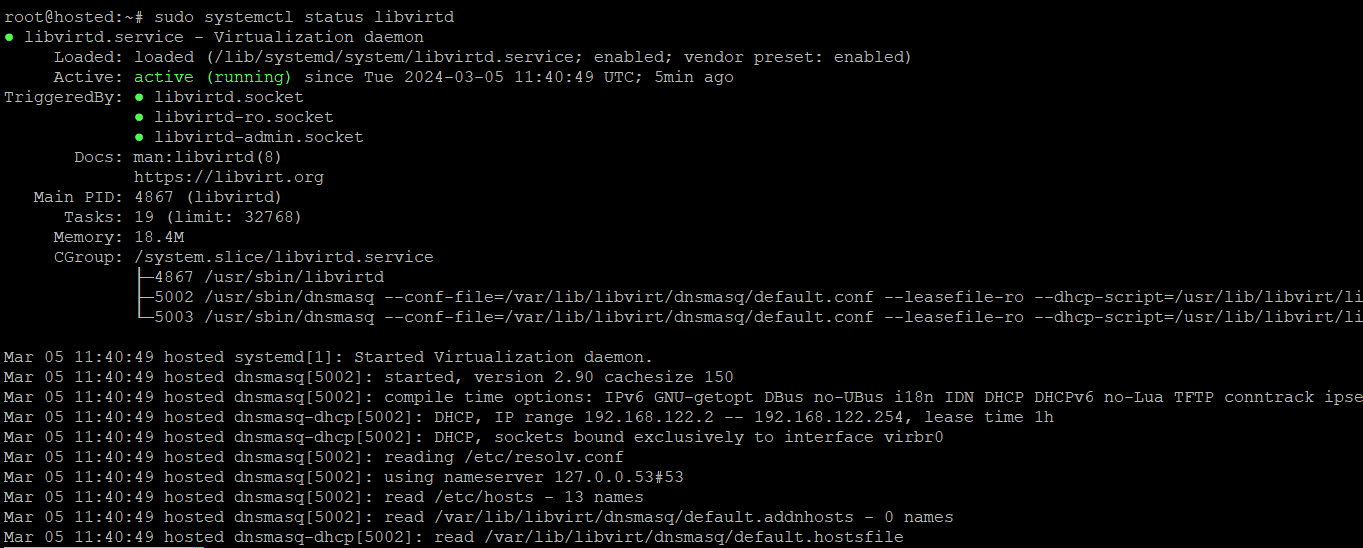
If the service status displays an active (running) status, press Q to exit the status display. In case the service is inactive, activate it using:
# sudo systemctl enable --now libvirtd
Create a Virtual Machine on Ubuntu 20.04
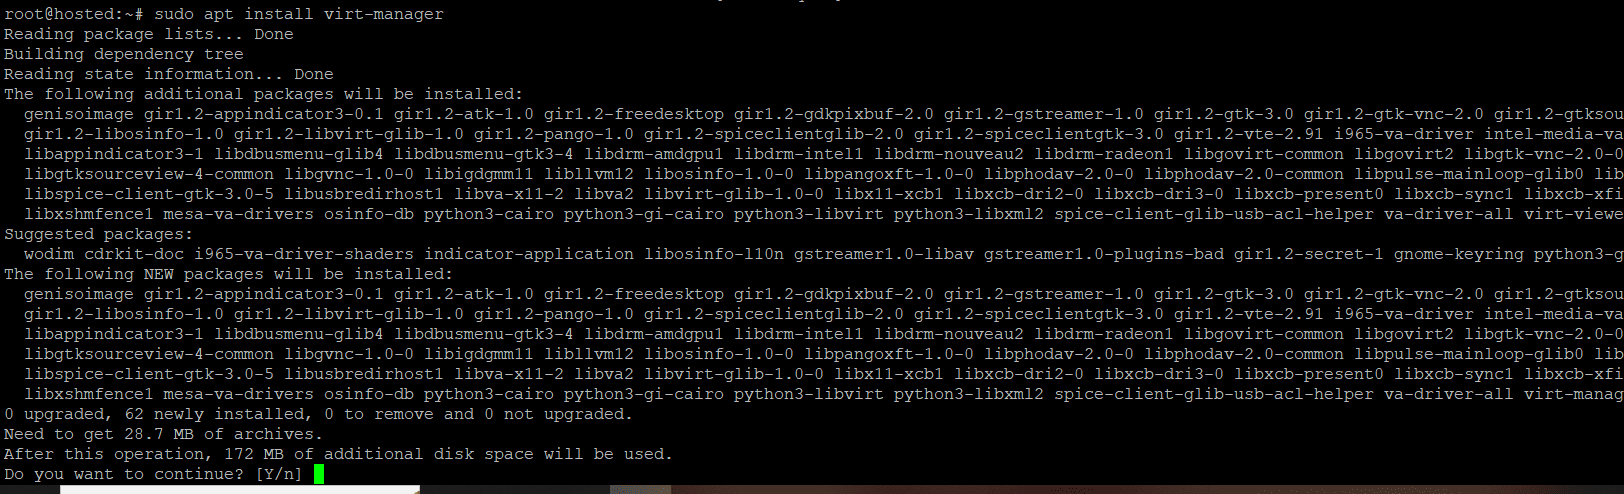
Now that you’ve installed and configured KVM, you can go ahead and create a virtual machine on Ubuntu. However, before selecting one of the methods outlined, ensure you have installed virt-manager, a utility for creating and overseeing VMs by running the following command:
# sudo apt install virt-manager
Remember to enter Y to install the utility.
In addition, ensure you have downloaded the ISO file containing the operating system you intend to install on the VM.
Once you have verified your system’s compatibility and installed virt-manager, you can create a virtual machine on Ubuntu 20.04:
Method #1: Create a Virtual Machine Using virt manager GUI
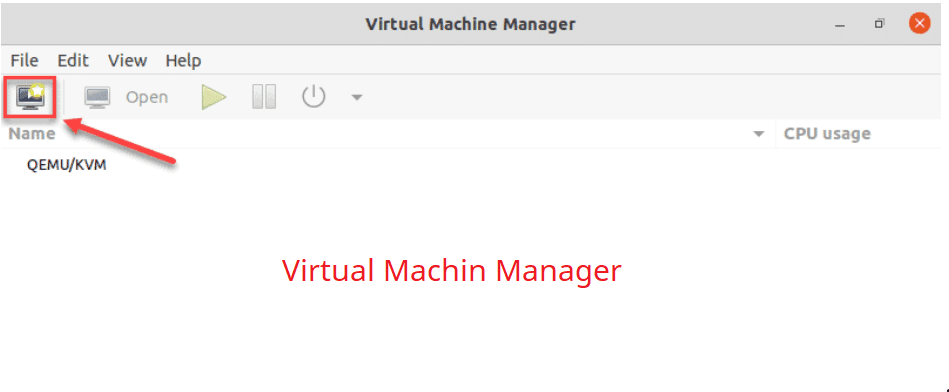
Start by launching the Virtual Machine Manager (virt) with admin privileges by executing the following:
# sudo virt-manager
Locate and click on the computer icon in the upper-left corner of the VM manager window.
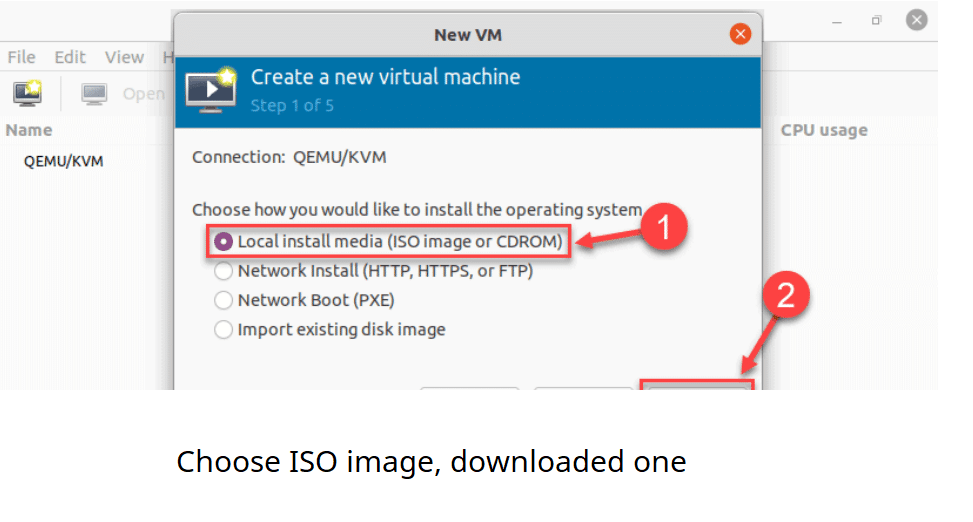
Once the dialog box appears, select Local install media and click Forward.
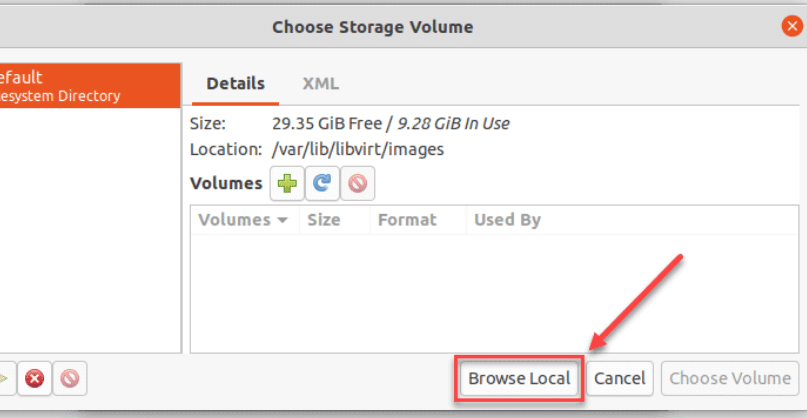
Click Browse Local and navigate to the directory where your ISO file is located.
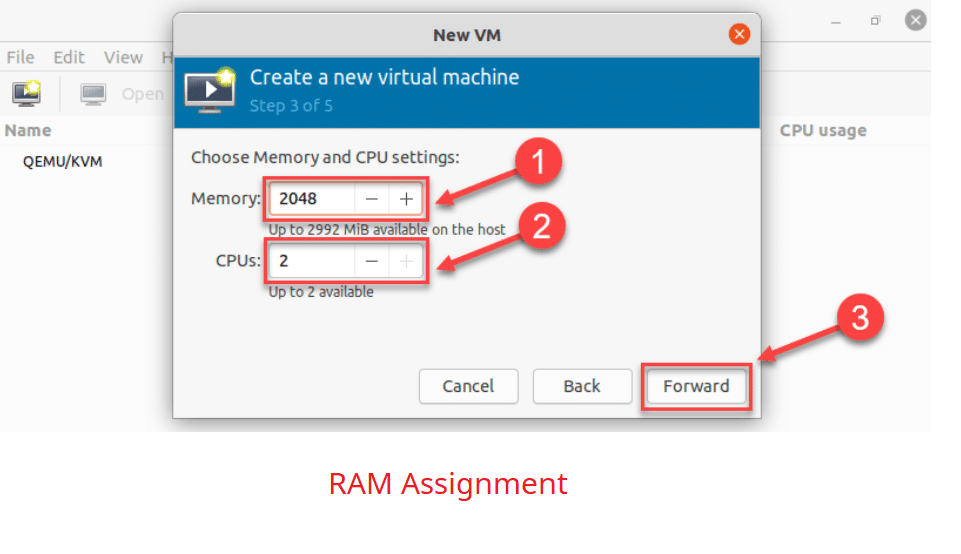
Specify the desired amount of RAM and the CPU cores for the VM using the sliders and click Forward.
Next, allocate the hard disk space for the VM and click Forward to proceed to the final step.
Finally, enter a name for your VM and click Finish to complete the VM setup.
IMPORTANT: The VM will automatically start, prompting you to begin installing the operating system (OS) from the ISO file.
Method #2: Create a VM From the Command Line
Now that you’ve learned to create a virtual machine on Ubuntu 20.04 using virt-manager GUI, we will look into an alternative method of creating a VM using the command line virt-install utility.
We recommend this utility for creating a VM via the Linux terminal because it provides greater flexibility by allowing you to specify various configuration options.
The command syntax for virt-install is as follows:
# virt-install --option1=value --option2=value ...
For instance, run the following command to install Fedora 33 Workstation:
# virt-install --name=my-vm \
--description="Fedora 33 Workstation" \
--ram=2048\ --vcpus=2\
--disk=path/to/vm.qcow2 \
--cdrom=path/to/fedora33.iso \
--graphics=spice
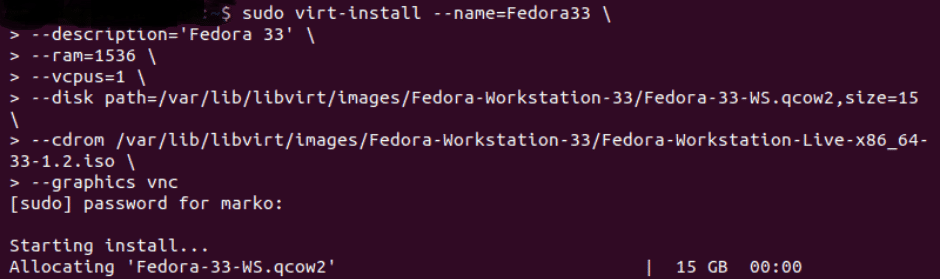
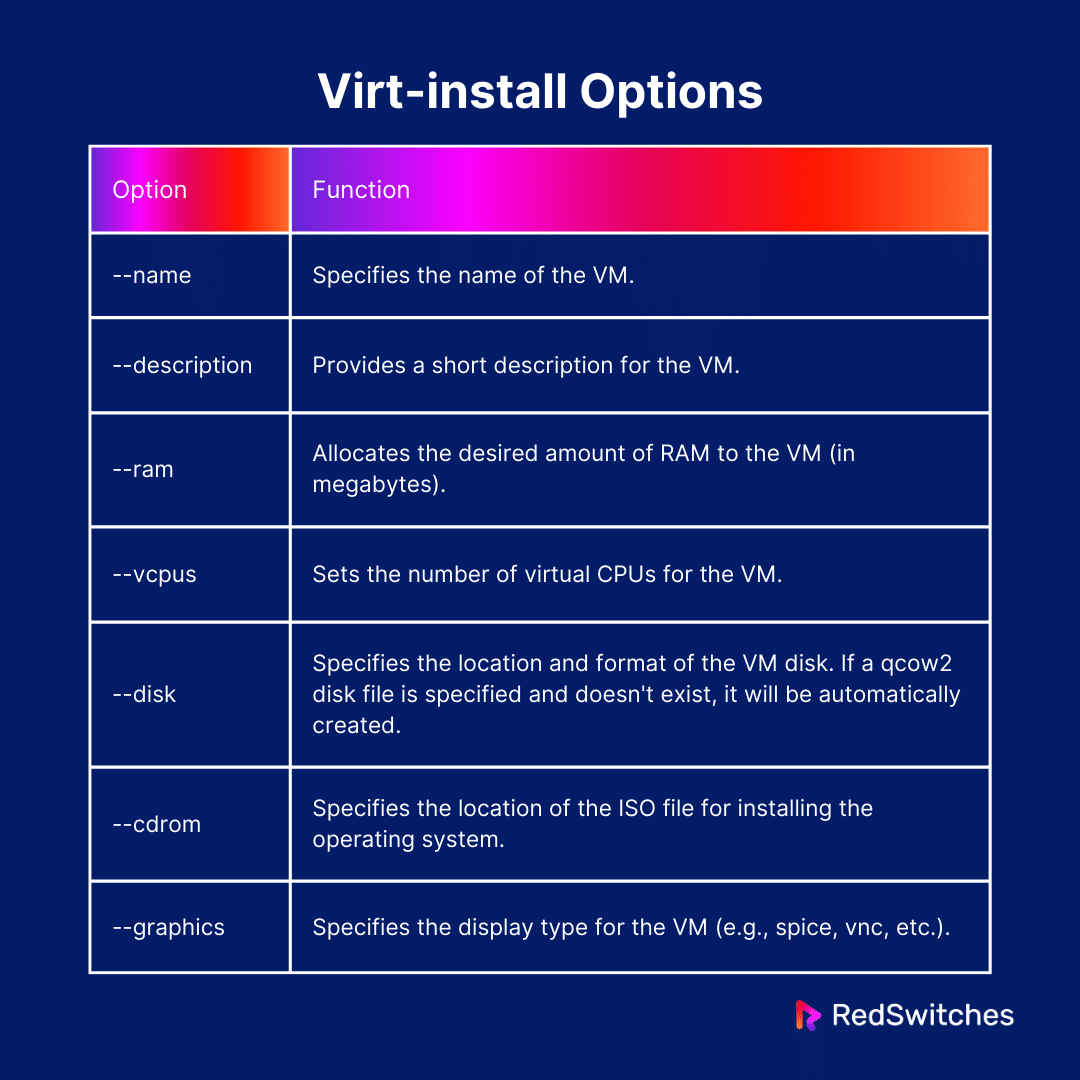
virt-install supports several options that define specific parameters for the virtual machine. You can adjust these options based on your requirements to create the VM according to your desired configuration.
The following table presents the most important options for the utility:
Also Read: Install Ubuntu 20.04 LTS Focal Fossa In 5 Easy Steps
Conclusion
Installing KVM on Ubuntu 20.04 is straightforward and opens up the powerful capabilities of virtualization on your system. Whether developing software, testing different environments, or simply exploring Linux, KVM provides a robust and flexible platform for running VMs.
RedSwitches Bare Metal Hosting Provider offers an optimal infrastructure, ensuring high performance and reliability for your downloading tasks and beyond. So, if you’re looking for a robust server for your Linux projects, we offer the best-dedicated server pricing and deliver instant dedicated servers, usually on the same day the order gets approved. Whether you need a dedicated server, a traffic-friendly 10Gbps dedicated server, or a powerful bare metal server, we are your trusted hosting partner.
FAQs
Q. Can I run Windows VMs on KVM?
Absolutely! KVM supports running Windows VMs. For that, you will need a valid Windows installation media, and you might also need to adjust virtual hardware settings for optimal compatibility.
Q. How can I access the graphical interface of a VM?
The method for accessing the graphical interface (GUI) of your VM on Ubuntu 20.04 with KVM depends on how you created the VM. If you created the VM using the graphical Virt Manager tool, you can easily access its GUI directly within Virt Manager. You’ll need a remote desktop client to access its GUI if you created the VM using the command line interface (virt-install).
Q. Is it possible to migrate VMs from another hypervisor to KVM?
Yes, you can migrate VMs from other hypervisors such as VMware or VirtualBox to KVM. The process involves converting VM disk images to a compatible format like qcow2 and creating a new VM in KVM that utilizes the converted disk image. Tools like virt-v2v can streamline this process.
Q. How do I back up a VM in KVM?
Creating backups of your VM in KVM is essential to protect your data and ensure you can recover in case of unexpected issues. VM backups in KVM can be performed by creating snapshots of the VM’s disk image or by copying the disk image file to another location. For more comprehensive backups, you can also use tools like virsh to automate backups, including VM configuration and disk images.
Q. Can I automate the creation and management of VMs with KVM?
Yes, KVM, along with the Libvirt library, provides a robust set of CLI tools for automating VM creation, deletion, and management. You can integrate commonly used tools like virt-install and virsh into scripts for automation. Additionally, you can opt for APIs for seamless integration with cloud management platforms.
Q. How do I resize a VM’s disk image in KVM?
KVM allows you to resize a VM’s disk image to accommodate growing storage needs. To resize a VM’s disk image in KVM, use the qemu-img resize command to increase the size of the disk image file. After resizing, adjust the filesystem within the VM’s operating system to utilize the additional space.
Q. What are the limitations of using KVM?
KVM is a robust and powerful virtualization solution. While it is powerful, it does have some limitations. This includes resource consumption, complexity, limited operating system support, hardware requirements, lack of GUI management tools, and advanced feature configurations.
Q. How do I set up a network bridge for my guest machines?
Configure a virtual bridge to provide guest machines with direct access to your host network. This enables guest machines to obtain their own IP addresses and communicate with other devices on the network. You can also set up a network bridge by configuring XML files and commands specific to your kernel version.
Q. Can I configure KVM to work with remote hosts?
Yes, you can configure KVM to work with remote hosts, allowing you to manage VMs from a central location. However, by default, KVM setups may not be optimized for remote access and control. You may need to make adjustments to accommodate remote access and control by utilizing specific commands tailored to your specific setup.
Q. How do I install an operating system on a VM using an ISO image file?
To install an operating system on a VM:
- Mount the ISO image file containing the operating system installation media.
- During VM creation, specify the mounted ISO file as the installation source to boot from and install the desired OS on your guest machine.
