As a developer, you know that managing dependencies and libraries is essential to creating any web application. Anyone who’s used PHP before knows this can become quite a chore.
Enter Composer, a popular dependency manager for PHP.
Composer makes it easy to download, manage, and update packages that your PHP application requires for its functionality. By automating the dependent management process, developers save time, reduce code errors, and improve their applications’ security.
The only flip side is that the installation process can be confusing if you’re new to Composer or Ubuntu 22.04.
In this tutorial, we’ll walk you through installing and using Composer on Ubuntu 22.04. Whether you’re a beginner or an experienced PHP developer, this guide will help you unlock the full capabilities of Composer to manage your application’s dependencies.
Let’s start with the prerequisites of the process.
Table Of Content
Prerequisites to Installing Composer on Ubuntu 22.04
You’ll need the following to install Composer on Ubuntu:
- A server running Ubuntu 22.04 with a non-root user with sudo privileges.
- PHP version 7.3 or higher installed.
Install Composer on Ubuntu 22.04
Let’s start the process of installing Composer on the Ubuntu server:
Step # 1: Install PHP and Additional Dependencies
Before you can install Composer, you’ll need to ensure all of the necessary dependencies and PHP packages are installed.
For this, log into your server and run the following command to update all the packages on the server.:
sudo apt-get update
Next, install PHP-related dependencies with the following command:
sudo apt-get install php php-cli php-mbstring git unzip
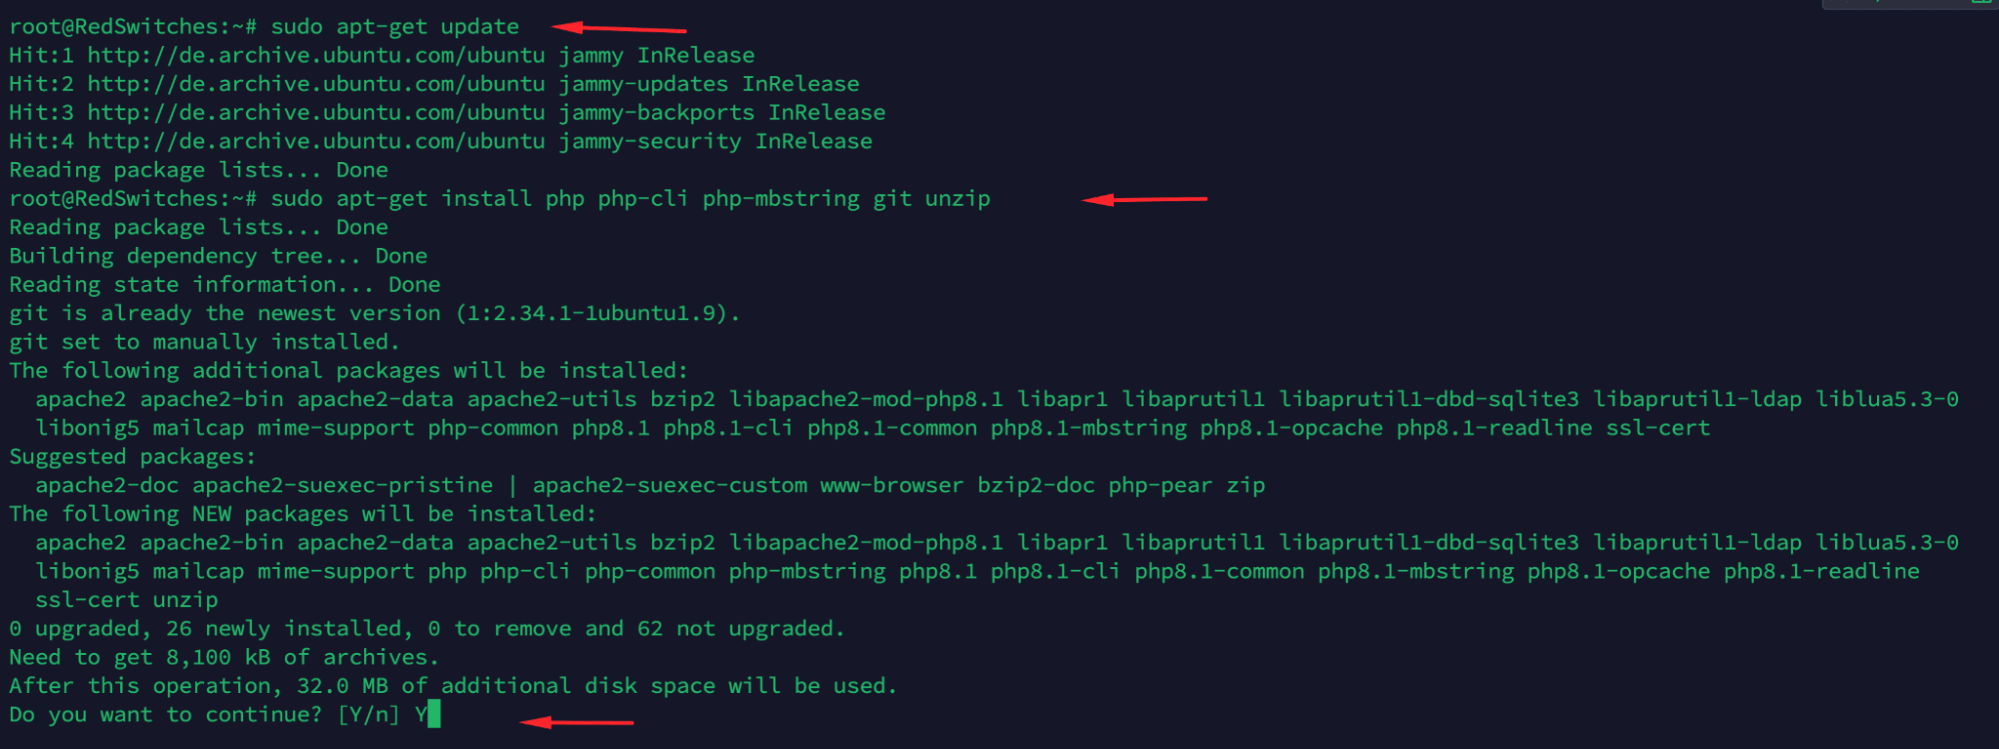
You will be prompted to confirm the installation by typing Y and hitting ENTER.
Once all dependencies are installed, you can proceed with Composer installation.
Step # 2(a): Download the Composer Executable
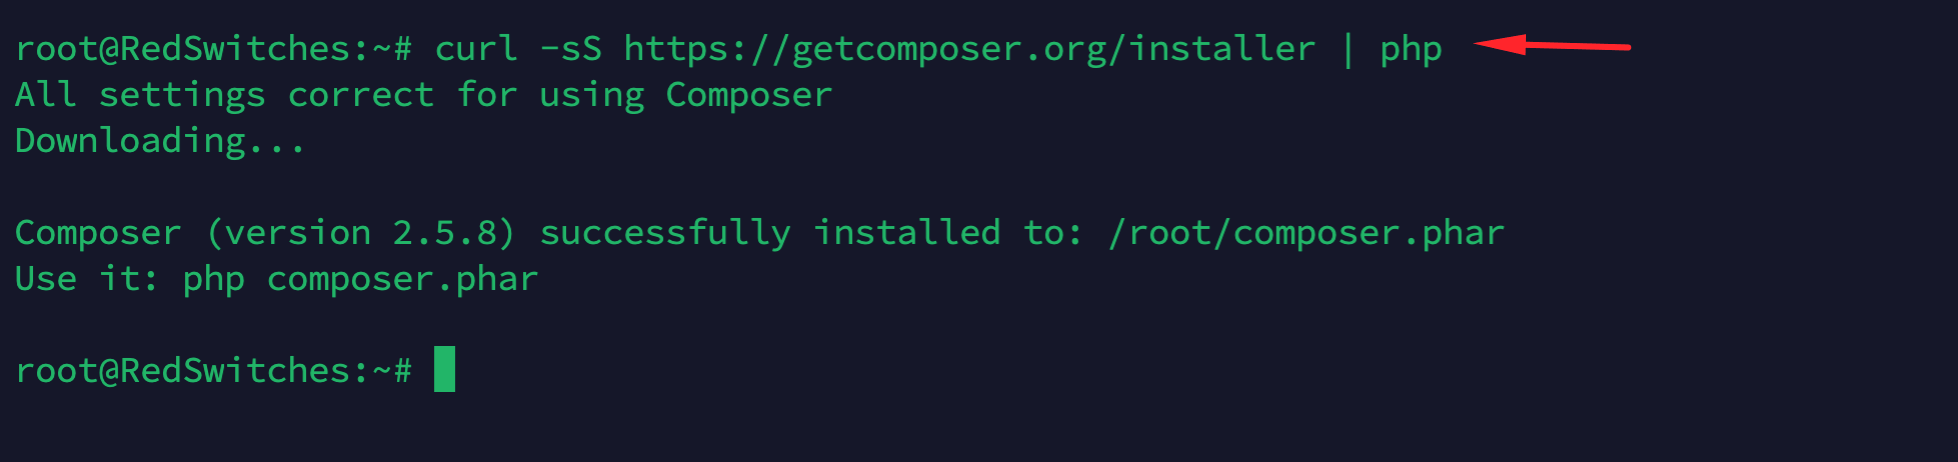
Now that you have all the necessary dependencies installed, you can install Composer on the Ubuntu server.
We highly recommend using the following curl command to have the latest Composer version.
curl -sS https://getcomposer.org/installer | php
This will download and execute an installer script that will download the latest version of Composer and install it in your current working directory.
Step # 2(b): Install Composer Globally
You’ll need to move the composer to use Composer globally and run the Composer commands from anywhere.phar file from your current directory to a location included in your PATH environment variable.
The most common location is the /usr/local/bin directory. So use the following command to initiate the move:
sudo mv composer.phar /usr/local/bin/composer

Step # 3: Test the Installation
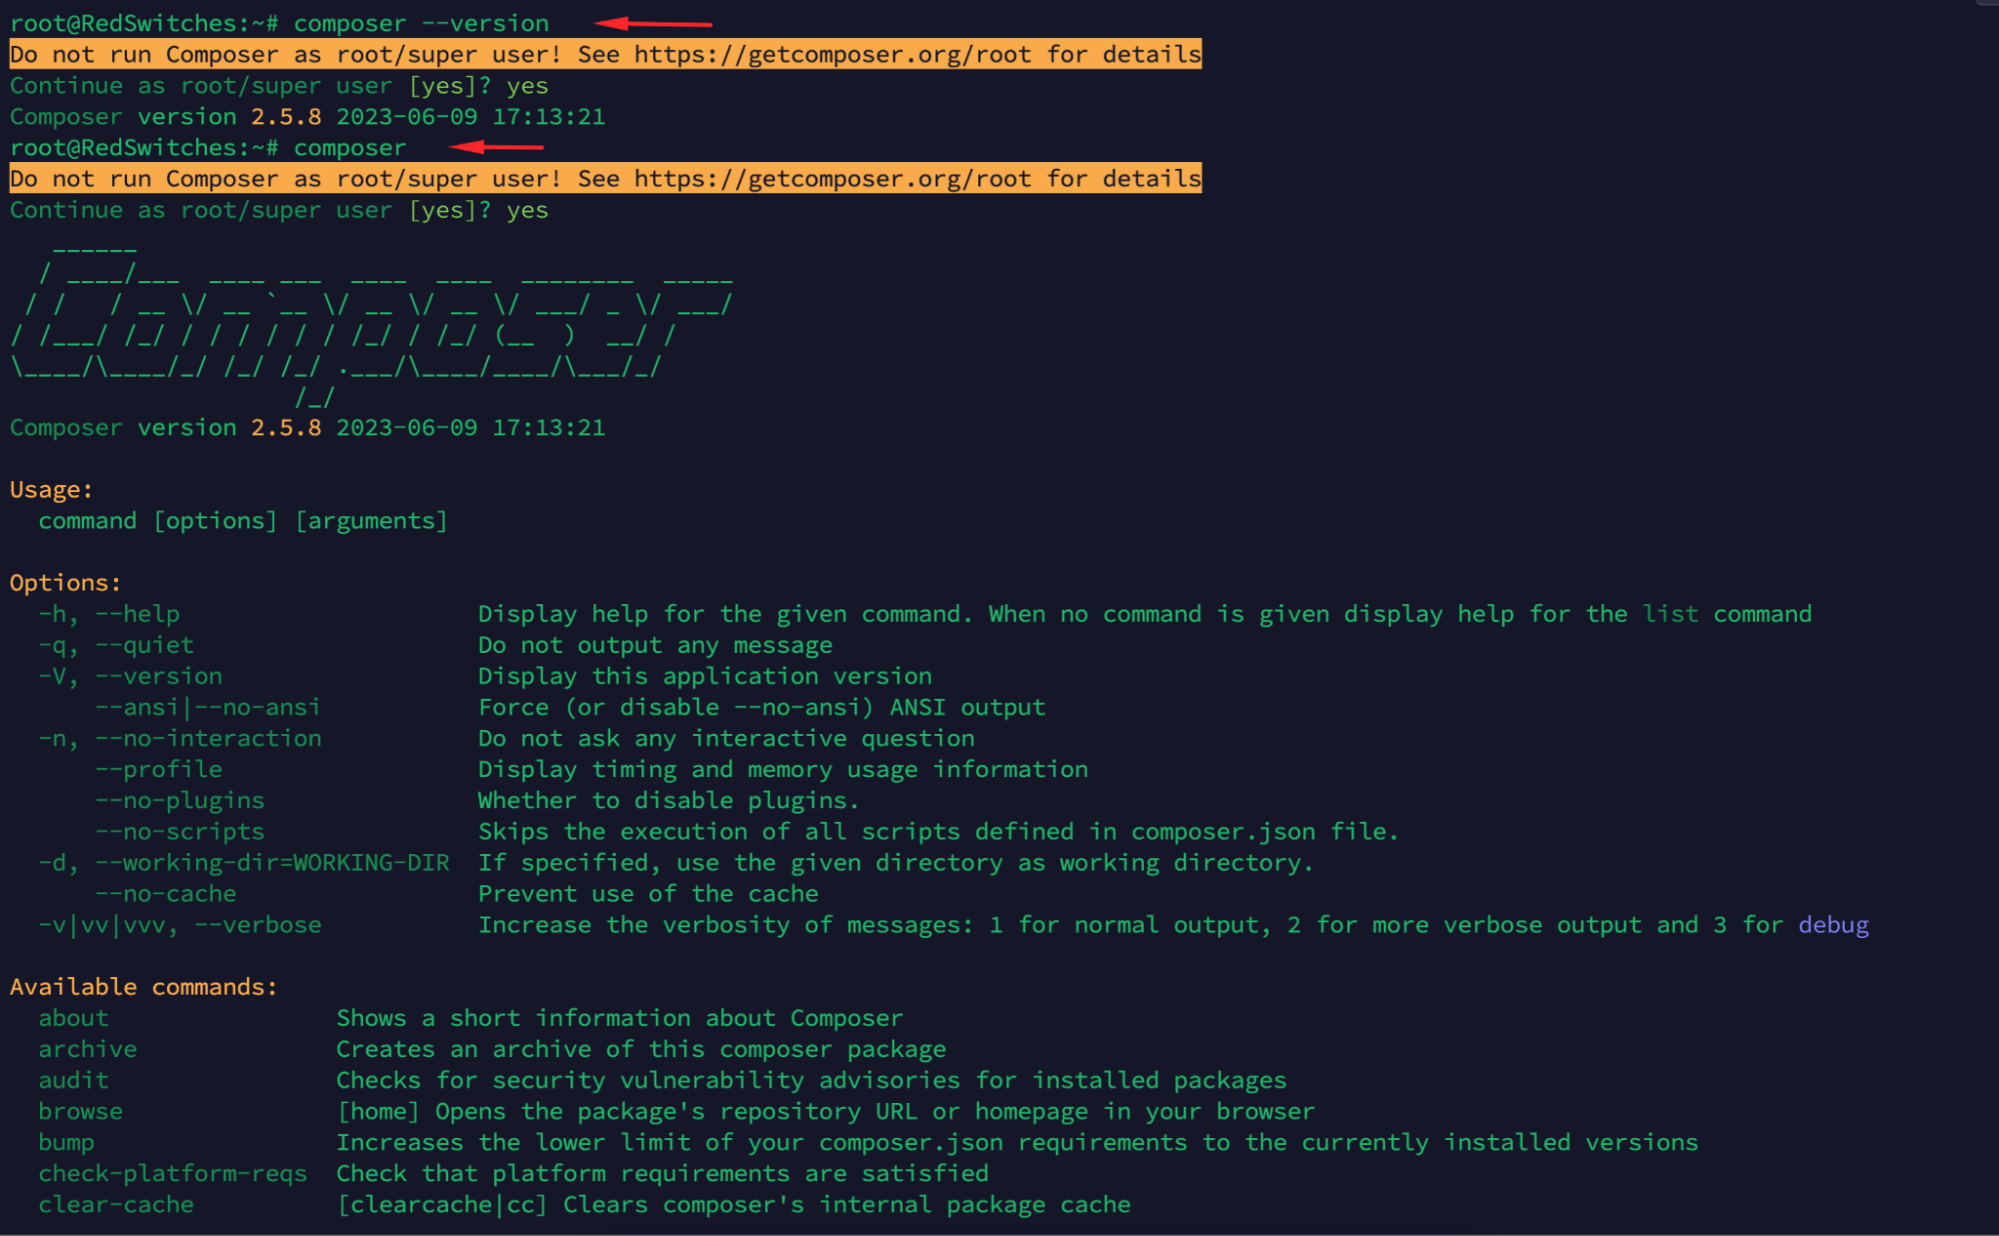
Now that you have installed Composer on Ubuntu, it’s time to test it. To do so, run the following command:
composer --version
This should output something like “Composer version 2.5.8 2023-06-09 17:13:21”.
Use Composer to Manage Application Dependencies
Now that you have Composer installed and tested let’s look at how to use it for managing dependencies.
In this section, we will create a simple project and add a dependency using Composer commands.
Step # 1: Create a Project
Start by creating a directory for your project:
mkdir myproject && cd myproject

Step # 2: Initialize the Project
Next, initialize the project with Composer. This will create an empty composer.json file in your project directory:
composer init

You will be prompted to answer a few questions about your project. Once you’ve answered them, your composer.json file should look something like this:
{

"name": "root/myproject",

"description": "RedSwitches",

"type": "project",

"require": {}

}
Step # 3: Add a Dependency
Now, let’s add a dependency to the project. We’ll use the twig/twig package for this example. To add it, run the following command:
composer require twig/twig
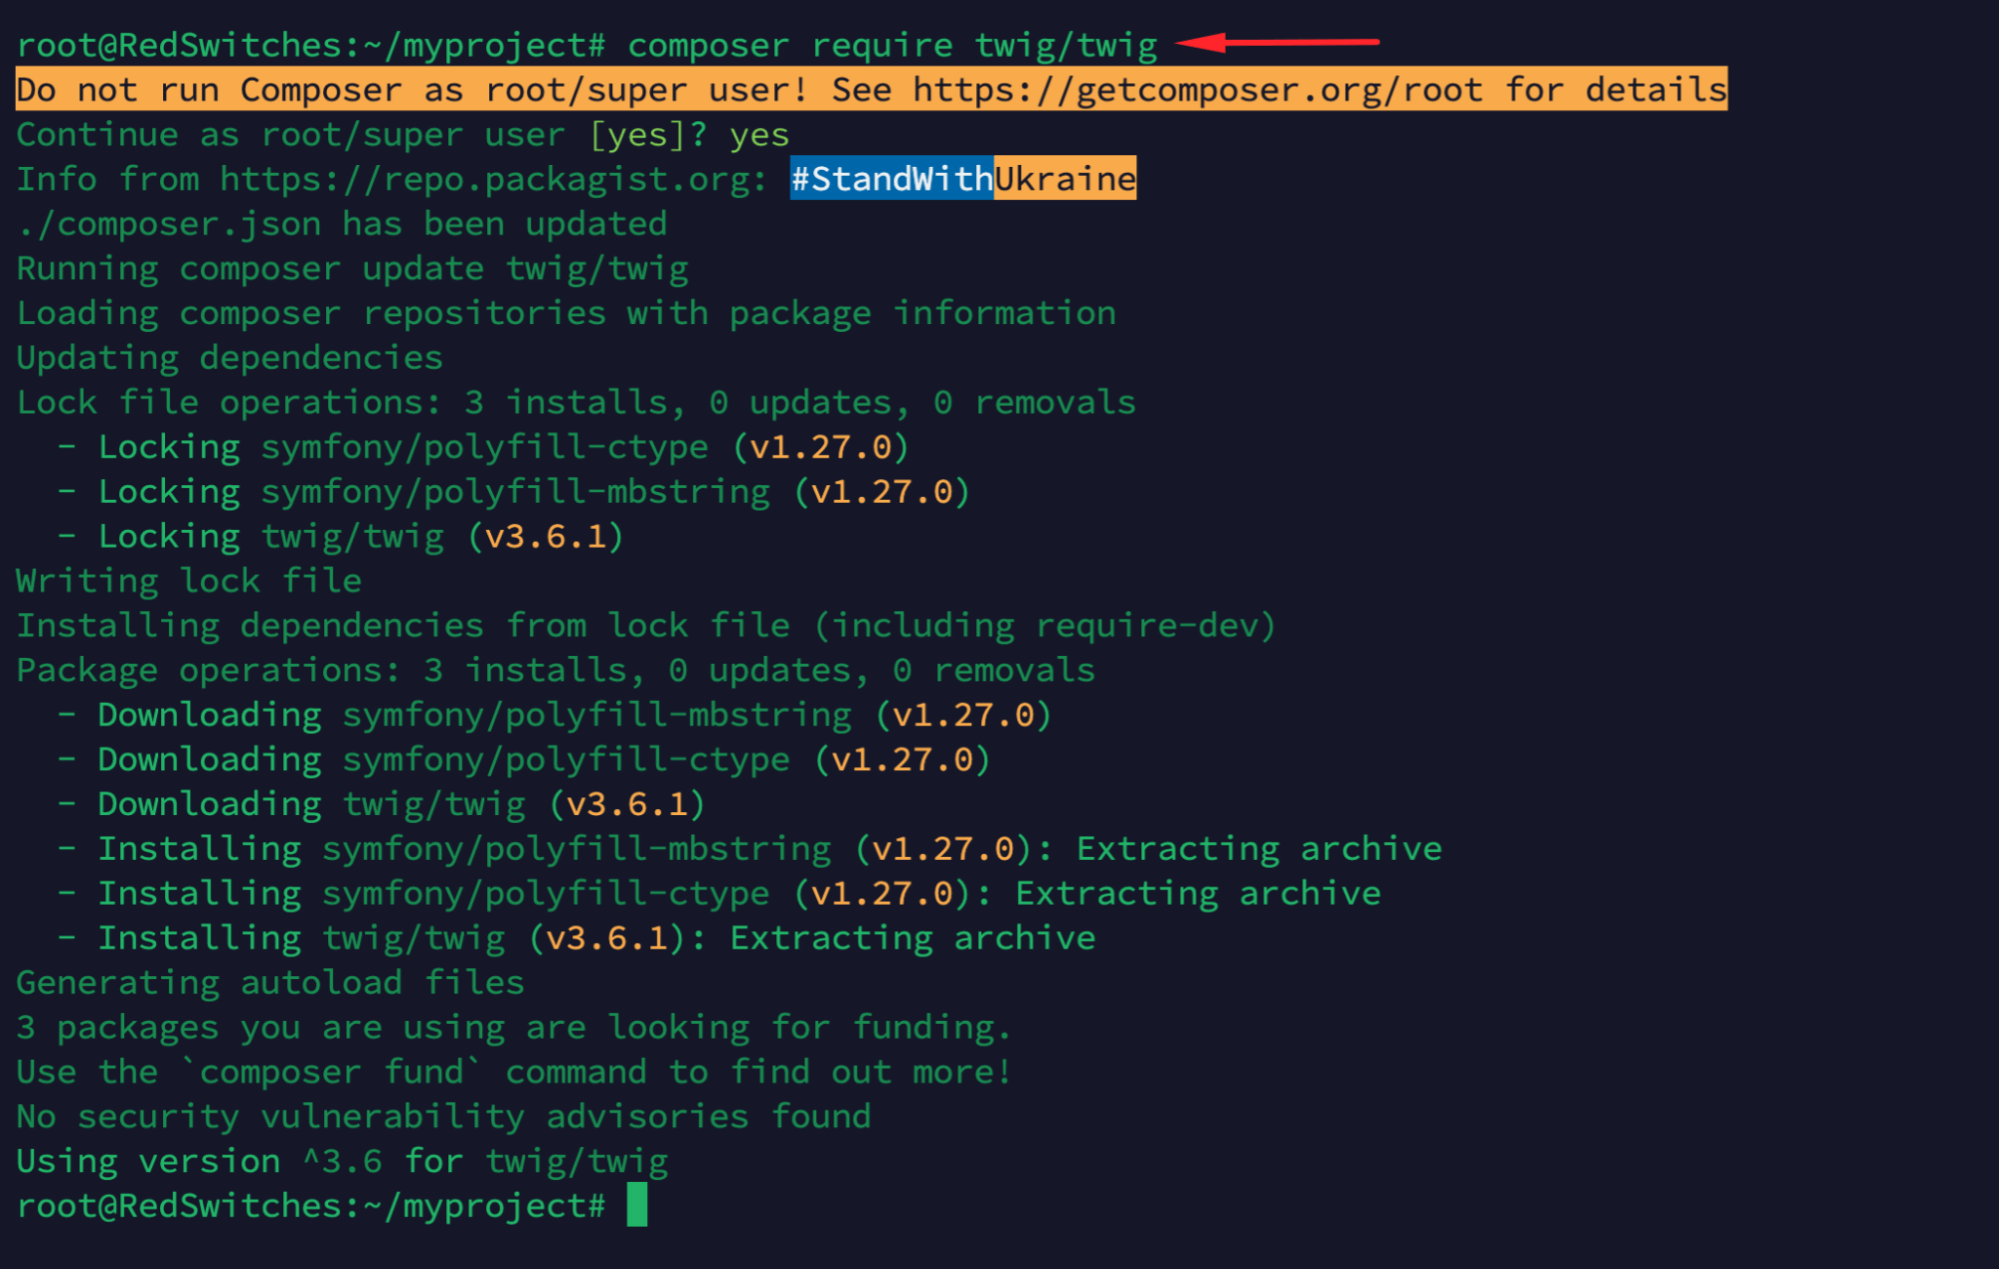
Once you’ve added the dependency, you should see it listed in the composer.json file:
{

"name": "root/myproject",

"description": "RedSwitches",

"type": "project",

"require": {

"twig/twig": "^3.6"

}

}
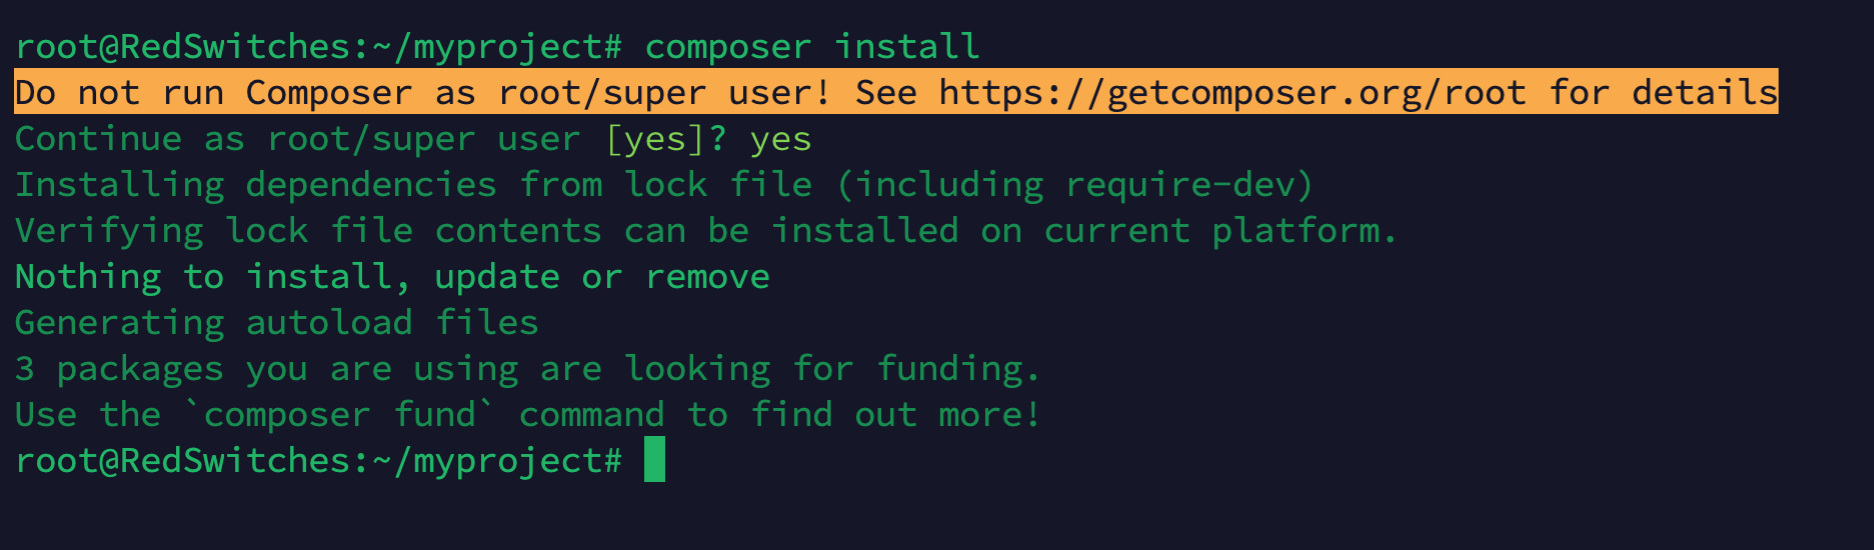
Step # 4: Install the Dependencies
Now, you can install the dependency you just added by running the following command:
composer install
This will download and install the necessary files in a vendor directory in your project root. You can now use these dependencies in your project.
Use Composer with a Framework
Now that you understand the basics of using Composer, let’s look at an example of using it with a framework.
We’ll use Laravel because it’s a very popular PHP framework in the industry.
Step # 1: Install the Laravel Package
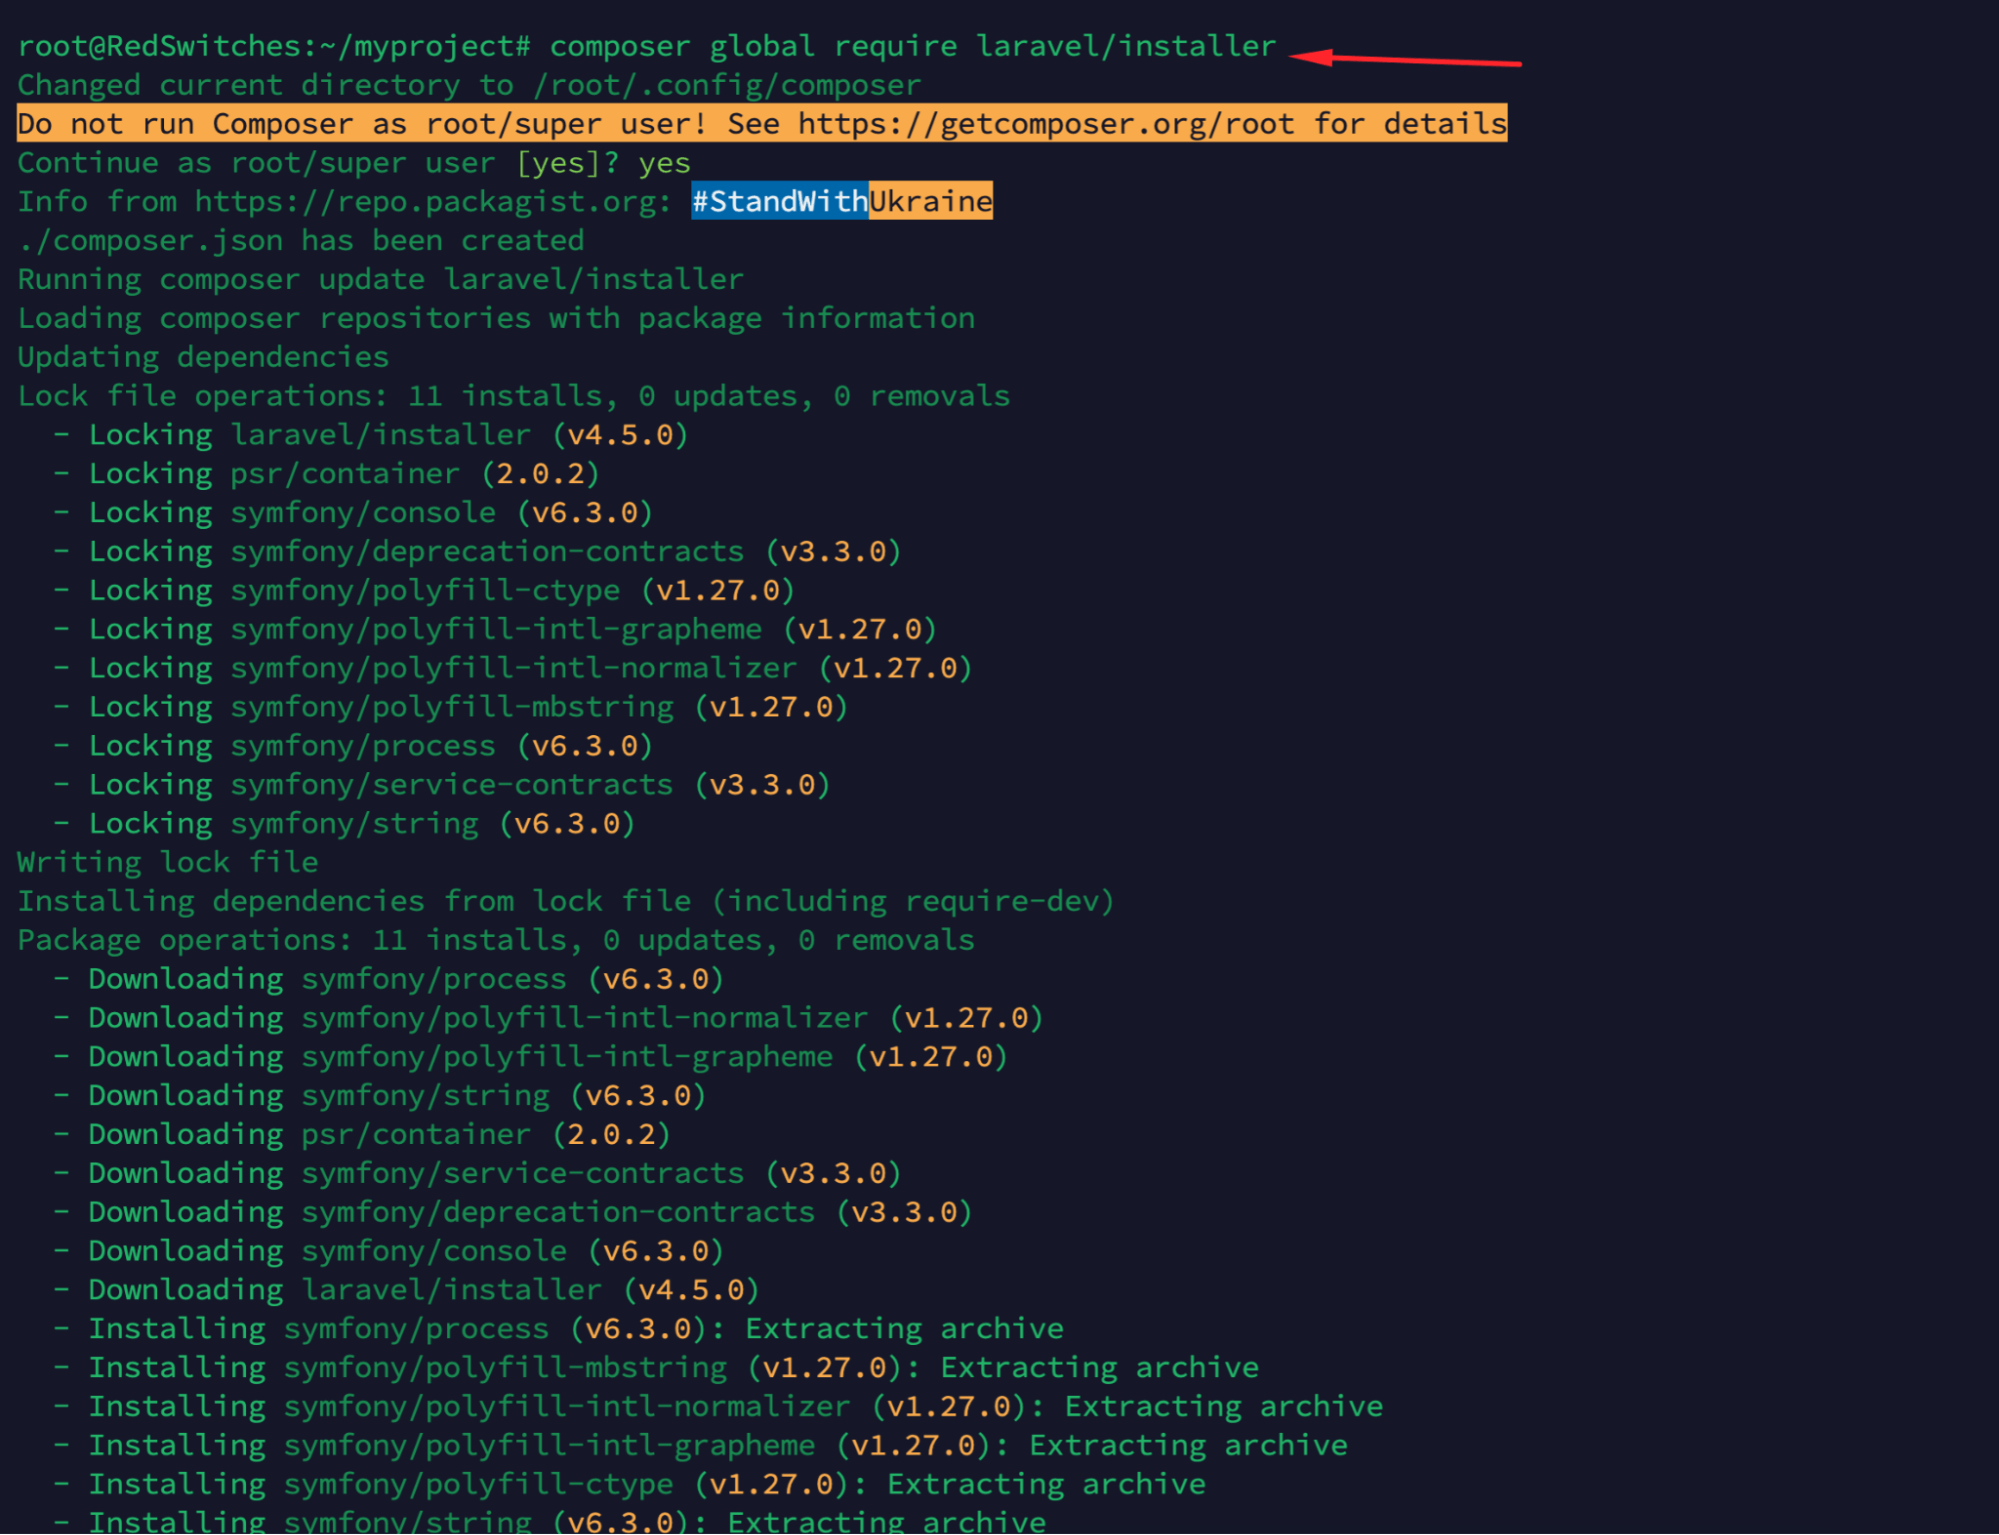
The first step is to install the Laravel installer package, allowing us to create a new Laravel project from the command line. To do so, run the following command:
composer global require laravel/installer
Step # 2: Create a Laravel Project
Once the installation is complete, you’re ready to create a new Laravel project. To do so, run the following command:
laravel new myproject
This will create a new myproject directory with all necessary files and dependencies in your current working directory.
Conclusion
Composer is a powerful dependency manager for PHP that allows you to manage project dependencies and install packages from Packagist easily. In this article, we’ve looked at how to install Composer on Ubuntu 22.04. We also looked at an example of using Composer with the Laravel framework.
At RedSwitches, we facilitate customers by providing fully customizable bare metal servers that they can use for installing Composer on Ubuntu. If you’re unsure of the server specifications for your latest projects, get in touch, and our expert support engineers will guide you throughout the process.
FAQ’s
Q-1) Why do I need Composer for my projects?
Composer is a dependency manager for PHP that allows you to easily manage project dependencies and install packages from Packagist (Composer Repository). It helps keep your project organized by allowing you to specify the exact version of each package you need and any other packages they might require. This makes it easier to maintain and update projects over time.
Q-2) How can I update Composer on my server?
To update Composer on your server, run the following command:sudo composer self-update
This will update Composer to the latest version.

You can also specify a particular version of Composer to install by running the following command:sudo composer self-update [version]
For example, if you want to install version 2.5.8 , you can run the following command:sudo composer self-update 2.5.8
Q-3) Where should I run the composer install?
The composer should be run in the directory that contains the composer.json file. This is usually the root of your project, but it could also be a sub-directory. Once you’re in the correct directory, simply run this command to install dependencies:composer installThis will download and install all specified packages in your composer.json file. You can also use Composer to update existing packages and add new ones.
