CentOS is a free and open-source operating system that has most of the functionality of the RedHat Enterprise Linux. However, CentOS delivers these capabilities at a fraction of the cost of RHEL ownership.
As a result, you can easily guess the reason behind the popularity of CentOS as the preferred OS for websites because of its stability and reliability. In addition, you can find CentOS-compatible applications for all requirements.
Before you can get these benefits, you need to install CentOS on your system.
In this tutorial, we will discuss the 4 major steps you should follow to install CentOS 7 on your system.
Table Of Contents
Install CentOS 7 in 4 Steps
Before we go into the details, let’s see the prerequisites of the process.
The Prerequisites
- You’ll need at least 15GB of free space on your computer to install CentOS 7.
- Download the CentOS 7 installation file. It’s often in ISO format.
Let’s get started installing CentOS 7!
Step #1: Download CentOS 7
To get the latest version of CentOS 7, go to the Downloads section of the CentOS website.
For regular use at home or small businesses, the DVD option, which has a graphical interface, is best. Alternatively, if you’re setting up a business system, go for the Minimal option.
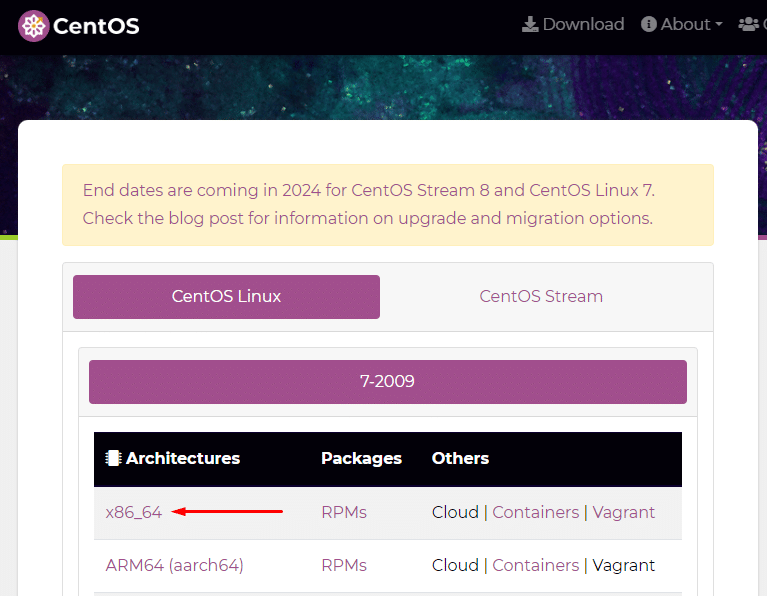
Once you click the link for the architecture of your system, you will see the following screen. Click the link mentioned in the screenshot.

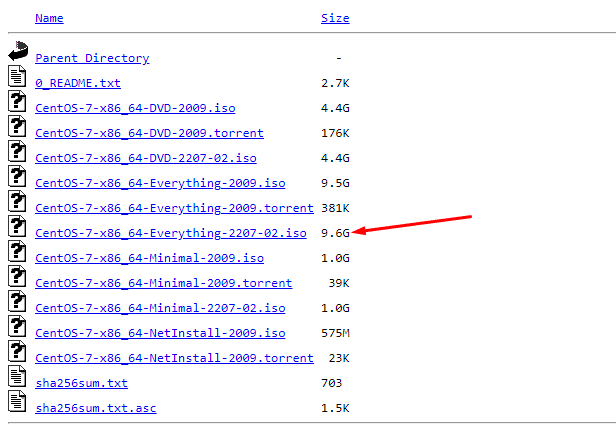
Next, you will see the list of downloadable formats. Click on the indicated link to download the Centos 7 ISO file.
NOTE: Remember that CentOS 6 reached its end of life in November 2020. The CentOS team no longer maintains this version or delivers security patches/updates.
Step #2: Create a Bootable USB or DVD
After downloading the ISO file, you can create an installation media. Here, you can opt for a bootable USB, an installation DVD, or use it to install CentOS 7 on a virtual machine.
We recommend making a bootable USB because it is convenient and almost universally supported.
You can use a variety of applications, including Etcher and Rufus to create bootable USBs. For this demonstration, we suggest using Rufus.
Download the appropriate version for the OS (Windows, macOS, or Linux), install it, and launch it.
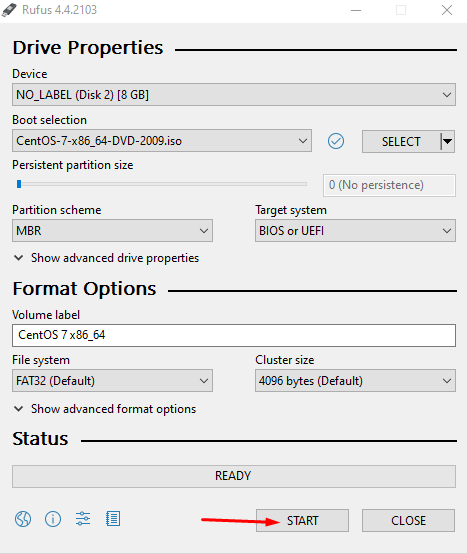
The process of creating a bootable USB through Rufus is simple:
- Select the CentOS 7 ISO file.
- Plug the USB drive.
- The USB drive will be selected automatically.
- Click Start.
Step #3: Boot the CentOS ISO File
After you have a bootable USB containing an installable CentOS 7 version, you may start the installation process.
Insert the USB into the port and restart the system.
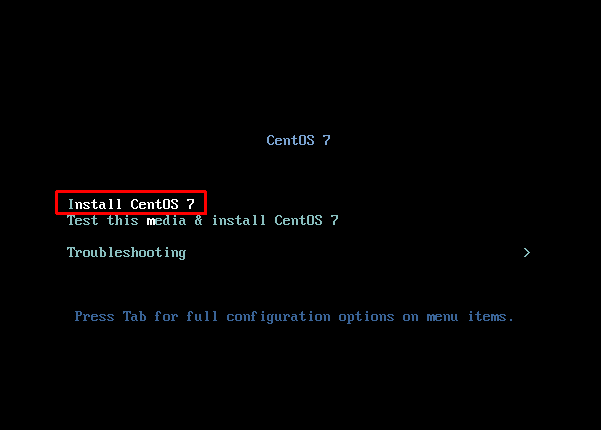
When the CentOS pre-installation screen appears, just choose Install CentOS 7. This will launch the installer’s easy-to-use graphical interface.
Since you are installing from a USB device, click the Install to Hard Drive icon or entry on the screen. This will bring up the installation wizard.
Step #4: Install CentOS on Your System
Before you start installation, decide on the language you wish to use for your system. The default choice is English.
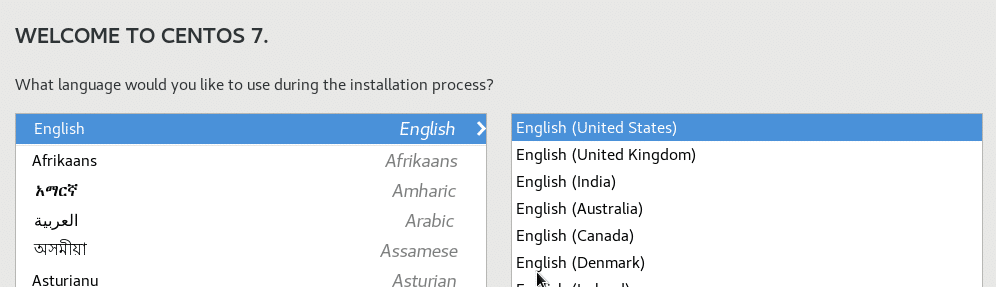
Press the Continue button to confirm your choice.
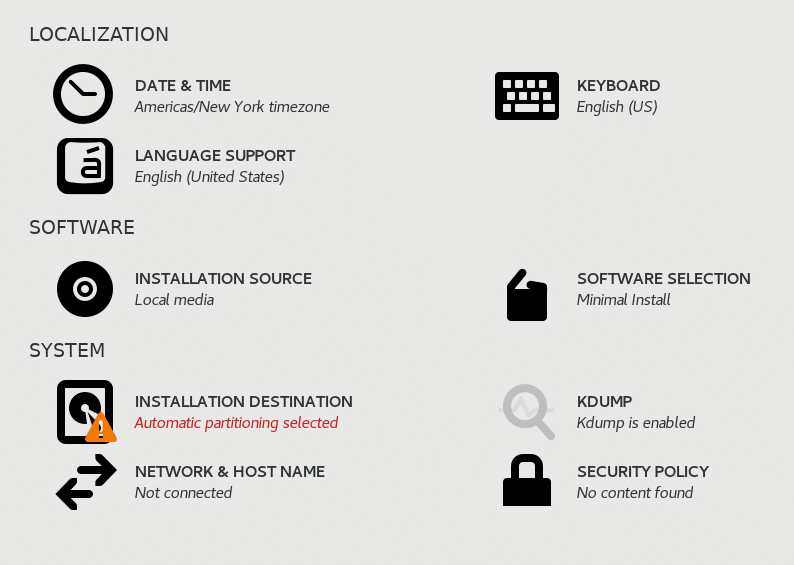
Before you start installing, there are a few settings you need to adjust. As a general rule, make sure you’ve configured anything highlighted with a caution icon.
We will now discuss some essential system settings that you need to finalize before the installer can start the installation process.
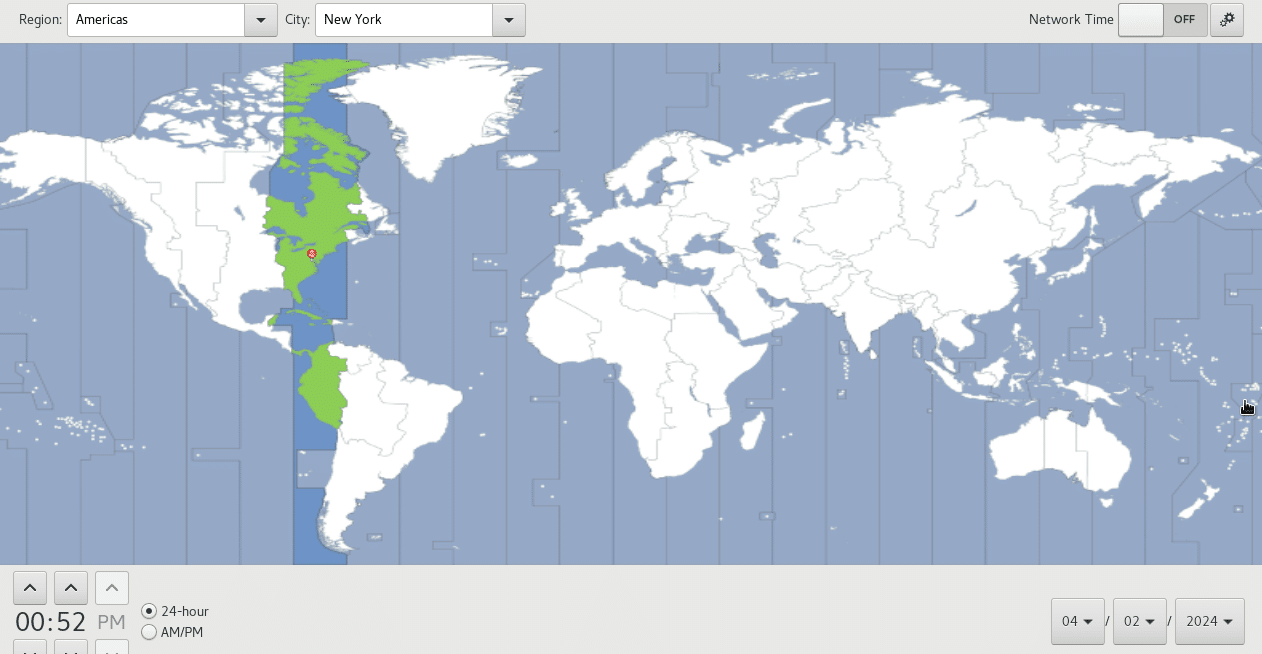
To set the date and time for your system, click on the Date & Time icon under the Localization section. Then, choose your region and time zone from the world map. Once you’ve chosen the appropriate time zone, click Done to preserve your changes.
Keyboard Layout
To choose your keyboard layout, go to the Keyboard section under Localization.
The default layout is usually English (US), which matches the language you chose initially. To add more layouts, click on the plus icon. You may also drag a layout to the top of the list to make it the default choice.
To specify a key combination for switching between layouts, click the Options button.When you’re finished with your selections, click Done to save them.
System Language
Next, choose the Language Support section under Localization. The language you selected in the Welcome to CentOS 7 dialog will be the primary language on your machine. If you require, you can add more languages. Once you’re done, click the Done button.

Software Selection
Click the Software Selection section under the Software heading. Here, you’ll find a list of different software options, including base setups and extra features you can add to your system. Here are some predetermined sets of software you can pick from to get started.
- Predefined Server Options. If you’re completely sure about what your server will be used for and don’t need to customize it, just pick one of the pre-set server options.
- GNOME Desktop and KDE Plasma Workspaces. These choices include a comprehensive graphical user interface (GUI).
- Minimal Install. This choice gives you excellent flexibility and doesn’t need as many resources. It’s ideal for servers that will host mission-critical workloads. Note that you may need to configure the options later on to fit your needs.
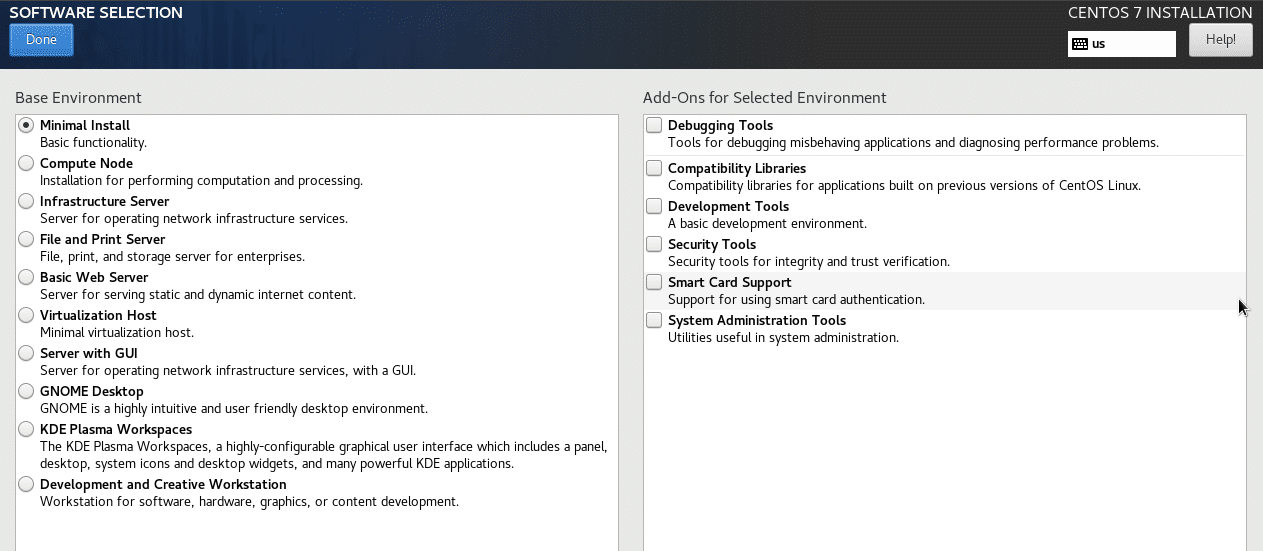
Once you’ve picked the base setup and any extras you want to add to the system, click Done.
You may need to wait for the system to check if there is any other software it needs before you move forward.
Select Installation Destination
Go to the Installation Destination section under System.
Take a look at your computer’s storage listed under Local Standard Disks. Choose the disk where you want to install CentOS 7.
Partitioning The Disk
At this point, you are ready for the critical step of partitioning the local hard drive for installing CentOS 7.
There are two options you can use at this stage:
Option #1: Automatic Partitioning
In the Other Storage Options section, check the option that reads Automatically configure partitioning. This ensures that the storage disk you chose will be divided automatically into partitions like /(root), /home, and swap and will set up an LVM logical volume using the XFS file system.
If your disk space is low, the installer may ask you to remove some files.
Once you’re finished, click Done.
Option #2: Manual Partitioning
Alternatively, you can opt for manually partitioning the dick. For this, start by ticking the box that says I will configure partitioning and then click Done.
If you prefer to use a different file system, like ext4 or vfat, or you want a non-LVM partitioning scheme, like btrfs, this option is a good fit for your requirements.
The installer will launch a configuration window where you may configure your partitions manually.
Note that this is an advanced choice and requires a detailed undertaking of filesystems, disk volume management, and disk management.
Configure KDUMP
KDUMP is a feature of the Linux kernel that creates detailed reports in the event of a kernel crash. It grabs system details when there’s a crash, which helps figure out why it happened. When it’s on, KDUMP sets aside a part of your computer’s memory for its operations.
You should know that the CentOS 7 installation process automatically turns on KDUMP.
If you want to turn off this feature, go to the KDUMP section under System and uncheck the box that says Enable kdump. Finally, click Done to save your changes.
Network and Hostname
Navigate to the Network & Host Name section of the System menu.
In the hostname field, enter the complete domain name for your system. For example, you could set it as server.redswitches.com, where server is the name of your computer, and redswitches.com is the domain name.
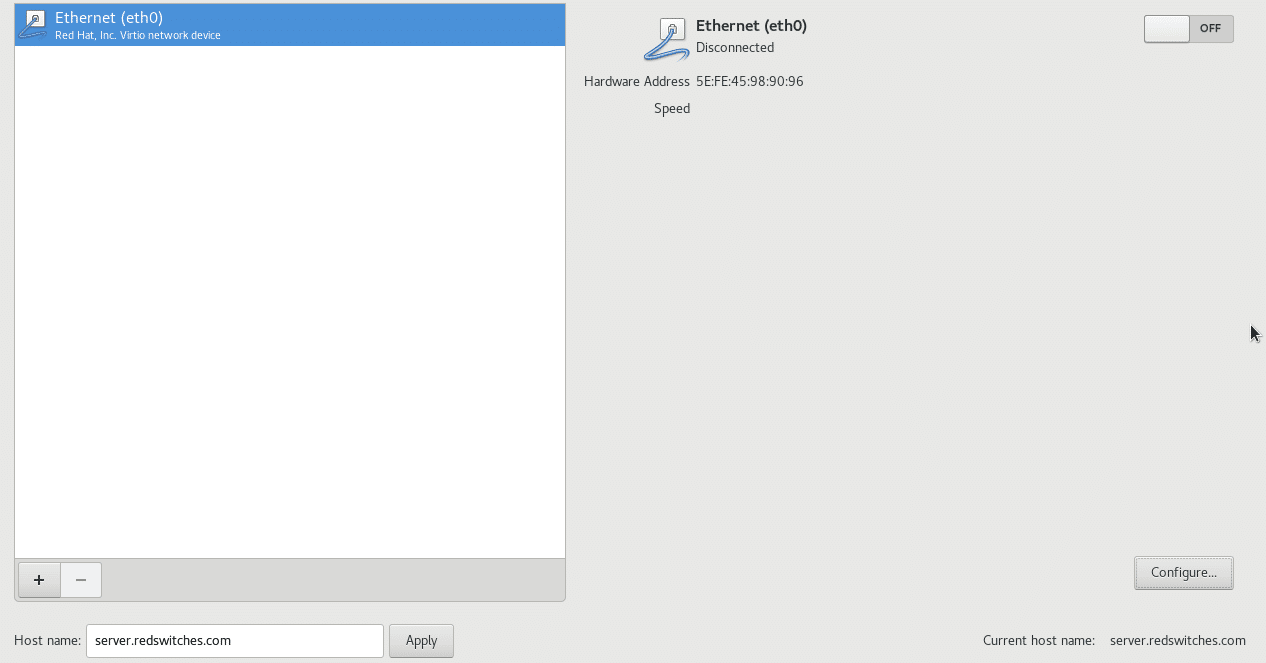
Next, click Configure… and choose whether to add IPv4 or IPv6 settings based on your network’s available resources. Then, add static IP addresses to help the network recognize your computer. Just remember that the settings in your network environment determine these values.
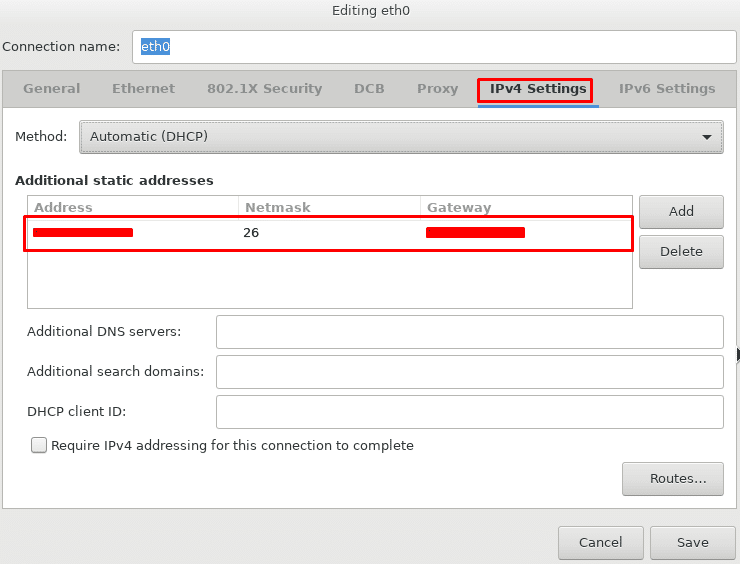
Follow these steps to configure the static IP address:
- Choose Manual from the Method drop-down menu.
- Press the Add button to add a static IP address.
- Fill in the following details for your network domain:
- – IP Address
- – Netmask Address
- – Gateway Address
- – DNS Servers Address
Once done, save the settings.
By default, all detected ethernet connections are disabled. To turn on the connection, click the ON/OFF switch.
You can refer to our tutorial on modifying CentOS network configuration files to change these settings after the installation.
Security Policy
Go to the Security Policy section under the System heading. Pick a profile from the list, then click Select profile. Finally, press the Done button to confirm your choice.
Start the Installation Process
Once you’ve adjusted everything the way you want, click Begin Installation to start the process.
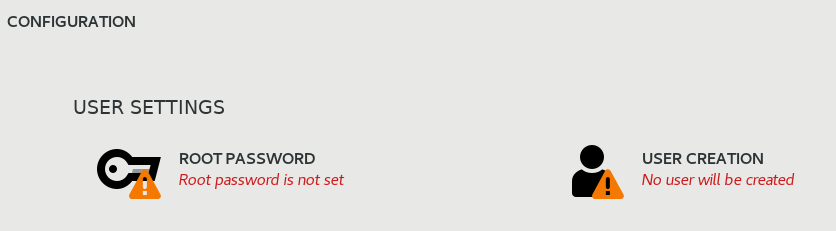
Define Root Password
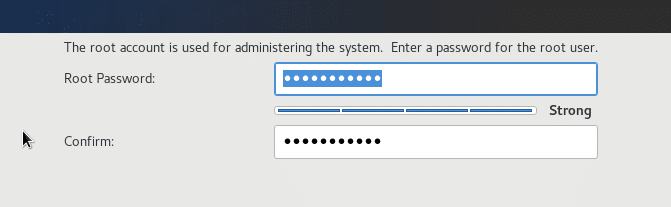
Setting up the account for the main administrator is a critical step of the process. For this, click the Root Password icon.
Enter a strong password and re-enter it to confirm.
Make sure your root password is at least 12 characters long and contains upper- and lowercase letters, digits, and special characters. A safe root password is crucial to the system’s security.
Click Done when you’re finished.
Create a User
Click User Creation to create a user account.
For this, provide their details, such as their full name, username, and password. It’s a good idea to uncheck the box that says Make this user an administrator. This is an important security consideration that prevents unauthorized use of escalated privileges.
You can refer to our tutorial on adding a user to the sudo group to give users these escalated privileges later on.
You should check the Require a password to use this account box to force the user to enter their password at every login.
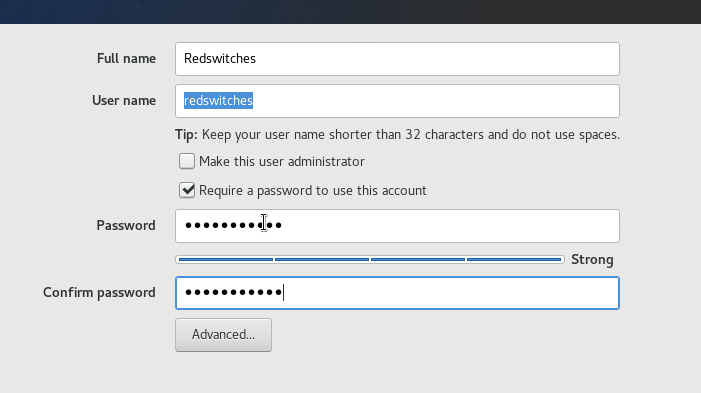
Once you’ve filled in all the information and set a strong password, click Done in the top-left corner of the screen.
Now, just wait for the installation process to finish.
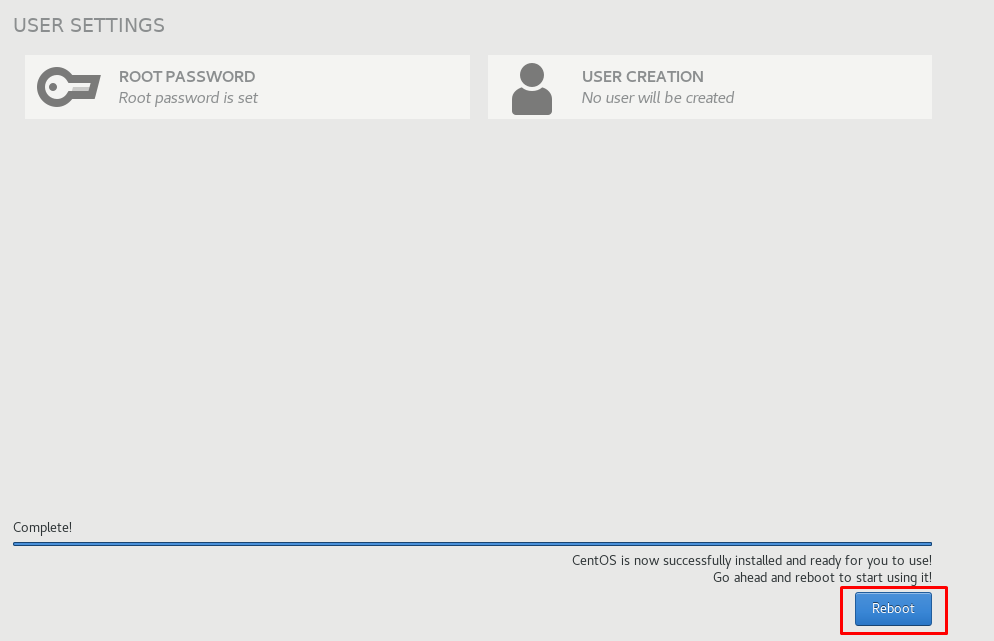
You need to restart the system before you can use your new CentOS setup. Click on the Reboot button.
After the system restarts, log in using the username and password you created earlier.
Also Read: Upgrade CentOS 7.x to CentOS 7.9 in 6 Steps
Conclusion
Installing CentOS 7 doesn’t have to be complicated. You can set up your system efficiently and securely by following these step-by-step instructions. CentOS 7 offers a stable and reliable platform for various computing needs, whether personal or business.
If you’re looking for reliable hosting for your CentOS 7 installation, consider Redswitches dedicated server hosting. With their robust infrastructure and excellent support, you can ensure your CentOS 7 installation runs smoothly and reliably. Take the next step in your CentOS journey with Redswitches dedicated server hosting.
At RedSwitches, we’re dedicated to helping you discover the perfect server solutions to drive your business to new heights. So, if you’re looking for a robust server, we offer the best-dedicated server pricing and deliver instant dedicated servers, usually on the same day the order gets approved. Whether you need a dedicated server, a traffic-friendly 10Gbps dedicated server, or a powerful bare metal server, we are your trusted hosting partner.
FAQs
Q. What is a network interface, and why is it important during CentOS 7 installation?
A network interface is a connection between a computer and a network. It allows communication between devices. During CentOS 7 installation, configuring the network interface ensures your system can connect to the internet or local network for updates and software downloads.
Q. Can I perform a minimal installation of CentOS 7, and what does it entail?
CentOS 7 offers a minimal installation option. This installs only the essential components required for the operating system to run, resulting in a lightweight and streamlined system ideal for specialized applications or servers.
Q. Where can I find the CentOS 7 ISO image for installation?
You can download the CentOS 7 ISO image from the official CentOS website or through trusted mirrors. Ensure you download the correct version and architecture suitable for your system.
Q. How do I configure network settings during CentOS 7 installation?
During installation, you’ll be prompted to configure network settings. This involves selecting your network interface and specifying whether to use DHCP or static IP addressing. Follow the on-screen instructions to set up your network connection.
Q. What are the different installation sources available for CentOS 7?
CentOS 7 installation sources include DVD ISO images, USB drives, and network repositories. You can choose the source that best fits your requirements and available resources.
Q. How do I set up the root user during CentOS 7 installation?
During installation, you’ll be prompted to create a root user. The root user has administrative privileges on the system, allowing them to perform tasks that require elevated permissions.
Q. What are the password requirements for the root account in CentOS 7?
The root account password in CentOS 7 should be strong and secure, consisting of at least 12 characters with a mix of uppercase and lowercase letters, numbers, and special characters.
Q. Can I install CentOS 7 using a DVD ISO image instead of a USB drive?
You can use a DVD ISO image to install CentOS 7. Simply burn the ISO image to a DVD and boot your system from the DVD drive to begin the installation process.
Q. When should I opt for manual configuration during CentOS 7 installation?
Manual configuration allows you to customize various aspects of the installation process, such as partitioning and network settings. Choose manual configuration if you require more control over these settings.
Q. What factors should I consider when choosing a partition scheme for CentOS 7 installation?
When selecting a partition scheme, consider factors such as the size of your hard drive, the intended use of the system, and any specific requirements or preferences. Common partition schemes include creating separate partitions for the root directory (/), home directory (/home), and swap space.
