
dmesg Linux command is a simple utility tool in Linux that shows messages from the kernel. These messages come from the kernel ring buffer, which holds details about hardware, device setup, and messages from kernel modules during system startup.
As a result, the dmesg linux command is very helpful when you’re trying to fix problems with hardware, like errors or warnings, and figuring out why a device isn’t working.
In this comprehensive tutorial, we will discuss how to use the dmesg command in Linux systems so that you can get information about what’s happening within your system.
Let’s start with an overview of the dmesg linux command.
Table Of Contents
- An Overview of the dmesg Linux Command
- Examples of Common Uses of the Linux dmesg Command
- Prerequisites
- Example #1: Display All Messages From the Kernel Ring Buffer
- Example #2: View Messages in Real-time
- Example #3: Search for Specific Terms
- Example #4: Read and Clear dmesg Logs
- Example #5: Add Human-friendly Timestamps in dmesg Logs
- Example #6: Enable Human-Readable Timestamps
- Example #7: Select Timestamp Format
- Example #8: Limit dmesg Output to a Specific Group
- Example #9: Filter Log Levels
- Example #10: Merging Facility and Level
- Conclusion
- FAQs
An Overview of the dmesg Linux Command
The basic dmesg command syntax is:
#dmesg [options]
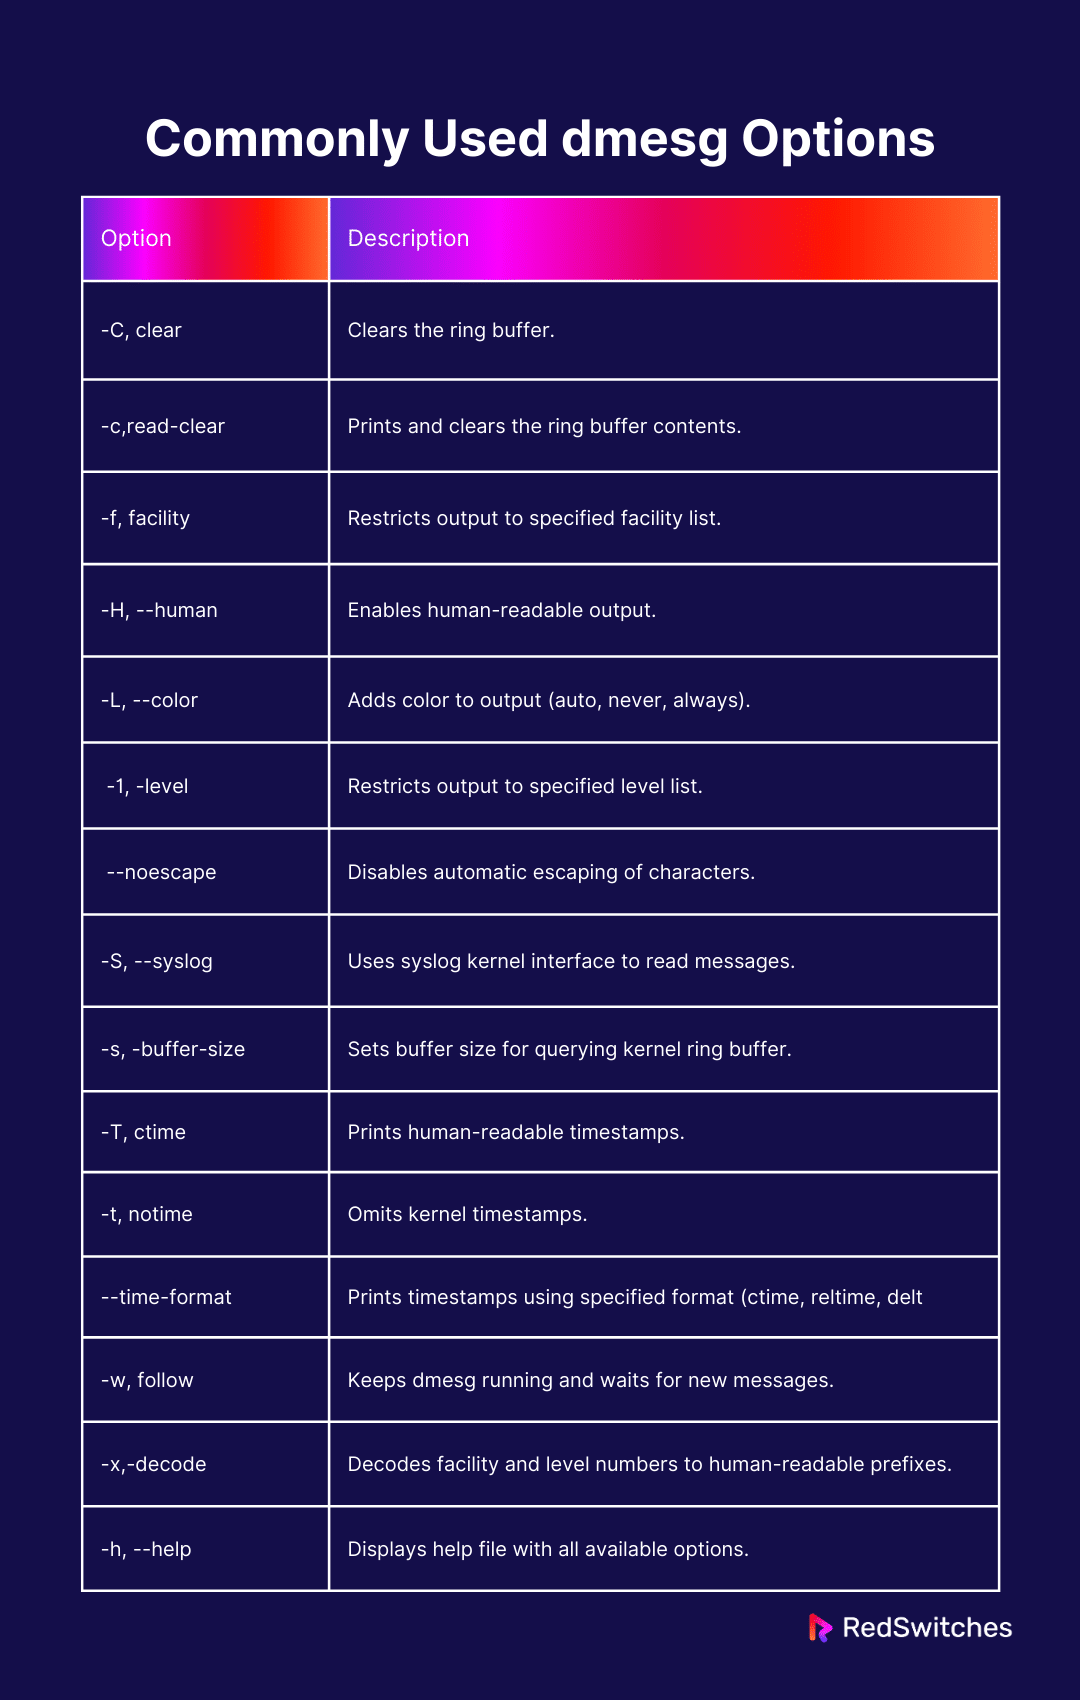
You can change the default behavior of the command by adding the appropriate options. Here is a list of the essential options you can use with the command.
Examples of Common Uses of the Linux dmesg Command
Prerequisites
- A system running a mainstream Linux distribution
- A user account with root or sudo rights.
Example #1: Display All Messages From the Kernel Ring Buffer
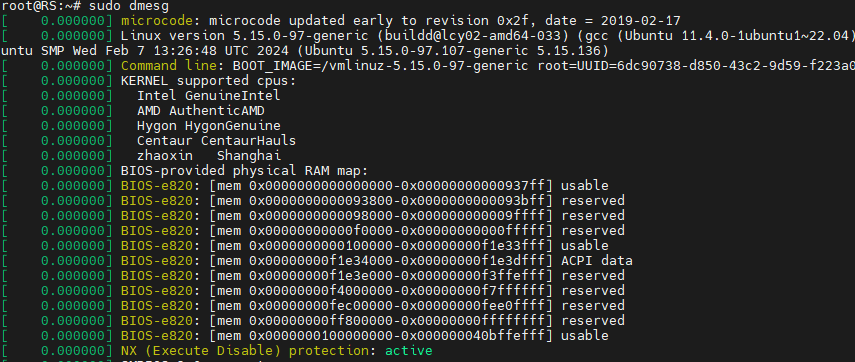
When you simply run the dmesg linux command without any options, it shows all the messages stored in the kernel buffer. This displays the complete content without interruption, providing a comprehensive overview of system activity.
# dmesg
The output can be very extensive and difficult to manage. You can combine the command with a pager utility (less or more) to make this output easier to read and find what you need. Alternatively, you can use the grep utility to search for specific messages.
For example, you can use the following command to view the messages one page at a time:
# sudo dmesg | less
To start searching, press the / key. You can move to the next match by pressing the Spacebar or go back with the B key. To exit, just press Q.
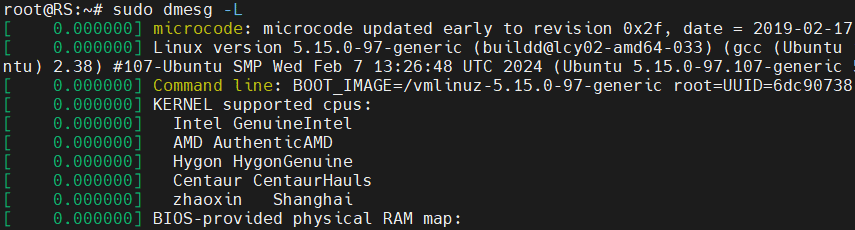
If you want the messages from dmesg to appear in color, you can use the -L option in the following command syntax:
# sudo dmesg -L
If you want to turn off the colored output, add –color=never to the command.

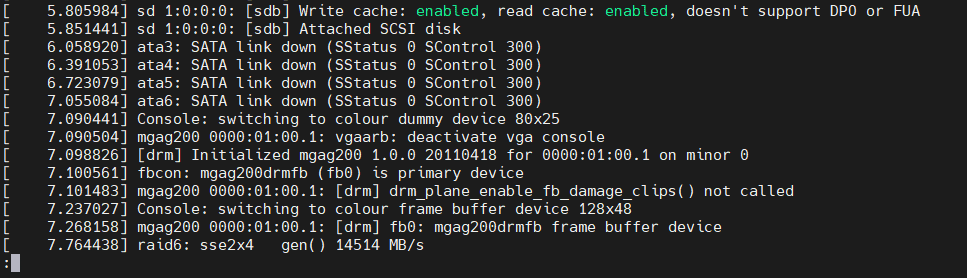
Example #2: View Messages in Real-time
We recommend the –follow option to monitor the kernel ring buffer in real-time and see messages as they arrive. This option instructs the dmesg command in Linux to continuously watch for new messages related to hardware or kernel modules.
Run the following command to enable real-time monitoring:
#sudo dmesg --follow
The command shows new messages at the bottom of the terminal window. To stop the process, press Ctrl+C.
Example #3: Search for Specific Terms
We suggest combining the dmesg linux command with the grep utility to find specific issues or hardware messages in the command’s output.
For instance, if you’re interested in messages related to memory, you can execute the following command:
#dmesg | grep -i memory
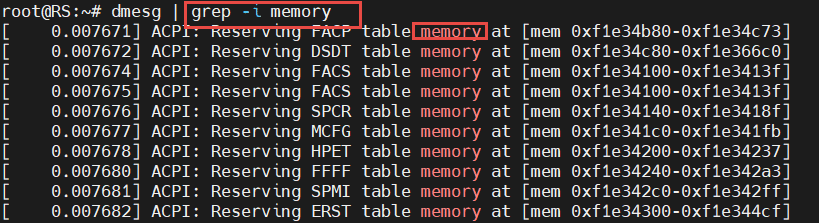
The output displays all lines from the buffer containing the specified strings. Remember that the -i switch makes the search case-insensitive and avoids overlooking case-sensitive information.
Alternatively, you can search for buffer messages related to USB, serial ports, network, or hard drives by using the following commands:
USB
#dmesg | grep -i usb
Serial Ports
#dmesg | grep -i tty
Network
#dmesg | grep -i eth
Hard Drives
#sudo dmesg | grep -i sda
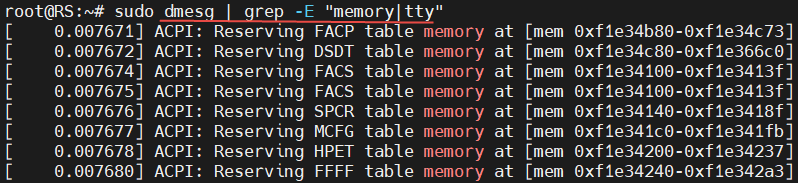
To search for multiple terms simultaneously, you can use the -E option with grep and enclose the search terms in quotation marks, separated by pipe delimiters. For instance, the following command searches for messages about memory and the terminal:
# sudo dmesg | grep -E "memory|tty"
Example #4: Read and Clear dmesg Logs
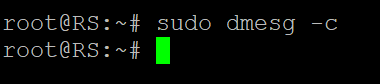
You can use the -c (or the more verbose –read-clear) option to clear the dmesg log after printing it in the terminal. This ensures you only have valid messages from the latest reboot.
Execute the following command to see this option in action:
#sudo dmesg -c
After running this command, if you rerun dmesg, there will be no output because the log has been cleared.
Example #5: Add Human-friendly Timestamps in dmesg Logs
Use the -H (or –human) option to produce a human-readable output and automatically pipe the output into a pager like less.
Execute the following command:
# sudo dmesg -H
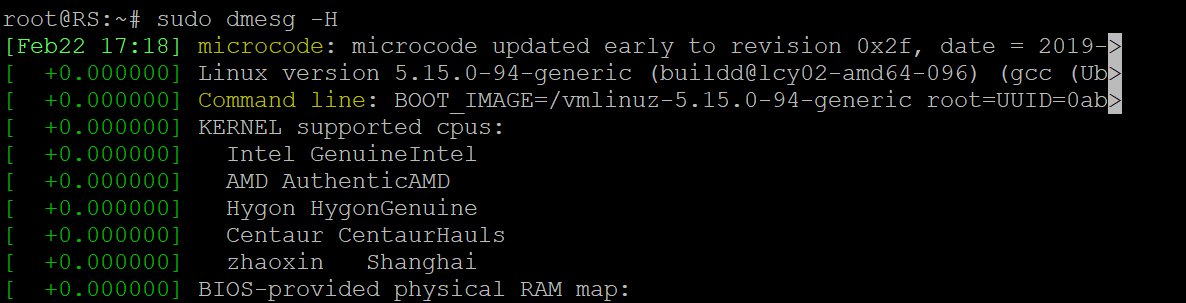
The command adds a timestamp to each log entry, displaying the date and time down to the minute. Interestingly, entries within the same minute are labeled with seconds and nanoseconds.
To exit the pager, simply press the Q key.
Also Read: Get Current Date and Time in Python With 2 Easy Methods
Example #6: Enable Human-Readable Timestamps
You can enable human-readable timestamps using the -T (or –ctime) option. Note that you may lose some accuracy at the nanosecond level, but you get easier-to-read timestamps.
Run the following command to enable this feature:
#sudo dmesg -T
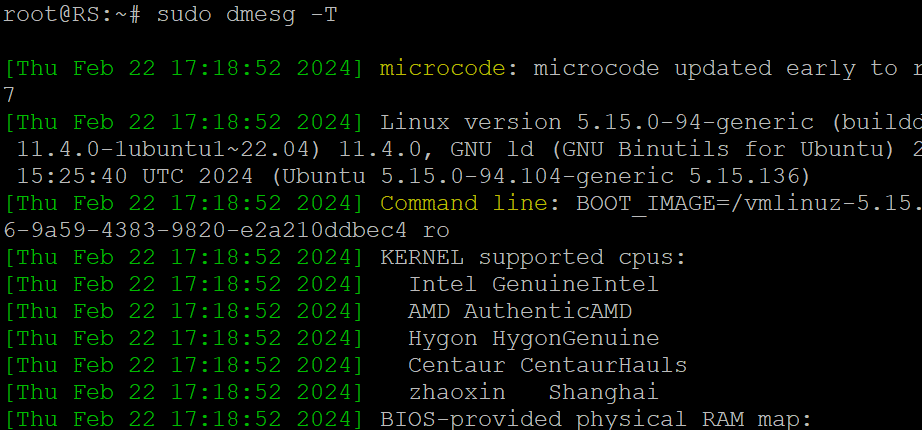
The timestamps in the output have standard dates and times, with a resolution down to the minute. Each action that occurred within the same minute is prefixed with the same timestamp.
Example #7: Select Timestamp Format
In addition to the above timestamp examples, you can use the –time-format [format] option to choose the timestamp format. The supported formats are:
- ctime
- reltime
- delta
- notime
- iso
For example, to use the iso format, run:
#sudo dmesg --time-format=iso

As you can see, the timestamp format has been set to YYYY-MM-DD<T>HH:MM:SS,<microseconds>←+><timezone offset from UTC>.
Example #8: Limit dmesg Output to a Specific Group
Instead of broadcasting the output, you can filter the dmesg output to a specific group with the -f option. The system groups messages in the kernel ring buffer into various facilities (categories), including:
- kern: Kernel messages.
- user: User-level messages.
- mail: Mail system messages.
- daemon: Messages about system daemons.
- auth: Authorization messages.
- syslog: Internal syslogd messages.
- lpr: Line printer subsystem messages.
- news: Network news subsystem messages.
For example, the following command limits the output to messages related to the syslog facility:
#sudo dmesg -f syslog

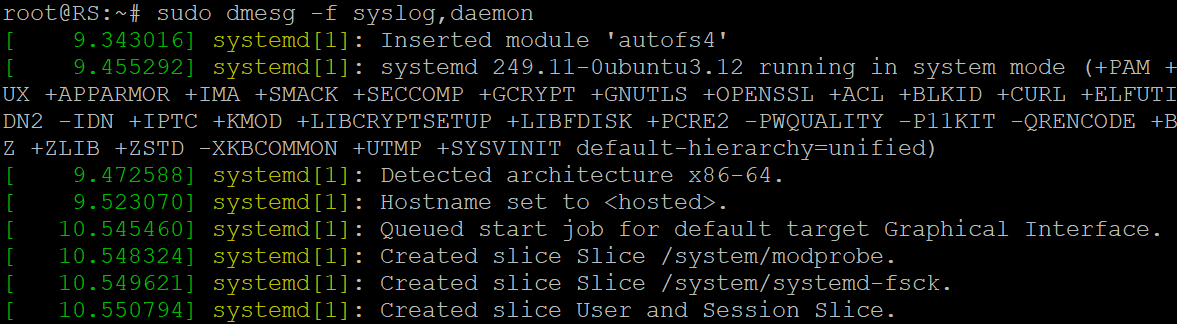
You can send messages from more than one facility by specifying a comma-separated list of facilities. For instance, consider the following command that displays messages about syslog and daemon:
#sudo dmesg -f syslog,daemon
Example #9: Filter Log Levels
dmesg assigns each buffer message a log level indicating its importance. These levels follow the standard Linux log level categorization:
- emerg: Emergency messages.
- alert: Alerts requiring immediate action.
- crit: Critical conditions.
- err: Error messages.
- warn: Warning messages.
- notice: Normal but significant conditions.
- info: Informational messages.
- debug: Debugging-level messages.
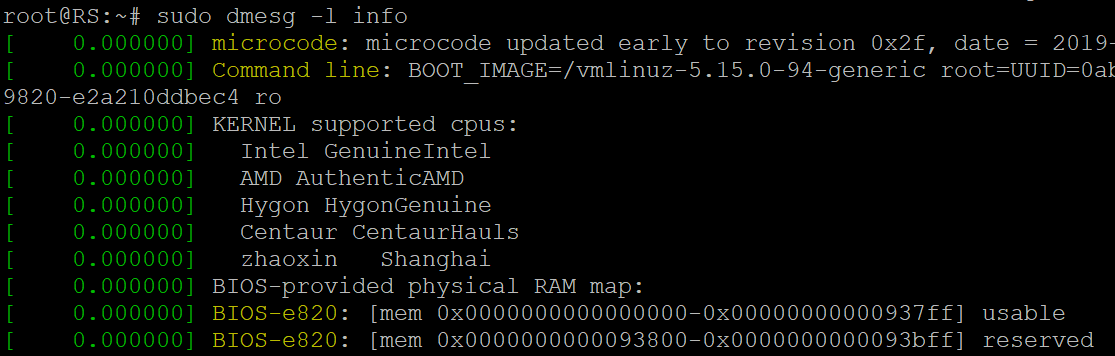
To instruct dmesg to print only the messages matching a certain level, use the -l option followed by the level name. For example, run the following command to print only the info-level messages:
#sudo dmesg -l info
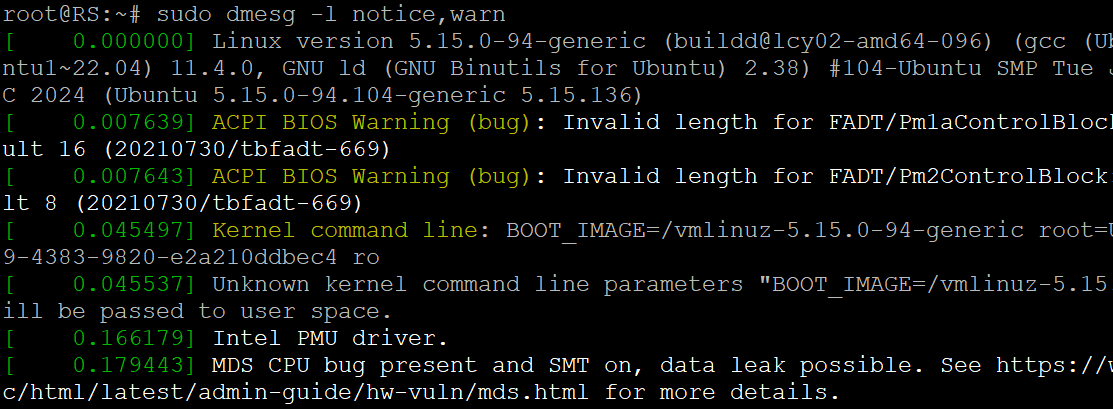
You can combine multiple levels in a comma-separated list to retrieve messages from those levels. For example, run the following command to print messages with notice and warn levels:
#sudo dmesg -l notice,warn
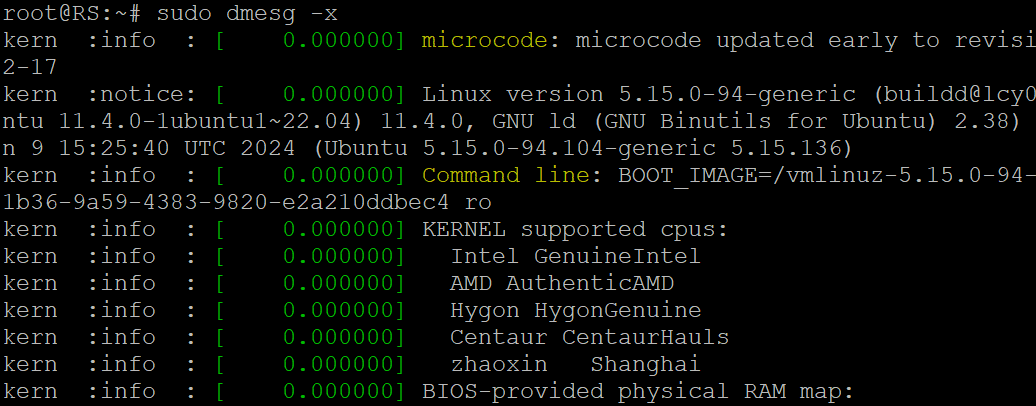
Example #10: Merging Facility and Level
To show each buffer message’s facility and log level at the start of each line, use the -x (decode) option.
For example, the following command prefixes the corresponding facility and log levels to the messages:
#sudo dmesg -x
Also Read: lsof Command in Linux with Examples
Conclusion
In this tutorial, we’ve learned how to effectively use the dmesg Linux command to troubleshoot and monitor system events. With options like ‘-f’, ‘-l’, and ‘-x’, we can filter messages by facility, log level, and decode them for better understanding. Additionally, features like ‘-H’ for human-readable timestamps and ‘-T’ for choosing timestamp formats make the output easier to read.
Consider RedSwitches for reliable hosting solutions tailored to your needs. We offer expert support and reliable infrastructure to ensure your applications perform optimally.
If you’re looking for a robust server for your Linux projects, we offer the best dedicated server pricing and deliver instant dedicated servers, usually on the same day the order gets approved. Whether you need a dedicated server, a traffic-friendly 10Gbps dedicated server, or a powerful bare metal server, we are your trusted hosting partner.
FAQs
Q. What is dmesg and how can I use it?
dmesg is a command in the Linux operating system that displays the kernel messages, including those related to hardware devices and system events. You can use the dmesg linux command to troubleshoot issues, view the kernel messages in the buffer, and identify problems with your system.
Q. How do timestamps work in dmesg output?
Timestamps in the dmesg output indicate the time when each kernel message was logged. These timestamps are essential for understanding the sequence of events and diagnosing issues that occur over time.
Q. What does the grep command with the -t option do in dmesg logs?
The grep command with the -t option in dmesg logs allows you to filter the output based on specific criteria. You can use this to search for messages related to a particular keyword or timestamp.
Q. How can I view kernel messages using the dmesg command?
To view kernel messages using the dmesg linux command, simply open a command line interface and type ‘dmesg’. This will display the messages from the kernel ring buffer and provide insights into the system’s operations.
Q. What is the significance of the logging mechanism in the Linux system?
The logging mechanism in the Linux system allows for the collection and storage of kernel messages and events. This is crucial for diagnosing issues, monitoring system behavior, and maintaining system health.
