Package management is a critical aspect of the JavaScript development process.
While npm has been the industry-standard for several years, developers now have the option of using Yarn as a great alternative to npm.
Yarn is a npm-compatible JavaScript package manager that automates installing, updating, managing, and uninstalling npm packages. The major strength of this package manager is the fast installation process that uses parallel processes and a local cache for each downloaded package.
In this comprehensive tutorial, we will discuss how to install Yarn on Ubuntu 22.04 using three easy methods. Once you have Yarn on your Ubuntu machine, we will discuss some basic essential Yarn operations.
Table Of Contents
How to Install Yarn on Ubuntu 22.04
Let’s start with the Yarn installation process. But first, let’s check out the prerequisites.
The Prerequisites
Make sure you have the following:
- A system running Ubuntu 22.04.
- A user account with sudo access.
- You have npm and Node.js installed on the system.
Method #1: Install the Latest Yarn Version
We recommend using Corepack for installing the most recent Yarn version. This script serves as a point of contact between the user and Yarn and is included in the most recent versions of Node.js.
Follow these steps to use Corepack to install Yarn on your system:
- Verify that the version of Node.js you have on the system with the following command:
# node -v

You need Node.js 20.11 or later for using Corepack. We strongly recommend updating Node.js if your system has an earlier version.
Some Linux distributions don’t have Corepack. If that’s the case, run the following command to install it.
# sudo npm install -g corepack
- Enter the following command to launch Corepack:
# corepack enable
- Use the following command to install the most recent version of Yarn:
# corepack prepare yarn@stable --activate

- Enter the following command to print the Yarn version to verify that it has been successfully installed:
# yarn --version

Optionally, you can update to the most recent stable version by running the following command:
# yarn set version stable

Method #2: Install Yarn’s Classic Version
Important: Yarn versions before 2.0 are no longer supported and are in maintenance mode.
In some rare cases, you may need to use an older Yarn version (usually for testing backward compatibility) for your project.
We will now show two ways (the repositories and NPM) to install Yarn 1.x.
Option #1: Use the Repository to Install Yarn Classic
You can use the repository that the Yarn developers maintain to install older versions. Note that you need cURL on your system to fetch the repository.
Refer to the following steps listed for detailed instructions.
- Insert the GPG Key
The GPG key is critical for verifying that you have the authentic repository.
# curl -sS https://dl.yarnpkg.com/debian/pubkey.gpg | gpg --dearmor | sudo tee /etc/apt/trusted.gpg.d/yarn.gpg

- Add the Yarn Repository
Next, add the Yarn repository to the list of master repositories. The following command enables the package manager to access and control the Yarn repository.
# echo "deb [signed-by=/etc/apt/trusted.gpg.d/yarn.gpg] https://dl.yarnpkg.com/debian/ stable main" | sudo tee /etc/apt/sources.list.d/yarn.list

- Update the Local Repository Index
# sudo apt update
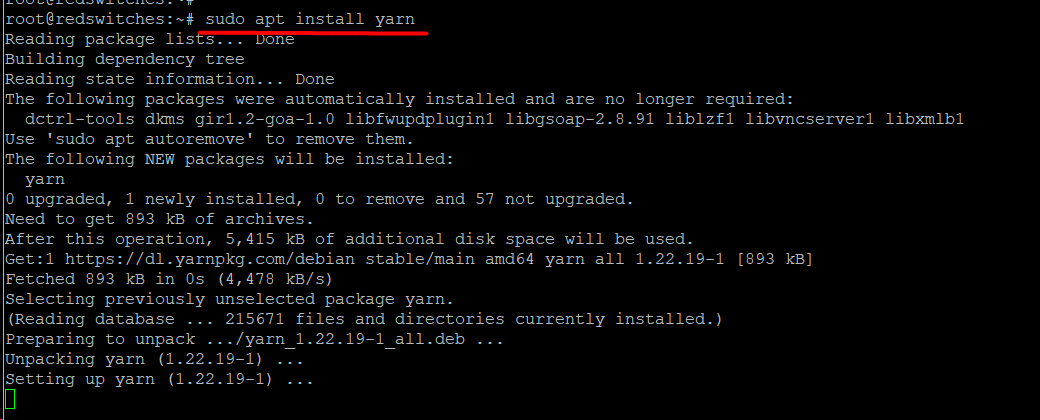
- Install Yarn
Run the following command to install Yarn from the repository. During the installation process, the package manager will install Node.js if it isn’t already installed.
# sudo apt install yarn
Finally, check the Yarn version to confirm the installation:
# yarn ––version

Option #2: Use NPM to Install Yarn Classic
Yarn and npm are very similar in many aspects. In particular, the yarn.lock helps keep the development environment consistent by limiting packages to a particular version.
You can use the standard NPM platform to install the classic Yarn version. If you don’t have NPM on the system, we recommend installing it with the sudo apt install npm command.
The process has the following steps:
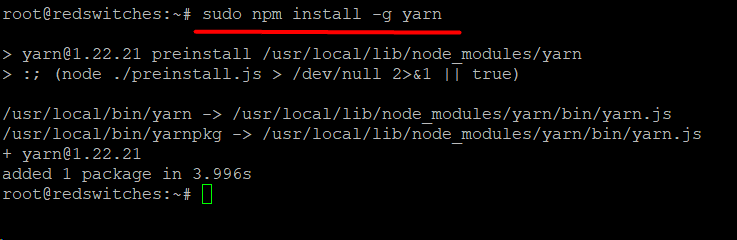
- Enter the following command to install Yarn using NPM:
# sudo npm install -g yarn
Method #3: Update Yarn From the Old to the Newest Version
If you already have Yarn Classic, you can run the following steps to install the latest Yarn version on your Ubuntu machine:
- Use the npm install command to ensure that the classic Yarn is updated to the most recent 1.x version:
# sudo npm install -g yarn

- Switch to the current Yarn version with the following command:
# yarn set version berry

Typical Yarn Operations
After installing Yarn, you can carry out the following operations to manage and speed up the JavaScript development process.
Start a New Project with Yarn
In the project directory, type the following to start a new project:
# yarn init
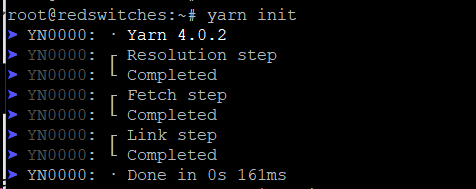
Yarn creates two files to initialize a project directory. The project configuration is stored in package.json, and the dependency information is kept in the yarn.lock file.
Include a Dependency in Your Project
Dependencies are packages that a package may need to work correctly. The syntax to install a dependency is as follows:
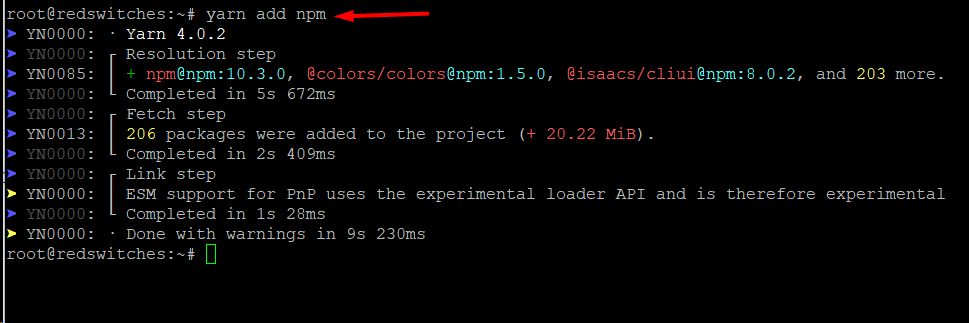
# yarn add [package-name]
You can even install a specific package version by adding the @version tag to the command:
# yarn add [package-name]@version
Similarly, you can use tags in a similar syntax:
# yarn add [package-name]@tag
This process of installing dependencies updates the package.json file. Updating the Yarn information also ensures that everyone using the package uses the same software.lock file.
Upgrade a Yarn Dependency
Use the upgrade option to upgrade a dependency. The syntax is as follows:
# yarn upgrade [package-name]
As with the add option, you can provide a version number or tag to upgrade. In this case, the command syntax will be:
# yarn upgrade [package-name]@version Or
# yarn upgrade [package-name]@tag
Uninstall a Yarn Dependency
You can easily uninstall a dependency with the remove option. The command syntax is as follows:
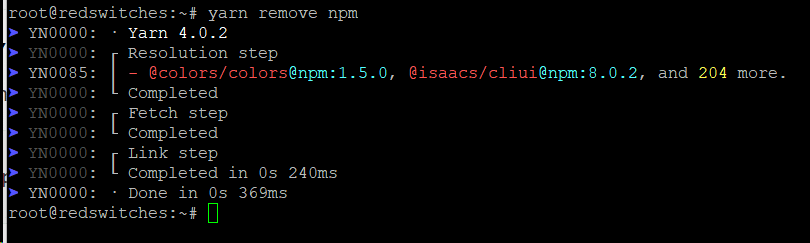
# yarn remove [package-name]
Set Up Extra Dependencies
Yarn maintains the list of the required packages in package.json, the project configuration file. You can add a package with extra dependencies in this file and then run the following command:
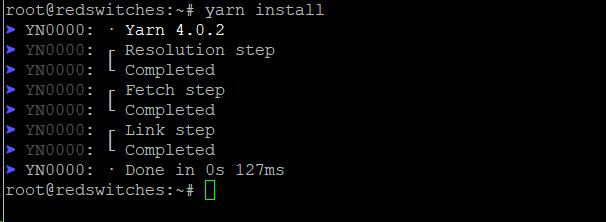
# yarn install
Yarn is configured to support multiple users. As such, a team member can add a Yarn package to the master package.json file. In this scenario, we strongly recommend executing the yarn install command right away to ensure that the development environment is updated to reflect the updates to the project dependencies.
Conclusion
Installing Yarn on Ubuntu 22.04 is a straightforward procedure that enhances JavaScript package management significantly.
Yarn provides a quick and dependable solution for optimizing dependencies, guaranteeing consistent builds, and improving teamwork. Developers prefer Yarn because of its efficient dependency management, improvements in performance, and offline functionalities.
The Yarn community and documentation are great places to start if you have any questions or concerns about a smooth and productive development process.
RedSwitches offers the best dedicated server pricing and delivers instant dedicated servers, usually on the same day the order gets approved. Whether you need a dedicated server, a traffic-friendly 10Gbps dedicated server, or a powerful bare metal server, we are your trusted hosting partner.
FAQs
Q. What is Yarn, and why use it on Ubuntu?
Yarn is a fast and reliable JavaScript package manager that enhances dependency management. It’s used on Ubuntu to streamline installing and managing project dependencies, ensuring consistency and efficiency in development workflows.
Q. Is Yarn a replacement for npm on Ubuntu?
Yarn and npm serve similar purposes, but Yarn is often preferred for its faster performance and deterministic dependency resolution. While they can coexist, Yarn is a suitable alternative or supplement to npm on Ubuntu.
Q. How do I check if Yarn is already installed on my Ubuntu system?
You can determine whether Yarn is installed using the yarn –version command. It will show the installed version if it is installed; if not, an error message will show.
Q. Can I install multiple versions of Yarn on Ubuntu?
Yes, you can manage multiple Yarn versions on Ubuntu using tools like nvm (Node Version Manager) or by installing Yarn globally and locally within specific projects.
Q. What’s the difference between global and local Yarn installations on Ubuntu?
A global Yarn installation applies system-wide, making it accessible from any project. Local installations are specific to a project, ensuring project-specific dependencies are isolated.
Q. How do I update Yarn on Ubuntu?
To update Yarn on your Ubuntu, run sudo apt update followed by sudo apt install –only-upgrade yarn.
Q. Can Yarn be used with non-JavaScript projects on Ubuntu?
Yarn is primarily designed for JavaScript projects but can be used for other languages or frameworks. Its focus, however, is on improving JavaScript package management.
Q. Are there alternatives to Yarn for package management on Ubuntu?
On Ubuntu, npm is a commonly used substitute for Yarn. Both work well, and the decision usually comes down to personal taste and project specifications.
Q. How do I uninstall Yarn from my Ubuntu system?
To uninstall Yarn from Ubuntu, use the command sudo apt remove –auto-remove yarn.
Q. Where can I find additional help with Yarn on Ubuntu?
For more in-depth details and troubleshooting, consult the official Yarn documentation and community forums. They are excellent sources of information about yarn visit and support.
