
Ruby is a widely-used programming language known for being easy to use and efficient. It serves as the foundation for the Ruby on Rails (RoR) framework and is used for a variety of purposes, including business applications, data analysis, and online application development.
Since Ubuntu is the preferred operating system for Ruby and RoR projects, the first step is to install Ruby on Ubuntu 22.04. This is a critical step in the development process because of the significant impact of the development environment on the quality of the final software product.
So, in this comprehensive tutorial, we’ll discuss three methods of installing Ruby on your Ubuntu machine. However, before that, it is important to consider the prerequisites for these methods.
Table Of Contents
- The Prerequisites
- Method #1: Install Ruby using the Ubuntu Repository
- Method #2: Install Ruby Via rbenv
- Method #3: Install Ruby Via RVM
- Conclusion
- FAQs
The Prerequisites
Before proceeding with the installation, ensure you have the following:
- A system running Ubuntu version 22.04 LTS.
- An account with sudo or root permissions.
Method #1: Install Ruby using the Ubuntu Repository
The built-in apt package manager is the most straightforward way to install Ruby on Ubuntu. This method leverages official packages maintained by Ubuntu, ensuring compatibility and stability.
Note that the packages in the official Ubuntu repositories do not always have the latest versions. Instead, these repositories aim to provide a stable version that works without conflicts on your Ubuntu system.
Step #1: Update the System Package Index
Start by running the following command to update the list of available packages on the system:
# sudo apt update
Step #2: Install Ruby
Now, run the following command to install Ruby on the system:
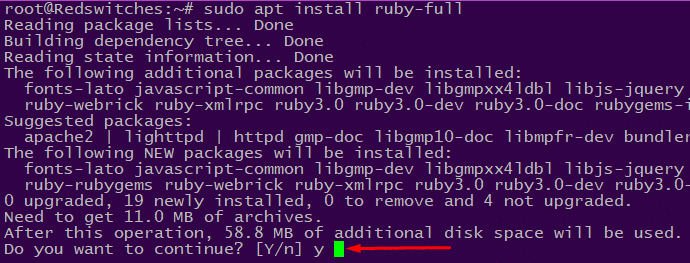
# sudo apt install ruby-full
The ruby-full package installs Ruby along with commonly used development tools and libraries. If prompted, enter Y and press Enter to confirm the installation.
Step #3: Check the Ruby Installation Status
Once the installation is complete, verify it by printing the Ruby version information with this command:
# ruby --version

Method #2: Install Ruby Via rbenv
rbenv is a command-line tool that helps you switch between different installed versions of Ruby on your system. It also facilitates the installation of new Ruby versions using the ruby-build plugin.
Here are the steps of the process.
Step #1: Download the Latest Updates and Dependencies
Update the system repositories by running the following command:
# sudo apt update
Next, use the following command to download and install the necessary libraries and compilers required for Ruby:
# sudo apt install git curl autoconf bison build-essential libssl-dev libyaml-dev libreadline6-dev zlib1g-dev libncurses5-dev libffi-dev libgdbm6 libgdbm-dev libdb-dev
When prompted, enter Y and press Enter to confirm the installation.
Step #2: Install rbenv
Download and execute the shell script to install rbenv:
# curl -fsSL https://github.com/rbenv/rbenv-installer/raw/HEAD/bin/rbenv-installer | bash
After the installation, add rbenv to PATH. For this, you need to include $HOME/.rbenv/bin in your PATH environment variable.
If you’re using the Bash shell, run the following commands:
# echo 'export PATH="$HOME/.rbenv/bin:$PATH"' >> ~/.bashrc
# echo 'eval "$(rbenv init -)"' >> ~/.bashrc
# source ~/.bashrc
Alternatively, if you’re using the Zsh shell, use:
# echo 'export PATH="$HOME/.rbenv/bin:$PATH"' >> ~/.zshrc
# echo 'eval "$(rbenv init -)"' >> ~/.zshrc
# source ~/.zshrc
We recommend checking the rbenv version with the following command:
# rbenv -v
![]()
Step #3: Install Ruby
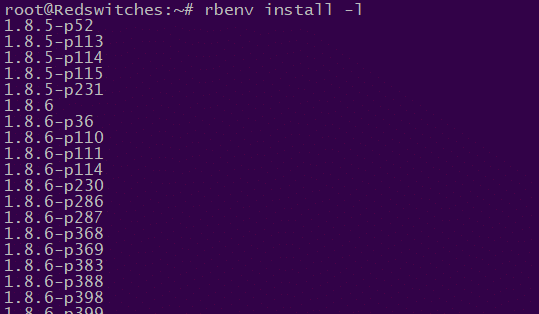
Start by displaying all available Ruby versions by running this command in the terminal:
# rbenv install -l
Choose and install your desired Ruby version:
# rbenv install [version number]
For instance, we used the following command to install Ruby version 2.7.1:
# rbenv install 2.7.1

NOTE: The process of installing Ruby using Rbenv may take a while. You can use the –verbose flag to observe each installation step in the command output:
# rbenv install --verbose [version number]
Once the installation finishes, we recommend setting the newly installed Ruby version as the default for your system:
# rbenv global [version number]
Since we installed version 2.7.1 in the previous steps, the command would like the following:
# rbenv global 2.7.1
Finally, verify the installed Ruby version in the terminal with the following command:
# ruby --version
Method #3: Install Ruby Via RVM
Ruby Version Manager (RVM) is a command line tool that helps you handle different Ruby environments on your Ubuntu system. You can use it to install Ruby on Ubuntu using these steps:
Step #1: Update System and Install Dependencies
Start by updating the system package index with the following command:
# sudo apt update
Download and install the necessary components that Ruby requires to function efficiently. For this, run the following command:
# sudo apt install curl g++ gcc autoconf automake bison libc6-dev libffi-dev libgdbm-dev libncurses5-dev libsqlite3-dev libtool libyaml-dev make pkg-config sqlite3 zlib1g-dev libgmp-dev libreadline-dev libssl-dev
If prompted, enter Y and press Enter to confirm the installation.
Step #2: Install RVM
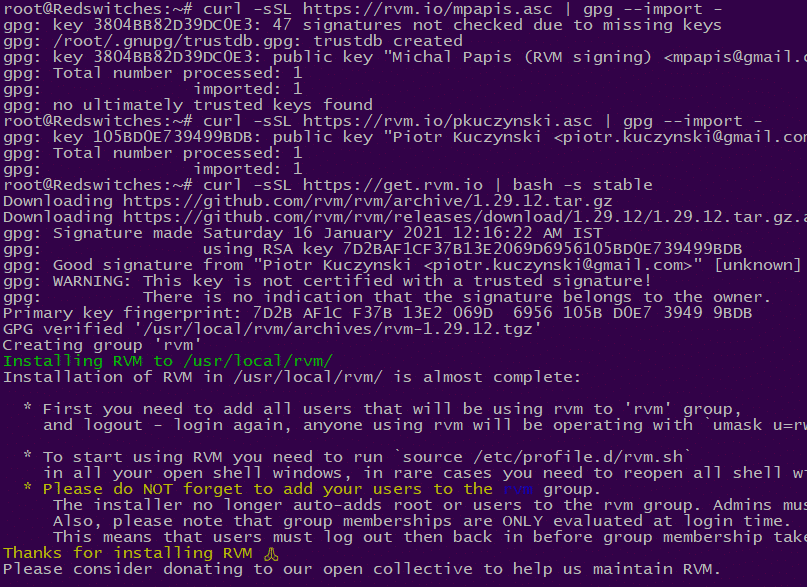
Now, you can go ahead and install RVM on the system. For this, start by adding the GPG key with the following command:
# gpg --keyserver hkp://pgp.mit.edu --recv-keys 409B6B1796C275462A1703113804BB82D39DC0E3 7D2BAF1CF37B13E2069D6956105BD0E739499BDB
This command downloads the GPG key required to verify the authenticity of the RVM installation script.
Set up RVM by running the installation script. The following cURL command fetches the script and executes it:
# curl -sSL https://get.rvm.io | bash -s stable
Activate the RVM script environment variables with the following command:
# source ~/ .rvm/scripts/rvm
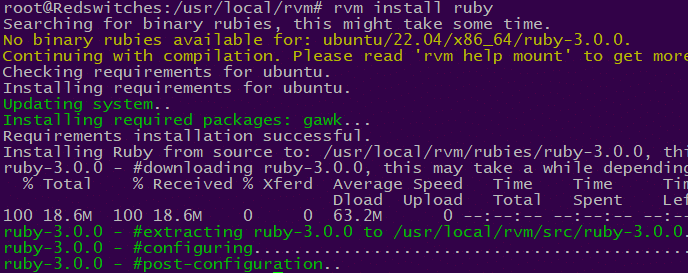
Step #3: Install Ruby
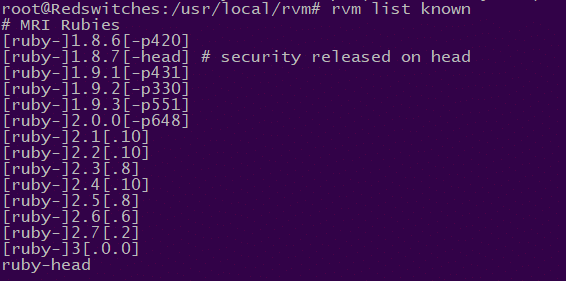
Display all the Ruby versions you can access using RVM.
# rvm list known
Choose a Ruby version and install it with the following command:
# rvm install ruby-[version number]
If you don’t provide a version number, the command will download the most recent stable Ruby version. The command in this scenario would be:
# rvm install ruby
At this point, the system may ask for your password:
Make the recently installed Ruby version the default one for your Ubuntu system:
# rvm --default use ruby-[version number]
In this instance, we’re using the default option without specifying a version number:
# rvm --default use ruby
Check the current version of Ruby to confirm that it is available on the system:
# ruby --version

Conclusion
Installing Ruby on Ubuntu 22.04 is a simple procedure that only requires a few steps. Whether you’re a beginner or an experienced user, following the instructions in this guide will help you set up Ruby on your system hassle-free.
For further assistance or to explore advanced Ruby hosting options, consider checking out RedSwitches. RedSwitches is your global dedicated hosting partner, offering bare metal hosting solutions tailored to enhance your Ruby development experience. We offer the best-dedicated server pricing and deliver instant dedicated servers, usually on the same day the order gets approved. Whether you need a dedicated server, a traffic-friendly 10Gbps dedicated server, or a powerful bare metal server, we are your trusted hosting partner.
FAQs
Q. How to install Ruby on Rails and rbenv on Ubuntu 22.04?
To install Ruby on Rails and rbenv on Ubuntu 22.04:
- Update package list:
# sudo apt update - Install prerequisites:
# sudo apt install git curl libssl-dev libreadline-dev zlib1g-dev - Install rbenv:
# git clone https://github.com/rbenv/rbenv.git ~/.rbenv - Set up rbenv:
# echo 'export PATH="$HOME/.rbenv/bin:$PATH"' >> ~/.bashrc && echo 'eval "$(rbenv init -)"' >> ~/.bashrc - Install Ruby:
# rbenv install 3.0.2 && rbenv global 3.0.2 - Install Rails:
# gem install rails. Verify the version using # ruby -v
Q. How can I install rbenv on Ubuntu 22.04?
To install rbenv on Ubuntu 22.04, you can use the following steps:
- Update apt package list: # sudo apt update
- Install necessary dependencies: # sudo apt install git curl libssl-dev libreadline-dev zlib1g-dev
- Clone rbenv repository from GitHub: # git clone https://github.com/rbenv/rbenv.git ~/.rbenv
- Add rbenv path to your bash profile:
# echo 'export PATH="$HOME/.rbenv/bin:$PATH"' >> ~/.bashrc
- Initialize rbenv by running:
# echo 'eval "$(rbenv init -)"' >> ~/.bashrc - Install ruby-build as a plugin for rbenv:
# git clone https://github.com/rbenv/ruby-build.git ~/.rbenv/plugins/ruby-build
Q. How do I install a specific version of Ruby with rbenv?
You can install a specific version of Ruby using rbenv by running the command:
# rbenv install [version_number].
For example, to install Ruby version 3.0.2, use the command:
# rbenv install 3.0.2.
After installation, you can set the installed version as the global version
# rbenv global [version_number].
Q. What is rbenv and why should I use it to manage Ruby versions?
rbenv is a powerful tool for managing multiple versions of Ruby on a single system. The multiple Ruby versions installed can be beneficial for several reasons, including setting global Ruby version for your projects, isolating gem sets, and maintaining a clean and organized Ruby development environment.
Q. Can you uninstall Ruby versions using rbenv?
Yes, you can uninstall specific Ruby versions using rbenv. To remove a Ruby version, use the command:
# rbenv uninstall [version_number].
This will uninstall the chosen Ruby version from your system.
Q. How do I install Ruby on Rails after setting up rbenv?
Once rbenv is set up, choose a compatible rails version and install it.
# gem install rails.
This command installs your system’s latest stable version of Rails, allowing you to start developing Ruby on Rails applications.
Q. What are the advantages of using rbenv over RVM for managing Ruby versions?
rbenv, known for its simplicity and lightweight nature compared to RVM (Ruby Version Manager), leverages existing system tools for a streamlined installation and efficient workflow. While RVM offers more advanced features, it is not beginner-friendly. Therefore, rbenv’s focus on version switching, isolated environments, clean workflow, efficiency, and lightweight footprint makes it a valuable tool for managing Ruby versions over RVM
