Thanks to the comeback of JavaScript in the shape of Angular and React, you’ll see a lot of JS projects (especially the user-facing components).
As such, Node.js and npm have become viral and powerful tools crucial in modern web development.
This step-by-step guide will walk you through installing Node.js and npm on Windows and Linux. By following these simple instructions, you’ll have Node.js and npm up and running quickly to have a solid foundation for building great web applications.
Table Of Content
- What Is Node.js
- What Is npm?
- Install Node.js & npm on Windows
- Troubleshooting: “Not Found” Error in Command Prompt
- Install Node.js & npm on Linux
- Conclusion
- FAQs
Let’s start with an introduction to both technologies
What is Node.js?
Node.js is an open-source runtime environment that allows developers to run JavaScript code on the server side. This adds a considerable performance boost to web applications and enables developers to create more efficient and scalable applications.
It utilizes an event-driven, non-blocking I/O model and has a vast ecosystem of libraries and modules available through npm (Node Package Manager).
What is npm?
npm, short for Node Package Manager, is a command-line tool essential to Node.js.
It allows developers to easily install, manage, and share packages or libraries of reusable code for their Node.js projects. With npm, developers don’t have to worry about dependencies and can easily collaborate with other developers within the Node.js community.
Install Node.js With npm
Now that you understand Node.js and npm, let’s see how to install these two technologies on Windows and Linux.
Note that you can find OS-specific core setup files by the Node.js developers.
Let’s start with installing Node.js and npm on Windows.
Install Node.js & npm on Windows
Follow this detailed guide to install Node.js on Windows
Step # 1: Download The Windows Installer
Start the installation process by visiting the official Node.js website and downloading the Windows Installer (.msi) file. This file contains all the necessary installer files for Node.js, including npm, the Node.js package manager.
Since the installer contains files for both npm and Node.js, you don’t need to download or install anything extra.
Remember to choose the appropriate version based on your Windows OS when downloading the installer file. So, if you’re using a 64-bit operating system, download the 64-bit version. Selecting the correct version ensures compatibility and optimal performance.
Once you have downloaded the Windows Installer file, you can install Node.js and npm on your Windows system.

Step # 2: Begin the Installation Process
To start the installation, double-click the downloaded .msi file to launch the process.
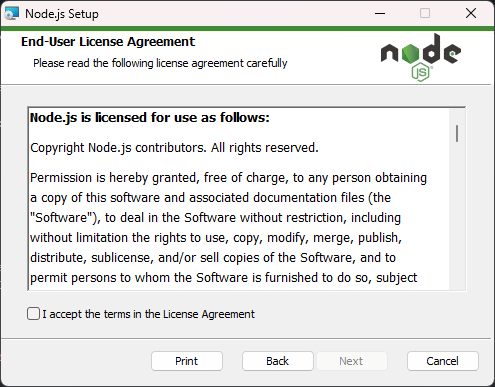
Upon running the installer, you will be prompted to accept the Node.js license agreement. To continue, tick the “I accept” box and click the “Next” button.
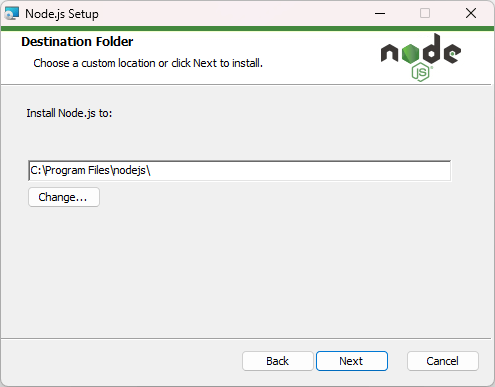
Next, you need to choose the installation destination for Node.js. If you prefer to keep the default directory, you can proceed by clicking the “Next” button. However, if you want to specify a different location, you can select a custom directory of your choice before clicking the “Next” button again.
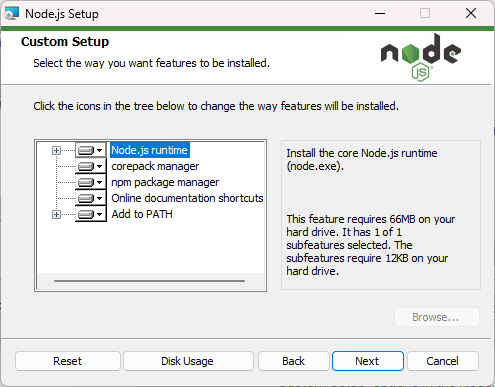
On the following screen, you will be presented with custom setup options.
If you prefer a standard installation with the default features, simply click the “Next” button. However, if you want to customize the installation by selecting specific elements, you can choose from the icons in the tree. Once you have finalized the selection, click the “Next” button to proceed.
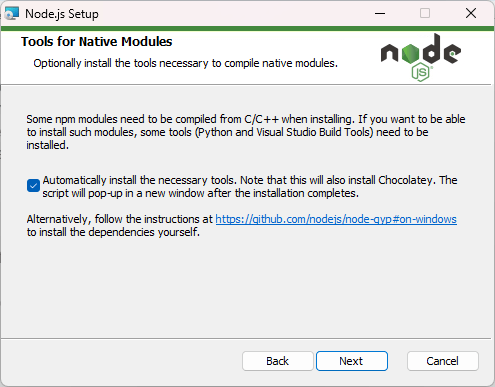
Node.js offers an option to install tools for native modules. If you’re interested in these, click the checkbox to mark your preferences or click “Next” to move forward with the default options.
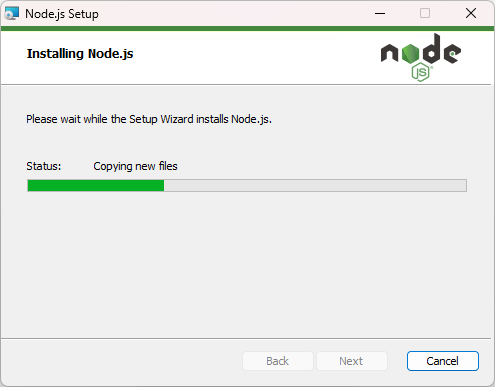
To complete the Node.js installation on Windows, simply click the “Install” button. This will initiate the installation process, and you can sit back and relax as Node.js is installed on your system.
Step # 3: Verify the Installation
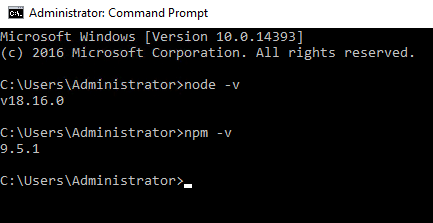
After the installation process finishes, verifying whether Node.js has been successfully installed on your system is essential. To confirm the installation and check the version, you can open the command prompt on your PC and enter the following command that’ll display the Node.js’s version information:
> node -v
Additionally, you can also check the version information of npm by running the following command:
> npm -v
Troubleshooting: “Not Found” Error in Command Prompt
If you encounter a “not found” error when running node -v or npm -v in the command prompt, try these troubleshooting steps:
Check the PATH Environment Variable: Ensure the PATH variable includes the correct path to the Node.js and npm executables. If this is missing, add the path (e.g., C:\Program Files\nodejs) in the system’s Environment Variables.
After modifying the PATH variable to apply the changes, close and reopen the command prompt window.
Reinstall Node.js and npm: If the error persists, consider reinstalling Node.js using the official installer from the Node.js website. Follow the installation instructions to ensure a successful installation.
Install Node.js & npm on Linux
Note: Since you can find several popular Linux distributions, we’ll use Ubuntu to demonstrate the process. However, the following process works with all popular Linux distributions.
Step # 1: Update System Packages
Before installing Node.js, we highly recommend updating the system packages to their latest versions. This ensures that we have a stable foundation for installing Node.js and npm on Ubuntu.
Start the process by launching the terminal and running the following commands:
# sudo apt update
# sudo apt upgrade
Step # 2: Install Node.js Using the NodeSource Repository
We’ll use the NodeSource repository to install the latest version of Node.js. For this, enter the following commands in the terminal:
# curl -sL https://deb.nodesource.com/setup_lts.x | sudo -E bash -

# sudo apt install -y nodejs
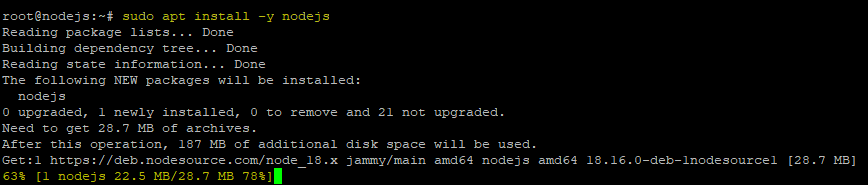
The first command retrieves the setup script from the NodeSource repository, while the second command installs Node.js and npm.
Step # 3: Verify the Installation
To verify that Node.js is successfully installed, run the following commands in the terminal:
# node -v
# npm -v
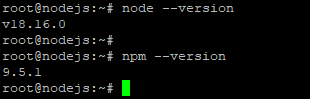
These commands will display information about the installed versions of Node.js and npm, respectively.
Installing Specific Node.js Versions (Optional)
If you need to install a specific Node.js version, you can use the n package. First, install the n package globally by running this command:
# sudo npm install -g n
After that, you can install a specific Node.js version by running the following command. Remember to replace the version with the desired version number (e.g., 12.22.5):
# sudo n <version>
Update npm (Optional)
To update npm to the latest version, use the following command:
# sudo npm install -g npm
Also Read: How to Install node.js on Debian: 3 Simple Methods
Conclusion
Installing Node.js and npm is straightforward on Windows and Linux operating systems. We explained the process you could follow to have Node.js and npm up and running on your machine in no time.
Node.js empowers you to develop efficient and scalable web applications, while npm simplifies package management and facilitates collaboration within the Node.js community. Whether you’re a beginner or an experienced developer, harnessing the power of Node.js and npm will enhance your web development capabilities.
FAQs
Q1: What is the difference between Node.js and npm?
A1: Node.js is a runtime environment that allows running JavaScript code on the server side, while npm is a command-line tool that comes bundled with Node.js. npm facilitates installing, managing, and sharing packages or libraries of reusable code for Node.js projects.
Q2: Can I install Node.js on any operating system?
A2: Yes, Node.js is compatible with various operating systems, including Windows, Linux, and macOS.
Q3: Do I need to install npm separately after installing Node.js?
A3: No, npm is included in the Node.js installation package, so you don’t need to install it separately.
Q4: How can I verify if Node.js is installed correctly?
A4: Open the command prompt or terminal and run the command node -v. It will display the installed version of Node.js. Similarly, you can use the command npm -v to check the installed npm version.
Q5: What should I do if I encounter a “not found” error when running node -v or npm -v?
A5: If you face a “not found” error, check the PATH Environment Variable to ensure it includes the correct Node.js and npm executables path. Remember to restart the command prompt after modifying the PATH variable.
Q6: Can I install specific versions of Node.js?
A6: Yes, you can use the n package to install specific versions of Node.js. After installing the n package globally, you can use the package to install a specific Node.js version.
