
In a Linux environment, environment variables are dynamic key-value pairs that modify and control how processes are executed.
As such, knowing how to manage and modify these variables is a great way of controlling how scripts and commands interact with each other and system applications.
Linux provides a versatile export command to help you set up and manage environment variables. The real power of this command lies in how you can use it in a wide range of scenarios to make variables available across shells and scripts.
In this tutorial, we will discuss the export command in Linux. After that, we will discuss five examples to help everyone get the hang of the command.
Table Of Contents
An Overview of the Linux Export Command
The export command enables you to adjust environment variables that are applied right away in the ongoing shell session without the need to restart the shell.
The basic syntax for the export command is straightforward:
# export [options] [name[=value] ...]
This basic syntax allows you to set environment variables that will be inherited by child processes initiated by the current shell.
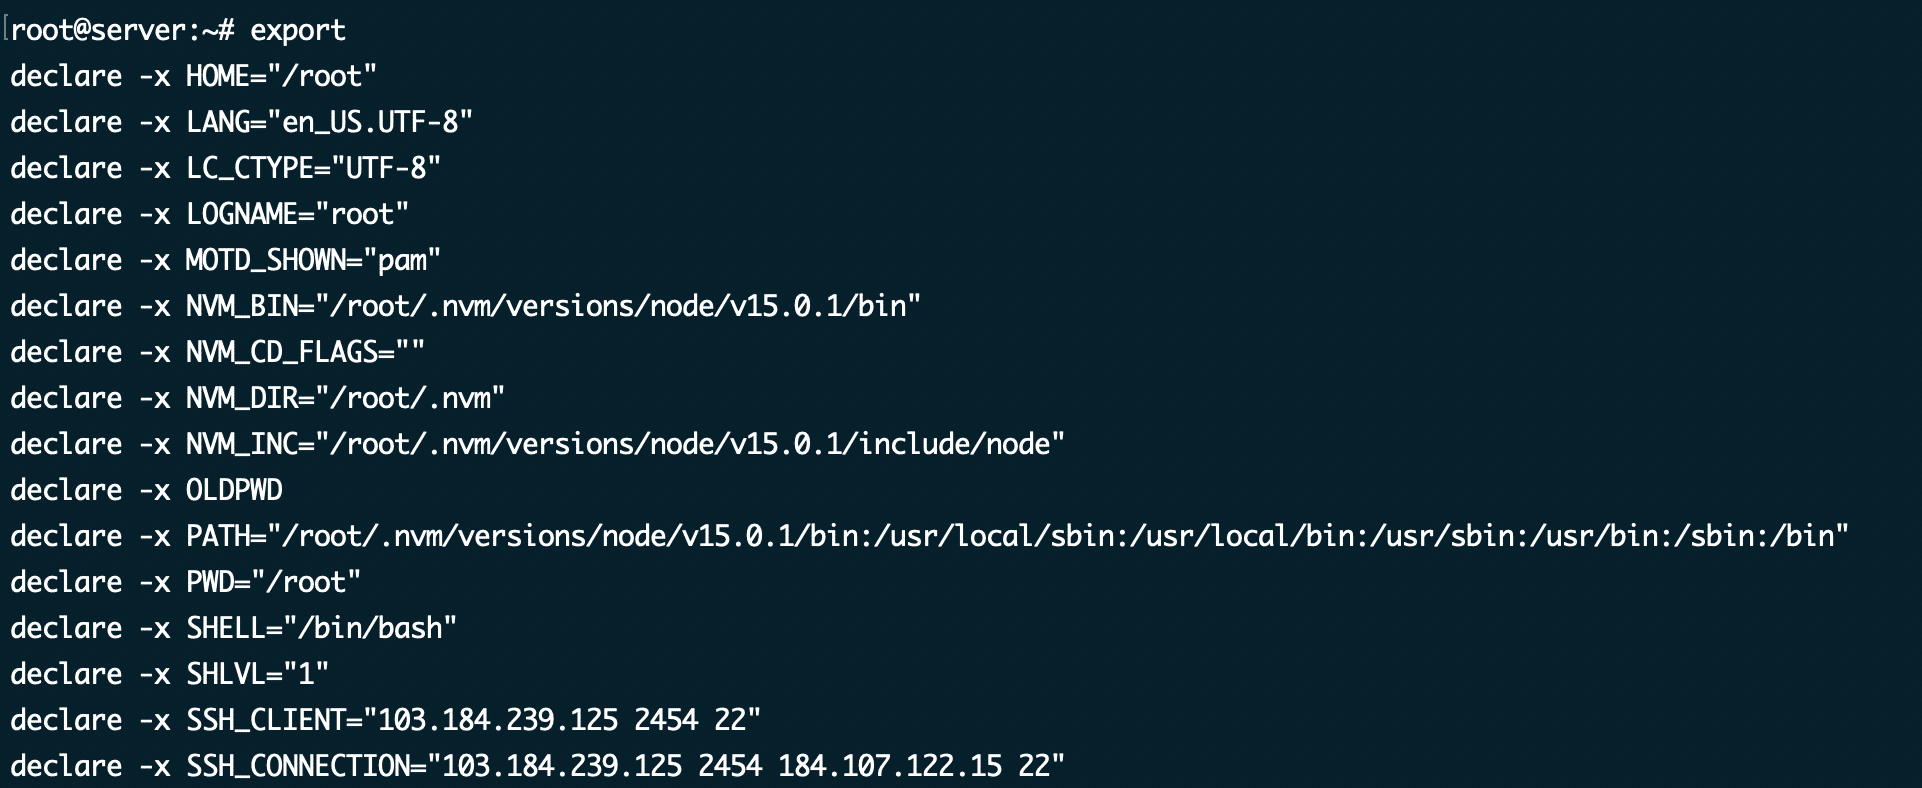
If you run the command without adding any options, it will show you a list of all the variables that have been set up and are currently shared.
Here’s what you might see in your terminal:
Linux export Options
While export itself is a simple command, it real power comes out when you include one or more of the following options:
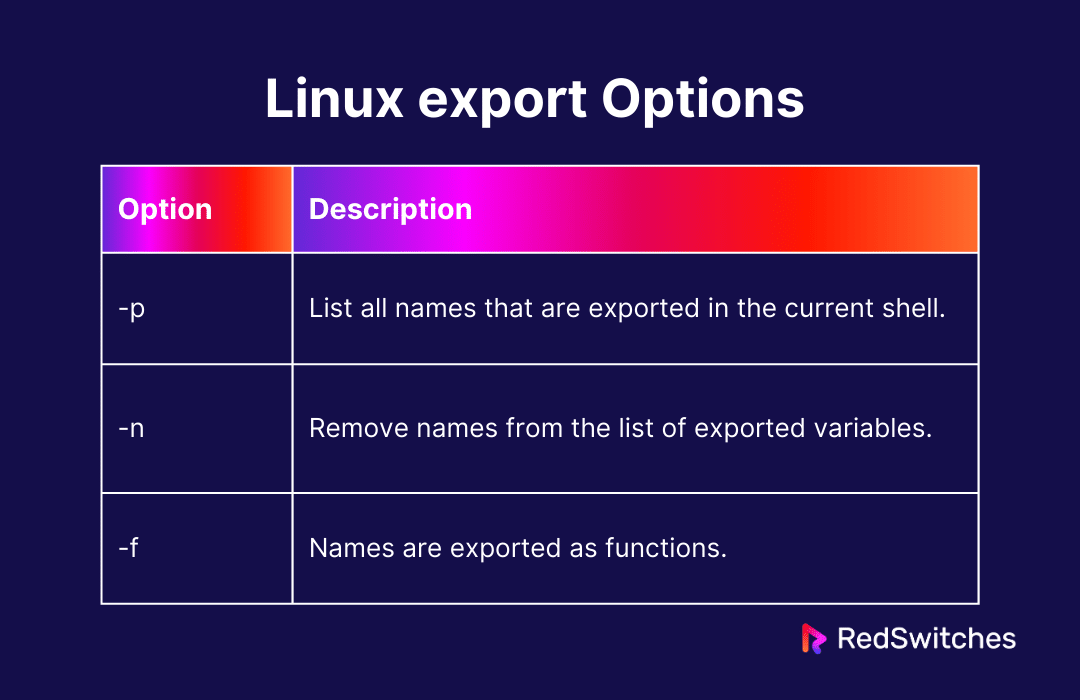
Let’s look into these options to see how these options allow us to manipulate the environment more precisely.
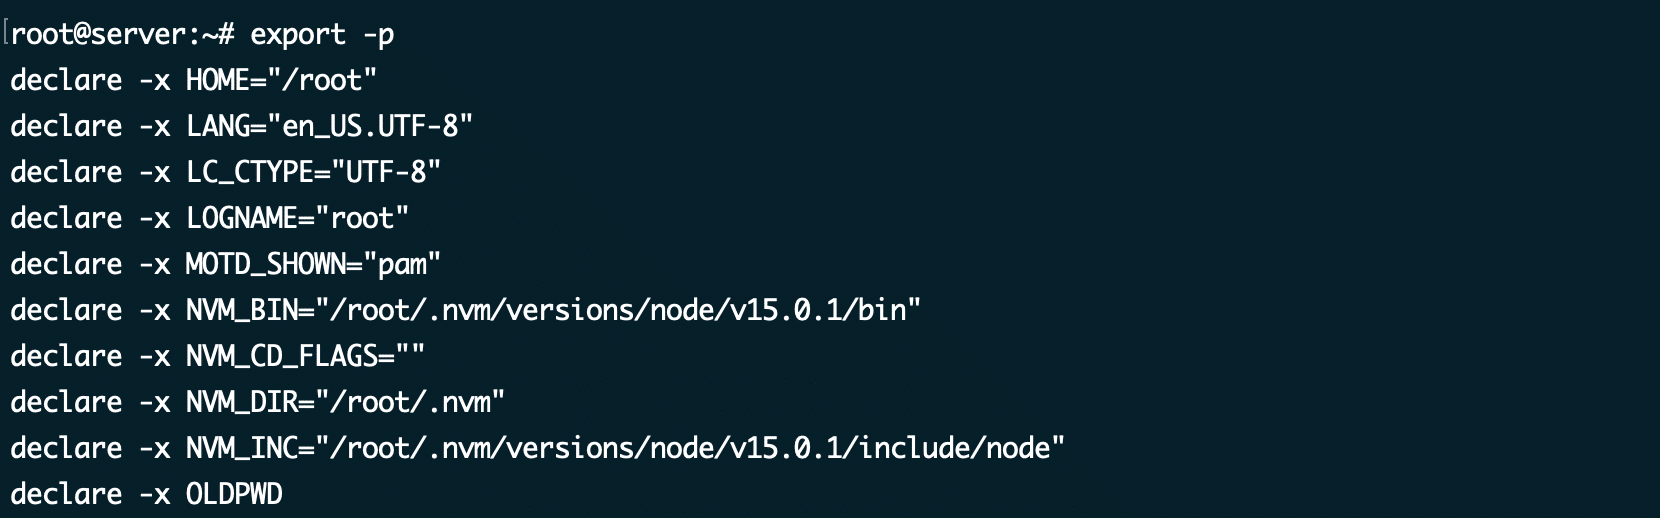
Export with -p Option
The -p flag shows all the variables currently being used in the shell session.
The output of the export -p is usually similar to using the command without any flags.
Export with -n Option
The -n option is used to take away specific variables and functions from the environment’s export list. For instance, if we decide to remove the HOME variable, we would use the following command:
# export -n HOME
After executing the command, we recommend checking if the variable is still included in the list of variables. For this, we recommend filtering the output of the export (or export -p) command with the grep utility. The command in this scenario would be as follows:
#export | grep HOME
As you can see, there is no output, indicating that the grep utility can’t find HOME in the command’s output.

Export with -f Option
The -f option is used for turning Bash variable names into functions that you can call in your scripts and commands. This means you can create a function directly on the command line, give it a unique identifier, and then make it available for use anywhere in your session by exporting it.
Here’s a quick guide to creating and exporting functions:
First, define your function with a unique name directly in the terminal. You need to include the function’s behavior and variables.
function welcome_msg {
echo "Hello world"
}
welcome_msg

After defining the function, you can make it globally accessible in the current shell session by exporting it. In this process, we will use the function’s name with the export-f command. The complete syntax in this situation will be:
# export -f welcome_msg
The function’s name will remain intact for child shells.
A great use case of this command syntax is to define custom commands as functions and export them so that you can use it in scripts and commands.
5 Examples of the Linux export Command
We will now discuss some practical examples demonstrating the effective use of the export command.
The Prerequisites
Before diving into the examples of the export command, ensure you have:
- A system running a mainstream Linux distribution.
- A user account with root or sudo privileges.
- Familiarity with shell environments (Bash, Zsh, etc.), as the export command behavior might slightly vary between these shells.
Example #1: Assign a Value Before Exporting
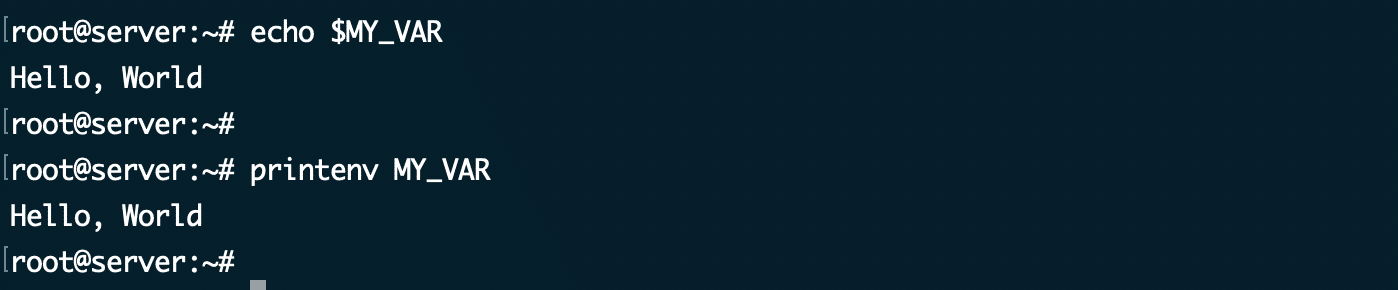
You can define a variable and its value before using the export command to make it an environment variable. Consider the following scenario where we defined the MY_VAR variable and then used the export command:
# MY_VAR="Hello, World"
export MY_VAR

Since there is no status message, we recommend displaying the value of the variable using either the echo or printenv command:
# printenv MY_VAR
Example #2: Export Multiple Variables in a Single Command
You can expedite environmental variable declaration and export by using the following command syntax:
# export VAR1="value1" VAR2="value2"

As with single variable declaration, we recommend you verify the value of the variables using the echo command.
Example #3:Set a Default Value
A common use case of the export command is to set the default value for previously undeclared environment variables:
For instance, we recommend setting your preferred text editor as the default.
Start by running the following command to designate Vim as the default text editor via the EDITOR variable:
# export EDITOR=/usr/bin/vim
Next, verify the value of the EDITOR variable by filtering the output of the export command using grep:
# export | grep EDITOR

This will confirm that the default text editor has been successfully changed to Vim.
Example #4: Change Command Line Appearance
You can modify the appearance of your command line by exporting PS1, the primary prompt string. Here’s a sample implementation of the export command:
# export PS1='\[\e[1;32m\][\u@\h \W]\$\[\e[0m\] '

Example #5: Export Name Value
Exporting a name value confines it to the scope of the current shell session. When you close the command line interface or terminate the shell session, the exported name-value environment variables are also removed.
We recommend using the export command for exporting a name value.
For example, if you have a variable named NAME with the value John, Use the following export command:
# export NAME=John
This command makes the variable NAME with its value John available to any child processes spawned from the current shell session. This means that any programs or scripts running from that shell session can access and utilize the value of the NAME variable.
This can be particularly useful when you want to pass environment variables from one shell session to another or when you want to ensure that variables are available to all sub-processes spawned from the current shell.
Also Read: 6 Simple Examples of Using the Linux watch Command
Also Read: lsof Command in Linux with Examples
Also Read: Mastering the Linux tee Command for Redirecting Output In 9 Examples
Conclusion
Understanding and utilizing the export command in Linux enhances your ability to manage and control the environment in which your applications and scripts run. It offers a seamless way to pass important information like configuration settings and file paths to programs and processes initiated from the shell.
As you explore Linux hosting solutions for your projects or applications, consider RedSwitches bare metal hosting provider for unparalleled performance and reliability. Our services ensure that your Linux environment is supported by robust and high-performing hardware, making it an ideal choice for businesses seeking to leverage Linux’s power without compromising on efficiency and uptime.
So, if you’re looking for a robust server for your Ubuntu projects, we offer the best dedicated server pricing and deliver instant dedicated servers, usually on the same day the order gets approved. Whether you need a dedicated server, a traffic-friendly 10Gbps dedicated server, or a powerful bare metal server, we are your trusted hosting partner.
FAQs
Q. Can I permanently set environment variables using export?
The export command only sets environment variables for the duration of the session. To set them permanently, add the export command to your shell’s startup script, like .bashrc or .profile.
Q. How do I view all exported variables?
Use the command export -p to list all variables that are currently exported in the environment.
Q. Can I “unexport” a variable?
Yes, you can “unexport” a variable, making it no longer available to child processes, by using the -n option, e.g., export -n VAR_NAME.
Q. Is export available in all shells?
While most popular shells like bash and zsh support export, its implementation and options might vary. Always refer to your shell’s documentation for specifics.
Q. How does export affect child processes?
Exported variables are inherited by processes started from the same shell, allowing you to set environment variables that influence the behavior of scripts and programs.
Q. How do I export a variable in Linux?
To export a variable in Linux, you can use the syntax: export VARIABLE_NAME=value. This command will make the variable available to other processes.
Q. What are some practical examples of using the export command in Linux?
You can use the export command in Linux to set variables in the current shell, pass variables to shell scripts, and ensure that environment variables are available in a new shell session.
Q. Can I use the export command in shell scripts?
Yes, you can use the export command in shell scripts to define and export variables that need to be accessed by other processes or scripts.
Q. How can I display all environment variables used in the current shell?
To display all environment variables used in the current shell, you can use the command: printenv. This will show all the variables currently set in your shell session.
