In web applications, developers use databases to store and retrieve data in response to user queries. Given their importance, website owners and developers use a feature-rich tool — the Database Management System (DBMS). It is a critical component of any web development stack.
Of the many DBMS available on the market, phpMyAdmin is a popular choice.
This short tutorial will guide you through the process of installing phpMyAdmin on an Ubuntu system. However, before we dive into the technical side of the process, we’ll discuss the role of phpMyAdmin, the benefits it offers, and how it simplifies database management.
Table Of Content
- Introducing phpMyAdmin
- The Benefits of Using phpMyAdmin
- Setting up the Server For phpMyAdmin Installation
- Install the LAMP Stack on Ubuntu 20.04
- Install phpMyAdmin on Ubuntu
- Enhancing Security for phpMyAdmin
- Conclusion
Introducing phpMyAdmin
phpMyAdmin is a free and open-source web-based database management tool for MySQL and MariaDB.
While many users recognize the need for the extensive capabilities of a database management system like MySQL, the prospect of interacting with the system solely through the MySQL prompt can be daunting. This is where phpMyAdmin comes into play, offering a user-friendly web interface for seamless MySQL interaction.
The installation process of phpMyAdmin is simple, and you can configure additional security layers to manage your databases on an Ubuntu 20.04 system.
The Benefits of Using phpMyAdmin
phpMyAdmin offers a range of advantages that make it a valuable addition to your toolkit. Here are some of the key benefits of using phpMyAdmin:
User-Friendly Interface
phpMyAdmin has an intuitive web-based interface that takes away the complexities of database management. This user-friendly environment benefits users who may need to be more comfortable with command-line database administration.
Efficient Database Management
With phpMyAdmin, you can easily perform a wide range of database operations. This includes creating, modifying, and deleting databases and tables, managing user privileges, and executing SQL queries.
Data Visualization
The tool offers various features for visualizing database structures, including browsing and editing table data, viewing database relationships through foreign key support, and generating visual representations of your database schema.
SQL Query Execution
phpMyAdmin lets you write and execute SQL queries directly within the interface. This feature is valuable for developers and administrators who must run custom queries to retrieve or manipulate data.
Easy Data Import and Export
You can effortlessly import and export databases and tables in various formats, including SQL, CSV, and XML. This flexibility simplifies migrating data between systems and sharing data with other application components.
Database Security
phpMyAdmin includes robust security features, allowing you to manage user privileges and access control. You can set permissions at various levels, ensuring only authorized users can access and change values in database tables.
Cross-Platform Compatibility
Since phpMyAdmin has a web-based interface, you only need a browser to access and complete most tasks. Because of this platform-independence, users don’t have to worry about the underlying OS (phpMyAdmin works equally well with Windows, macOS, and Linux).
Open-Source and Free
phpMyAdmin is an open-source software, freely available for anyone to use, modify, and distribute. This makes it a cost-effective solution for both individuals and organizations.
Active Community and Updates
The phpMyAdmin project has a dedicated community of developers and users who regularly contribute to adding new features and refining existing capabilities. Community-pushed updates ensure phpMyAdmin stays current with the latest database technologies and security standards.
Setting up the Server For phpMyAdmin Installation
Before initiating the phpMyAdmin installation process, you need to set up a LAMP stack (Linux, Apache, MySQL, PHP) on your Ubuntu server.
You’ll also need an SSH client for secure server access. If you need help using an SSH client to connect to a server, we have a great tutorial on using PuTTY for SSH remote connections.
After that background, let’s discuss the prerequisites.
Prerequisites of the Installation Process
The following are the prerequisites of the process:
- A server with an active LAMP or LEMP stack. Here, we’ll use Ubuntu as the Linux component of the stack. We’ll install the rest of the stack’s components during the server prep process.
- Root access or a user with sudo privileges.
Install the LAMP Stack on Ubuntu 20.04
Since you need a functional LAMP stack for phpMyAdmin, we’ll set it up before going into the details of how to install phpMyAdmin on Ubuntu.
At this point, Ubuntu, one of the four components, is already installed on the test server.
Let’s install the rest of the three components.
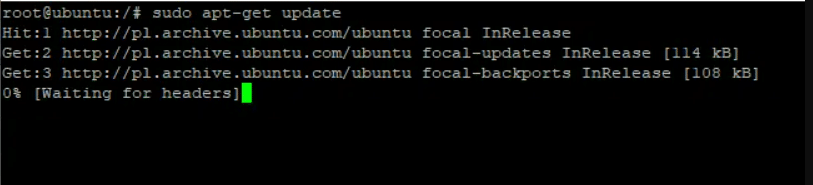
Step # 1: Update System Packages
Before actually starting the installation process, it’s always a great idea to update the system packages so that you get the latest stable version of the installed packages. For this, log into the server with the root password or with sudo privilege access, and use the following command to update the system packages:
# sudo apt update
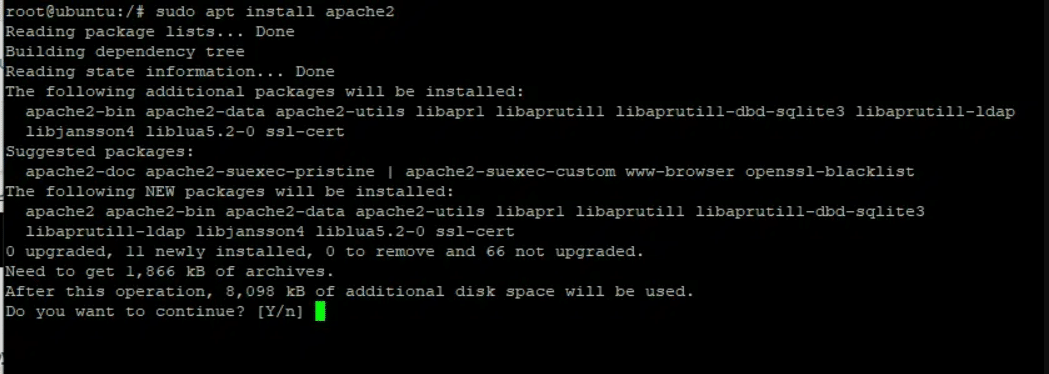
Step # 2: Install Apache
If Apache isn’t installed on your Ubuntu system, now would be a good time to install it. For this, use the following command:
# sudo apt install apache2
Step # 3: Allow Apache Through the System Firewall
After installing Apache, we strongly recommend enabling Apache services through the firewall. Use the following command:
# sudo ufw allow in “Apache”
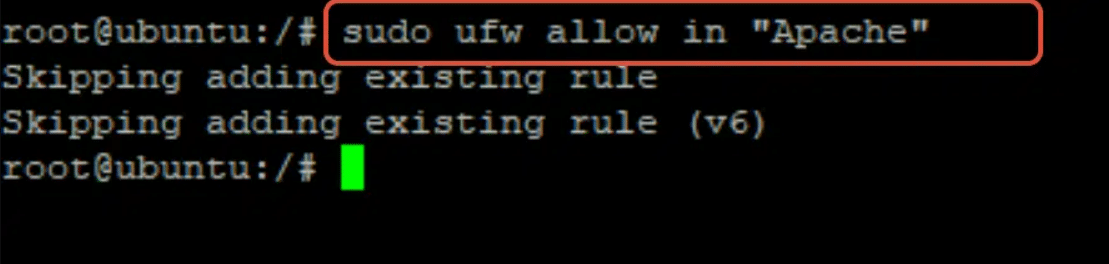
Now check the status of the Apache services with the following command:
# sudo ufw status
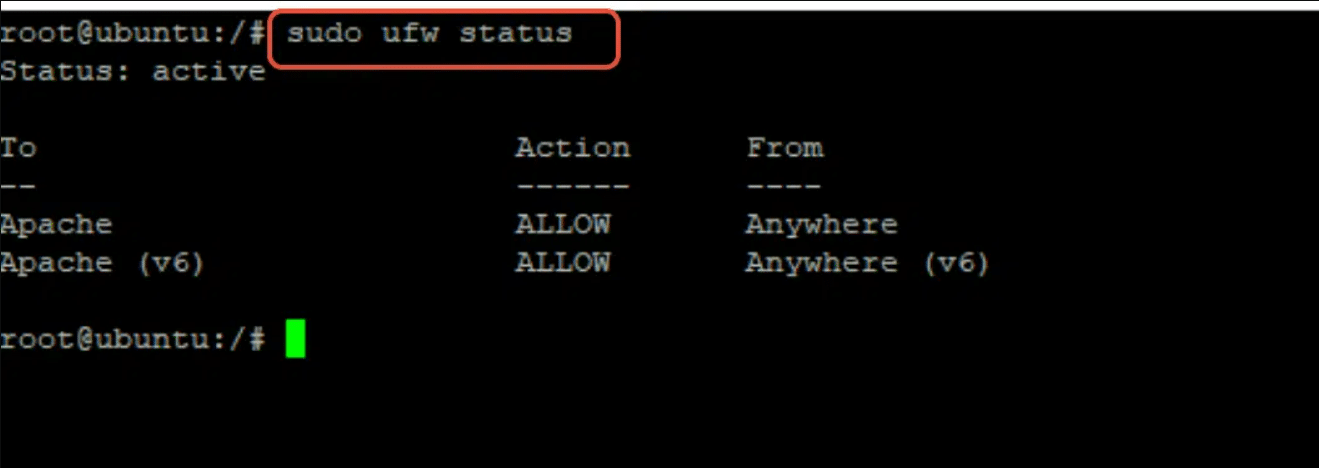
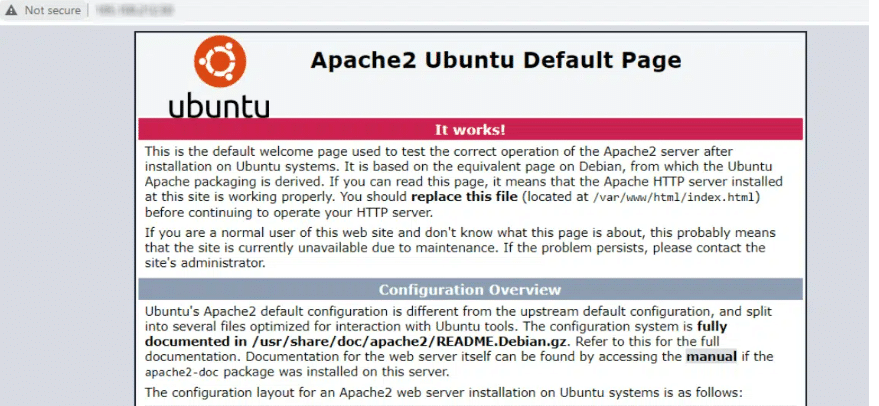
As you can see, Apache services are allowed through the firewall. You can also double-check whether Apache is working on Ubuntu by accessing the IP address of your server in the browser.
If Apache is working properly on the localhost, you will see something similar to the following web page:
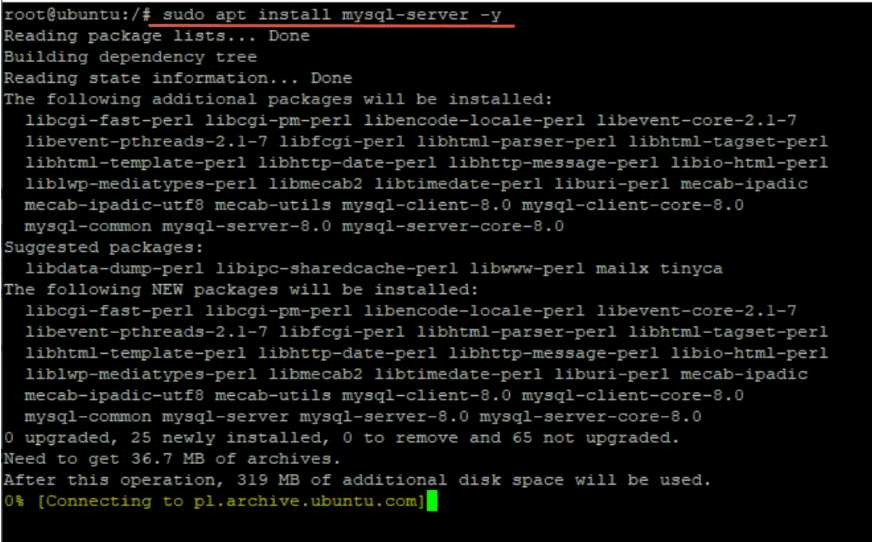
Step # 4: Install MySQL Server
Next, use the following command to install the MySQL server on Ubuntu 20.04:
# sudo apt install mysql-server -y
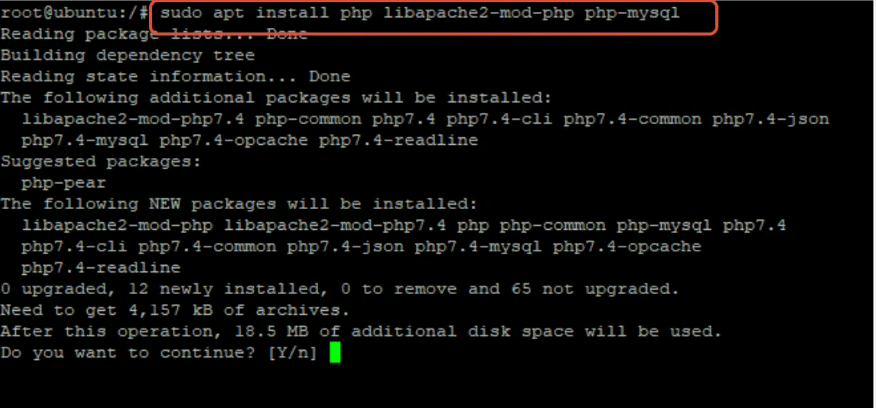
Step # 5: Install PHP
Run the following command on the Ubuntu terminal to install PHP and the necessary dependent libraries and packages:
# sudo apt install php libapache2-mod-php php-mysql
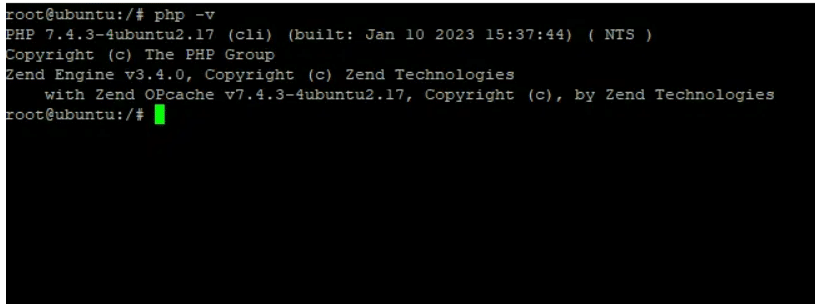
Once the process finishes, you need to verify the success of the process by getting the installed PHP version. For this, use the “-v” option with the “php” command in the terminal:
$ php -v
As you can see from the output, the process has installed PHP 7.4.3 on Ubuntu 20.04.
At this point, you have a functional LAMP stack on the server. Now, let’s install phpMyAdmin on Ubuntu.
Install phpMyAdmin on Ubuntu
Now that the prerequisites are in place, we can go ahead and install phpMyAdmin on the Ubuntu 20.04 server running the LAMP stack.
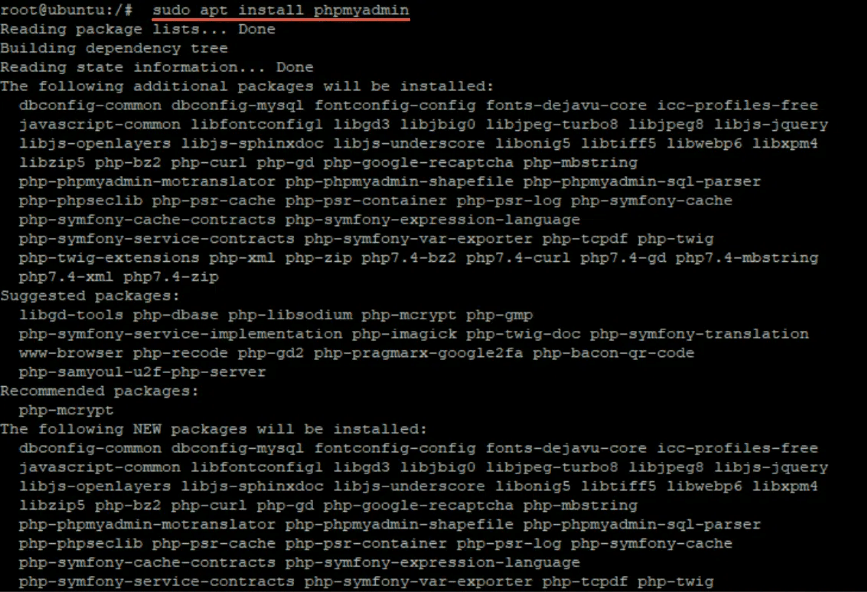
Step # 1: Install phpMyAdmin
Launch the terminal and install phpMyAdmin on Ubuntu 20.04 by running the following command with sudo privileges:
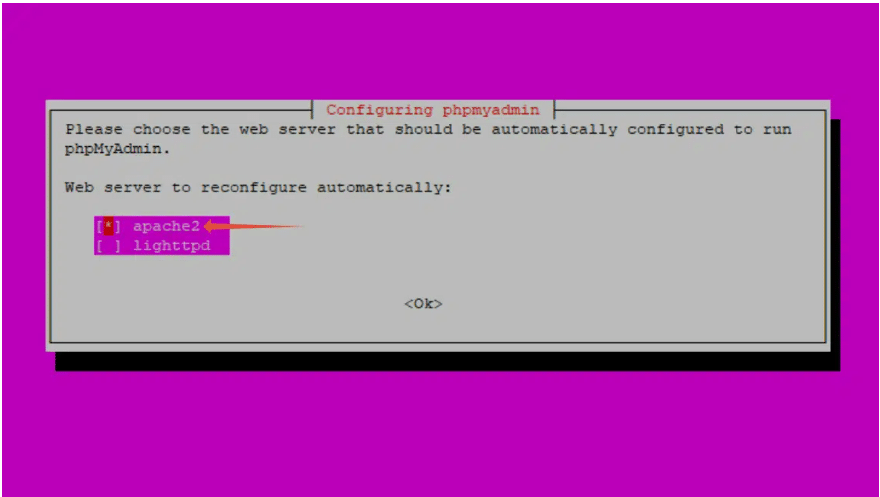
$ sudo apt install phpmyadmin
Once the dependencies have been downloaded, you’ll see the Package Configuration wizard. Start by choosing “apache2” and press the Enter key:
Following that, you will be prompted to create a password for database access. Enter a strong password and hit Enter:
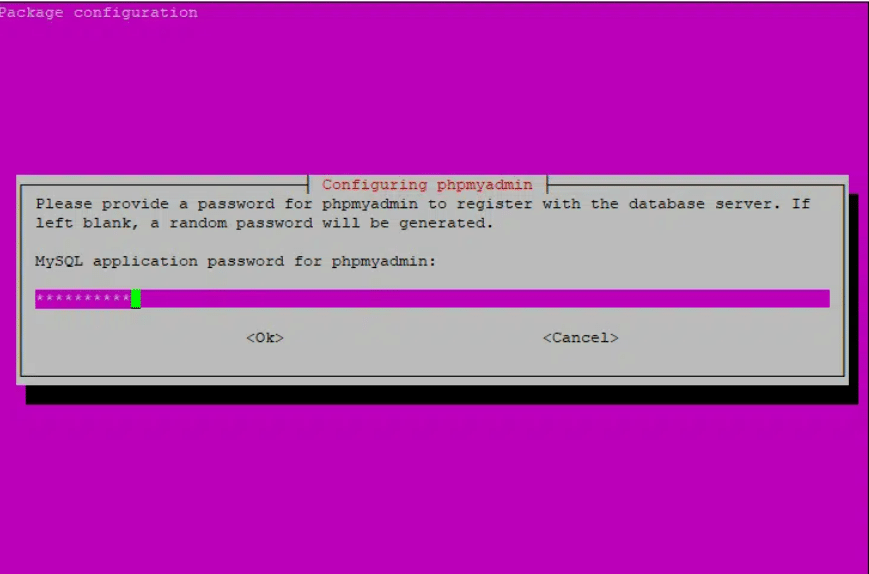
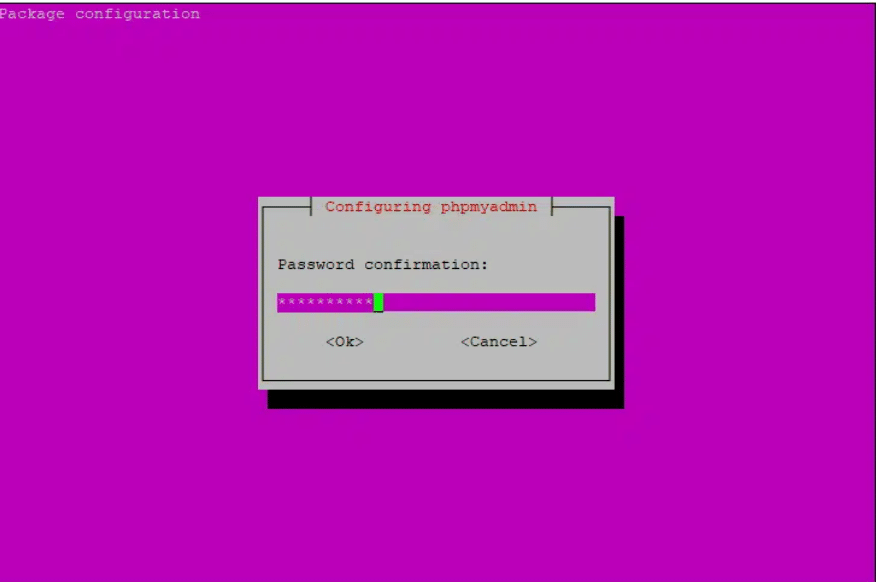
Retype the password and press Enter once more:
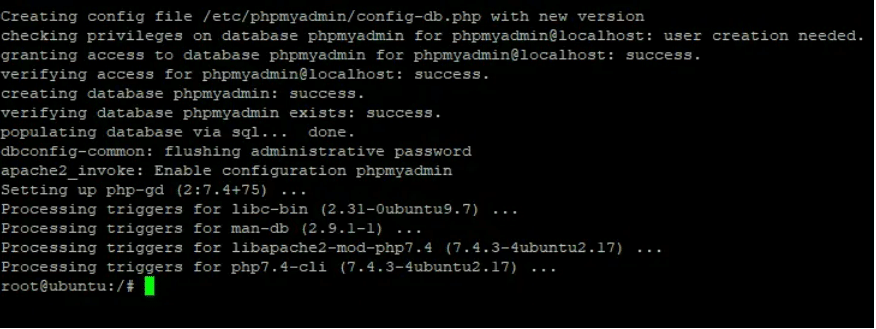
The installation process will finish in the terminal.
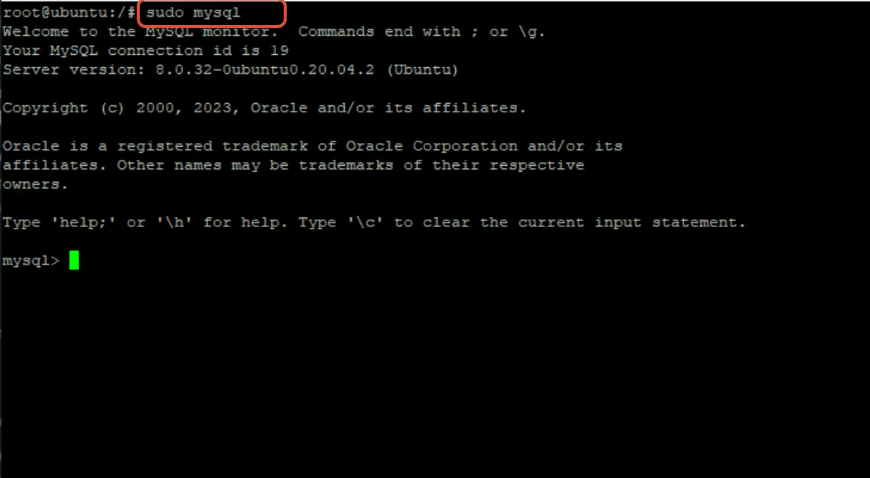
Step # 2: Access MySQL and phpMyAdmin in Ubuntu Terminal
After the installation finishes, launch the terminal and connect to MySQL with the following command:
$ sudo mysql
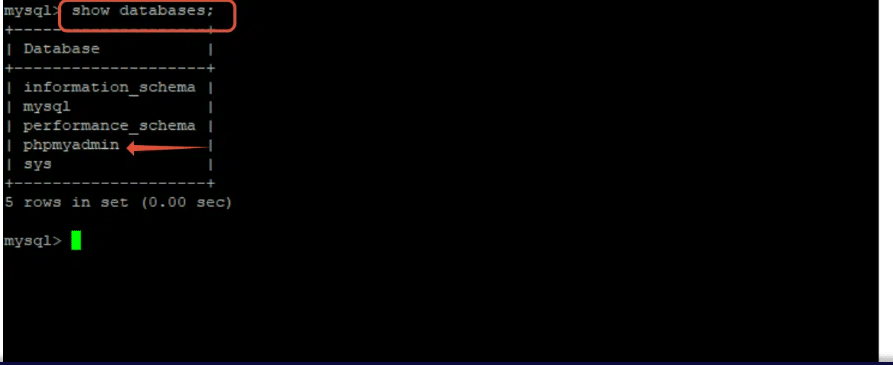
Next, use the following command to see a list of all available databases:
mysql> show databases;
Now you need to grant the phpMyAdmin database all local host privileges:
GRANT ALL PRIVILEGES ON *.* To ‘phpmyadmin ‘@' localhost';

To exit the command line, flush all privileges before using the “Exit” command:
> FLUSH PRIVILEGES;
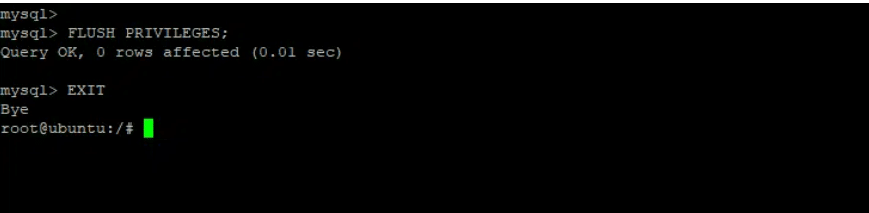
> Exit;
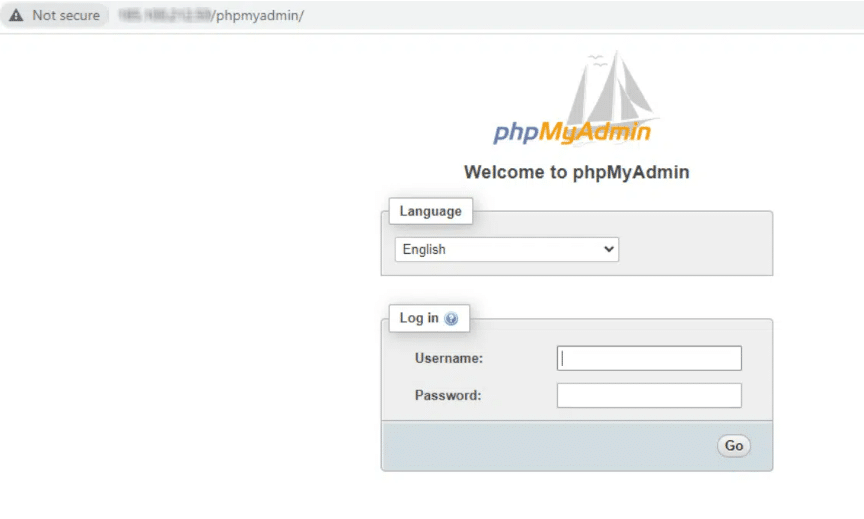
Step # 3: Access phpMyAdmin in the Browser
Now, go to “http://ip-address>/phpmyadmin” in the browser to access the phpMyAdmin database.
The following output indicates that we successfully installed phpMyAdmin without any errors.
Enhancing Security for phpMyAdmin
Since phpMyAdmin is a common target for potential attackers, it’s crucial to take extra steps to protect it from unauthorized access. One effective method is to create a security layer using Apache’s built-in .htaccess-based authentication and authorization.
To implement this security measure, you’ll first need to enable the use of .htaccess file overrides within your phpMyAdmin configuration in Apache. Follow these steps:
1.Use your preferred text editor to open the phpmyadmin.conf file located in the Apache configuration directory. For this demo, we’ll use the nano text editor:
# sudo nano /etc/apache2/conf-available/phpmyadmin.conf
2.Go to the <Directory /usr/share/phpmyadmin> section of the configuration file, and add the following line:
AllowOverride All
/etc/apache2/conf-available/phpmyadmin.conf

<Directory /usr/share/phpmyadmin>

Options SymLinksIfOwnerMatch

DirectoryIndex index.php

AllowOverride All

. . .
3. After adding this line, save and close the file (Since we’re using nano, it’ll be CTRL + X, then Y, and ENTER).To apply the changes, restart Apache with the following command
# sudo systemctl restart apache2
Now that you’ve enabled the use of .htaccess files for your phpMyAdmin application, it’s time to create one to enhance security.
4. Remember that you must place .htaccess file within the application directory. To create and open this file with root privileges, use the following command:
# sudo nano /usr/share/phpmyadmin/.htaccess
5. Add the following content to the .htaccess file:
/usr/share/phpmyadmin/.htaccess

AuthType Basic

AuthName "Restricted Files"

AuthUserFile /etc/phpmyadmin/.htpasswd

Require valid-user
Here’s what each line means:
- AuthType Basic: Specifies the type of authentication, which in this case is password-based.
- AuthName: Sets the message for the authentication dialog box to keep it generic.
- AuthUserFile: Specifies the location of the password file used for authentication. It is critical that this file must be outside the served directories.
- Require valid-user: Specifies that only authenticated users should access this resource, preventing unauthorized access.
6. Save and close the file.
Note that we designated the password file location as /etc/phpmyadmin/.htpasswd. Chances are that the file doesn’t exist at this location. However, we can easily create this file and set an initial user with the htpasswd utility:
# sudo htpasswd -c /etc/phpmyadmin/.htpasswd username
7. You’ll be prompted to choose and confirm a password for the user you’re creating. Afterward, the file will be created with the hashed password you provided.
If you wish to add additional users, do so without the -c flag:
# sudo htpasswd /etc/phpmyadmin/.htpasswd additional user
8. Finally, restart Apache to activate .htaccess authentication:
# sudo systemctl restart apache2
Now, when you access your phpMyAdmin subdirectory, you’ll be prompted to enter the username and password you configured:
https://domain_name_or_IP/phpmyadmin.
Conclusion
Adding phpMyAdmin to your Ubuntu system is easy and can simplify life for developers and website managers.
Just stick to the steps in this guide, and you’ll have phpMyAdmin set up on your Ubuntu system smoothly. Don’t forget to keep it updated with the latest security fixes to keep your system safe.
With phpMyAdmin ready to go, you can smoothly handle your databases, run SQL queries, and take care of administrative jobs without a fuss.
Looking for top-notch dedicated hosting solutions and expert support? Visit RedSwitches to enhance your server infrastructure and elevate your database management experience today!
We offer the best dedicated server pricing and deliver instant dedicated servers, usually on the same day the order gets approved. Whether you need a dedicated server, a traffic-friendly 10Gbps dedicated server, or a powerful bare metal server, we are your trusted hosting partner.
FAQs
Q. Is phpMyAdmin the same as MySQL?
No, phpMyAdmin and MySQL are related, but different database management components. MySQL is a dedicated database management system, while phpMyAdmin is an open-source software tool designed to manage MySQL databases. It offers a web-based interface that enables users to interact with the MySQL server, facilitating tasks such as database creation, table and field management, and SQL query execution.
Q. What sets PHP apart from phpMyAdmin?
PHP is a scripting language used for developing dynamic web applications. It’s used to create web pages with interactive content and can be embedded within HTML code. PHP can access and manipulate data within all popular databases, including MySQL and PostgreSQL.
In contrast, phpMyAdmin is a free, open-source utility specifically tailored for MySQL and other database management, offering a user-friendly graphical interface for tasks like database and table administration, record manipulation, and more.
Q. Why should I install phpMyAdmin on my Ubuntu server?
Installing phpMyAdmin on your Ubuntu server allows you to interact with and manage your databases more conveniently, especially if you’re uncomfortable with the command-line interface.
Q. Is phpMyAdmin compatible with all Ubuntu versions?
phpMyAdmin is compatible with various Ubuntu versions, but specific installation steps may vary. Consult the documentation for your specific Ubuntu version to ensure a smooth installation.
Q. What are the prerequisites for installing phpMyAdmin on Ubuntu?
You’ll need a Ubuntu server with a working LAMP (Linux, Apache, MySQL, PHP) stack installed. Ensure that your server packages are up-to-date before starting the installation.
Q. How can I install phpMyAdmin on Ubuntu using the terminal?
The installation process typically involves running a series of commands in the terminal. You can find detailed step-by-step instructions in our installation guide.
Q. Can I install phpMyAdmin on a local Ubuntu machine for development purposes?
Absolutely! You can install phpMyAdmin on a local Ubuntu machine to manage databases for development, testing, or learning purposes. The installation steps are similar to installing it on a live server.
Q. Is it necessary to secure phpMyAdmin after installation?
Yes, securing phpMyAdmin is crucial to protect your databases. You should configure authentication, restrict access, and implement SSL encryption for added security. Our installation guide covers these security measures.
Q. What should I do if I encounter errors during the installation process?
If you encounter errors during the installation of phpMyAdmin, you can troubleshoot by checking logs, verifying system requirements, and consulting online forums or community support for assistance.
Q. Can I uninstall phpMyAdmin from my Ubuntu server if I no longer need it?
Yes, you can uninstall phpMyAdmin from your Ubuntu server using package management commands. We recommend extreme caution during the process because you could easily remove a dependency that could destabilize other apps on the server.
Q. Are there alternative tools to phpMyAdmin for managing MySQL on Ubuntu?
Yes, there are alternative database management tools like Adminer and MySQL Workbench. phpMyAdmin is popular due to its simplicity and web-based interface, but you can explore other options based on your preferences.
