Are you an Ubuntu user and want to try Kubernetes? Are you wondering how to install kubectl on Ubuntu?
Kubernetes is a powerful open-source platform for deploying, managing, and scaling containerized applications in a cluster environment. It has revolutionized how developers build and deploy applications. For this, developers opt for Kubernetes to initiate and oversee Docker containers across multiple servers within a single pod.
You also get kubectl, a CLI tool for managing the entire cluster and deploying applications on it.
Installing kubectl on Ubuntu can be difficult for beginners, but once you get the hang of it, you can easily set it for your Kubernetes installation.
This article will discuss what Kubectl is, how it works, and the steps needed to install Kubectl on Ubuntu. We’ll also discuss some tips to get the most out of your installation and make it as efficient as possible.
Table Of Contents
- What is Kubectl?
- How Kubectl Works?
- How to Install kubectl on Ubuntu 20.04 LTS
- Check Kubectl Version
- Kubectl Command Syntax
- Some Basic Kubectl Commands
- Uninstall kubectl
- Conclusion
- FAQs
Let’s start with the introductions.
What is Kubectl?
Kubectl is a command-line tool used to interact with Kubernetes clusters. It is a client-side utility that communicates with the Kubernetes API server, allowing users to manage and deploy applications on a local or remote Kubernetes cluster.
With kubectl, users can perform various tasks, such as creating and managing pods, services, and deployments, checking the status of nodes and clusters, scaling applications up or down, and updating cluster configurations.
Kubectl is an essential tool for developers, system administrators, and DevOps engineers who work with Kubernetes. It is open-source, and you can use it on any platform that supports Kubernetes, including Linux, macOS, and Windows.
How Kubectl Works?
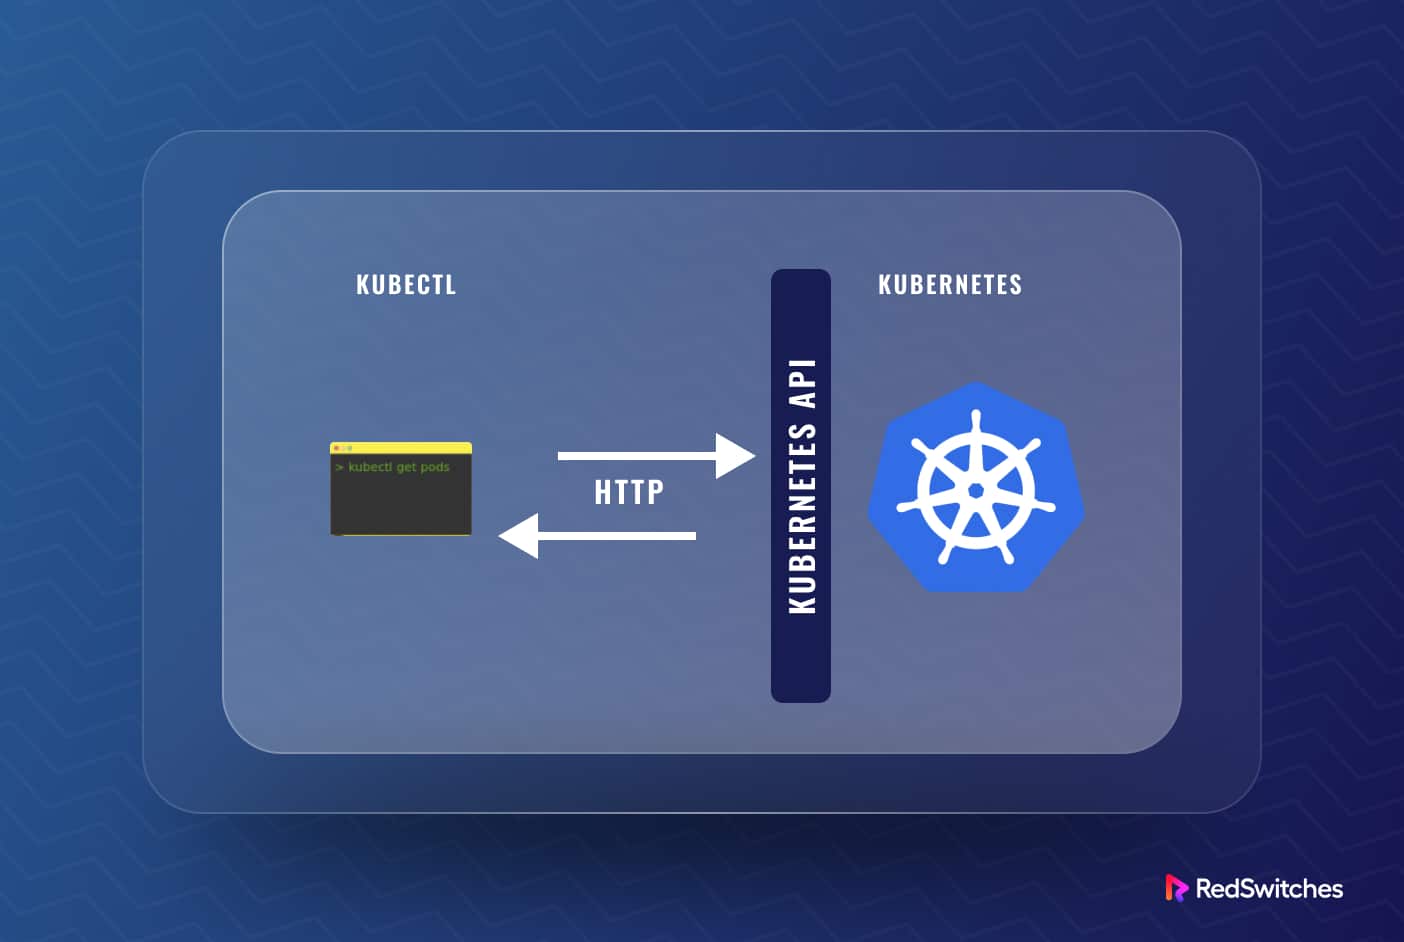
Kubectl communicates with the Kubernetes API server using a RESTful API. The API server runs on the Kubernetes control plane, which manages the Kubernetes cluster’s state.
When a user runs a kubectl command, the following happens:
- The kubectl command is parsed by the Kubernetes API client, which converts it into an API request.
- The API request is sent to the Kubernetes API server.
- The Kubernetes API server receives the API request and validates it. If the request is valid, the Kubernetes API server updates the desired state of the Kubernetes cluster.
- The Kubernetes API server responds to the kubectl command, indicating the operation’s success (or failure).
Kubectl allows users to interact with the Kubernetes control plane and manage the state of the Kubernetes cluster. Users can create, modify, or delete Kubernetes resources (including pods, services, and deployments) by issuing kubectl commands.
Kubectl also offers several valuable features, such as auto-completion, context switching, and configuration management, that developers and admins use to simplify working with Kubernetes clusters.
The command uses a config file stored in the .kube directory under the user’s home path to perform tasks according to API requests against a specific cluster.
How to Install kubectl on Ubuntu 20.04 LTS
If you plan to manage containerized applications on Ubuntu effectively, install Kubernetes and configure kubectl and other tools for streamlined cluster management.
We assume that you already have a working Kubernetes installation. So, we’ll now go through setting up kubectl on Ubuntu 20.04 LTS.
Prerequisites
The following are the prerequisites of the process:
- A server running Ubuntu 20.04 LTS.
- Root access to the server or a user with sudo privileges.
aptorapt-getshould be installed on the server.- The
snaputility must be available on the server.
Now that you have the prerequisites of the process, let’s dive into how to install kubectl on Ubuntu 20.04 LTS.
Step # 1: Update Server Packages
It is always a good idea to update the server package index so that the latest versions are installed and available for the kubectl installation. On our Ubuntu 20.04 LTS test system, we use the apt-update command to sync all packages.
# apt-get update
This command will refresh the list of available software packages from the repositories.
# sudo apt upgrade
Execute this command to install the latest versions of the packages that are already installed on the server.
Step # 2: Kubectl installation on Ubuntu 20.04 LTS
Before we start, use a kubectl version compatible with your cluster’s version. For example, if your cluster uses version 1.28, your kubectl version should be around 1.27 to 1.29. This way, the installation process will go smoothly, and post-installation, kubectl will work without issues.
There are three popular ways to install kubectl on Ubuntu:
- Through curl: You can download the kubectl binary using the curl command and change file permissions to mark it executable. This method provides more control over the installation process.
- Through the APT Package Manager: APT is the default package manager for Ubuntu. You can use it to install kubectl from the official repositories. This method is simpler and well-integrated with Ubuntu’s package management system.
- Using the Snap Package Manager: Snap is another popular package manager that offers a simple way to install kubectl. It provides an isolated application environment, which can be beneficial in some scenarios.
Let’s look into these three methods in detail.
Method 1: Install kubectl binary with curl
Using the curl command, you can download the kubectl binary from the official Kubernetes website. This method is helpful if you want a particular Kubectl version or to kubectl install without traditional package managers.
Start with the following command to get the latest version on the server:
On x86-64:
curl -LO "https://dl.k8s.io/release/$(curl -L -s https://dl.k8s.io/release/stable.txt)/bin/linux/amd64/kubectl"

On arm64:
curl -LO "https://dl.k8s.io/release/$(curl -L -s https://dl.k8s.io/release/stable.txt)/bin/linux/arm64/kubectl"
If you want to install a specific version, please mention the version number in the URL. For example, for version 1.28.0:
On x86-64:
curl -LO https://dl.k8s.io/release/v1.28.0/bin/linux/amd64/kubectl
On arm64:
curl -LO https://dl.k8s.io/release/v1.28.0/bin/linux/arm64/kubectl
Next, change the file permissions to make the kubectl binary executable.
# chmod +x kubectl

Move the binary into the PATH environment variable to be accessible from any path on the server.
# sudo mv kubectl /usr/local/bin
At this point, the kubectl has been installed successfully on your Ubuntu machine.
Also Read: How to Set or Change User Agent with cURL: A Step-by-Step Guide
Method 2: Install kubectl through the apt – native Package Manager
You can use this method on Ubuntu Linux, Debian Linux, and any other operating system that relies on the APT package manager.
Start by updating the APT package index and installing the necessary packages to access and use the Kubernetes apt repository:
# sudo apt-get update

# sudo apt-get install -y apt-transport-https ca-certificates curl
Next, get the Google Cloud public signing key for the Kubernetes package repositories.
curl -fsSL https://packages.cloud.google.com/apt/doc/apt-key.gpg| gpg -o /usr/share/keyrings/kubernetes-archive-keyring.gpg --dearmor

Add the Kubernetes repository to the package manager:
# echo "deb [signed-by=/usr/share/keyrings/kubernetes-archive-keyring.gpg] http://apt.kubernetes.io/ kubernetes-xenial main" | sudo tee -a /etc/apt/sources.list

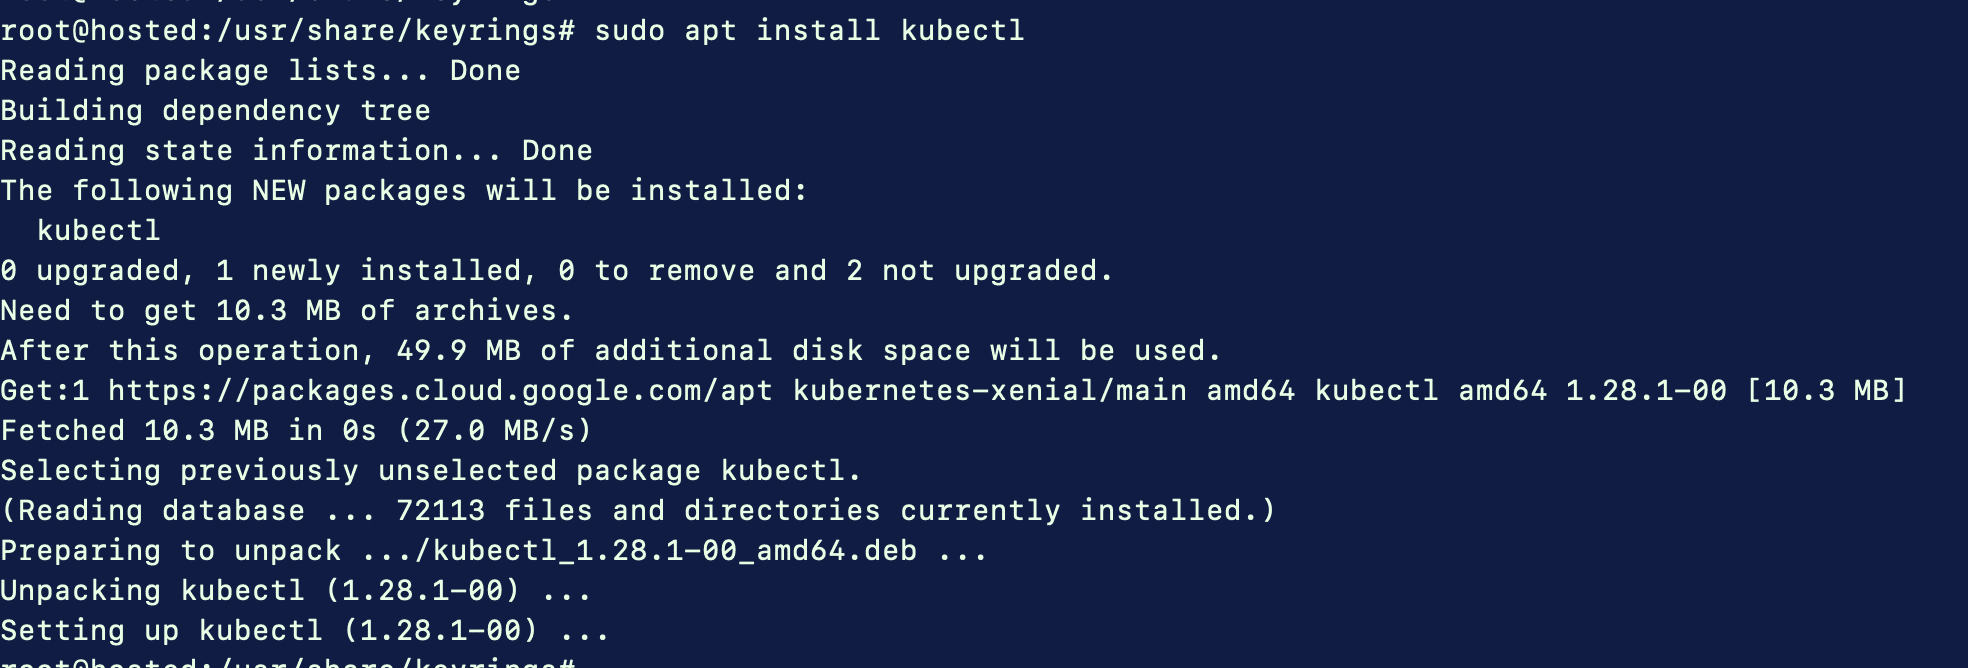
We can update the packages again and use the regular apt install command to download kubectl.
# sudo apt update

# sudo apt install kubectl
Method 3: Install Kubectl using Snap
Snap is already included in all Ubuntu installations. Since Snap is a package manager that works universally, the following command will function on any Linux distribution that already includes Snap:
# sudo snap install kubectl --classic

Check Kubectl Version
Once you have installed kubectl via any of the methods mentioned above, we highly recommend verifying the version using the kubectl version command.
For this, use the following command:
# kubectl version --client

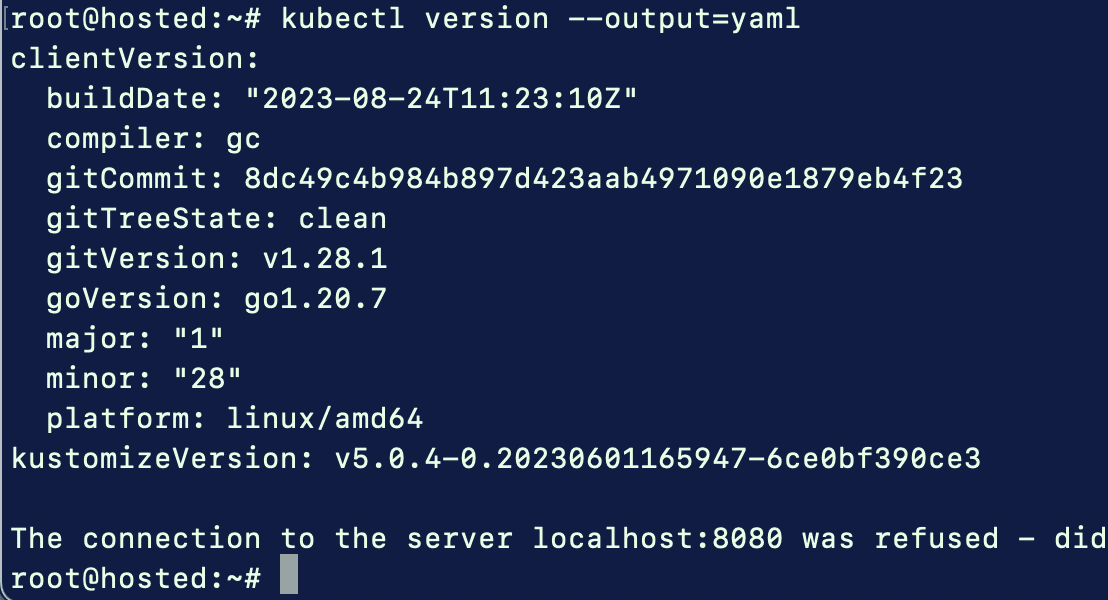
If you want more detailed output, use this command:
# kubectl version --output=yaml
Now that you have installed Kubectl on the Ubuntu server, the next move is to learn the utility in detail. Let’s start with the anatomy of a kubectl command.
Kubectl Command Syntax
The syntax of kubectl commands usually follows this pattern:
$ kubectl [command] [TYPE] [NAME] [flags]
Let’s break down these four components.
Command
The command portion describes what operation you want to perform – create, describe, get, apply, and delete. You can execute these commands on one or multiple resources since it’s possible to designate various resources in a single command.
- Create – generate new resources from files or standard input devices.
- Describe – retrieves details about a resource or resource group.
- Get – fetches cluster data from various sources.
- Delete – erases resources as required.
- Apply – push changes based on your configuration files.
Type
This component characterizes the type of resource. This is case-insensitive and used in a single, plural, or abbreviated manner.
Name
This denotes the identity of a resource and is case-sensitive.
Flags
A flag sets options on a command.
Some Basic Kubectl Commands
kubectl uses a kubeconfig file to locate and access a Kubernetes cluster. This file is automatically generated when you create a cluster using kube-up.sh or deploy a Minikube cluster successfully. The kubectl configuration is typically found at ~/.kube/config by default.
Once the cluster setup is ready, you can try following basic commands.
Get the Cluster State
Use the following command to get the cluster state:
# kubectl cluster-info
When a URL response is visible, it indicates that your kubectl setup is correctly configured for cluster access.
Get The Cluster Information
Use the following command to get the information about the server:
# kubectl config view
List Available API Resources
The following command displays the list of available API resources.
# kubectl api-resources
List All Deployments
The following command will list the deployments:
# kubectl get deployment
List All Available Services
The following command will list all available services in the current namespace:
# kubectl get services
Get the Status of a Node
The following command will get the list and status of the nodes. The details include the node’s name, status, roles, age, and Kubernetes version.
# kubectl get nodes
Create a New Namespace
The following command will create a new namespace.
# kubectl create ns my-space
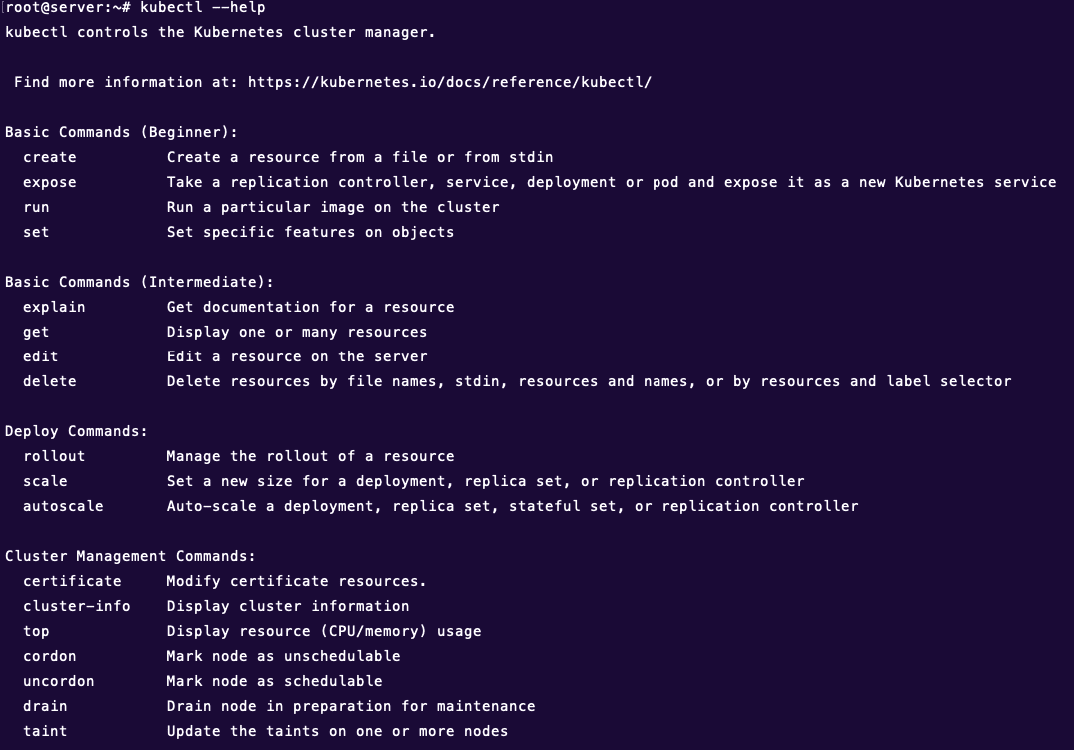
Get Help
You can also check all the options available for the kubectl command by using the kubectl --help command, as shown below.
Uninstall kubectl
You might want to remove kubectl from an Ubuntu server in some scenarios. For this, you need to remove the kubectl package.
You must follow the corresponding uninstall method depending on the method you chose to install kubectl.
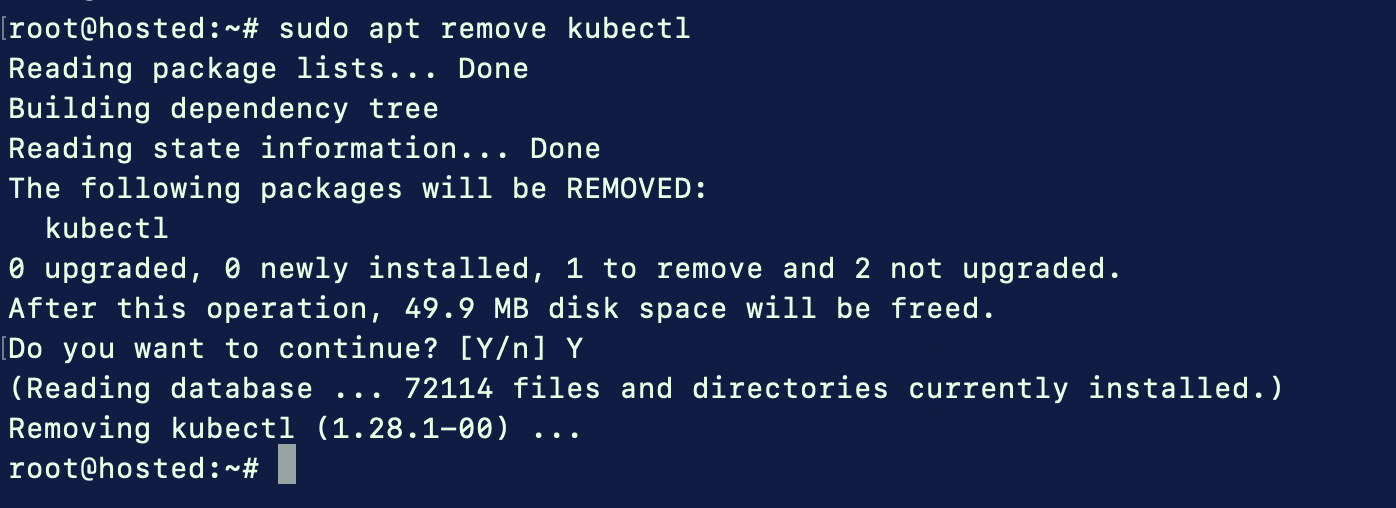
Uninstall via Package Manager
If you installed kubectl using a package manager like APT, you could use the package manager’s uninstall command to remove it.
For example, for APT, use the following command:
# sudo apt remove kubectl
Uninstall by Manual Removal
You can find and remove the binary’s location if you manually downloaded and installed kubectl (using the curl command). Also, remember to remove any related configuration files.
# sudo rm -f /usr/local/bin/kubectl
Uninstall via Snap
If you installed kubectl using Snap, you could use the following command to uninstall it:
# sudo snap remove kubectl

Conclusion
Mastering the installation of kubectl on your Ubuntu system is a crucial skill for anyone navigating the Kubernetes ecosystem. This guide provides step-by-step instructions to set up kubectl on Ubuntu.
This command-line tool is your gateway to effective Kubernetes cluster management. We here at RedSwitches recognize the pivotal role Kubernetes plays in modern application deployment and offer platforms finely tuned for Kubernetes compatibility.
Now that you’ve got kubectl up and running, why not take the next step?
Explore RedSwitches Kubernetes hosting services to experience the full potential of your Ubuntu-based Kubernetes environment. Empower your containerized applications, simplify management, and scale with confidence. Get started with RedSwitches today and embark on a journey of cloud-native excellence!
FAQs
Q: How can I enable kubectl autocomplete in Bash?
A: Follow these steps to enable kubectl autocomplete option in Bash
- Make sure that the bash-completion package is installed. If not, install it with the command:
sudo apt-get install -y bash-completion
- Now, you can generate the required kubectl completion rules with the kubectl completion bash command. Store the rules in your .bashrc file. Please use the following command for this step:
source <(kubectl completion bash) # set up autocomplete in bash into the current shell, bash-completion package should be installed first.
echo "source <(kubectl completion bash)" >> ~/.bashrc # add autocomplete permanently to your bash shell
Note: Make sure to run this only once so that you don’t get duplicated rules.
After that, use the source command to activate the new rules:
source ~/.bashrc
Q: What are some common uses of kubectl?
A: Some common uses of kubectl include creating and managing Kubernetes resources, inspecting cluster resources, troubleshooting, and application deployment.
Q: How do I use kubectl to deploy an application to a Kubernetes cluster?
A: You can use kubectl to deploy an application to a Kubernetes cluster by creating a deployment manifest in YAML format. Next, run the kubectl apply command to create or update the deployment.
Q: What is a Kubernetes resource?
A: Kubernetes is a popular tool for container orchestration. A Kubernetes resource is an object that represents a piece of the cluster’s state, such as a pod, a deployment, or a service.
Q: How can I view the logs of a pod using kubectl?
A: You can view the logs of a pod using the kubectl logs command followed by the name of the pod you want to view the logs for.
kubectl logs <pod-name>
Q: How can I install the snap utility?
A: If snap is not available, you can install it on your system with the following command:
sudo apt update
sudo apt install snapd
Q: How can I check the status of a deployment using kubectl?
A: You can check the status of a deployment using the kubectl rollout status command followed by the deployment name you want to check the status of.
kubectl rollout status deployment/<deployment-name>
